
Shopping Cart
The Shopping Cart app is a paragraph app which is used to show the contents of a shopping cart in frontend, guide the user through a checkour flow, and complete an order.
More specifically the Shopping Cart app does the following:
- Keeps a record of the items added to cart
- Shows the items in the cart to the customer
- Handles the checkout process
- Shows an order receipt
- Sends out order confirmation emails
Once the app is added to a paragraph you can configure it using the app settings. The app settings consist of sections controlling different aspects of the app behavior, as outlined below.
The first settings are used to set a shop and (optionally) an order context for the cart (Figure 1.1). You can also check checkout to quote if this is supposed to be a quotes cart.
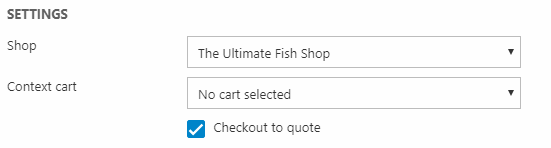
If no shop is selected, orders are created under the default shop, as defined in the website Ecommerce settings.
Adding to cart
This article concerns the Shopping Cart app and how to use it - to learn how to add products to a cart see cart commands.
Checkout flow
Next, you can define the checkout flow – the steps the customer will go through to complete an order (Figure 2.1).
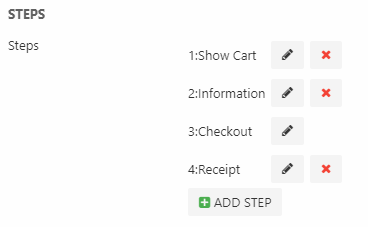
A standard checkout flow typically consists of three or four steps, e.g.:
- Show cart
- Information
- Checkout (required)
- Receipt
A one-page checkout will have a single step before checkout, a multi-step checkout will have several.
In either case, the customer is asked to supply information and select e.g. a payment and shipping method and submit these to card using a form – in order for the cart to receive this information, the input fields being submitted must have specific named, ids & values. See more in the Submitting to Cart section of this article.
Notification Emails
The notification emails section is used to create email notifications for both customers and staff – most commonly an order confirmation email.
To create a notification click Add notification to open the Edit email window (Figure 3.1) and configure the notification.
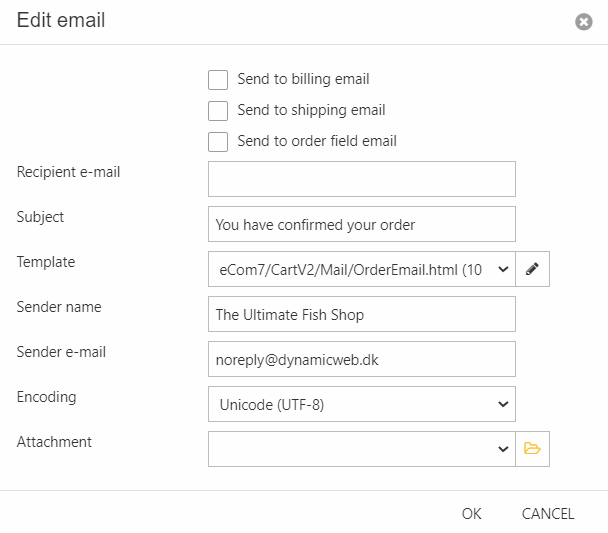
To configure the notification you must first specify a recipient – this can be done in several ways:
- Send to billing email or shipping email
- Check Send to order field email to select a custom order field
- Manually specify a recipient email – also accepts a list of email addresses separated by commas
For each notification you must also:
- Provide a subject
- Select/create an email template
- Provide a sender name and sender email
- Select an encoding (defaults to UTF-8)
- (Optional) Select an attachment to include with the email
Tip: You can use {OrderID} in the subject to insert the order number in the confirmation email.
Field validation
The field validation settings (Figure 4.1) allow you to apply validation rules during checkout.
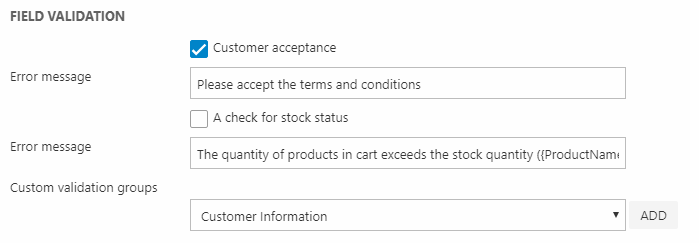
You can:
- Toggle a check for terms and conditions
- Toggle a check for stock status – this field is required if product reservation is enabled.
- Select a validation group to apply during checkout
Prior to Dynamicweb 9.8, three shipping fields were auto-validated - Name, Address, and Country - but as of 9.8 and forward only Country is automatically validated. You must therefore use field validation groups - as linked to above - to set up further validation of shipping fields.
Other settings
A number of other settings ara available on the shopping cart app - these are described below.
Newsletter
The Newsletter section(Figure 6.1) is used to make it possible to update the email permission field for the user during checkout. The current value is available via the Ecom:Cart.UseNewsletterSubscription tag.

Empty cart settings
The Empty cart settings (Figure 7.1) control what a user will see when they view an empty cart.
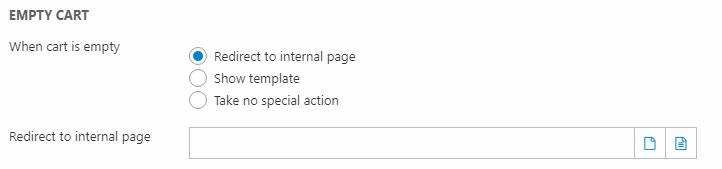
You have three options:
- Redirect to an internal page lets you select a specific page on your website to redirect users to
- Show template allows you to select a custom template to show instead of the cart. You can then add cool stuff to the template, of course, like suggested or personalized products and news.
- Take no special action does exactly what it says, and simply displays the first step of the order process as with a full cart. However, you can use the Ecom:Order.IsEmpty tag to test for and do stuff if a cart is empty.
User Management
The User management section (Figure 8.1) allows you to control how the cart interacts with the Users area of Dynamicweb.
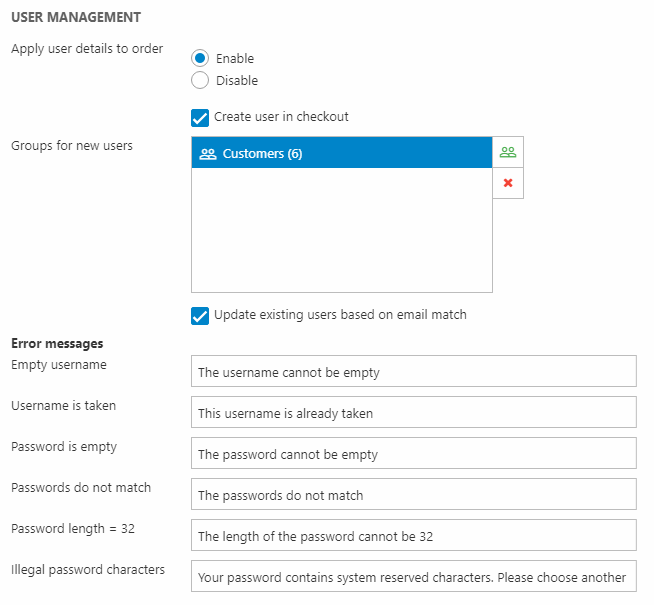
Basically, you can do two things:
- Apply user details to order – this setting applied user field like Name, Address, Phone, and so on to an order during checkout. You usually always want this enabled unless you’re creating orders on behalf of anonymous users.
- Create user during checkout – this option creates users during checkout. Additional settings are available when this setting is enabled:
|
Setting |
Use |
Comments |
|
Groups for new users |
Add the new users to these groups |
|
|
Update existing users based on email match |
If a user with this email exists, update the user with the checkout information details |
|
|
Error messages |
Specify validation error messages |
|
If a user is logged in on two separate computers, the shopping cart content will be automatically synchronized.
Saving an address to user management
Dynamicweb supports saving an address on a logged in user on checkout. Look at the InformationSaveCart.hmtl template for example code.
The address will be saved to the addresses section of the user, if it doesn’t match an existing address.
Payment & Delivery
On multi-shop solutions the payment & delivery section is used to control exactly which payment methods and shipping methods should be available on this cart (Figure 9.1).
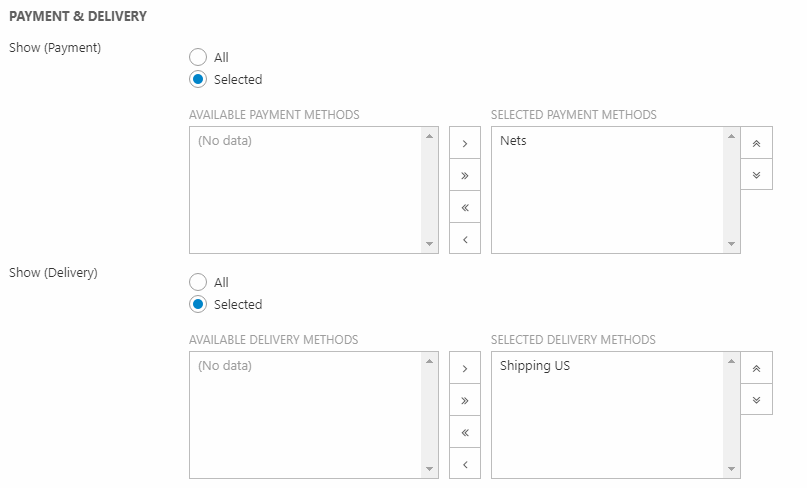
To make a payment method or shipping method available for a cart, move it from the list of available methods (left column) to the list of selected methods (right column).
Leave as All if all methods should be made available, depending on the language context.
Behavior settings
The behavior settings (Figure 10.1) control cart behavior in a variety of situations, as outlined below.
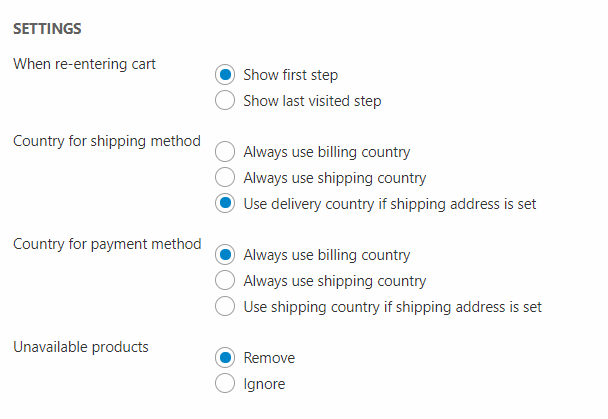
You can control:
- If the cart should show the first order step or show the last visited step for users returning to the cart after leaving the order flow. If you use validation groups on other steps than the first step, set to last visited to make sure you have access to validation loops in your templates.
- How the cart selects which shipping and payment methods should be available – the options being billing country, shipping country, or shipping country if a shipping address has been selected.
- Prices in the shopping cart are recalculated when the billing or shipping country is changed. VAT is recalculated when a new billing country is set, and Taxes are recalculated when a new shipping country is set.
- If products which have become unavailable should be removed or ignored
Advanced configuration options
From Settings > Ecommerce > Advanced configuration > Shopping Cart you have access to a number of advanced configuration options for the Shopping Cart app.
Read about the settings in this article.

Database
These are the database tables relevant for the Shopping Cart app and related functionality.
EcomAddressValidatorSettings
Contains settings for providers in Settings -> Ecom -> Orders -> Address Validation.
| Field name | Data type | Length | |
|---|---|---|---|
| AddressValidatorSettingId | int | 4 | |
| AddressValidatorName | nvarchar | 255 | |
| AddressValidatorActive | bit | 1 | |
| AddressValidatorProviderSettings | nvarchar | Max | |
| AddressValidatorUserGroupIds | nvarchar | Max |
EcomValidationGroups
Contains validation groups as defined in Settings -> Ecommerce -> Orders -> Validation groups.
| Field name | Data type | Length | |
|---|---|---|---|
| ValidationGroupId | nvarchar | 50 | |
| ValidationGroupName | nvarchar | 255 | |
| ValidationGroupAutoId | int | 4 | |
| ValidationGroupDoNotValidateIfAllFieldsAreEmpty | bit | 1 |
EcomValidationGroupsTranslation
Contains translations (EcomValidationGroupsTranslationValidationGroupLanguageID) of validation groups (EcomValidationGroupsTranslationValidationGroupID).
| Field name | Data type | Length | |
|---|---|---|---|
| EcomValidationGroupsTranslationValidationGroupID | nvarchar | 50 | |
| EcomValidationGroupsTranslationValidationGroupLanguageID | nvarchar | 50 | |
| EcomValidationGroupsTranslationValidationGroupName | nvarchar | 255 |
EcomValidations
Contains field definitions (ValidationFieldName) for validation rules and keeps track of which validation groups it belongs to (ValidationGroupId).
| Field name | Data type | Length | |
|---|---|---|---|
| ValidationId | nvarchar | 50 | |
| ValidationGroupId | nvarchar | 50 | |
| ValidationFieldName | nvarchar | 255 | |
| ValidationUseAndOperator | bit | 1 | |
| ValidationFieldType | nvarchar | 255 | |
| ValidationAutoId | int | 4 |
EcomValidationRules
Contains validation rule definitions (ValidationRuleId) and keeps track of which fields (ValidationRuleValidationId) belong to a rule.
| Field name | Data type | Length | |
|---|---|---|---|
| ValidationRuleId | nvarchar | 50 | |
| ValidationRuleValidationId | nvarchar | 50 | |
| ValidationRuleType | nvarchar | 255 | |
| ValidationRuleParameters | nvarchar | Max | |
| ValidationRuleAutoId | int | 4 |
EcomSavedForLater
Registers products (SavedForLaterProductId, SavedForLaterVariantId, SavedForlaterLangugageId) marked as Saved for Later during a session (SavedForLaterSessionId).
| Field name | Data type | Length | |
|---|---|---|---|
| SavedForLaterId | int | 4 | |
| SavedForLaterProductId | nvarchar | 30 | |
| SavedForLaterVariantId | nvarchar | 255 | |
| SavedForLaterLanguageId | nvarchar | 50 | |
| SavedForLaterSessionId | int | 4 | |
| SavedForLaterDateAdded | datetime | 8 |
EcomOrderContexts
| Field name | Data type | Length | |
|---|---|---|---|
| OrderContextId | nvarchar | 50 | |
| OrderContextName | nvarchar | 255 | |
| OrderContextAutoId | int | 4 |
EcomOrderContextAccessUserRelation
| Field name | Data type | Length | |
|---|---|---|---|
| OrderContextAccessUserAccessUserId | int | 4 | |
| OrderContextAccessUserOrderContextId | nvarchar | 50 | |
| OrderContextAccessUserOrderId | nvarchar | 50 | |
| OrderContextAccessUserRelationAutoId | int | 4 |
EcomOrderContextShopRelation
| Field name | Data type | Length | |
|---|---|---|---|
| OrderContextShopRelationContextId | nvarchar | 50 | |
| OrderContextShopRelationShopId | nvarchar | 50 | |
| OrderContextShopRelationAutoId | int | 4 |