
PayPal Express Checkout
Express Checkout is PayPal’s standard way of transferring money from a sender to a receiver.
A customer selecting PayPal Express Checkout is redirected to the PayPal login page.
After they authenticate their accounts, they are taken to the checkout page where they can confirm their Billing Information and then complete their orders.
This guide will show you the basic setup of PayPal Express Checkout in the PayPal administration (sandbox) and in the Dynamicweb administration.
PayPal supports multiple currencies. Please read more here: https://www.paypal.com/multicurrency.
Creating a test account
PayPal has a dedicated test environment, called Sandbox, which mirrors all the functionality from the live version.
In order to get access to Sandbox you first need to create a PayPal account on www.paypal.com. You can then log in to the developer administration at developer.paypal.com to start creating test accounts.
You can create business (merchant) accounts or personal (buyer) accounts. Read more about the different account types.
To create your test account(s):
- Log in to developer.paypal.com
- Click Sandbox > Accounts in the menu to open an overview of your test accounts
- Click Create Account to create a business or personal test account – read more about creating test accounts
In order to test your implementation, you must create a business account.
Obtaining your API credentials
Once you’ve created your business account in Sandbox mode, click it and open the Profile > API credentials (Figure 3.1).
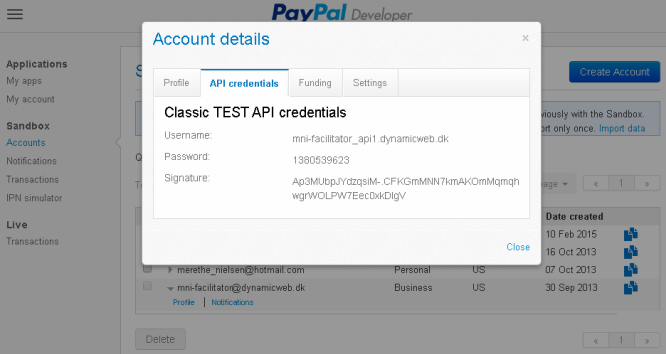
You will need these credentials in order to configure your Dynamicweb Paypal Express Checkout checkout handler.
Configuring the checkout handler
Once your account has been configured, you can create and configure the matching payment method in Dynamicweb.
To do so:
- Create or edit a payment method in the Management Center > Ecommerce > Orders > Payment following the regular procedure
- Select the PayPal Express Checkout checkout handler from the dropdown
- Fill in the associated parameters (Figure 4.1)
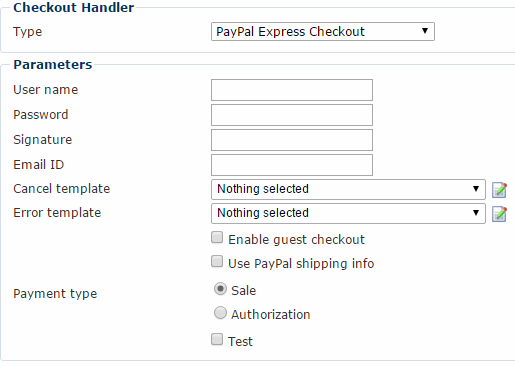
You must:
- Enter the username, password and signature associated with your account (API credentials)
- Enter the email address associated with your account (the one you use to login)
- Select, edit or create your error and cancel templates
- Select a payment type:
- Instant authorizes and captures payment immediately, and set s the capture state of the order to Captured. Not legal in all countries – some require you to capture only once the goods have been shipped
- Authorization and Capture authorizes the transaction, requiring you to manually capture payment from your Ecommerce order list. An authorization puts a reservation on the amount from the buyers funding source for 3 + 3 days over a 29 day period. The amount can be captured at any time during this 29 day period.
In addition, check the checkboxes appropriate to your implementation:
- You may enable guest checkout to allow users with no PayPal account to check. They can then optionally create an account. Enabling this is usually a good idea.
- You may use PayPal shipping info to pre-fill the checkout page with the Shipping Address from the customers’ PayPal account
- Check Test if you are working in a test mode
Testing
Before going live, test your setup thoroughly.
You can read more about the testing procedure in the Sandbox Testing Guide documentation.