
ePay
As of July 2017, ePay claim to not support integration with Dynamicweb. We recommend that you use Quickpay or DIBS instead, unless there's a very compelling reason for using ePay.
ePay offers a flexible payment solution which makes it easy to receive online payments. ePay supports many different payment methods and acquirers.
Read more about ePay here: http://www.epay.eu/epay-payment-solutions/ and http://tech.epay.dk/en/faq-introduction
Limitations
- You must use a public IP for your shop
Creating a test account
Before setting up the payment window on your webshop, you have to create a free test account with ePay. Once you've created the account, you'll receive a test merchant number which is used for making test payments.
Create your test account here. (http://www.epay.eu/order-epay/)
You can view the orders here: https://ssl.ditonlinebetalingssystem.dk/admin/
Configure settings in ePay administration
The ePay administration can be accessed here: https://ssl.ditonlinebetalingssystem.dk/admin/login.asp (login is provided by ePay).
Find merchant number and add domains
In the ePay administration in Settings > Payment system you can find your merchant number that you need in order to setup the provider in the Dynamicweb administration.
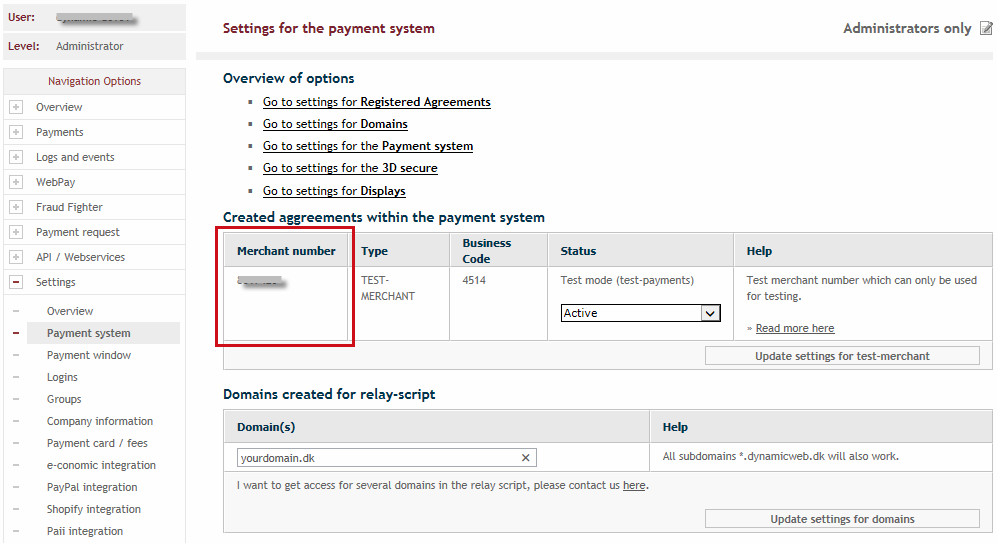
Here you also add the domain that you want to use with this account.
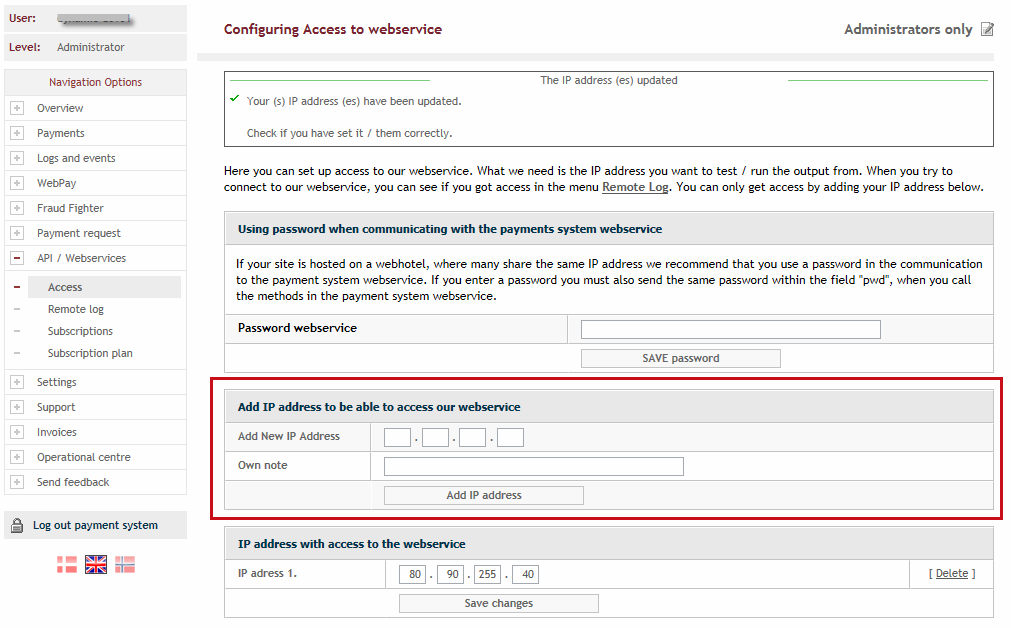
Setup access to ePay webservice
If you need to capture orders from the Dynamicweb order list, you need to enter the public IP address to your solution in the ePay administration. Go to API/Webservices > Access > Add IP address to be able to access our webservice.
Customize ePay transaction window and enable Transaction fees
At the ePay administration you can customize your ePay, e.g. add a company logo and company name. You can also enable Transaction fees if you want to charge your customer for the cost of payment.
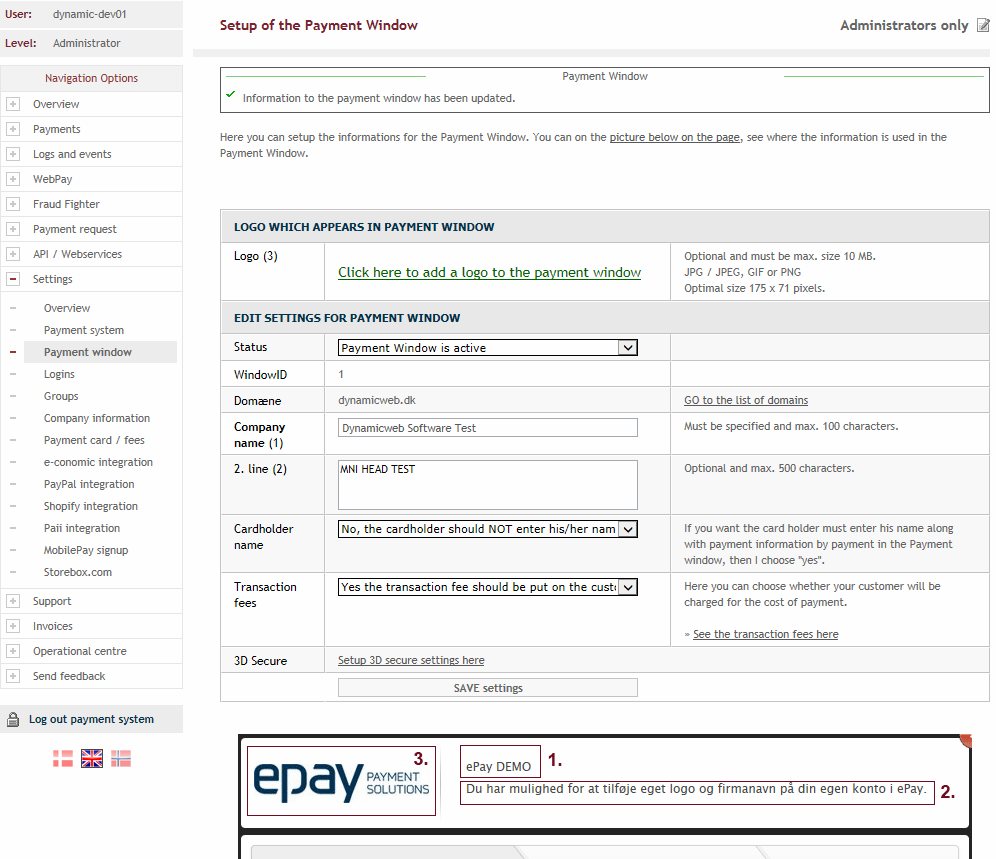
Changes can be made at https://ssl.ditonlinebetalingssystem.dk/admin/login.asp in Settings > Payment Window.
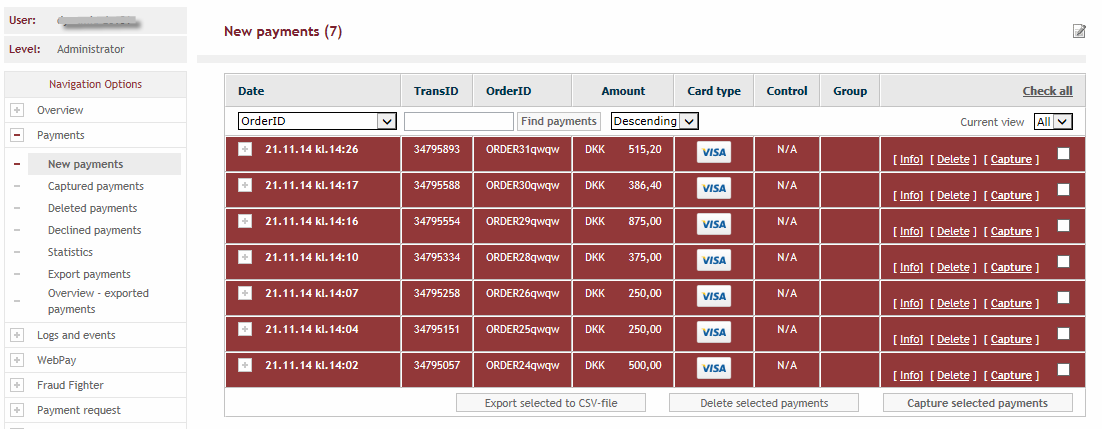
Overview of transactions
You can find and manage the transaction in the ePay administration in Payments.
Configure the checkout handler
Once your account has been configured, you can create and configure the matching payment method in Dynamicweb.
To do so:
- Create or edit a payment method in the Management Center > Ecommerce > Orders > Payment following the regular procedure
- Select the ePay Payment Window checkout handler from the dropdown
- Fill in the associated parameters (Figure 8.1)
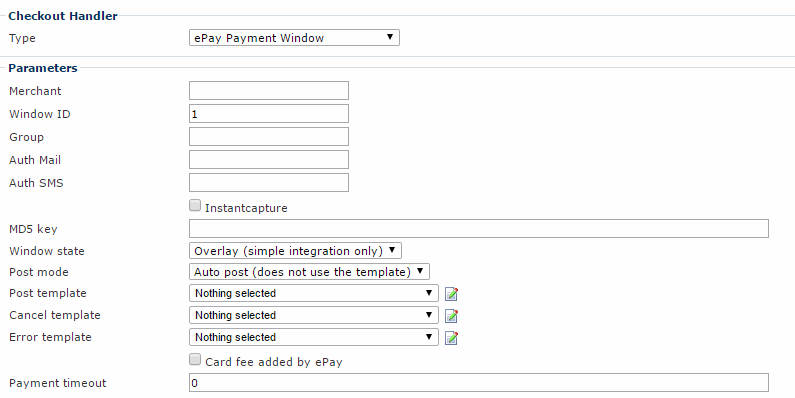
You must:
- Enter your Merchant ID provided to you by ePay. You can login to the ePay administration and click Settings > Payment system to find the merchant number
- Enter a Window ID
The Window ID defines what payment window you use. If you have different shops/domains and want to open different windows (with different logos or settings) from your domains, you need the window ID to control what window that should open from the different shops/domains.
You can get an overview of your payment windows or add new from the ePay administration in Settings > Payment window - If you use MD5, write the MD5 key you entered in the ePay administration in Settings > Payment system. We recommend that you use MD5 to secure the data that is transferred between your Dynamicweb solution and ePay
- Choose a Window state of the payment window
- Full screen
- Overlay - the payment window opens "on top" of your website
- Choose a Post Mode (Auto post mode or Render template mode)
- The render template mode uses the customizable post templates below.
Furthermore, you can:
- Select the group to which the payment is associated. If the group doesn't exist, it is automatically created when you start using the parameter.
- Write an Auth mail, if the shop owner should receive an email when a payment is authorized (from an ePay webservice). This is NOT for your customer's order confirmation. You can enter multiple e-mail addresses by separating them by semicolon (;).
- Write a phone number for Auth SMS, if the shop owner should receive a SMS containing information about the payment (from an ePay webservice). It costs DKK 0.25 per SMS (Price in 2015. Contact ePay for the currenct rate).
- Enable Instant capture to capture payments as soon as they are authorized. It withdraws the money right away (not legal in all countries) - and the capture state in the order list is set to "Captured" when the order is completed.
If not checked (default), the payment is not captured and the payment must be captured manually in the ePay administration or in the Dynamicweb order list
Notice! When using instant capture for payments to Teller, two operations are made: authorize and capture. Sometimes the capture fails, which results in a complete decline of the transaction.
- Customize any templates
- Post template – the template that is used for posting transaction information to ePay. Used when Post Mode = Render template.
- Cancel template – template for message in case of cancelling.
- Error template – template for message in case of error.
- Enable Card fee added by ePay.
- Setup a payment timeout (minutes)
If you want to use fees (your customers are charged for the cost of payment) you need to enable Transaction fees in the ePay administration in Settings > Payment window. A list of transaction fees is also available from this page in the administration.
Testing
You should test your setup thoroughly before going live. ePay automatically inserts the test credentials in the test transaction window.
You can use the following card numbers for testing purposes:
Dankort
- Card number: 4444444444444000
- Expiration date: Optional (mm / yy)
- CVV: Optional
VISA
- Card number: 3333333333333000
- Expiration date: Optional (mm / yy)
- CVV: Optional
MasterCard
- Card number: 5555555555555000
- Expiration date: Optional (mm / yy)
- CVV: Optional
Error codes
Error code when trying to capture an order:
"Incorrect pbsResponse and epayresponse code received from ePay". Error code -1003 occurs when you’ve not opened up for your IP address in the ePay administration. Log on to your ePay administration, and go to API/Webservices > Access. Here you can add the IP address on which your system is located.
Other error codes:
Acquirer: https://ssl.ditonlinebetalingssystem.dk/admin/support_errorcodesPBS.asp
System: https://ssl.ditonlinebetalingssystem.dk/admin/support_errorcodesSYS.asp
Going live
Once the integration is successfully tested in the developer test environment, you set up the checkout handler with the credentials for the ePay merchant account that you want to use for live transactions. If you choose to keep your test account and use ePay as your payment gateway, they can upgrade your test account to a production account.
Contact ePay (http://www.epay.eu/customerservice/contactinformation.asp) in order to get a live account or upgrade the test account.