

Adding range-based search to an Ecommerce Product Catalog
In this tutorial you will learn how to implement range searches in your Ecommerce, allowing your users to specify that they want to find only products where a value (typically Price) falls within a particular range.
In this tutorial, we will start from scratch, covering:
- Creating a new repository.
- Creating a new index.
- Creating a query with ranges.
- Adding a range selector to a template.
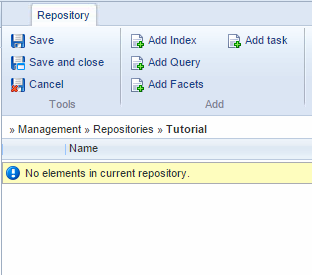
Create a new repository
- Go to you Management Center
- Right click on Repositories and create a new repository
- Name it and click OK
This creates a new repository (Figure 2.1).
Create a new index
Creating a working index requires you to add the elements in the proper order – Index > Instance > Build > Fields.
- Click Add index
- Name it
- Click OK
- Click Add instance
- Name it
- Select the LuceneIndexProvider
- Provide a folder name
- Click OK
- Click Add Build
- Name it
- Select the Dynamicweb.eCommerce.Indexing.ProductIndexBuilder
- Select Full as your builder action
- Click OK
- Click Add field
- Select field type Schema extender
- Select ProductIndexSchemaExtender as your type
- Click OK
- Save your index, then build the index (click the "build"-button next to your build. It has the the same as your instance)
- Save and close your index – it should look like Figure 3.1

Create your PriceRange query
- Click Add query
- Name it
- Select your index as data source
- Click OK
- Click Add parameter
- Name it (e.g. PriceRange)
- Select the bracketed System.Double[] type
- Click OK
- Click Expressions > Add group
- In the dropdowns, select the Active field and the Equal operator.
- Click the wand and select Constant & System.Boolean. Set value to true.
- Click Add expression
- Select the Price field
- Select Between as the operator
- Click the wand and select Parameter > Pricerange
- Save and close your query

Add a range selector to your frontend
To add a range selector to your frontend:
- Go to the Product Catalog module settings on your paragraph.
- Under the Show settings, select Index.
- Under the Index settings, select your query.
- Under Templates, modify the template where you want your range-selector to show up. For instance, add this example code to the top of your List.cshtml product list, just below the first inherit-statement.
This example renders a selector for each parameter which is not handles as a facet already. Here, we add two input boxes for minimum and maximum values - but you can use a jQuery range slider, or any other method you want.
- Finally, Save and close your module settings
And that’s it. You’re done! :)
Click Show page and start using your range.