Impersonation
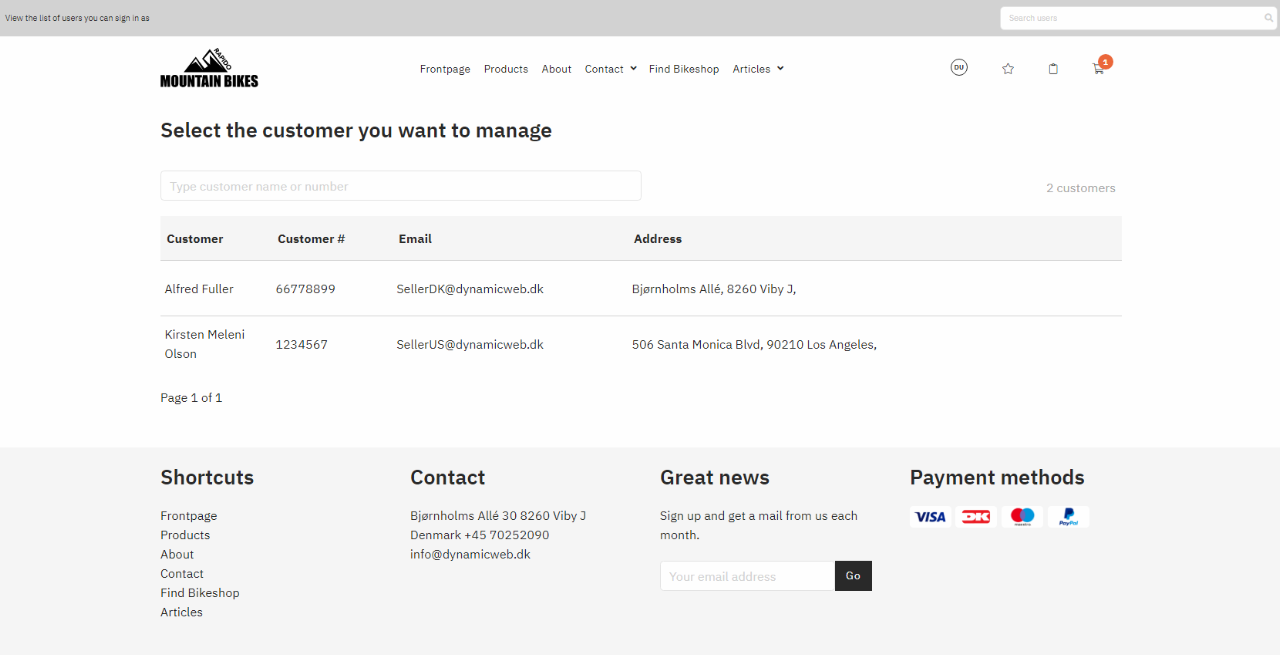
Using impersonation, a user or user group can see the website through another user's or user group's eyes and act on their behalf in terms of permissions on content, the product catalog, and products.
The impersonation functionality is already built into the templates of Rapido, so what you need to do is:
- Set up a repository
- Define which users can impersonate whom
- Create an impersonation page
This guide is based on an empty Rapido solution (no content and no products).
Secondary user repository
If a user has other users available to impersonate, we call these available users Secondary users. To make impersonation work, you must create an index and a query to render all available secondary users.
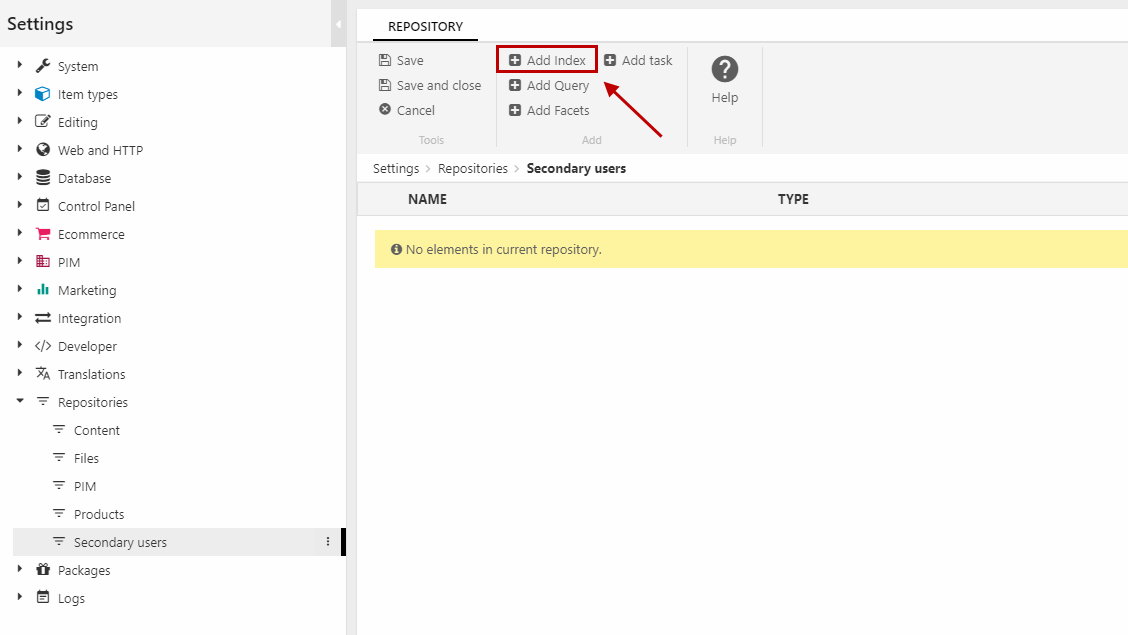
Open the Settings area and right-click the Repositories node to create a new repository (Figure 2.1). Call it Secondary users.

In the repository view (Figure 2.2), click add index in the ribbon bar and call it Users.
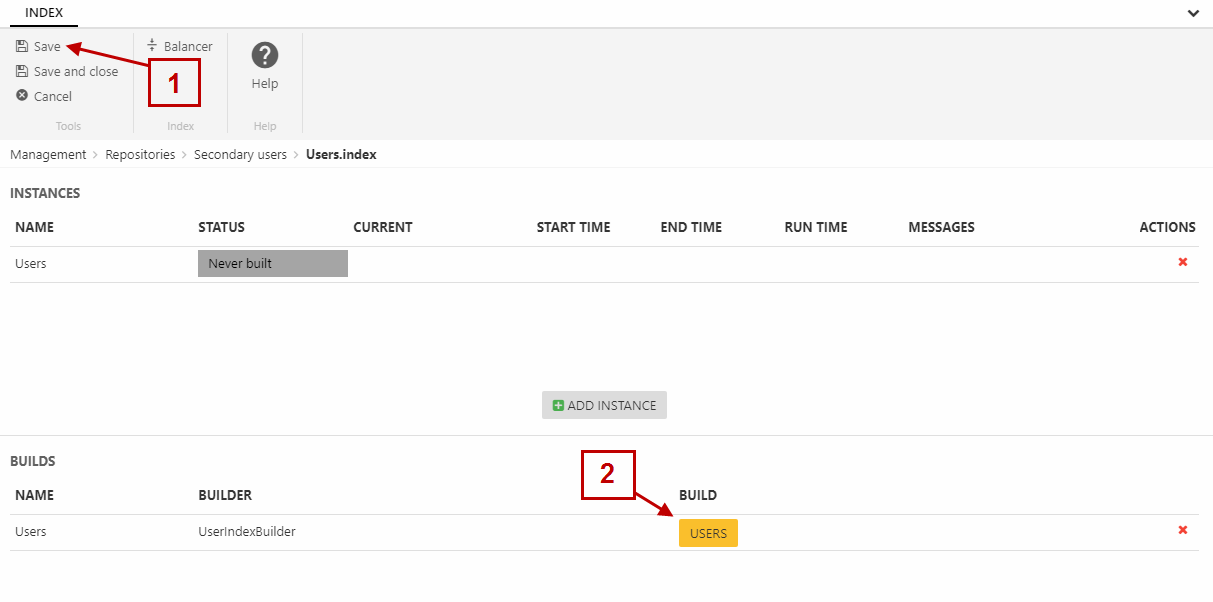
Add an instance called Users with the LuceneIndexProvider provider and then, add a build (Figure 2.3) and select the Dynamicweb.Security.UserManagement.Indexing.UserIndexBuilder.
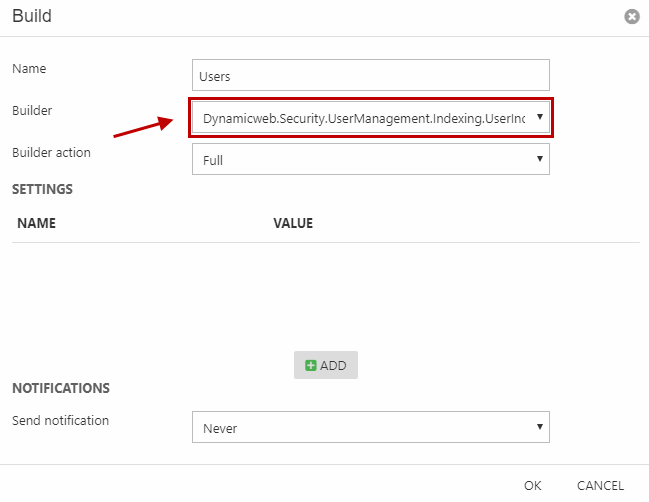
Save the index (1) and then click the yellow build button to build your Users index (2).
Now, click Add field and select the Schema extender field type and the UserIndexSchemaExtender type. Click OK.
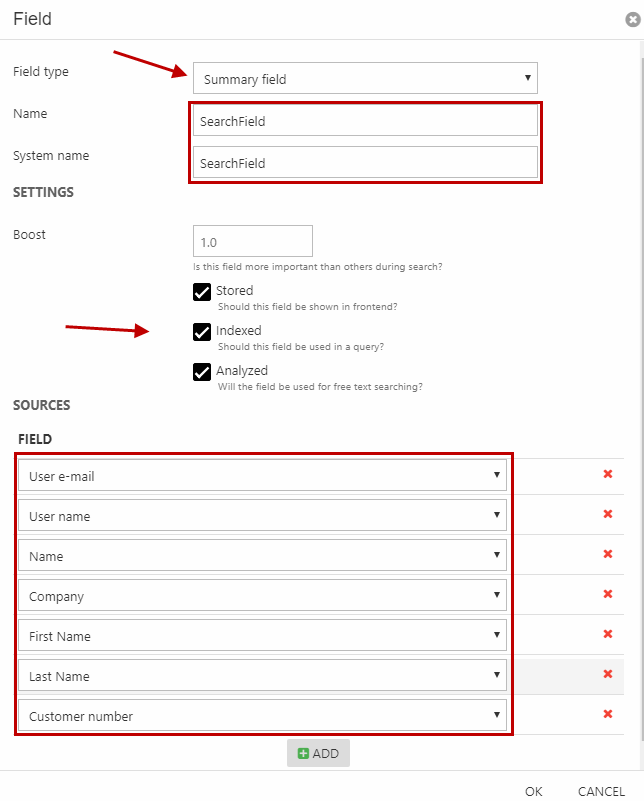
Then, add another field and (Figure 3.2):
- Select the Summary field field type
- Write SearchField as the name and system name
- Set the field to be Stored, Indexed, and Analyzed
- Under Sources, add 7 fields with:
- User e-mail
- User name
- Name
- Company
- First Name
- Last Name
- Customer number
Save and close the index.
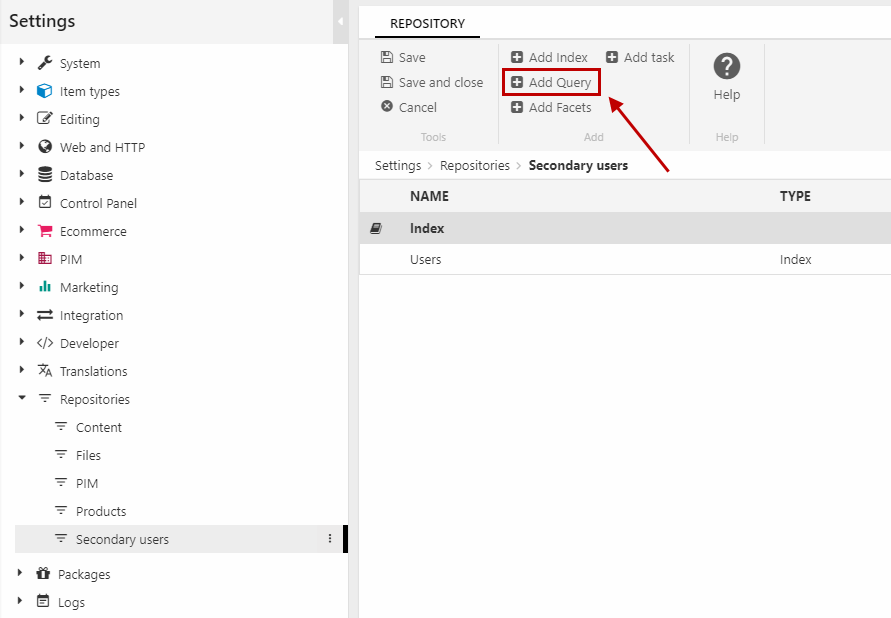
Back at the repository view, click Add Query (Figure 3.3) and call it Users and select the Users index as the Data Source.
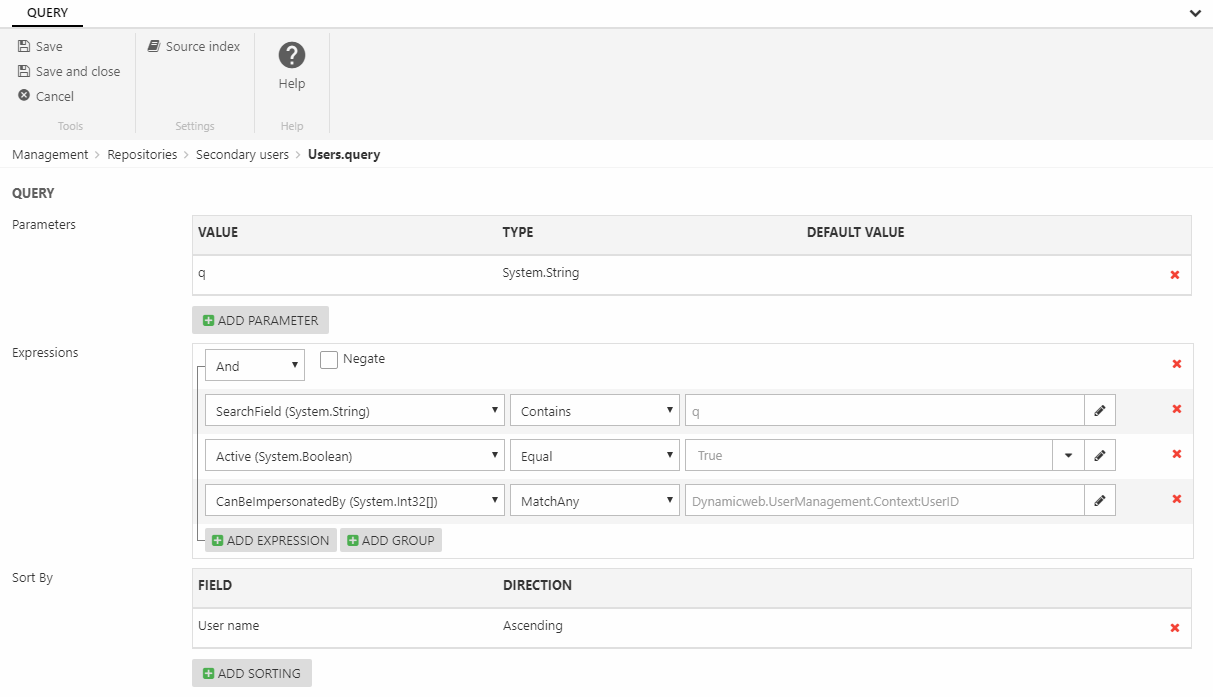
Add a parameter with the name q and the type System.String. This parameter will be used in the search field.
Under Expressions, click Add group and create three expressions with the:
- SearchField field, the Contains operator, and click the pencil icon to select the Parameter > q
- Active field, the Equal operator, and the True value
- CanBeImpersonatedBy field, the MatchAny operator, and click the pencil icon to select the Macro > UserID
Lastly, click Add sorting and select the User name field and make it Ascending.
Your query should now look like Figure 4.1. Save and close the query.
Set up impersonation on the users
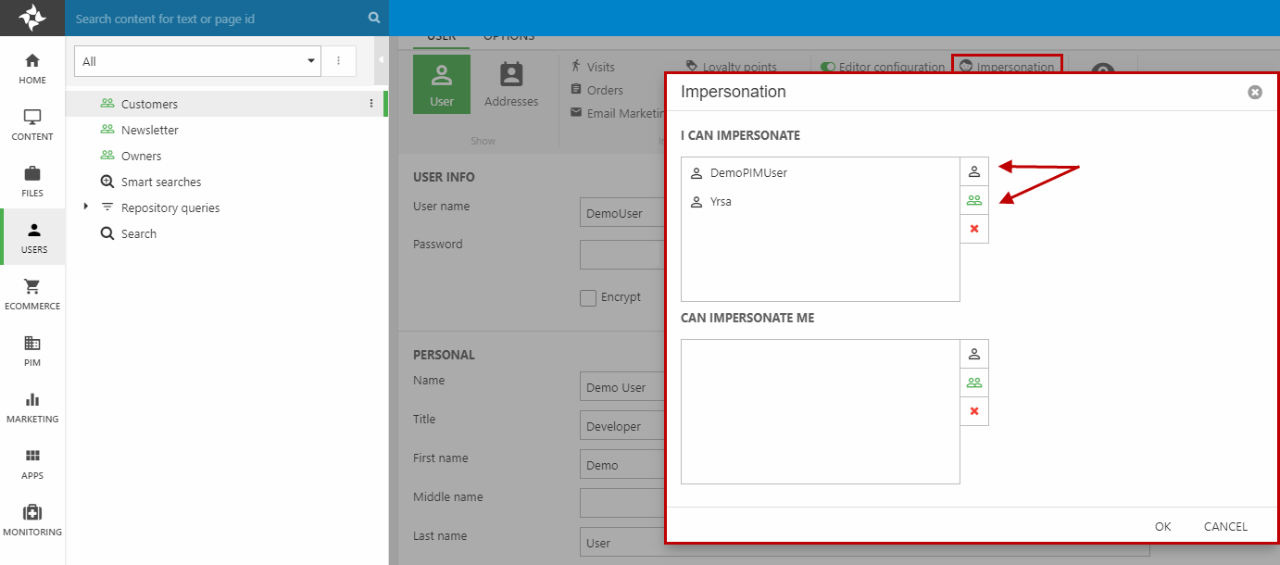
First, you must go through your users that should be able to impersonate. For each user, click Impersonation in the ribbon bar (Figure 5.1) and select:
- Which users this user can impersonate - "I can impersonate"
- Which users can impersonate this user - "Can impersonate me"
When you allow user 1 to impersonate user 2, user 1 will automatically show up in user 2's "Can impersonate me" list.
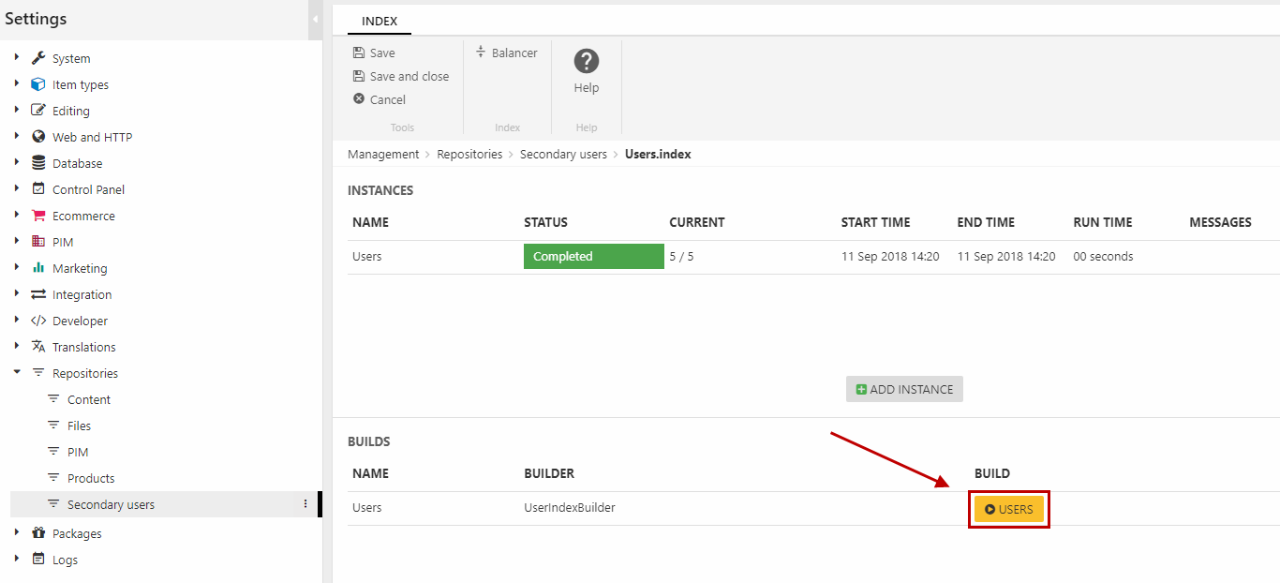
Then, go to Settings > Repositories > Secondary users. Enter the User index and build the index (Figure 5.2).
Now, even though the users have the ability to impersonate users, they can't activate it in frontend, which is the goal. So, you must create a page which the users can access upon login where they can choose a user (group) to impersonate.
Create an impersonation page
Create a page called Impersonation and make it Hide in menu. Then, create a paragraph and attach the Query Publisher app to it (Figure 6.1).

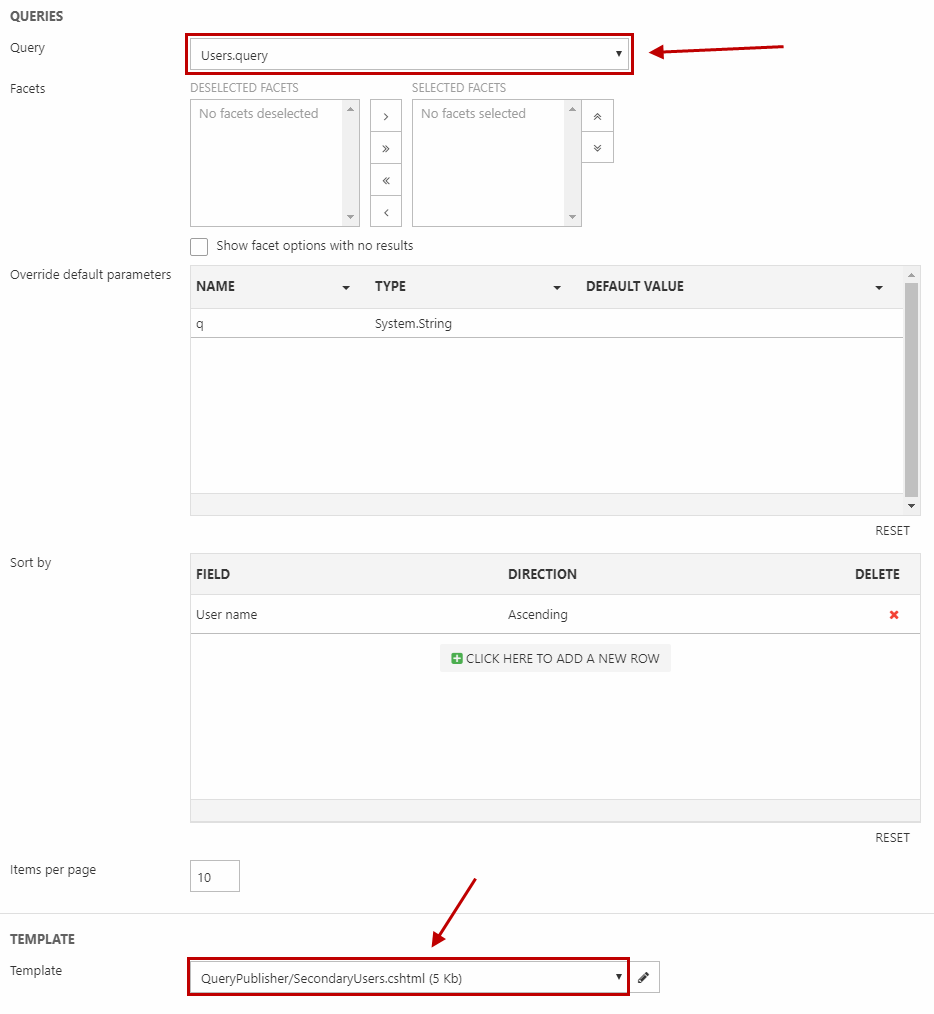
In the app settings (Figure 6.2) under Queries, select the Users.query. Under Template, select the QueryPublisher/SecondaryUsers.cshtml template.
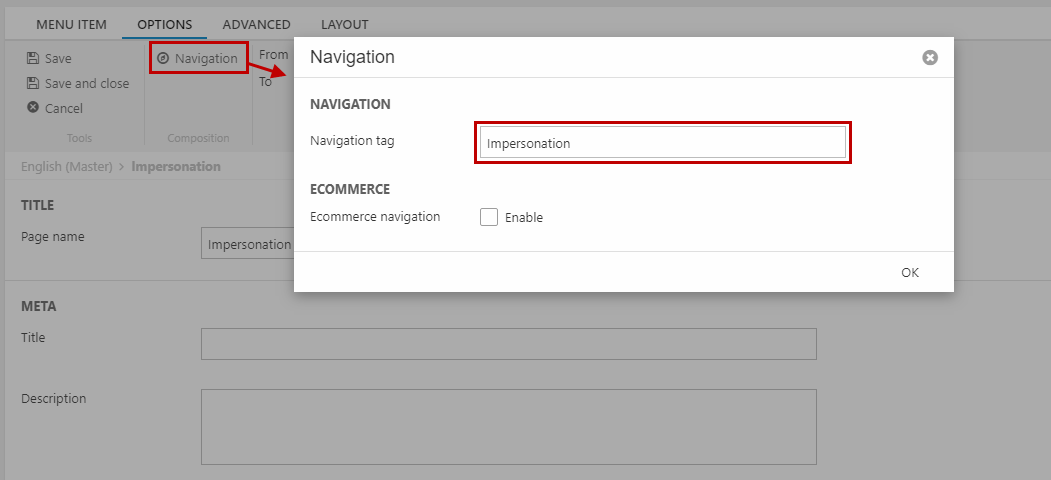
Lastly, save and close the paragraph. In the page view, open the Properties and go to the Options tab. Click Navigation (Figure 6.3) and write Impersonation as the Navigation tag.
My customers' orders setup
Users are able to retrieve a list of the orders they have placed for others, through impersonation. A collected list of all previous orders, from users that have been impersonated will be present, along with a reorder link.
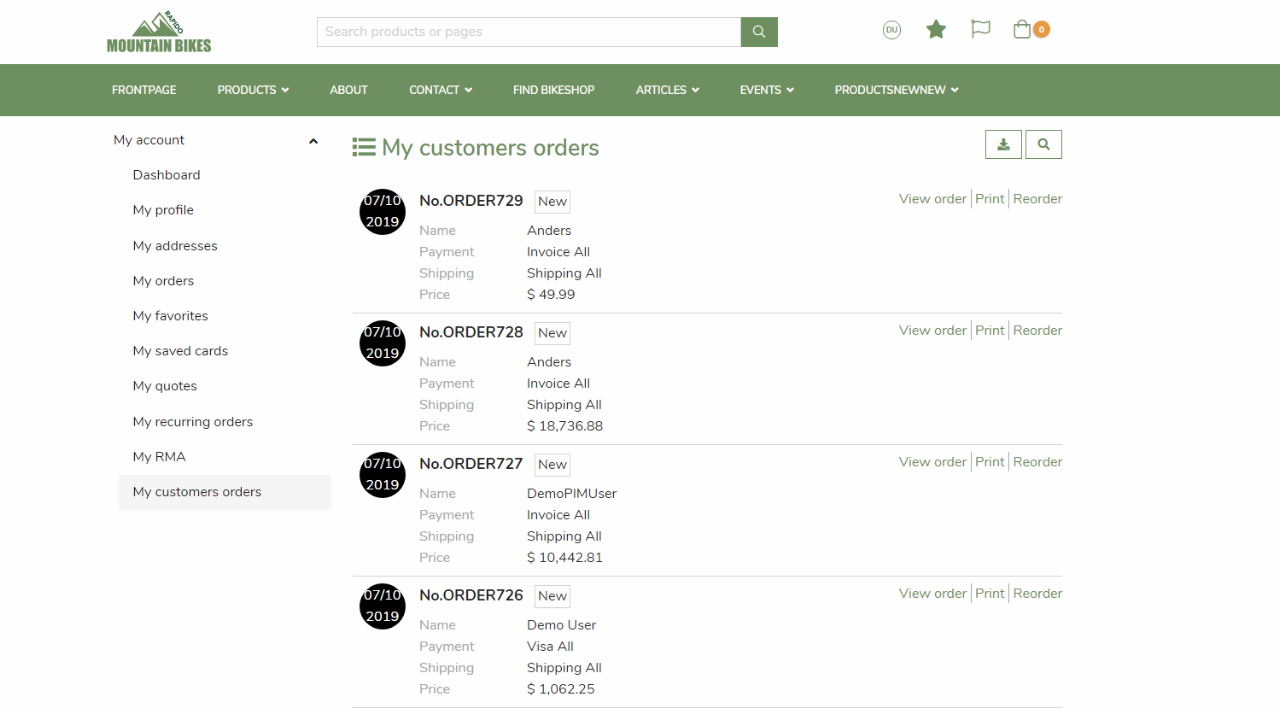
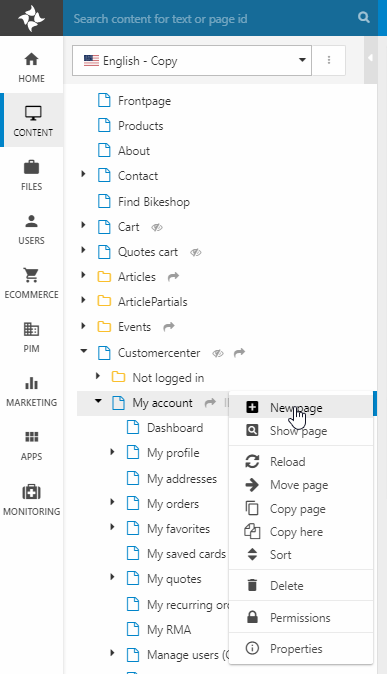
To set this up, create a new page under Customer Center > My Account and name it "My customers orders''.
After creating the page, create a paragraph and attach the Customer Center app to it. The configuration should be present after selecting the app (Figure 7.3).
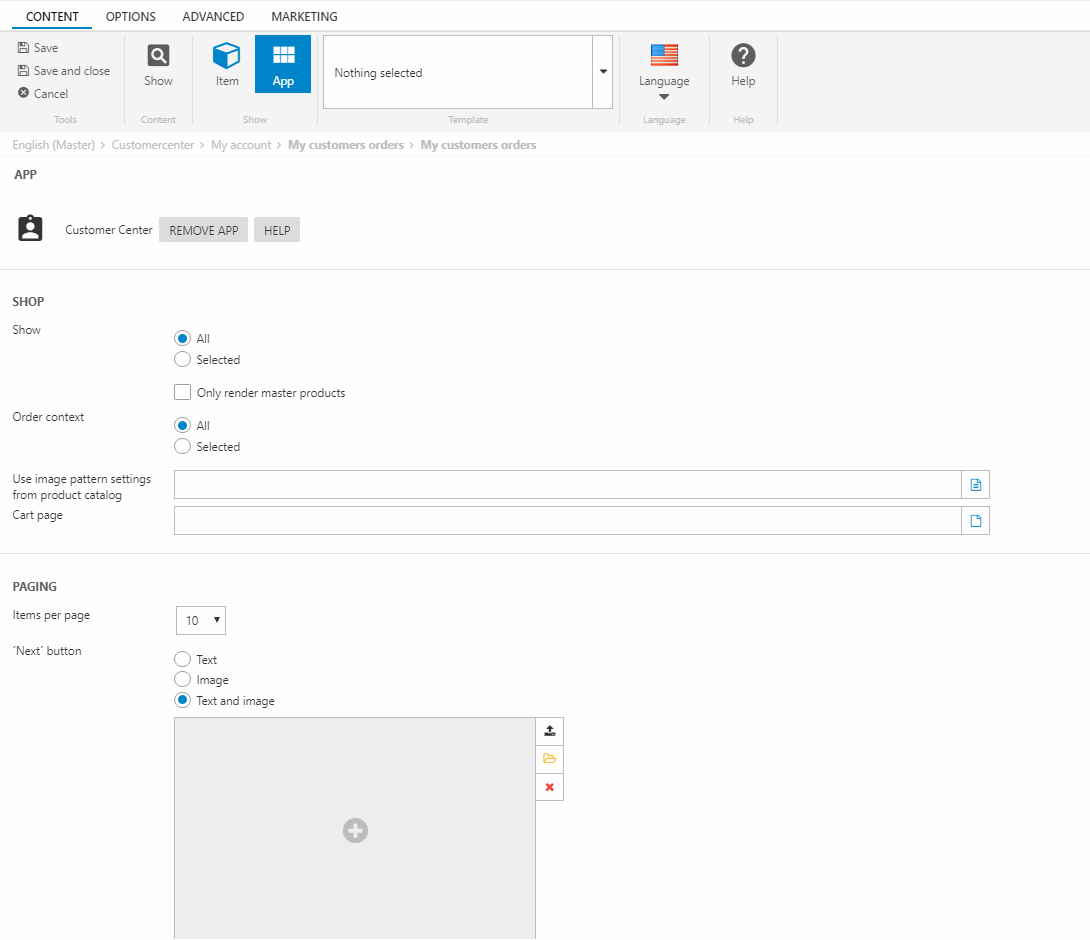
In the app configuration, scroll down to the orders section and choose ''Own orders and orders made by users that current user can impersonate'' from the retrieve list based on options (Figure 8.1).

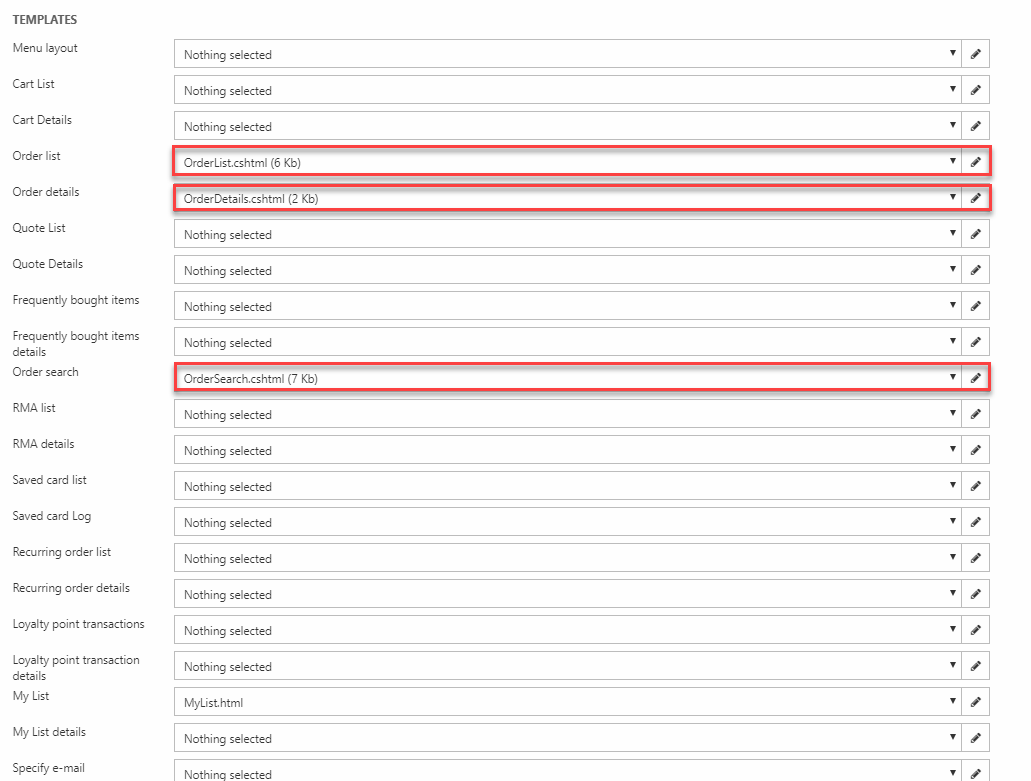
After this, the last step is making sure you have the correct template settings. Select the same templates as in Figure 8.2.