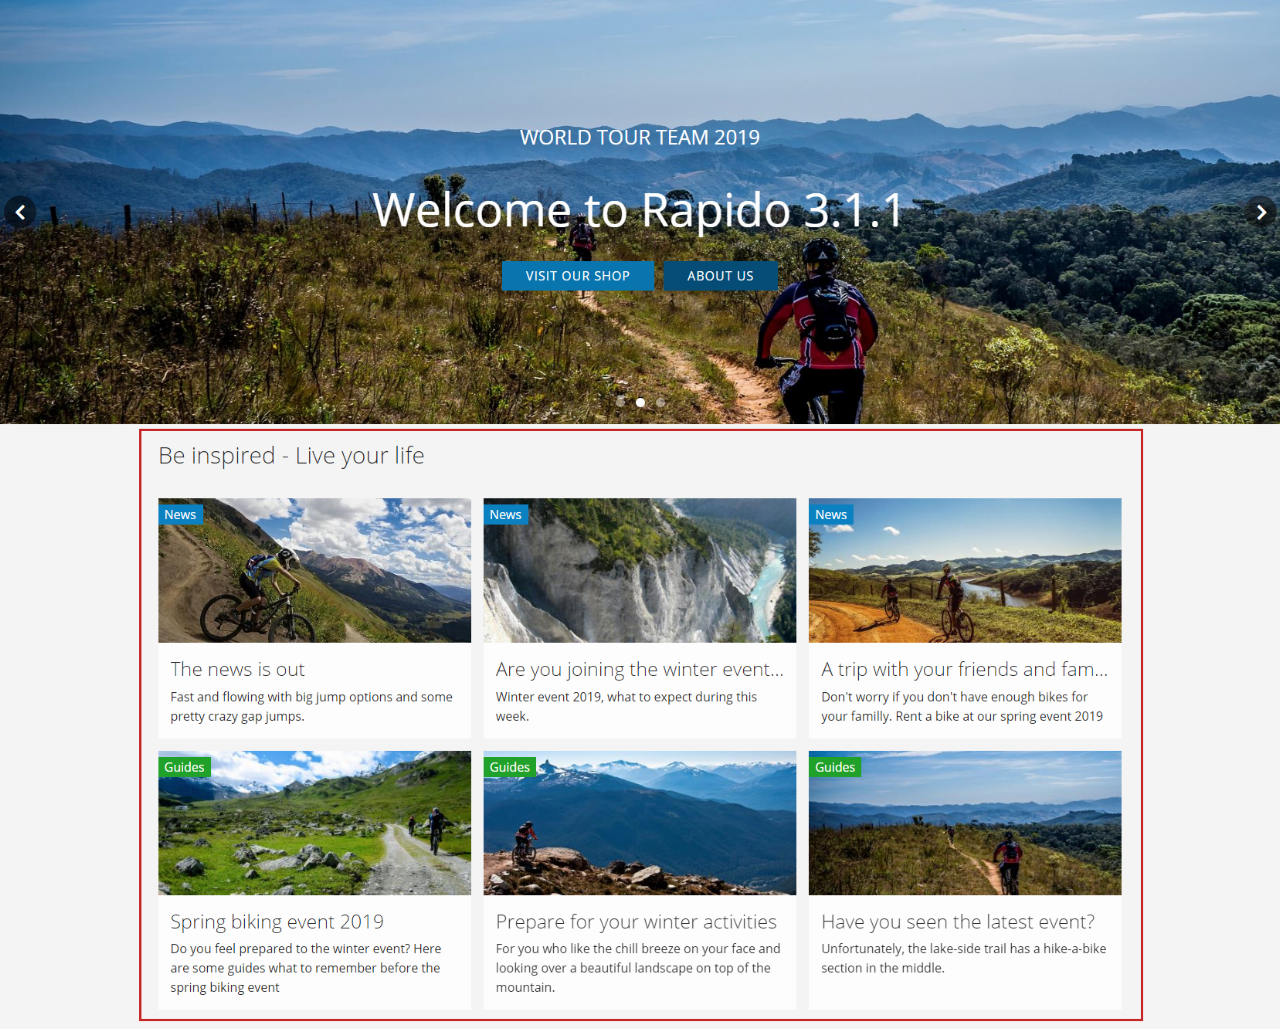
Dynamic articles
Rapido ships with a set of item type templates for creating dynamic articles - blogs posts, news articles, etc. - and displaying them in lists in frontend:
- The Dynamic article list page item type is used to create and configure a page listing all underlying dynamic articles
- The Dynamic article item type is used to create the actual articles – blog posts, news articles, etc.
- The Dynamic article list paragraph item type is used to publish a subset of articles on another page, e.g. the frontpage
List pages can be nested, so you can create a tree of article lists where layout options are inherited to all sub-lists, but can be overridden on each list or article. This way, you can easily ensure a persistent design and still have the option to change the layout for each list or article when you deem it necessary.
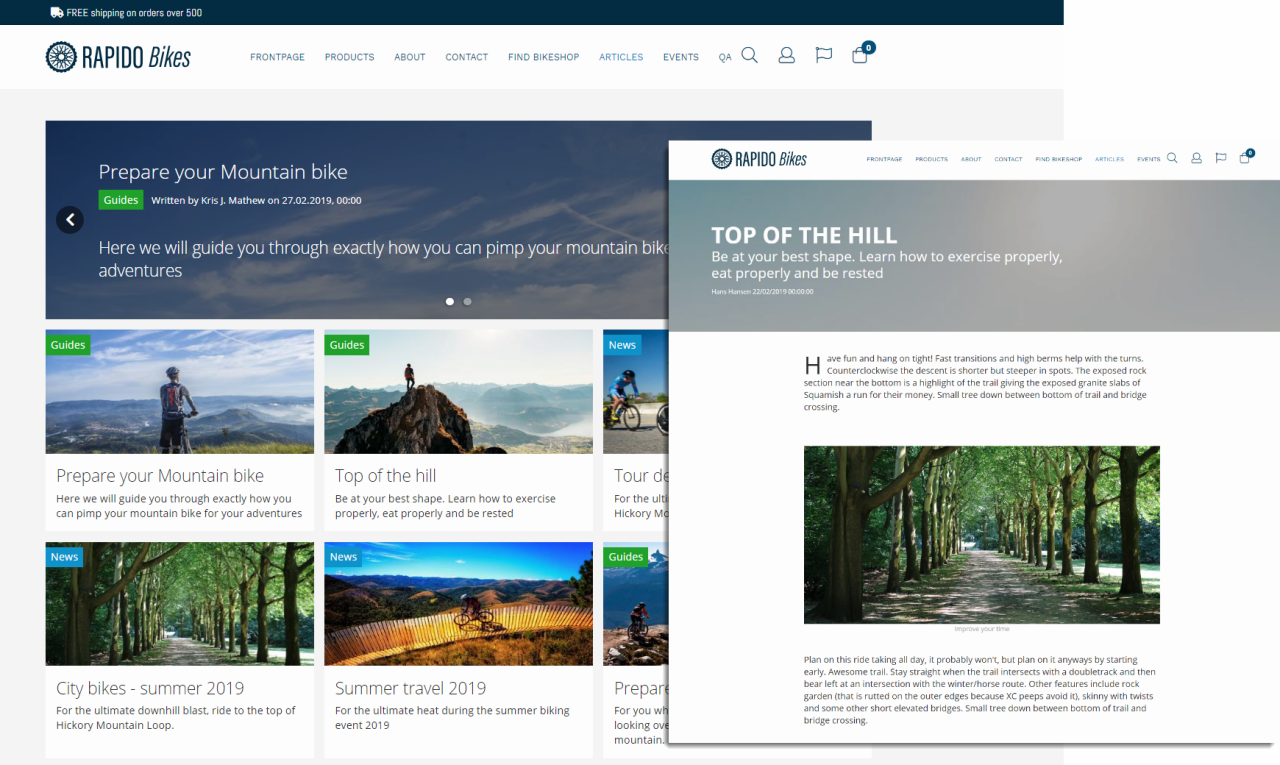
On the article list page, you will see an overview of all the articles – also those belonging to underlying sub-lists. Each article will have a label with the name of the list they are placed under.
You have different options regarding navigation structure:
- You can keep your News list, Blog list, etc. separate
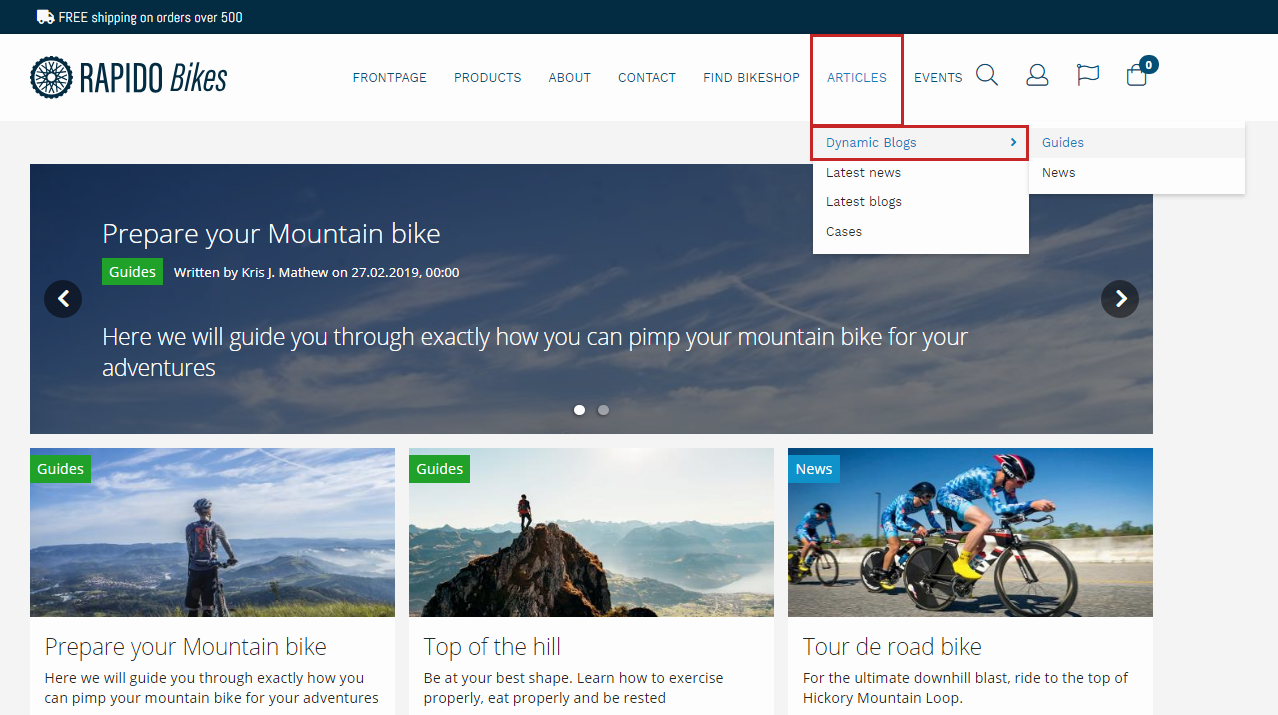
- You can gather all your article lists e.g. News list, Blog list, etc. under a total “Articles” list. By doing this, you will only have one list shown in the navigation (Figure 1.2)
What are dynamic articles?
As mentioned before, the dynamic articles feature includes the dynamic article list page and the articles themselves. For each list page or article, you have a set of configuration options which can be inherited to sub-lists or articles. The item types contain many fields, some of which you won’t need for your specific purpose. Therefore, we recommend that you make a copy of the original item types and delete any fields not necessary to suit your needs (read more about this procedure in another section later in this article or click here).
As for the original item types, all of the available fields are described in this section.
The dynamic articles list page
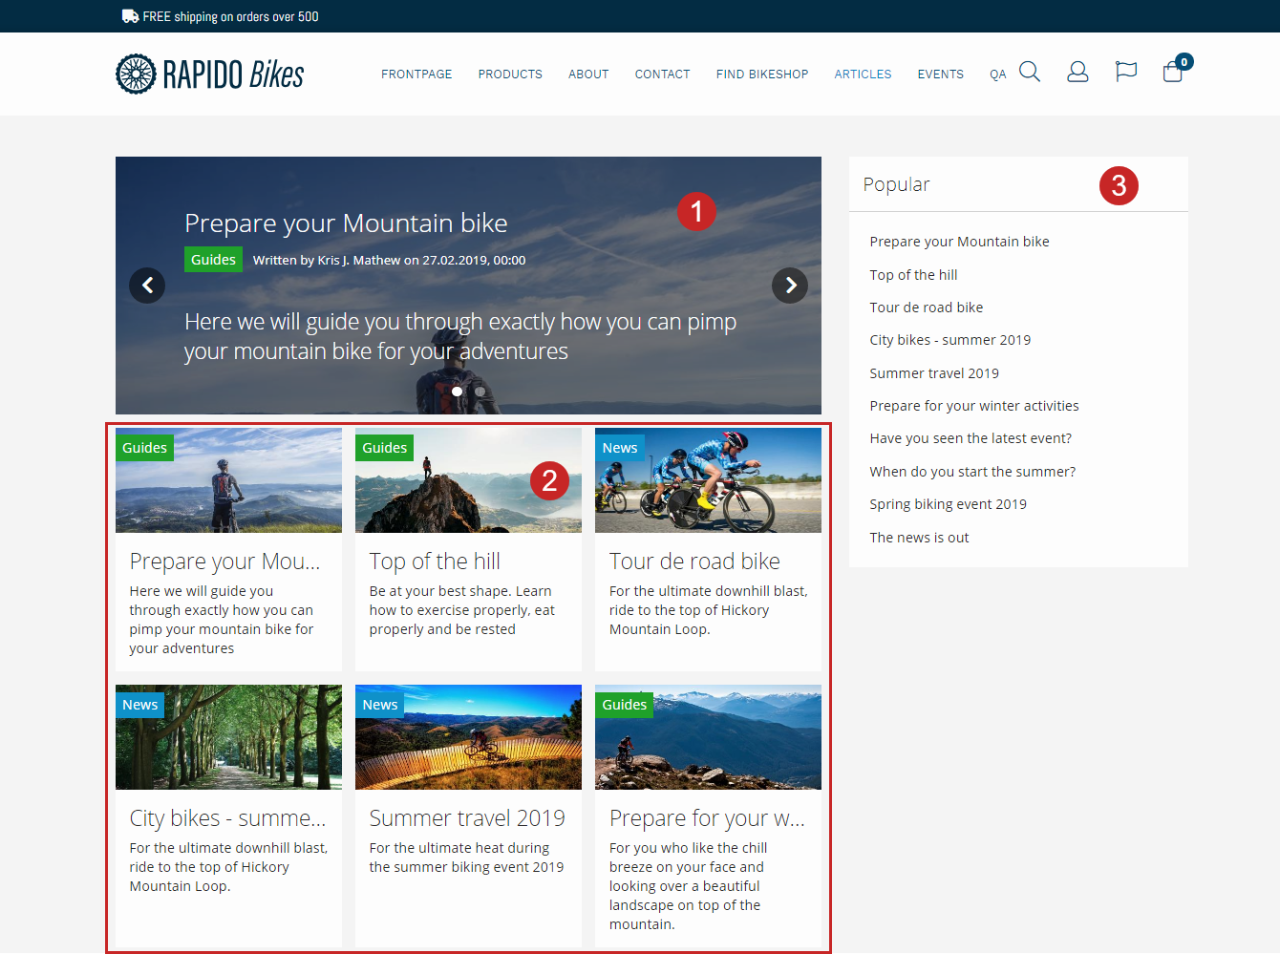
The article list page can show up to three sections – a focus list, a main list, and a popular articles list. The main list is always shown on the list page, whereas you can disable the focus list and popular articles list in the page settings.
- The focus list (1) showcases articles marked as “in focus” at the top of the page
- The main list (2) contains previews of all articles belonging to this list and underlying sub-lists
- The popular articles list (3) is shown to the right and displays articles marked as “popular” (the name “popular” can be changed)
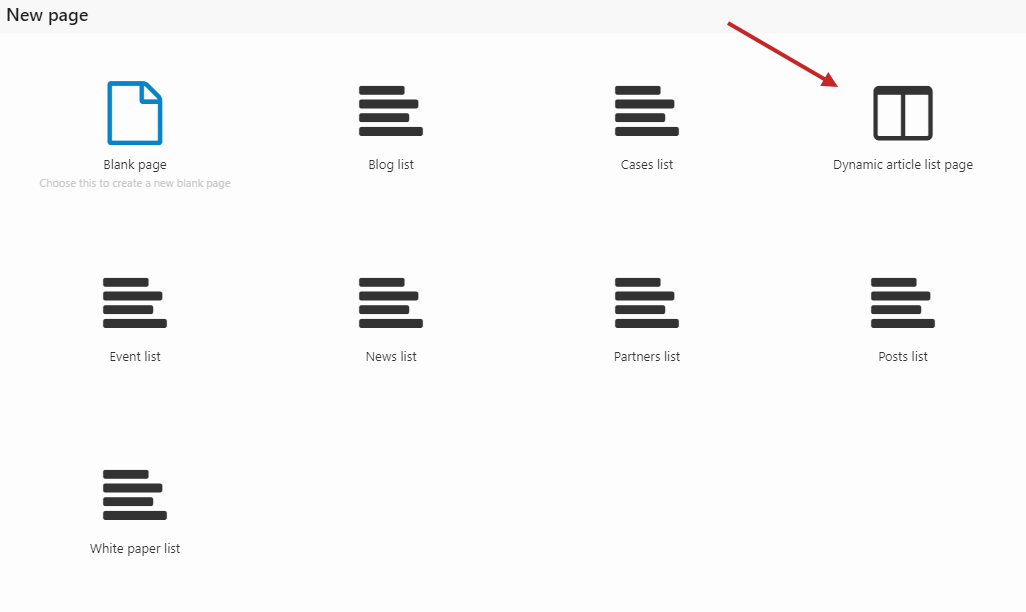
To create a dynamic article list, create a new page and then select your Dynamic article list page item type (Figure 3.2) – again, you should make your own copy item type, but here we will just use the original to go through all of the available fields.
You will then be directed to the page settings for the list (Figure 3.3).

In the General section, you can configure the design of the list. You can:
- Enter a title (is also used for the category stickers)
- Change the category color which is used for the stickers on all articles belonging to this list
- Choose to show/hide the title, (custom) filters, category filter, and search bar
Due to the better possibilities for nested article lists, each sub-list can be perceived as “categories” to the main list. For instance, a main list called Blogs might have a sub-list containing news articles and another sub-list containing guide articles. So, using the above settings, each category has its own color sticker and you can filter the list for each category.
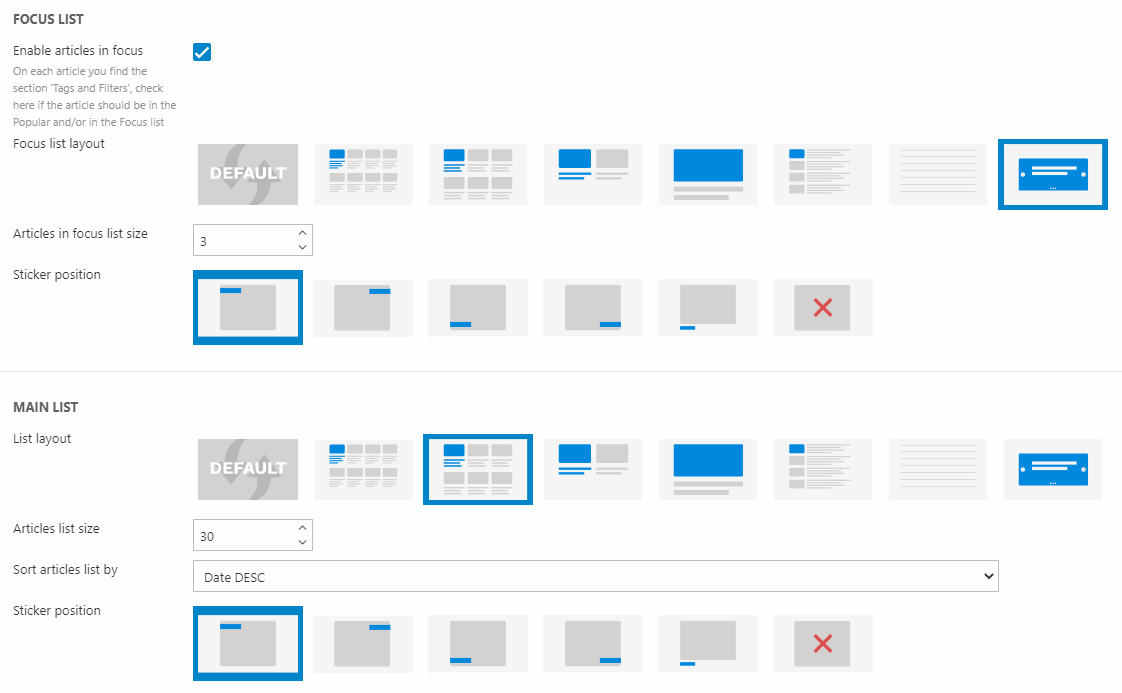
Below, you can configure the layout of the focus and main list (Figure 4.1).
You can:
- Enable/disable the focus list and select a list layout
- Define the amount of articles shown in the list
- Change the sorting of articles (only for the main list)
- Hide or change the position of the category sticker (this doesn’t apply to the carousel list layout, as the sticker on that layout is fixed at the top left corner)
Then comes the Popular/Related list settings, which are not related to the “Related articles” section on the individual articles.

With these settings you can enable the popular articles list, change the header and define the number of articles shown in the list.
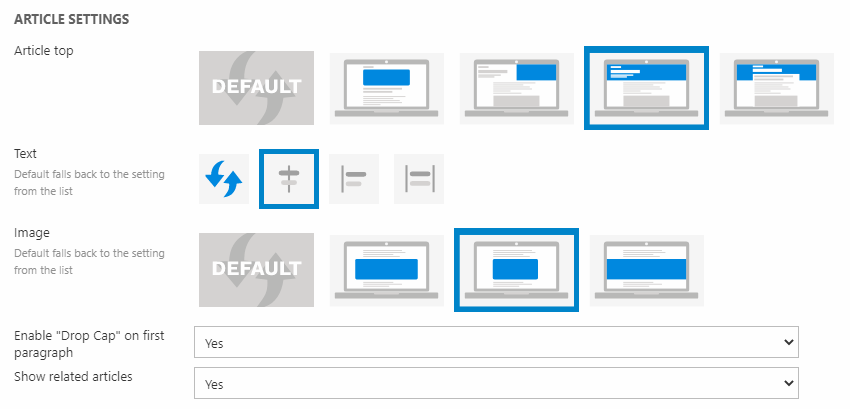
At the bottom, you will find settings related to the article pages. These settings are inherited to all articles – both articles belonging to this list and to sub-lists.
You can define the default:
- Top layout
- Alignment of the textboxes on the article page
- Image style
Besides this, you can enable “Drop Cap” on the first paragraph for each article, and enable the Related articles section below the article content.
The dynamic article
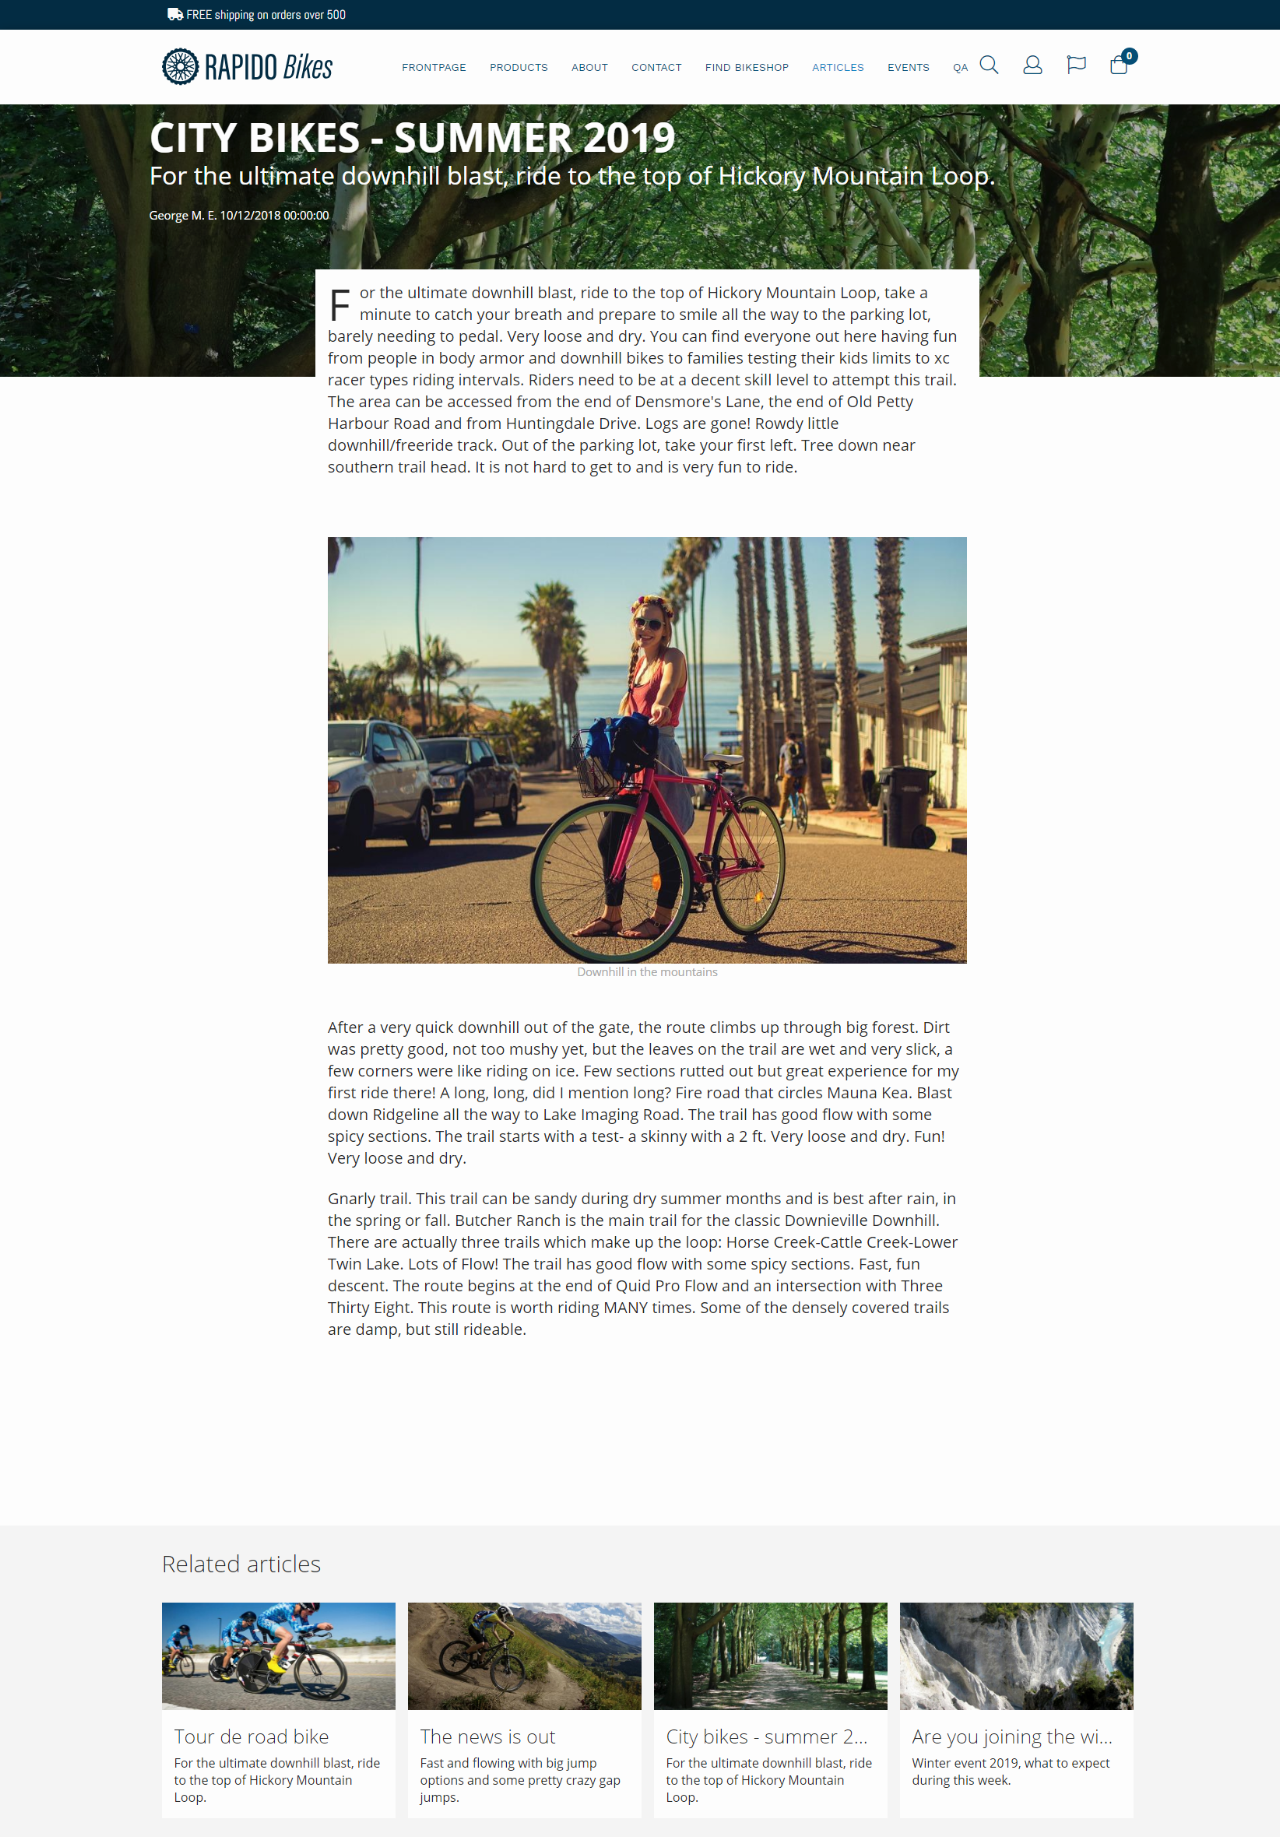
Each article consists of a header section with e.g. a title, banner, summary, etc., and some content in form of paragraphs with text and images. Below the content, you can enable a Related articles section which shows all articles of the particular list this article belongs to.
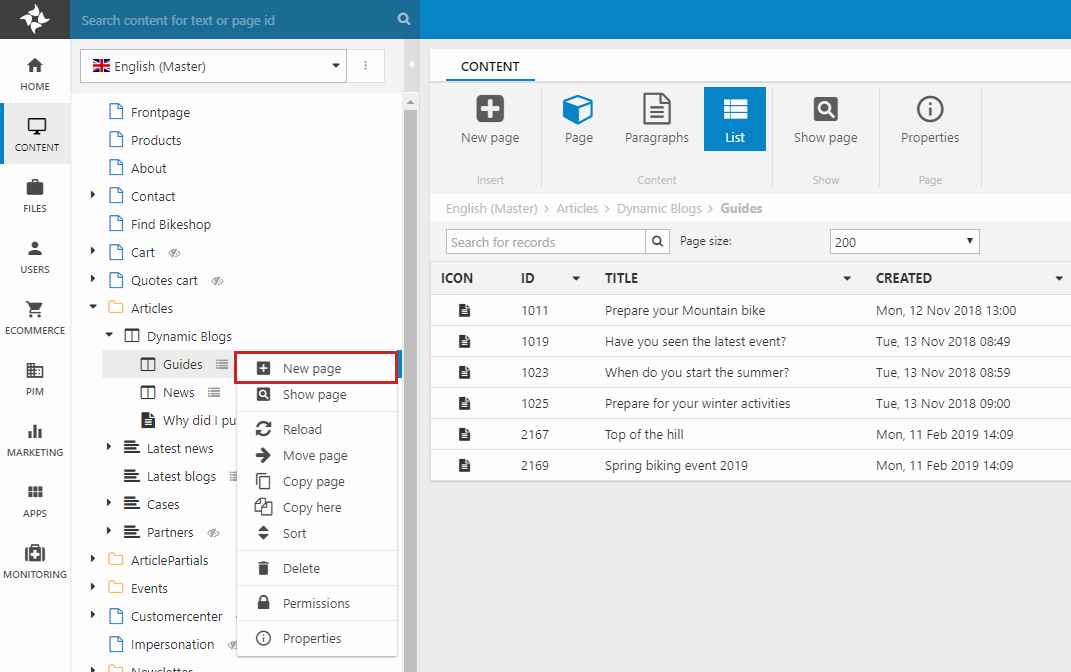
To create a dynamic article, right-click the article list and click New page (Figure 6.2).
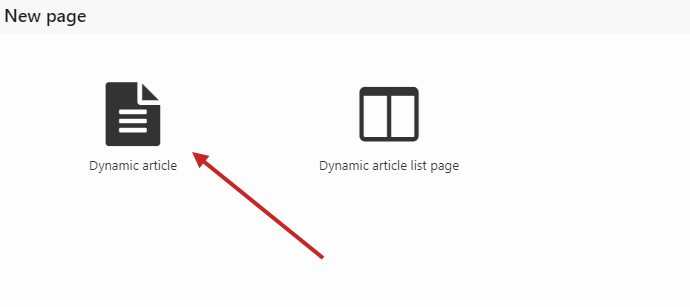
Select your Dynamic article item type (Figure 6.3) – again, you should make your own copy item type, but here we will just use the original to go through all of the available fields.
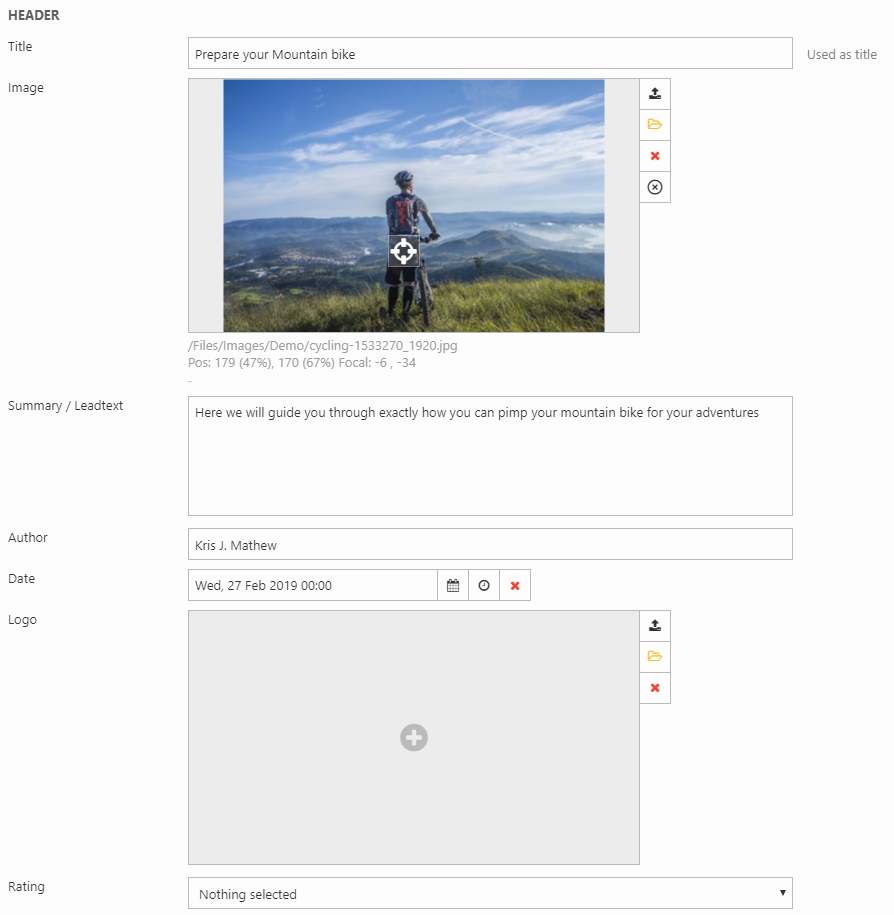
Now, you can add content to your article. Starting with the Header section (Figure 7.1), you can add the following which is both shown on the article and in the article list:
- A title
- Image
- Summary/leadtext
- Author & date
- Logo (shown as an overlay of the image in the article list)
- Rating (shown with stars)
Below, you can add content using article paragraphs (Figure 7.2).

Click Add article paragraph, and then in the General section (Figure 7.3) you can add the following:
- Heading
- Image & image caption
- Text
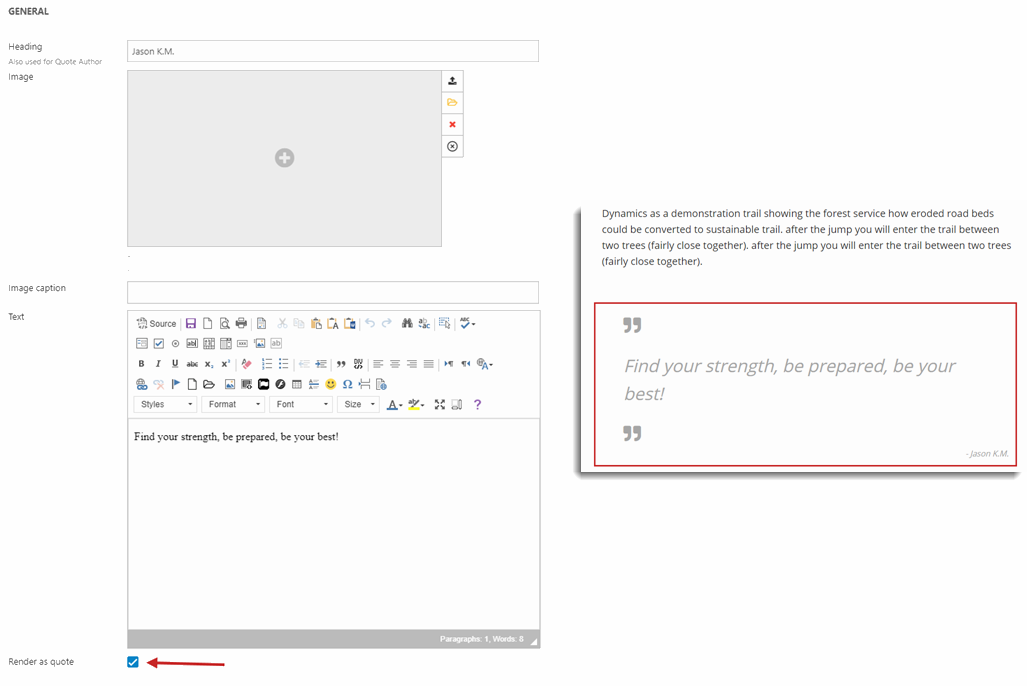
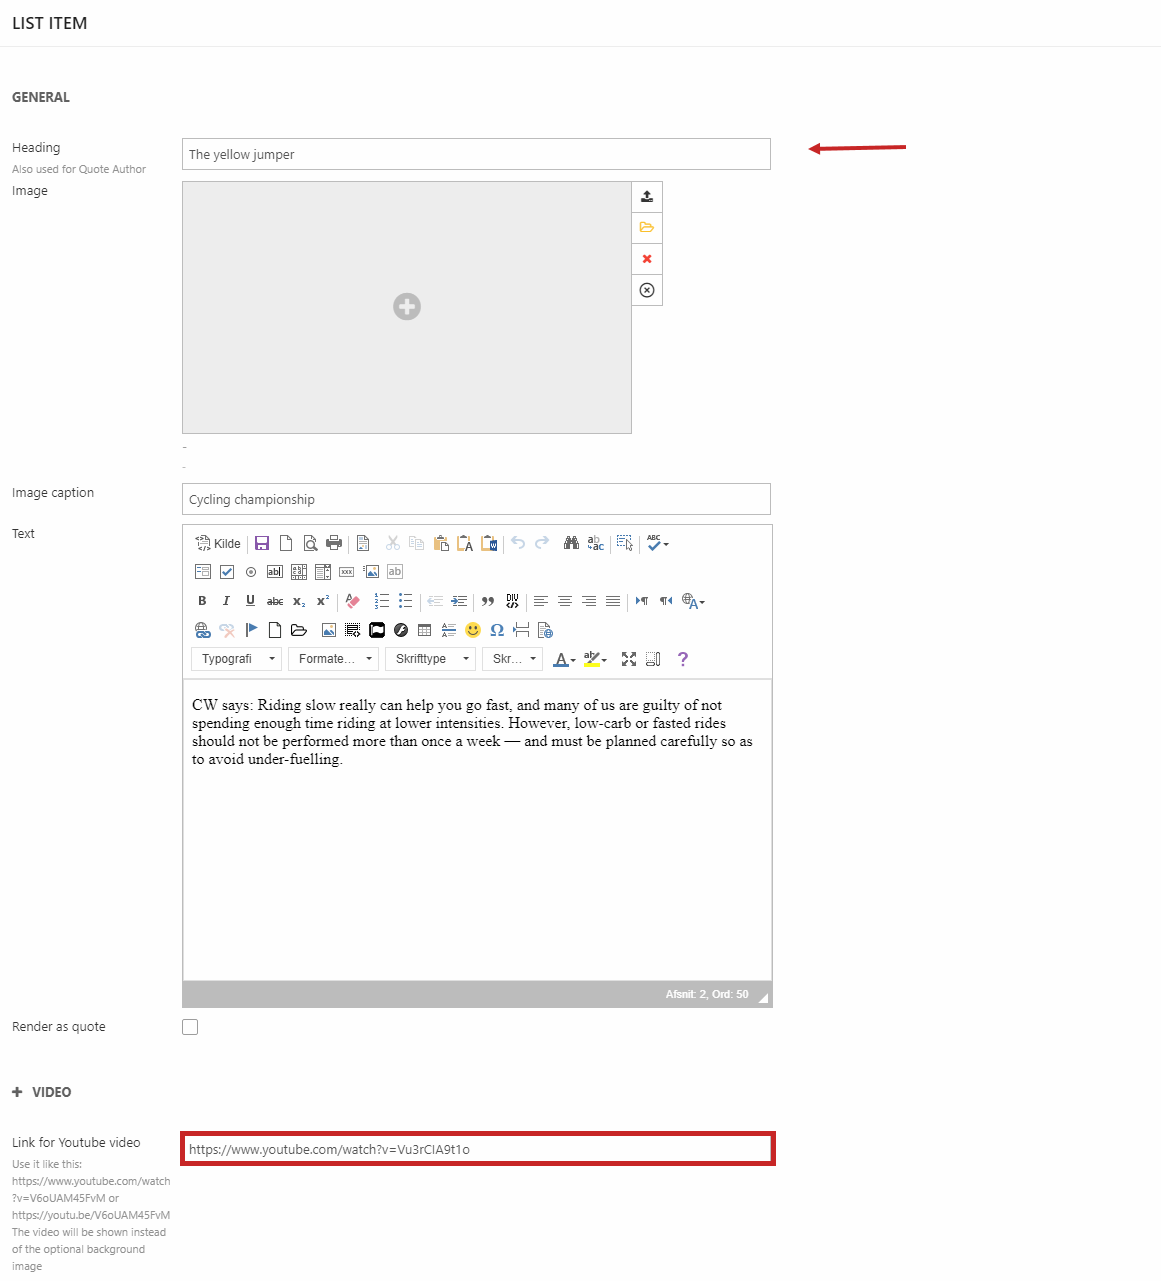
Enabling the render as quote checkbox will display the paragraph’s text as a quotation and use the heading as the author (Figure 8.1).
With the Video section, you can add a YouTube video to your paragraph by inserting a YouTube link (Figure 8.2).
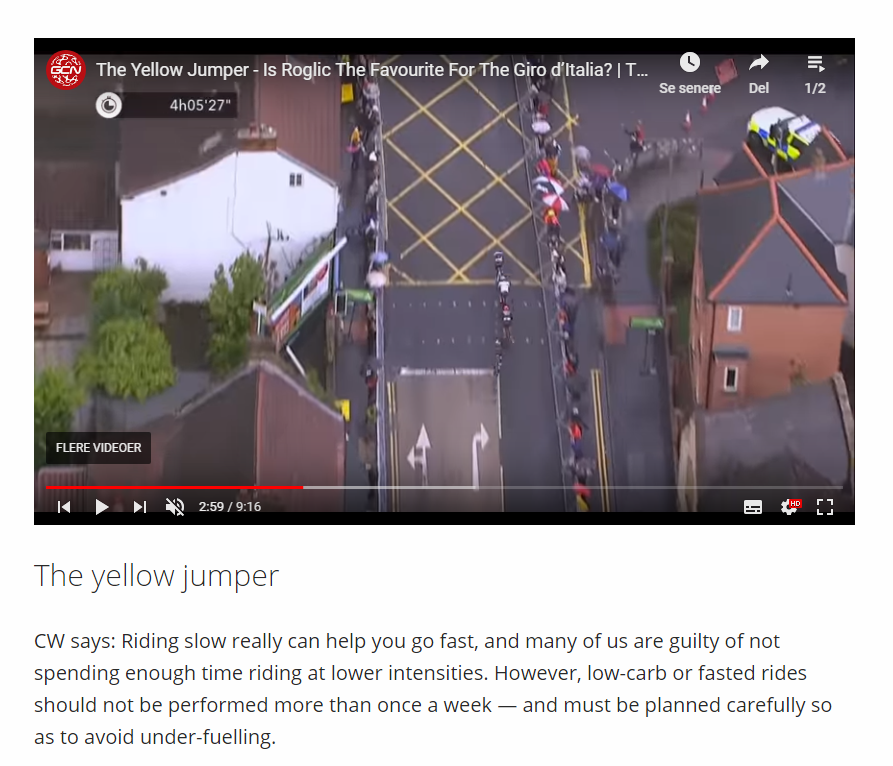
The video will then be rendered above the rest of the paragraph’s content (Figure 8.3).
Back in the article settings, you have the Call to action section where you can add a button or import a paragraph with an app attached e.g. Forms for Editors to the header (Figure 9.1).

Then you have the Tags and filters section (Figure 9.2). Here you can mark the article as popular and/or in focus and give them a sort id (relevant for the order in the focus/popular list).
Choose a filter option to make it possible find your article in the list using the filter (read more about these custom filters below).

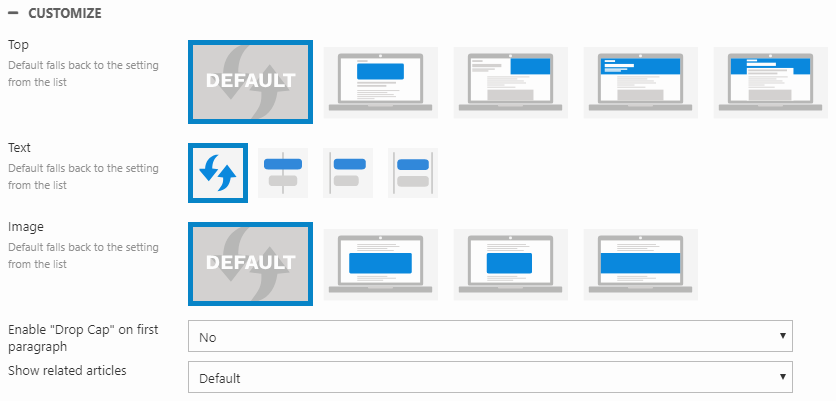
At the end, you'll find the Customize section (Figure 9.3), where you can overwrite the article layout options you defined for the list. So you have the same configuration options as you had for the list page.
The Default option will use the settings inherited from the article’s list. If that list is a sub-list that also have the Default option, then the settings from the parent list will be inherited and used.
Filter options
You can filter the articles in the article list as shown in Figure 10.1.
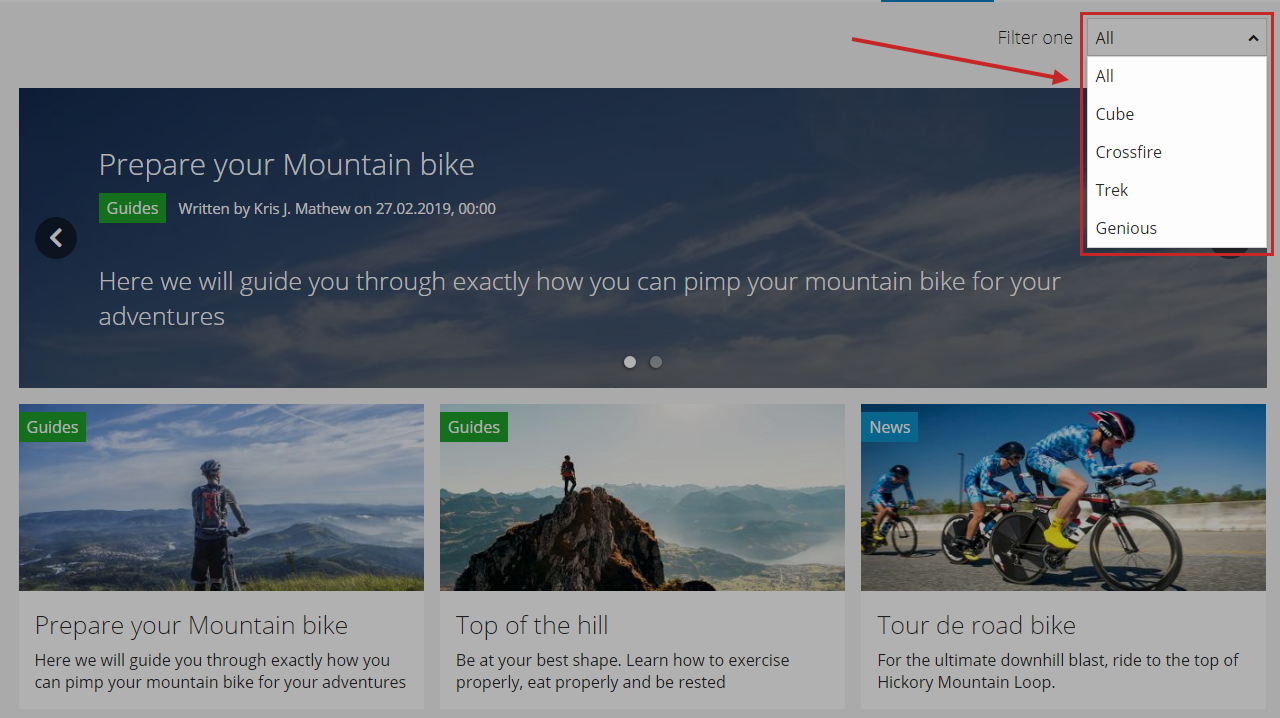
To create more filter options, go to Settings > Item types > Dynamic article. Click on the Filter one field (Figure 10.2).
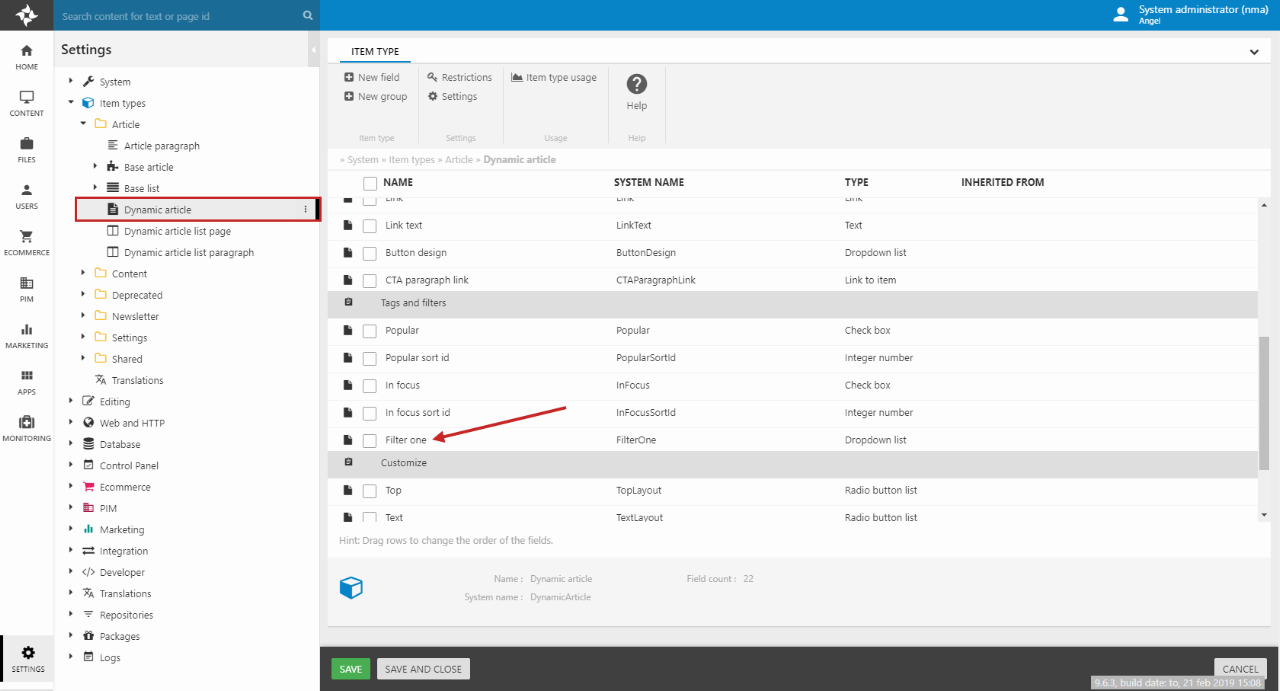
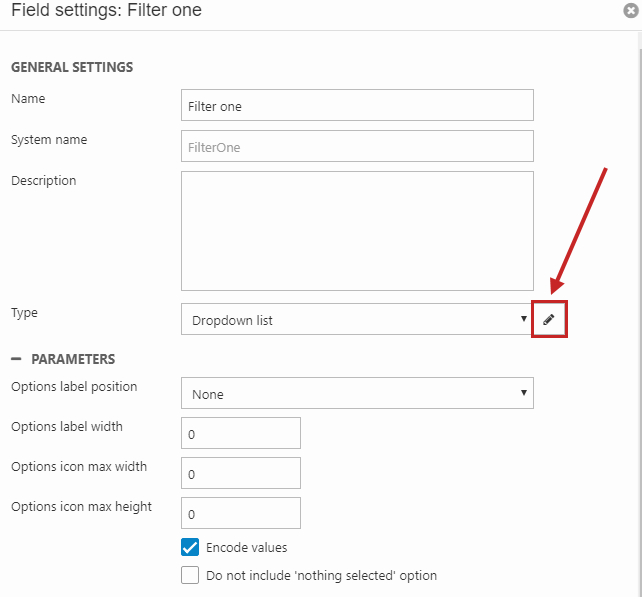
In the General settings and by the Type dropdown, click the pencil icon (Figure 10.3).
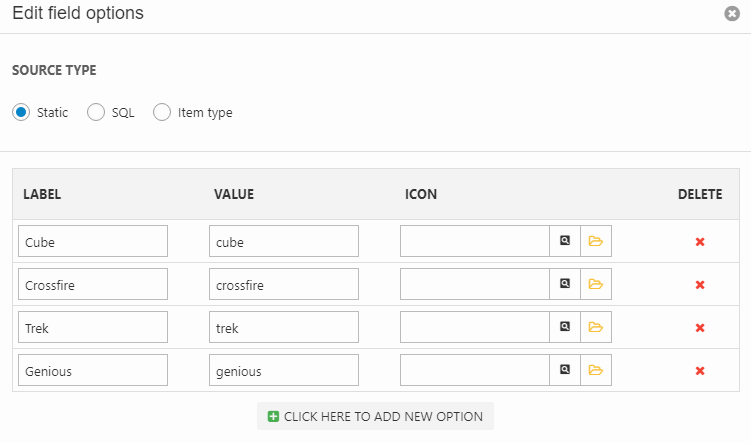
Here you can add more filter options (Figure 11.1).
Feed setup
To set up the feed for your dynamic list, click on the content node from the area menu, and then open the feeds folder. Click on the dynamic list (JSON) page and create a paragraph. Now you are set and ready to configure it. Follow these steps to set it up:
- Enter the paragraph and click on the app attacher
- Pick the item publisher app
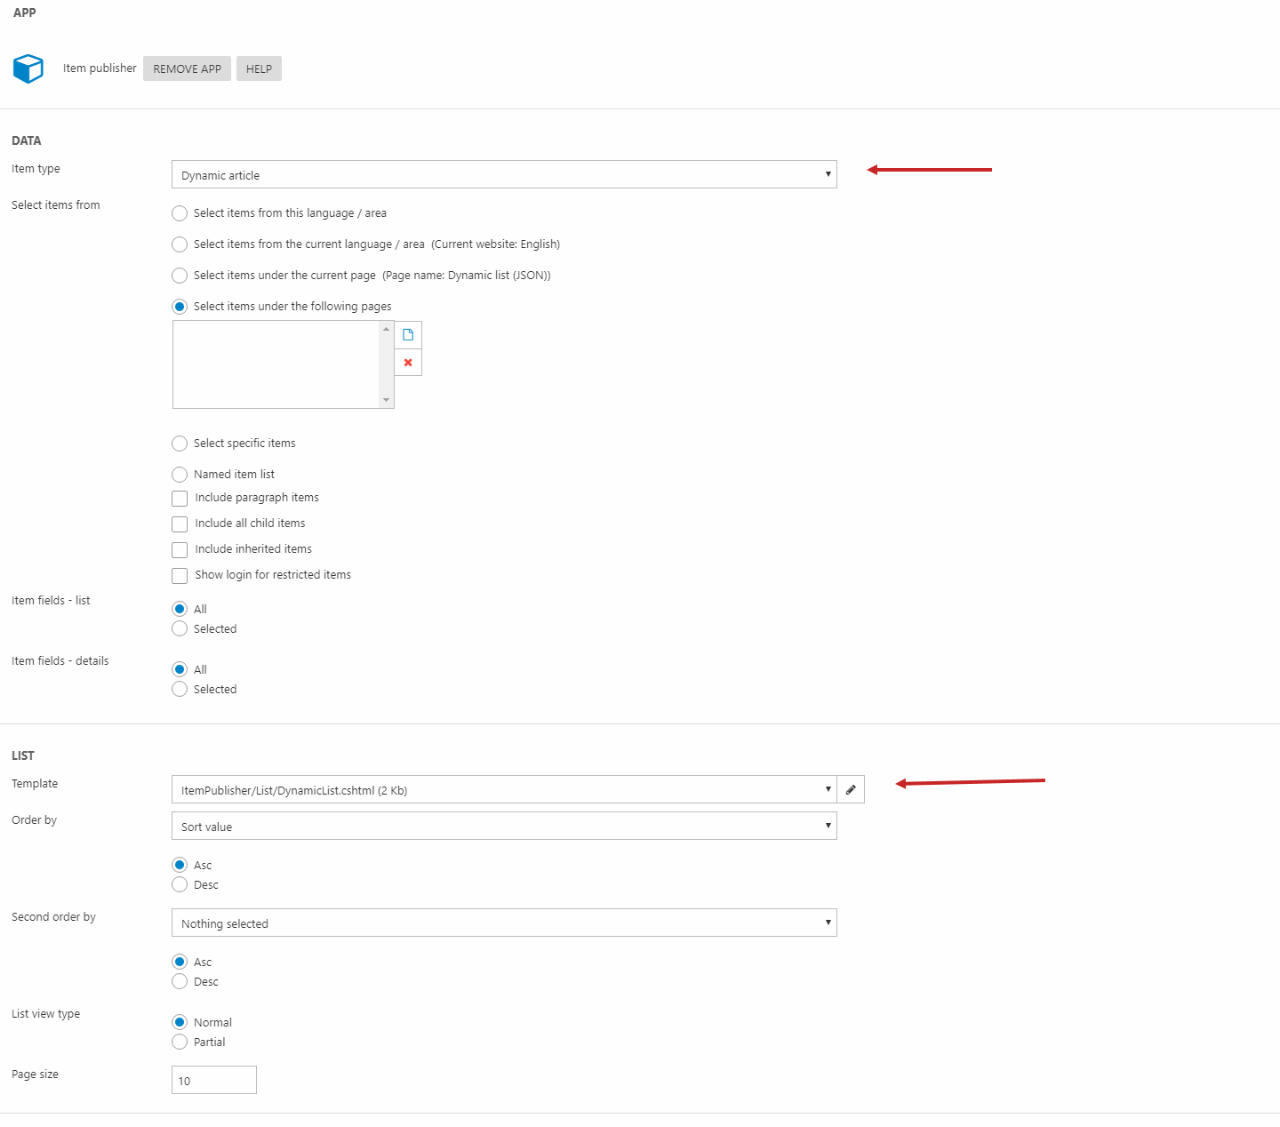
- From the data section, use dynamic article as the item type
- Scroll down to the list section and use DynamicList.cshtml as the template like the picture below shows Figure 12.1.
- Save it afterwards
Using dynamic articles
Before you start creating lists and articles, you should consider which type of content you want to create – which fields will be needed? For instance if you want a news list with news articles, then the ratings, logo, or any Call To Action settings may not be necessary and will just take up a lot of space each time you create an article. It could also be that for all articles under a list, you want the same text alignment or image style.
The three item types work as templates or a base for your project, and if you don’t need all of the default fields – which you in many cases don’t – you should copy the different item types and edit them to suit your needs. In the following example we will create our own news list and news article item types.
In Settings > Item types > Article, you’ll find the item types related to the dynamic articles.
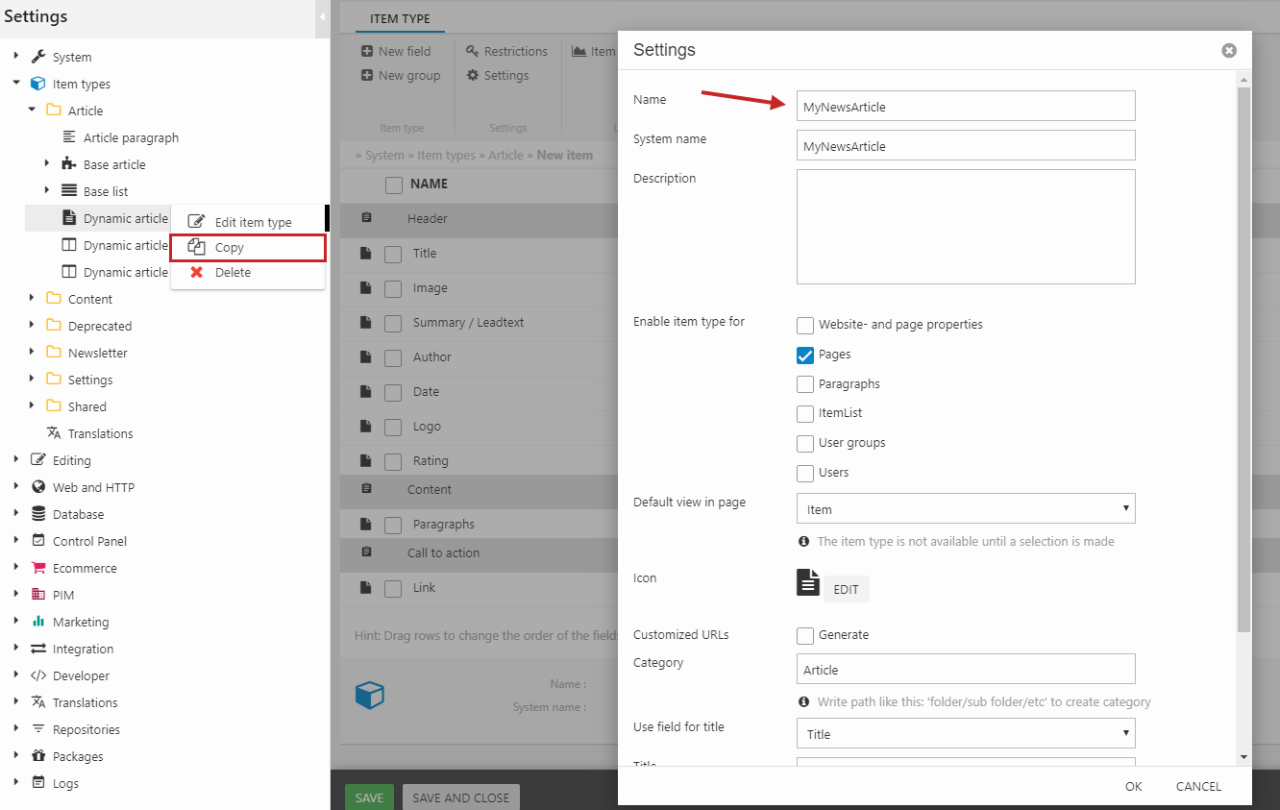
- Copy the Dynamic article item type (Figure 13.1)
- Rename it to e.g. MyNewsArticle – just leave the other settings be, as they should already match the original item type
- Press OK
- Remove the fields you don’t need (such as Logo or all CTA fields) by selecting them and right-click > Delete selected
NB: You must not delete the "Date" field - Remember to save the new item type
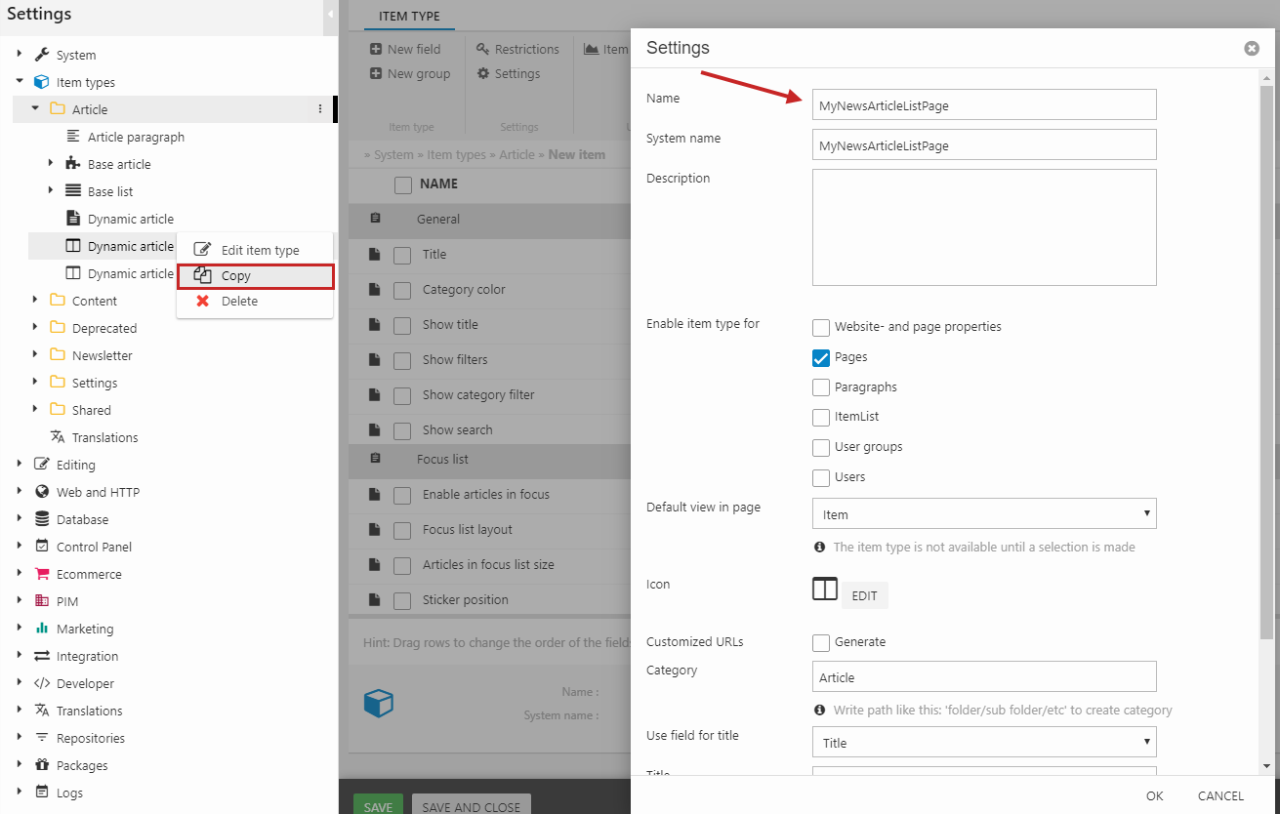
Now to the list page: repeat the procedure and copy the Dynamic article list page item type, rename it to e.g. MyNewsArticleListPage and press OK (Figure 13.2).
To make your new article list item type use your new article item type:
- Locate the field Item type name and right-click > Edit field
- Under Data, change the default value to the name of your new Dynamic article item type (Figure 13.3)
- Save the new item type
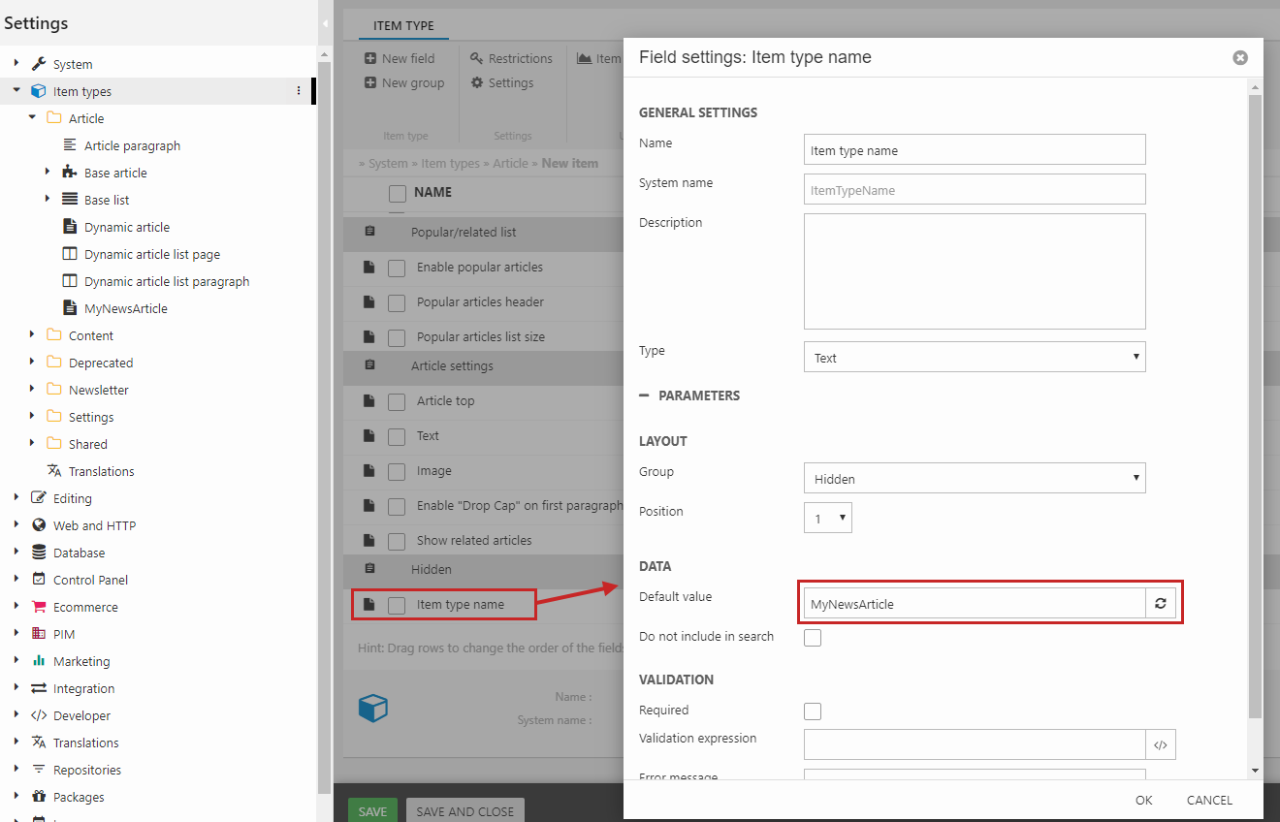
At the moment there’s an issue regarding the value of the Item type name field. So reopen your new article list page item type and double check that the default value for the Item type name field matches the name of your new article item type.
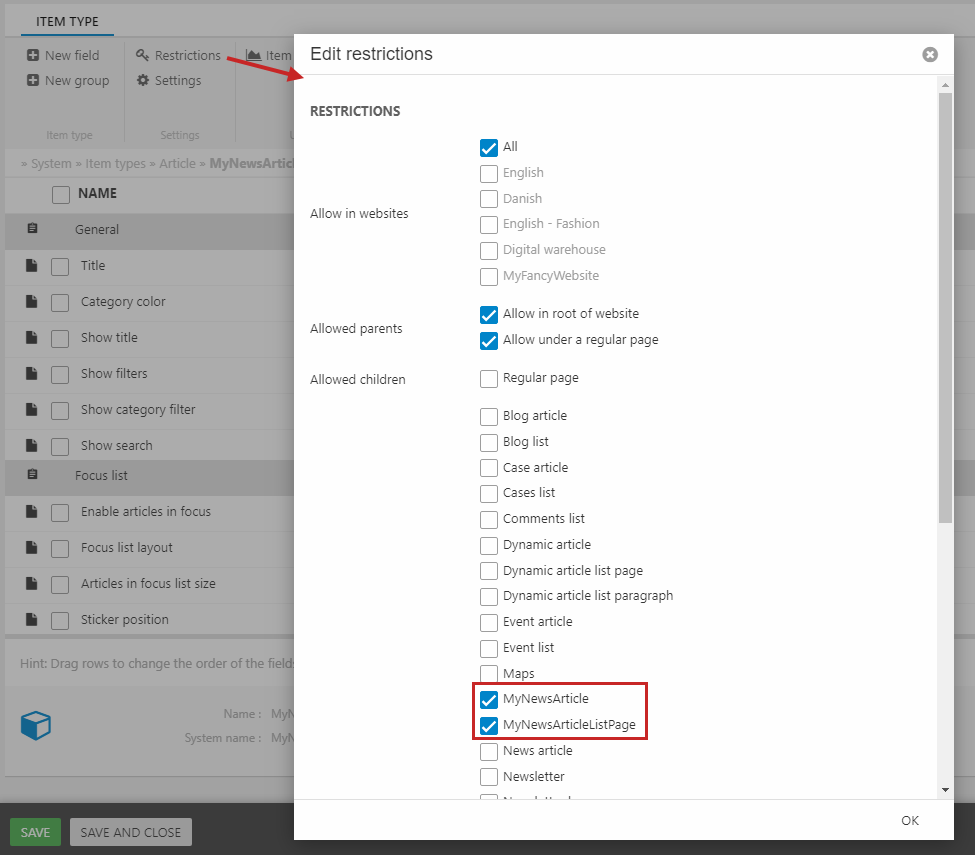
Another important step is to edit the Restrictions in the ribbon bar. Open the restrictions for your article list item type, and do the following under allowed children (Figure 15.1):
- Uncheck the two original item types
- Check the two new item types (the article and article list item types)
- Click OK and Save
Now that the items types have been created, we must make your solution use them. Go to the website settings and in the ribbon bar, open the Layout tab and click Item page layouts (Figure 15.2).
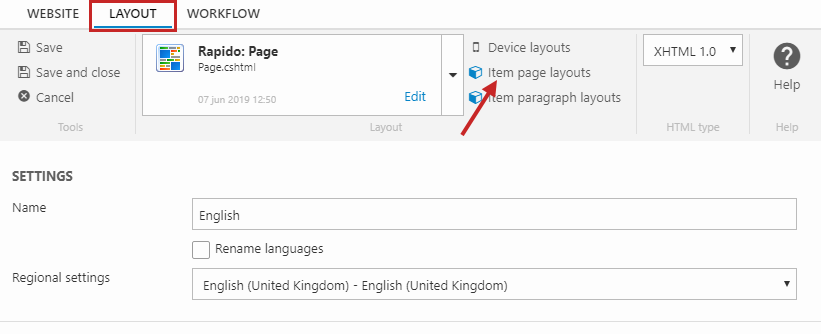
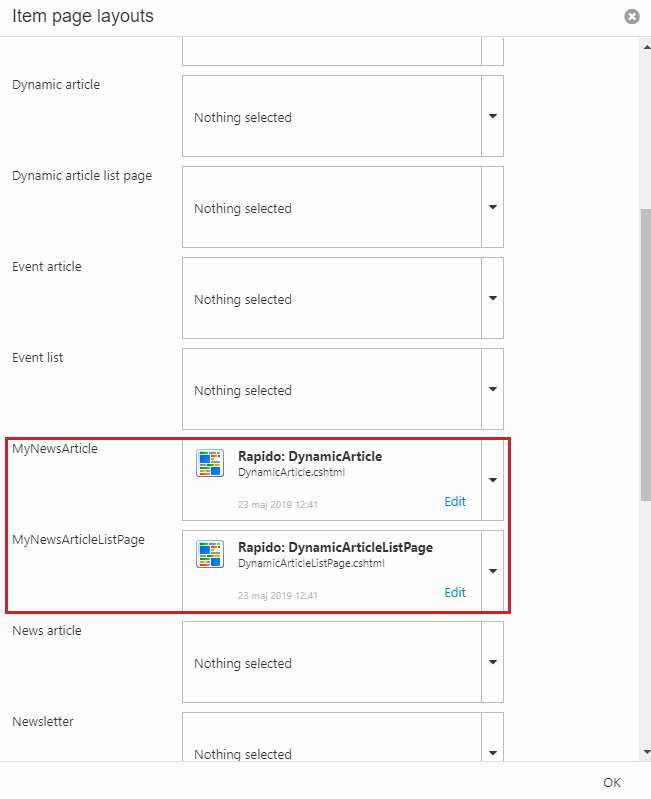
Select the following templates for your new item types:
- Rapido: DynamicArticle for your new dynamic article item type
- Rapido: DynamicArticleListPage for your new dynamic article list page item type
Save the website settings, and now you’re ready to use your new item types!
Dynamic article list paragraph
A dynamic article list paragraph is used to showcase a set of dynamic articles in a list on another page, typically the frontpage or an about page (Figure 16.1).
To create a dynamic article list paragraph, use the Articles item type with Visual Editor.
