Website setting presets
In Rapido, you can use presets which are preconfigurations of all the underlying settings of a section. Rapido ships with presets for e.g. the different product list views and the minicart.
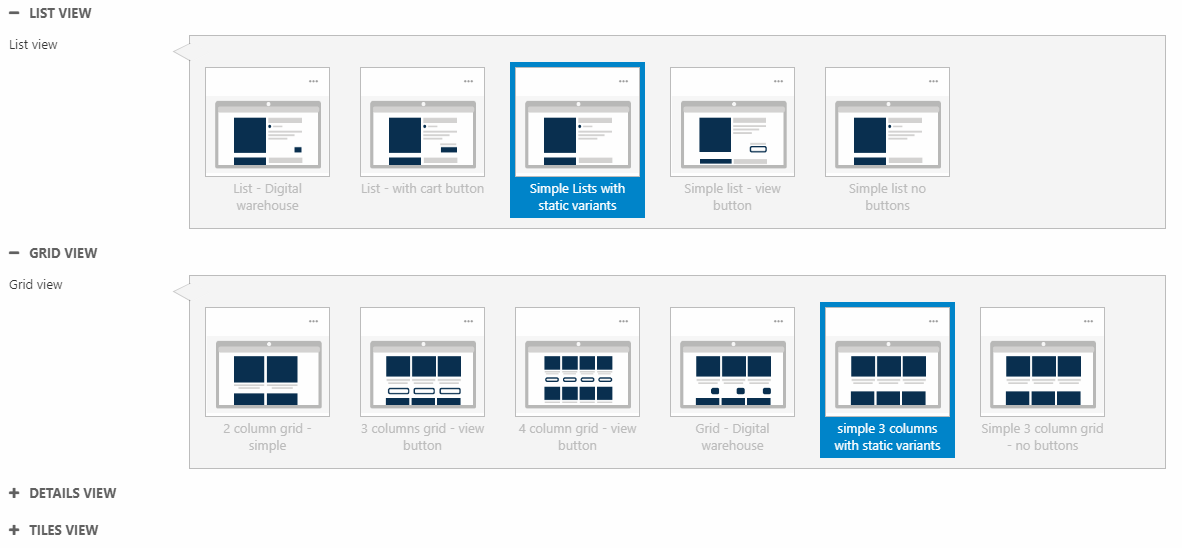
Using presets you can for example store the layout settings for a product list view, so you can easily switch between multiple layouts (Figure 1.1).
Clicking the three dots in the upper corner will open the context menu for the preset (Figure 1.2).
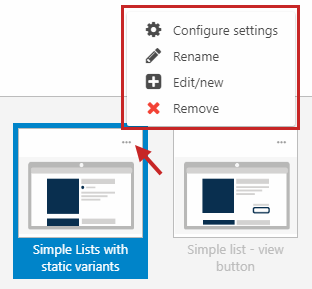
You have the following options:
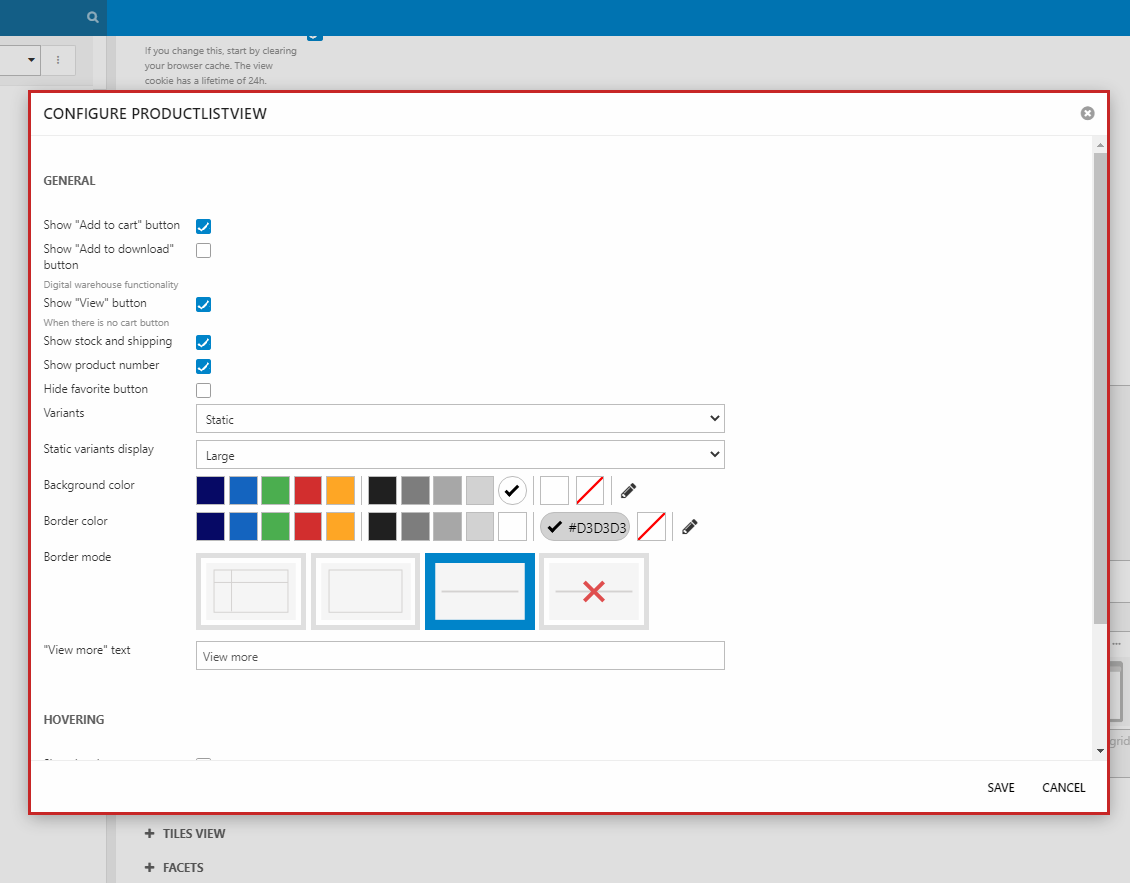
- Configure settings - opens the settings where you can change and save them (Figure 1.3)
- Rename
- Edit/new - opens the settings just like Configure settings, but here you can choose to Create new preset or Overwrite preset
- Remove
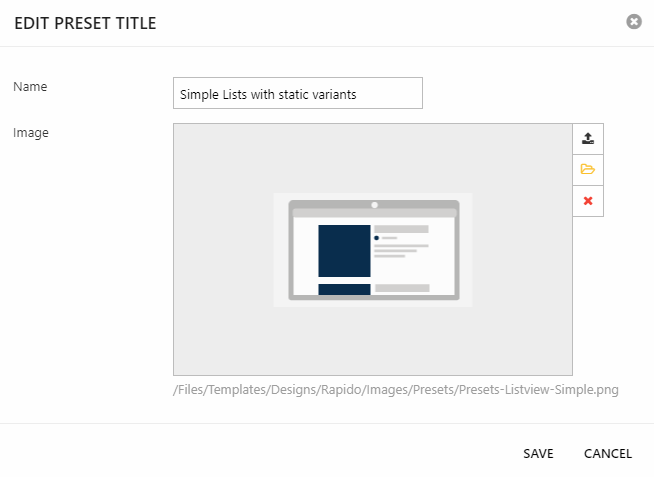
When renaming a preset, you can also add/change the image (Figure 2.1).
Disabling presets
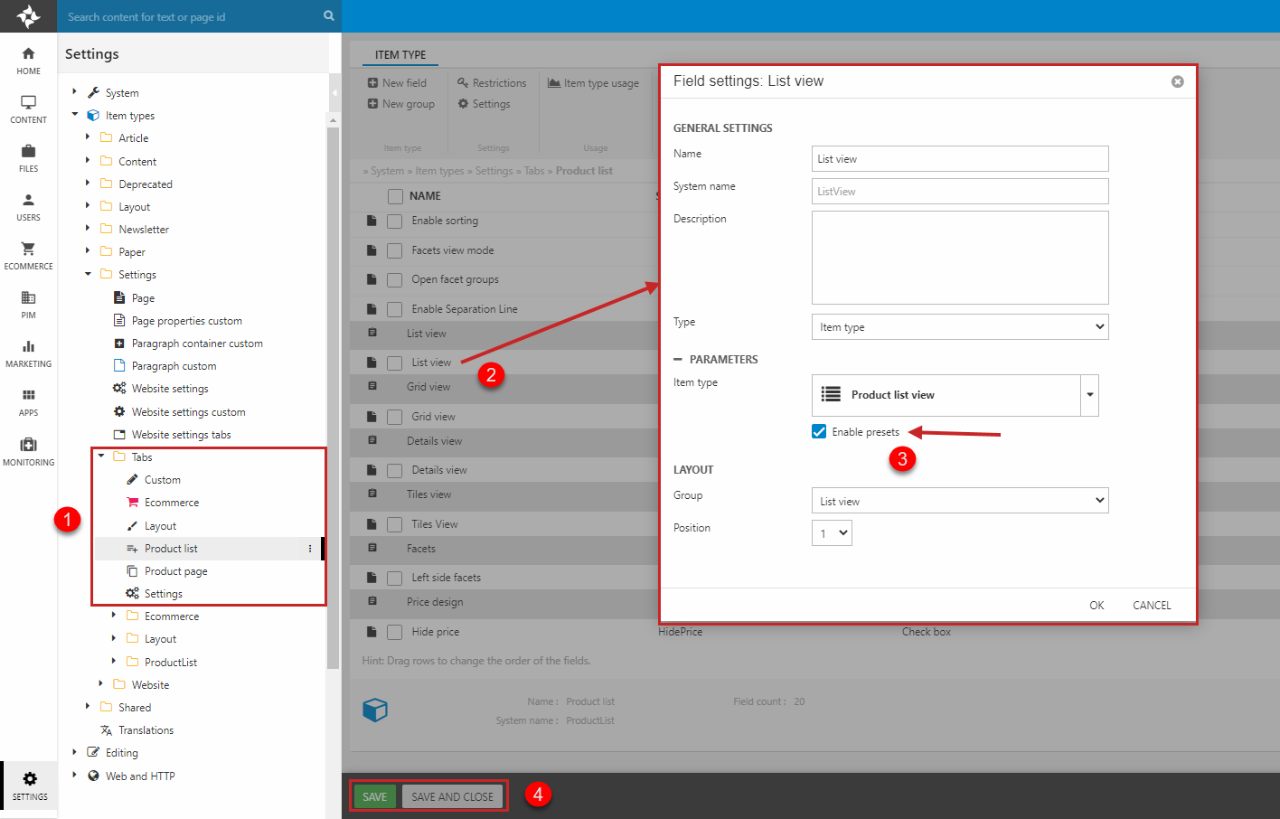
You can very specifically choose where to use presets and where not to. To disable presets for some settings say for the List view settings in the Product list tab, you must:
- Go to Settings > Item types > Settings > Tabs and click the specific tab - in this case, the Product list tab
- In the list, find the setting that has the presets and click it to open the Field settings
- Uncheck Enable presets to disable presets for this setting
- Save the changes
You can always switch back to presets later on, as the saved presets remain in their folder (System/Items/ProductListView in this case).
Import/export website settings
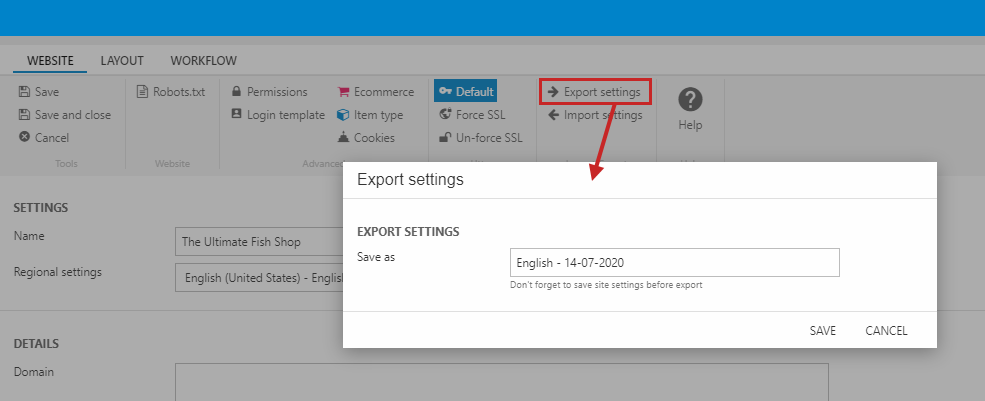
It is possible to export all of your website setting configurations into a single .json file:
- Press Export settings in the ribbon bar (Figure 4.1)
- Name your settings file
- Save
Your settings file will be placed in the System/Items/WebsiteSettings folder.
Using the same method, you can also easily roll back to the ”factory settings”:
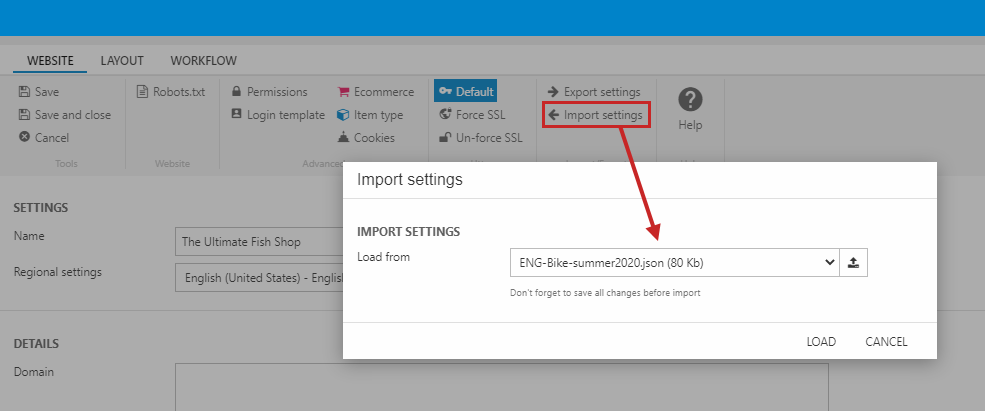
- Press Import settings in the ribbon bar (Figure 4.2)
- Select the appropriate settings file – at the time of writing it’s called ENG-Bike-summer2020.json
- Press Load
- Save
