
Product catalog setup
Most Rapido versions ship with example implementations of web shops – currently bikes and fashion – alongside product data for each shop. This product data is published to frontend using a product catalog app on a Products page on each website.
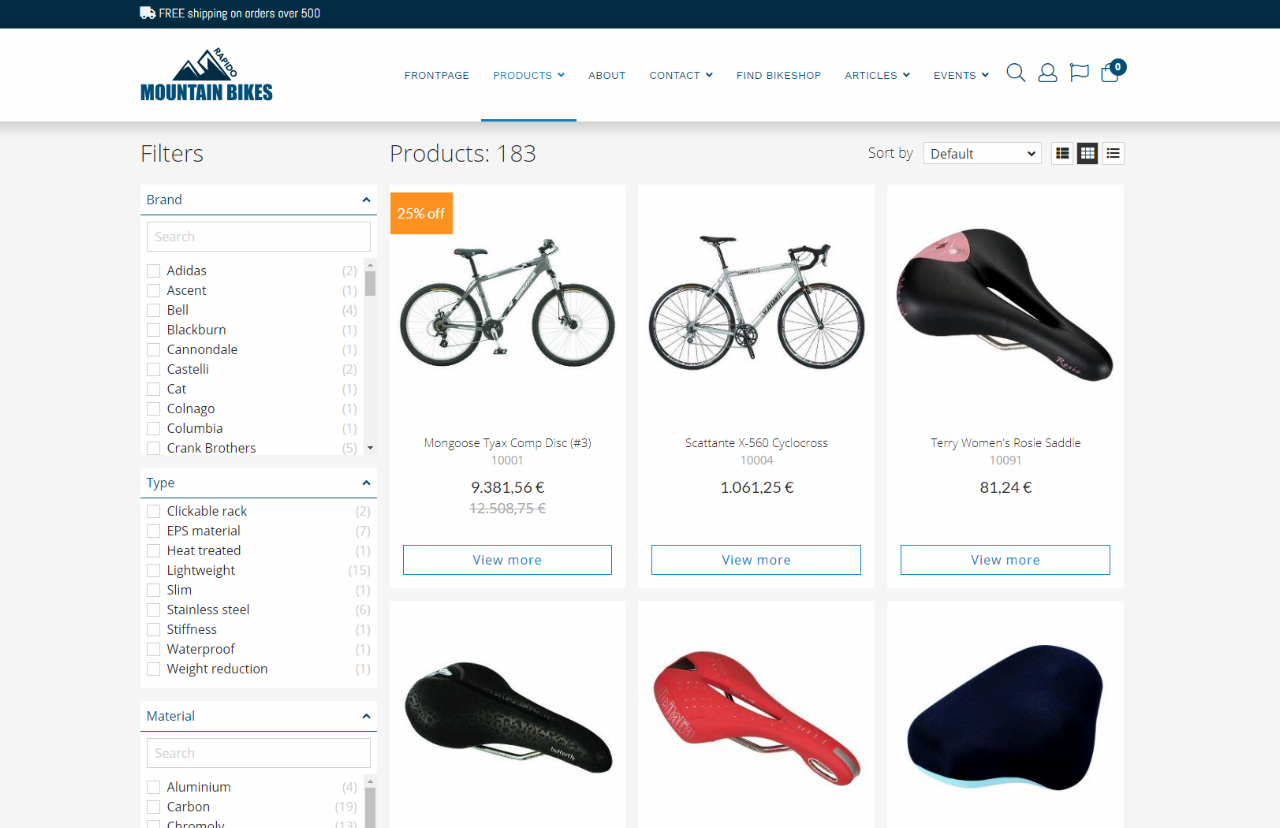
The product catalogue on Rapido is set up to publish product using an index query called Products – a set of statements which retrieve and publish a subset of products on a solution, e.g. all active products which match the language and shop the user is visiting in frontend. This query is also set up to react to the values a user selects in frontend using the filters section (Figure 1.1).
In this guide we will run through the steps required to set up this standard flow from scratch on a solution with no product data:
- Creating an index with product data
- Creating a query for extracting products based on their properties
- Creating a page with a product catalogue for publishing products
Index setup
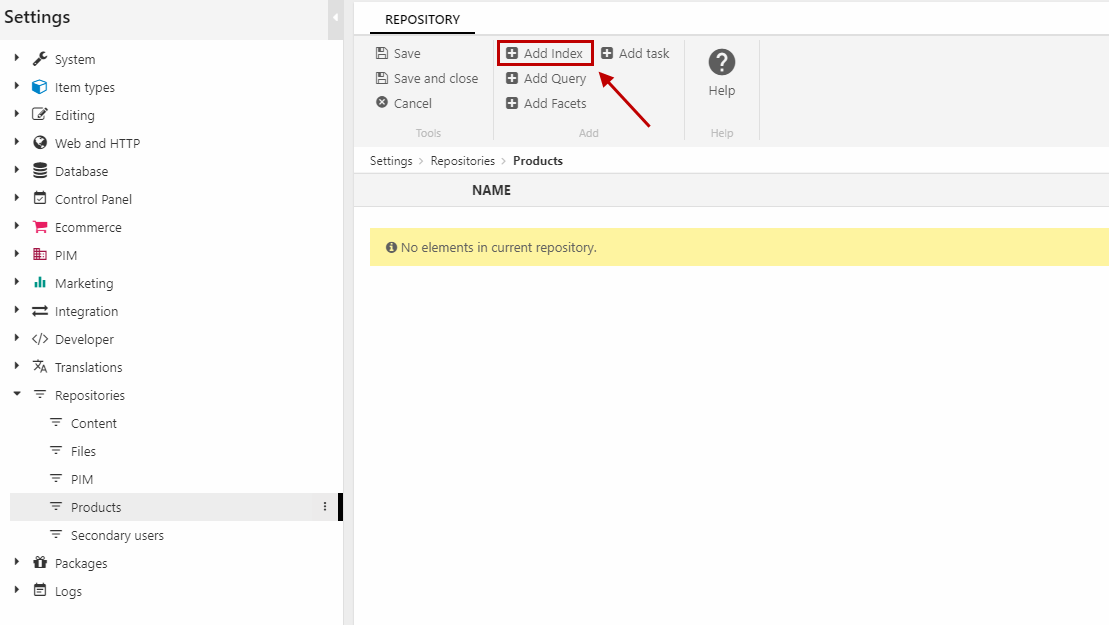
Go to Settings area and right-click the Repositories node. Create a new repository (Figure 2.1) and name it Products.

Add your index in the repository toolbar (Figure 2.2). Name the index Products.
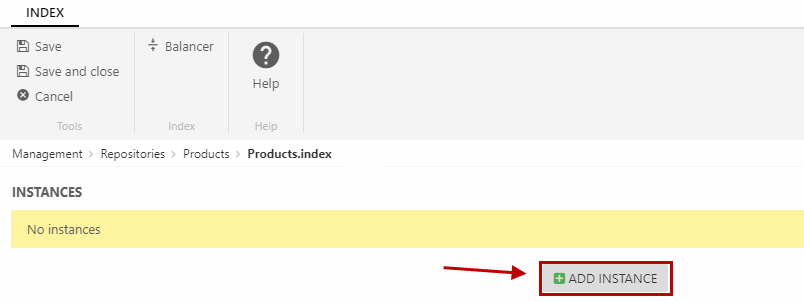
You will now be redirected to the index configuration view (Figure 2.3). Click Add Instance and leave the folder name blank.
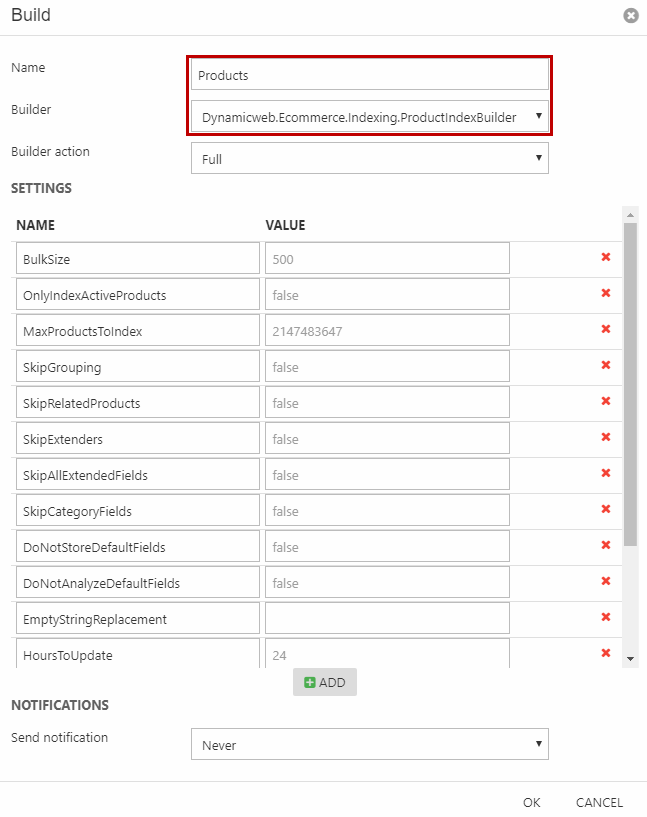
Now, click Add build to open the build configuration view (Figure 3.1). Name the build Products and change the Builder to Dynamicweb.Ecommerce.Indexing.ProductIndexBuilder (should be selected as defeault). Click OK.
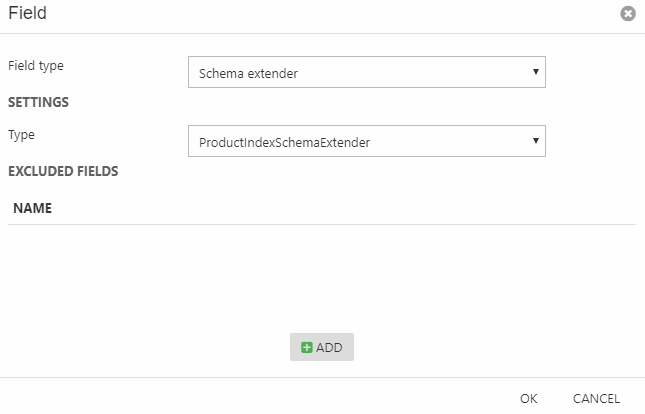
Under Fields, add field with the Schema extender field type and the ProductIndexSchemaExtender type (Figure 3.2).
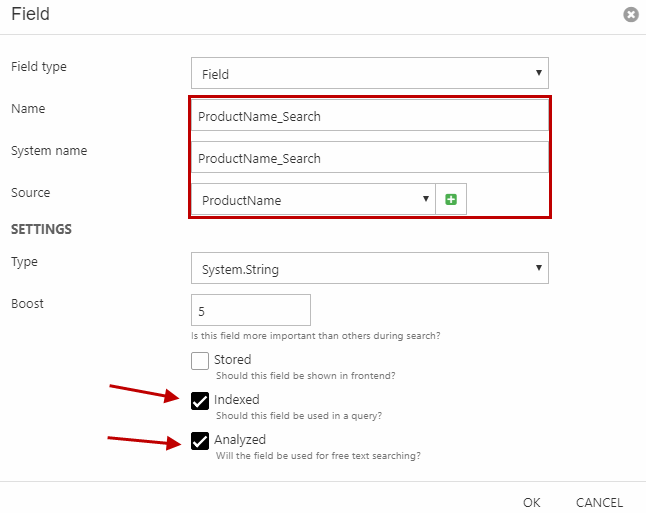
Save the index. Then, create a new field (Figure 3.3). Set the:
- Name and system name to be ProductName_Search
- Source to ProductName and type to System.String
- Field to be indexed and analyzed
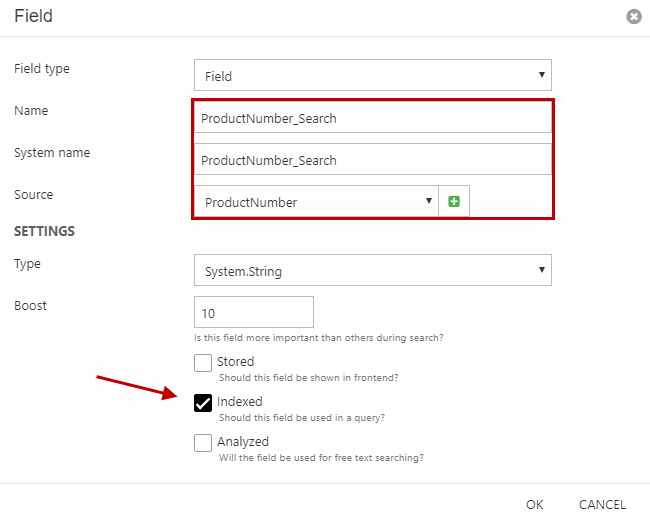
Create another field (Figure 4.1). This time, set the:
- Name and system name to be ProductNumber_Search
- Source to ProductNumber and type to System.String
- Field to be indexed
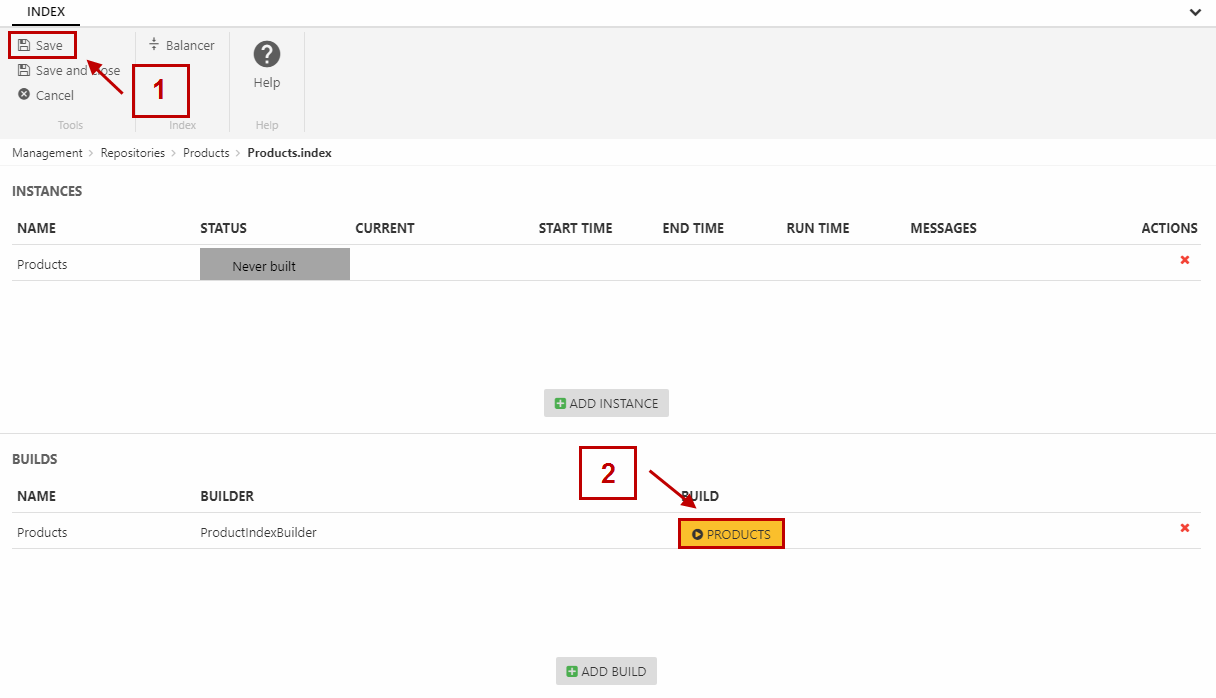
First, save the index. Then, build the index (Figure 4.2) and check that the instance says “Completed”.
Query setup
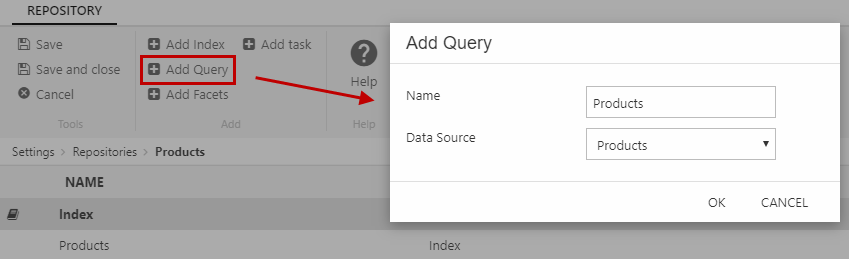
With the index all set up, return to the repository view and add a Query (Figure 5.1). Name it Products and select your new index as the Data Source.
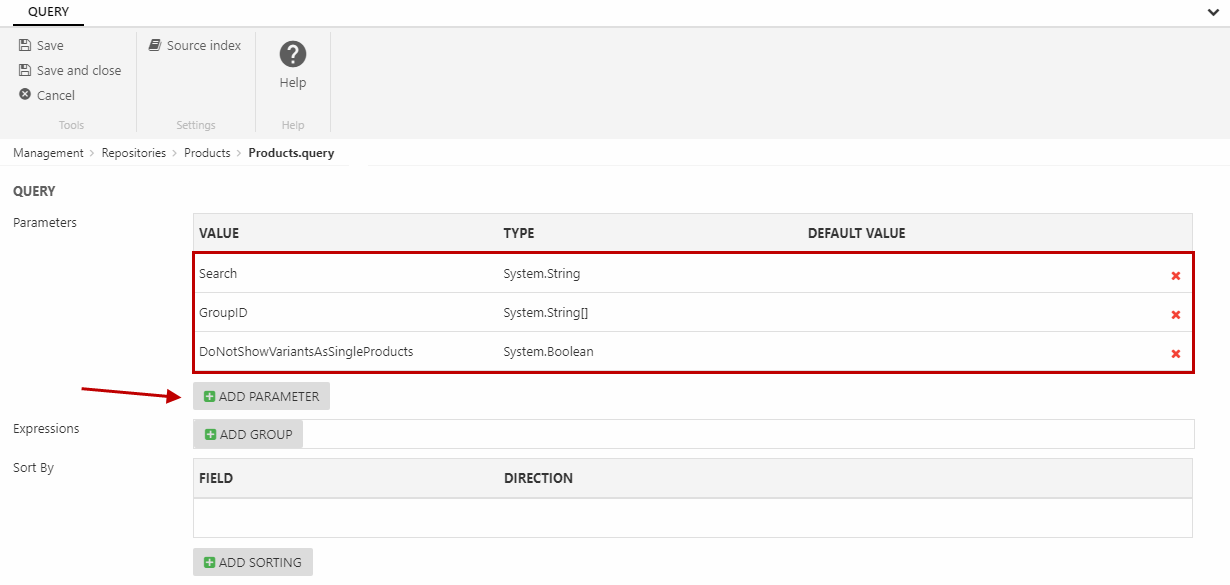
In the query configuration view, you can create parameters. These are necessary for the search, grouping and variants to work. Add the parameters as shown in Figure 5.2:
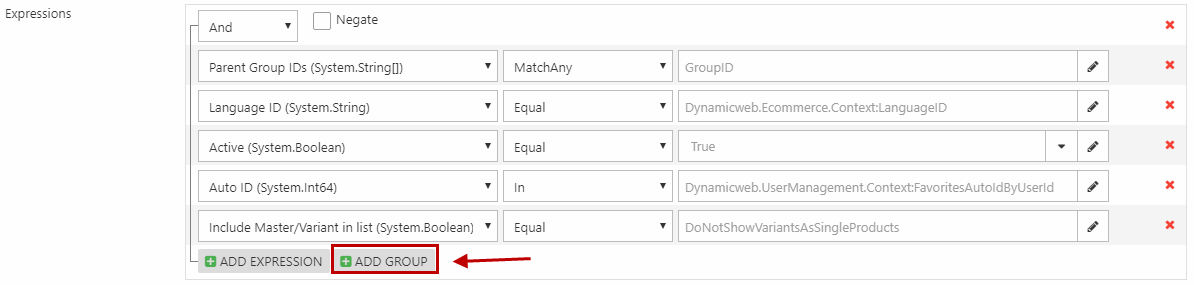
Let’s start with adding the group, language, and basic expressions. Click Add group to create a new expression group. After that, click Add Expression to add the following (Figure 5.3):
- Select the Parent Group IDs field, the MatchAny operator, and click the pencil icon and select Parameter > GroupID
- Select the Language ID field, the Equal operator, and click the pencil icon and select Macro > Language ID
- Select the Active field, the Equal operator, and the True value

Then, we have two expressions that must be added (Figure 6.1).
- Select the Auto ID field, the In operator, and click the pencil icon and select Macro > FavoritesAutoIdByUserId
- Select the Include Master/Variant in list field, the Equal operator, and click the pencil icon and select Parameter > DoNotShowVariantsAsSingleProducts

The first one makes it possible to render the favorites lists on the product catalog. The second one secures that variants in the favorites list are rendered as single products.
Now you must add the query expressions for the search fields to work. Click Add group (Figure 6.2).
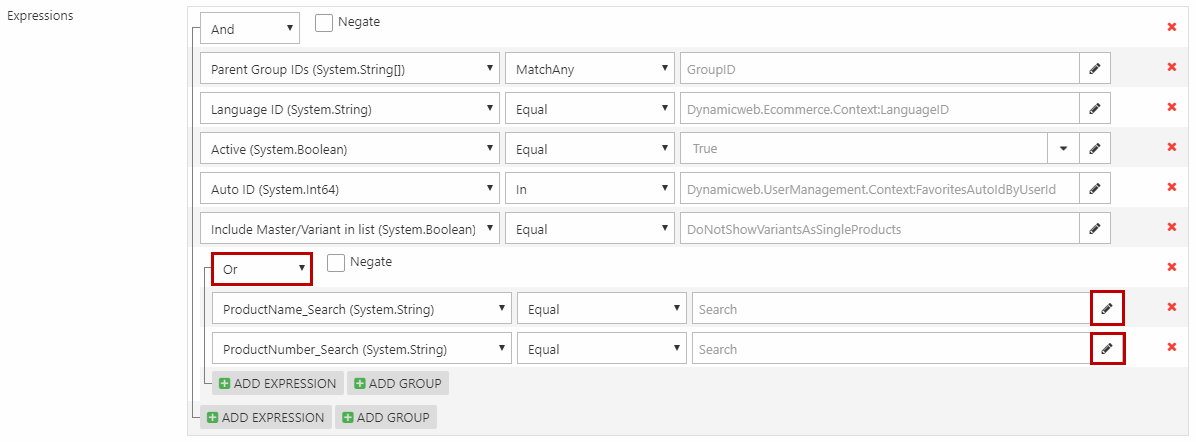
Change the group selector to Or and add the expressions (Figure 6.3):
- Select the ProductName_Search field, the Equal operator, and click the pencil icon and select Parameter > Search
- Select the ProductNumber_Search field, the Equal operator, and click the pencil icon and select Parameter > Search
Save and close the query.
Product Catalogue app
Now that you’ve set up the Products repository, you must configure the page for all of your products. This is done using the Product Catalog app.
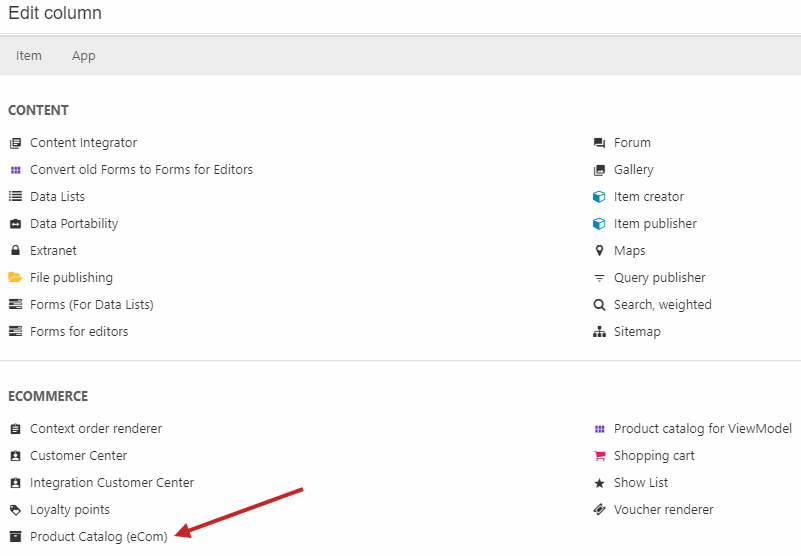
So create a new page, enter Visual Editor to add an empty column with the App item type. In the settings for the column, click App in the ribbon bar and attach the Product Catalog app (Figure 7.1).
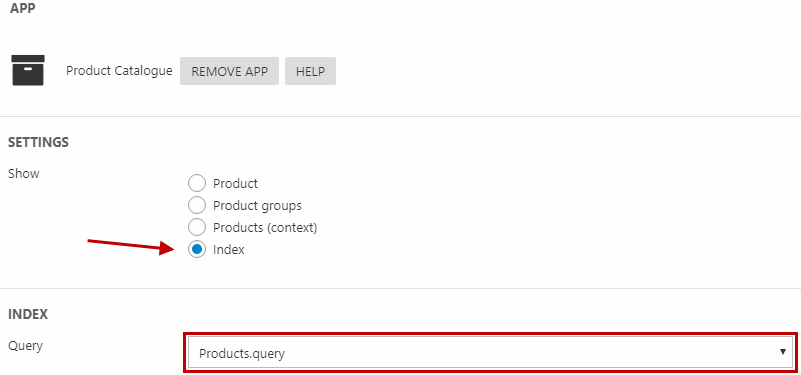
In the app settings, choose to show Index and select your Products query (Figure 7.2).
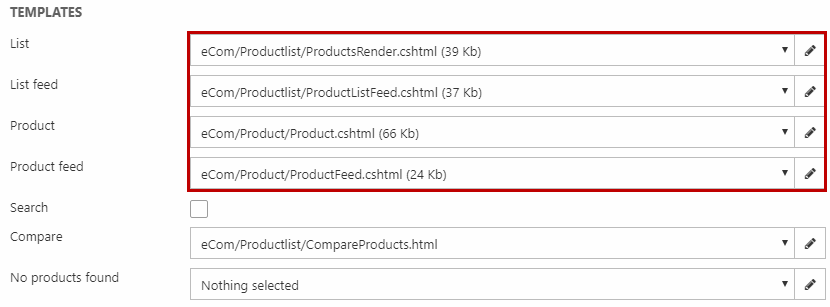
Under Templates (Figure 7.3), select the:
- eCom/Productlist/ProductsRender.cshtml as the List template
- eCom/Productlist/ProductsListFeed.cshtml as the List feed template
- ecom/Product/Product.cshtml as the Product template
- eCom/Product/ProductFeed.cshtml as the Product feed template
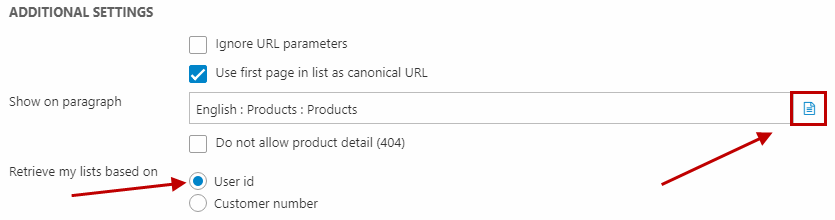
Under Additional settings for the Show on paragraph, select the paragraph that should contain the product catalog. Retrive my list based on should be set to User id as well. This secures that the favorite lists work as intended.
Save and close the paragraph and return to the page view for the Products page. In the ribbon bar, open the Properties (Figure 8.2).
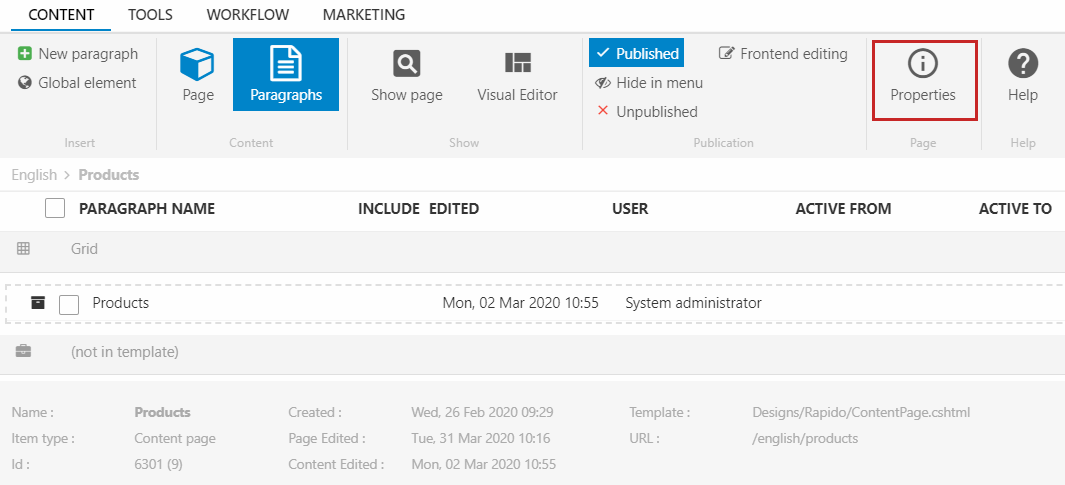
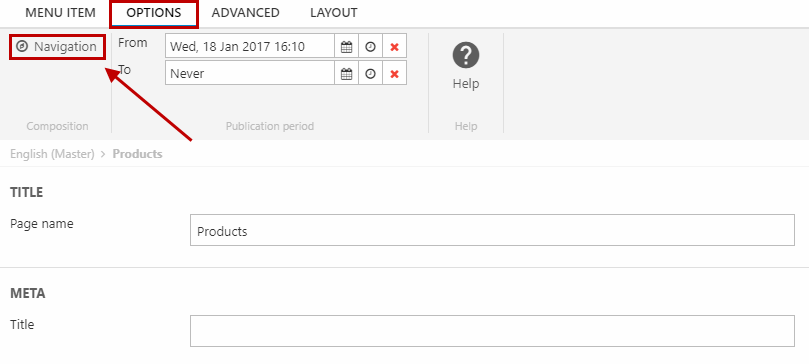
Then go to the Options tab and click Navigation (Figure 8.3).
Here, you must:
- Name the Navigation tag ProductsPage
- Enable Ecommerce navigation
- Set the Parent group to be a Shop and select your shop in the dropdown
- Select your Product page
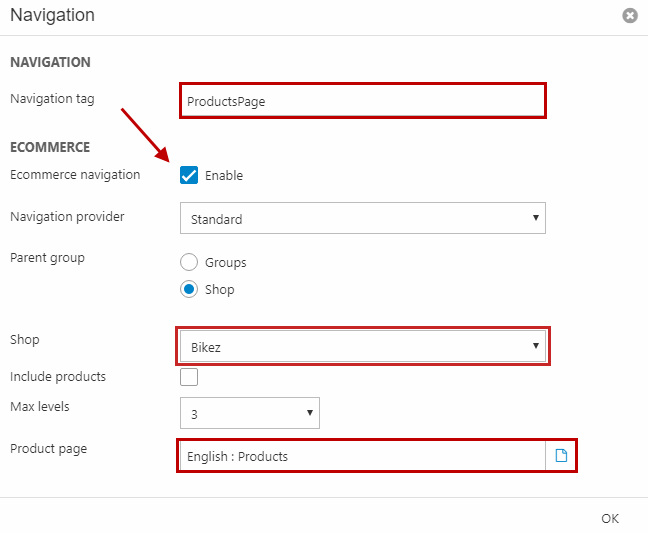
After that, click OK and you’re done!