
Content search
In Rapido, you can set up search for content, products or both in a combined search function. The content search is set up using a Content repository, a JSON search feed, and a search results page.
Content repository
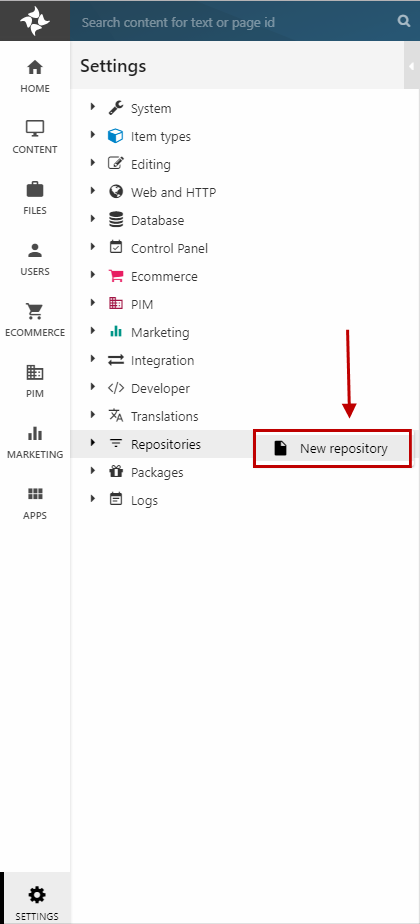
To set up the content search, you must start with creating a new repository called Content (Figure 2.1). Go to the Settings area and right-click the Repositories node. Click New repository and name it Content.
Now, you must add an index, a query, and some facets.
Creating the index
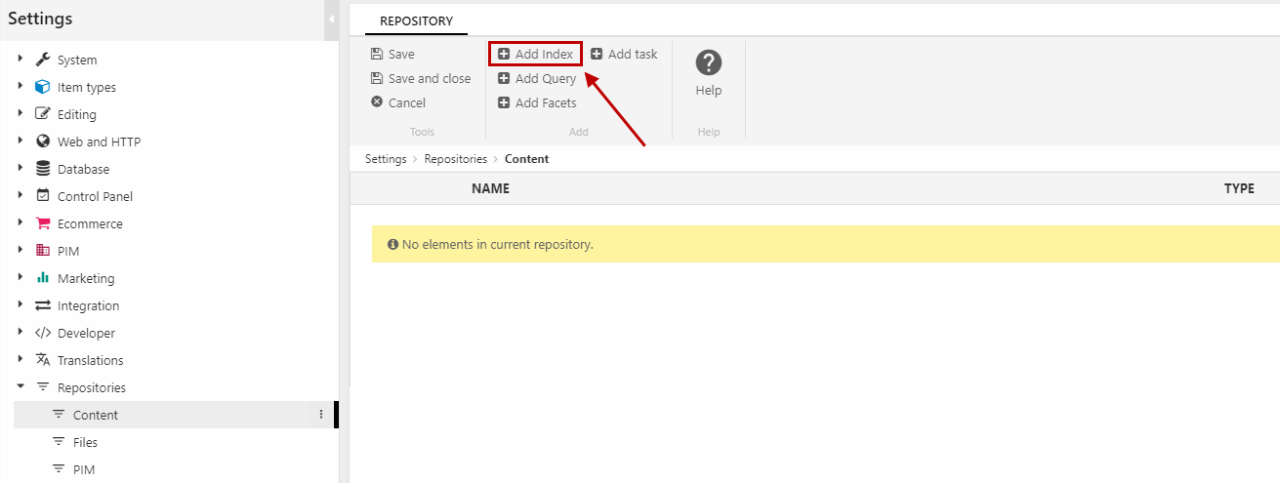
Click Add Index in the repository toolbar (Figure 3.1). Name the index Content builder.
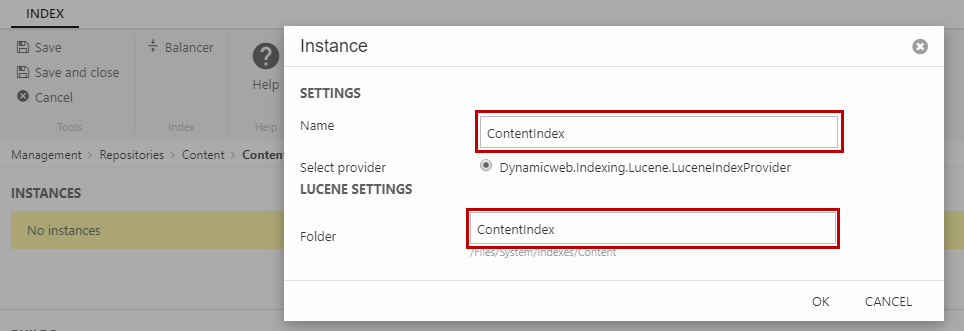
In the index configuration view, click Add Instance and name both the instance and the folder ContentIndex (Figure 3.2).
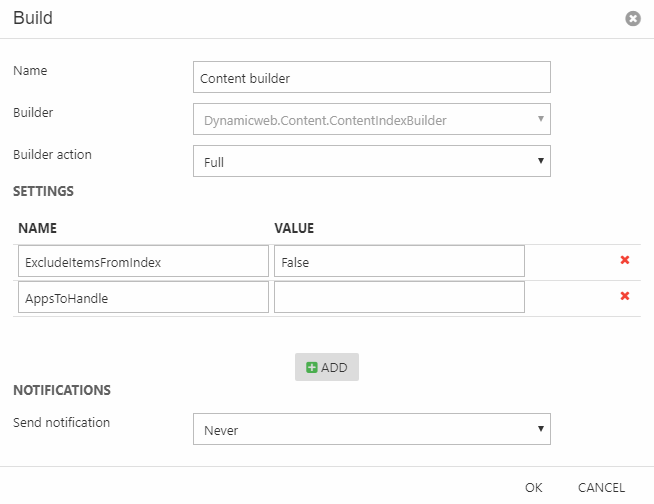
Now, click Add build to open the build configuration view (Figure 3.3). Name it Content builder and change the Builder to Dynamicweb.Content.ContentIndexBuilder.
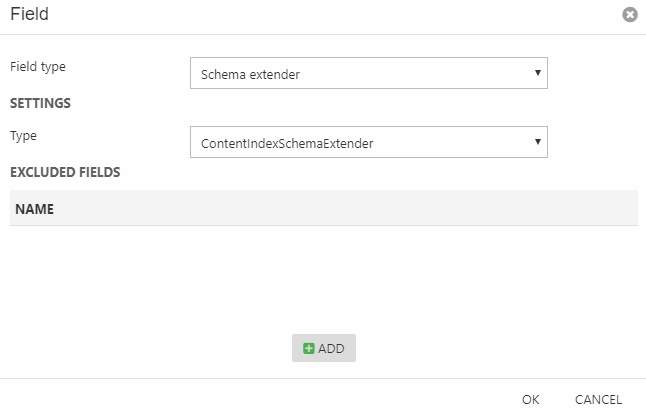
Click Add field. Select the Schema extender field type and the ContentIndexSchemaExtender type (Figure 4.1). Click OK.
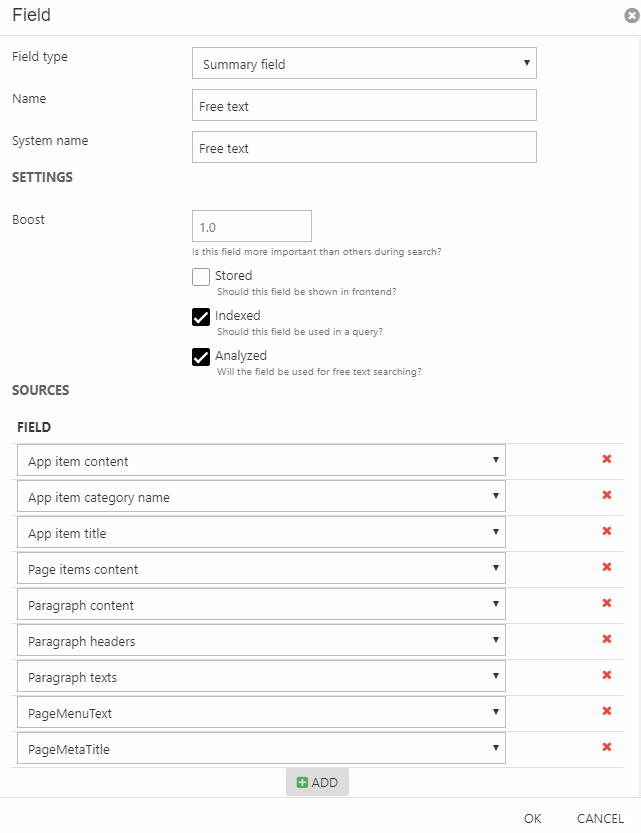
Save the index. Then, create a new field (Figure 4.2) with the Summary field field type. Name it Free text - also as the system name. Check the field to be indexed and analyzed. In the Field section, add the following fields:
- App item content
- App item category name
- App item title
- Page items content
- Paragraph content
- Paragraph headers
- Paragraph texts
- PageMenuText
- PageMetaTitle
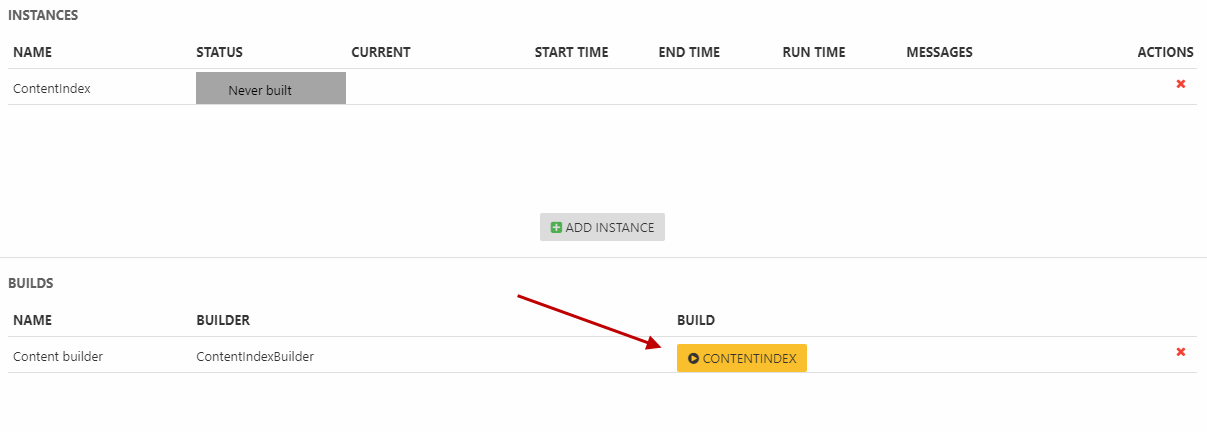
Click Save. Then, build the index (Figure 4.3) and Save and close once the ContentIndex instance says "Completed".
Creating the query
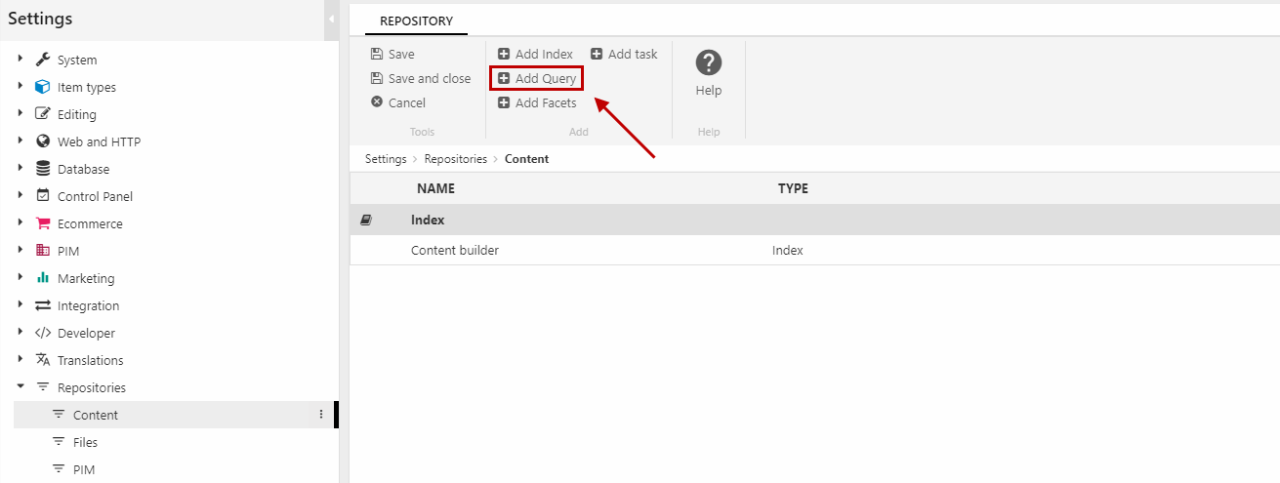
With the index all set up, click Add Query in the repository toolbar (Figure 5.1). Name the query Content search and select your new index Content builder as the Data Source.
In the query configuration view, create three parameters using the Add parameter button (Figure 5.2) and leave the default value blank:
- Search with the type System.String (the search string entered in the search bar)
- Areaid with the type System.Int32 (the website ID)
- Pagetype with the type System.String[] (the array of the different page types)

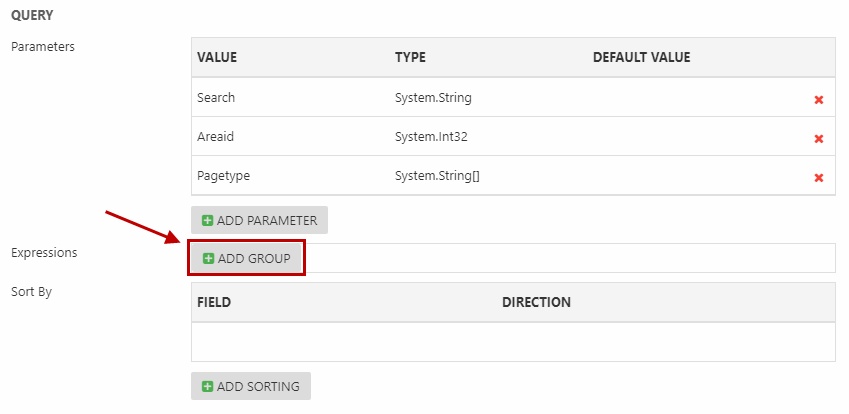
Under Expressions, click Add group (Figure 5.3).
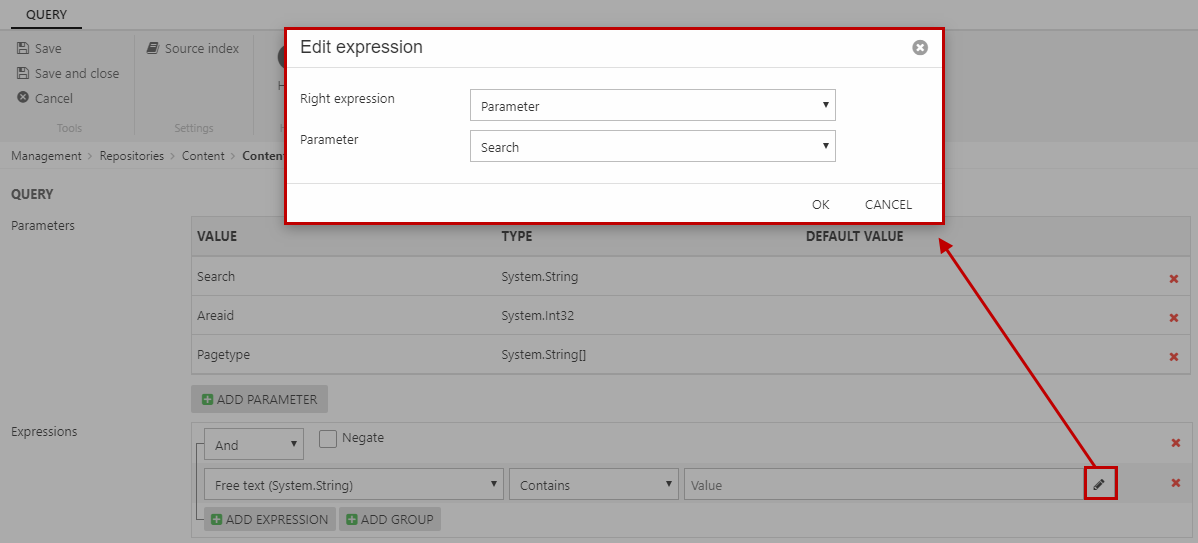
Select the Free text field and the Contains operator. Click the pencil icon (Figure 6.1), set the right expression to Parameter, and select the Search parameter created earlier.
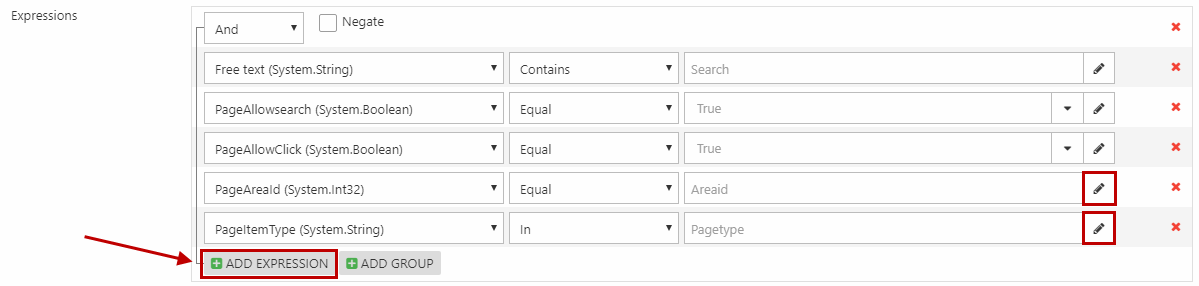
Add four more expressions using the Add expression button (Figure 6.2). These will include searchable and clickable pages for all your websites in the search.
Select the:
- PageAllowsearch field, the Equal operator, and the True value
- PageAllowClick field, the Equal operator, and the True value
- PageAreaId field, the Equal operator, and click the pencil icon and select the Parameter > Areaid
- PageItemType field, the In operator, and click the pencil icon and select the Parameter > Pagetype
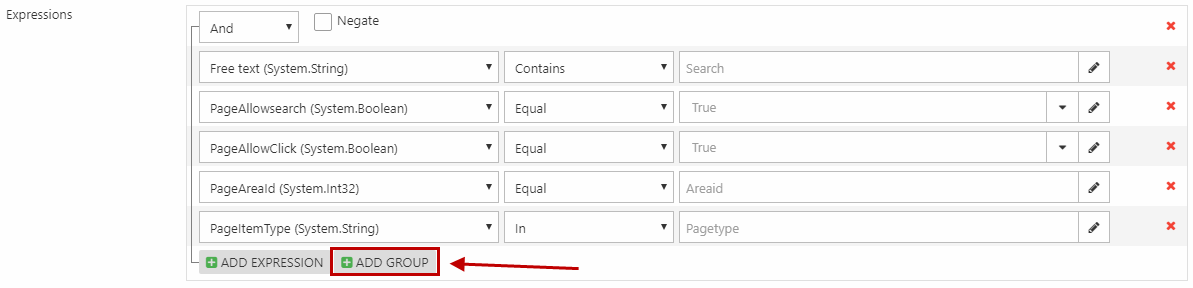
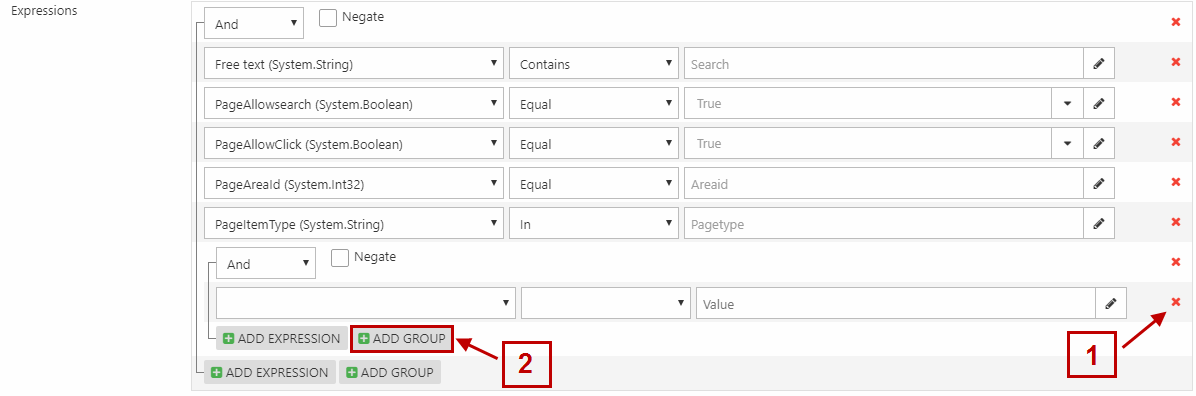
Right now we're working in the level 1 group of expressions. Click Add group (Figure 6.3) to create a level 2 group.
In the level 2 group, delete the expression field inside (1) and click Add group (2) (Figure 7.1).
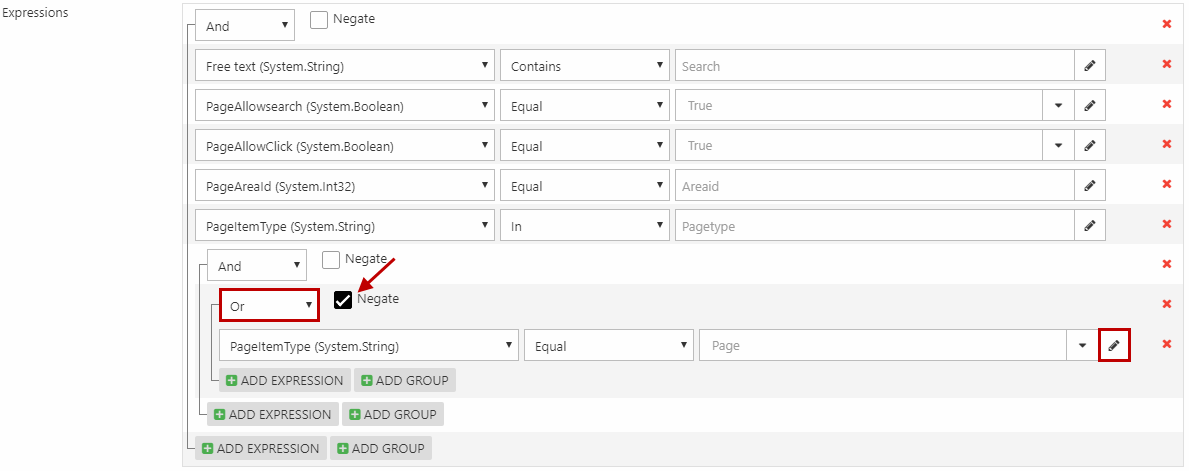
You must (Figure 7.2):
- Change the group selector to Or and check the Negate checkbox
- Select the PageItemType field and Equal operator
- Click the pencil icon and choose Constant and System.String
- Type-in Page as the value and click OK
Click Add group for the level 2 group again (Figure 7.3).
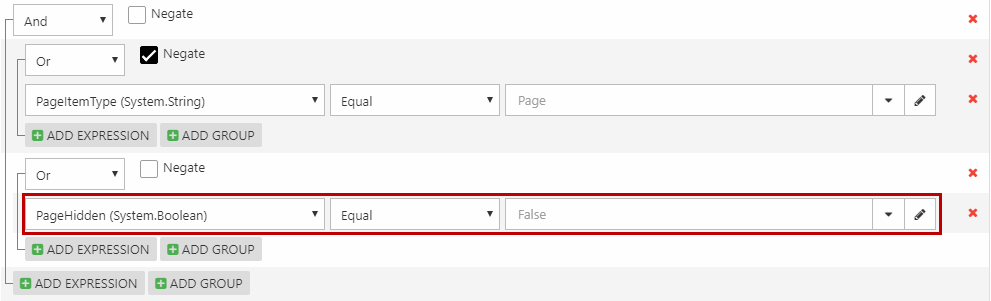
Select the PageHidden field, the Equal operator, and the False value (Figure 8.1).
Basically, this level 2 group excludes hidden pages in the search, by including pages that are either not hidden OR don't have the Page item type.
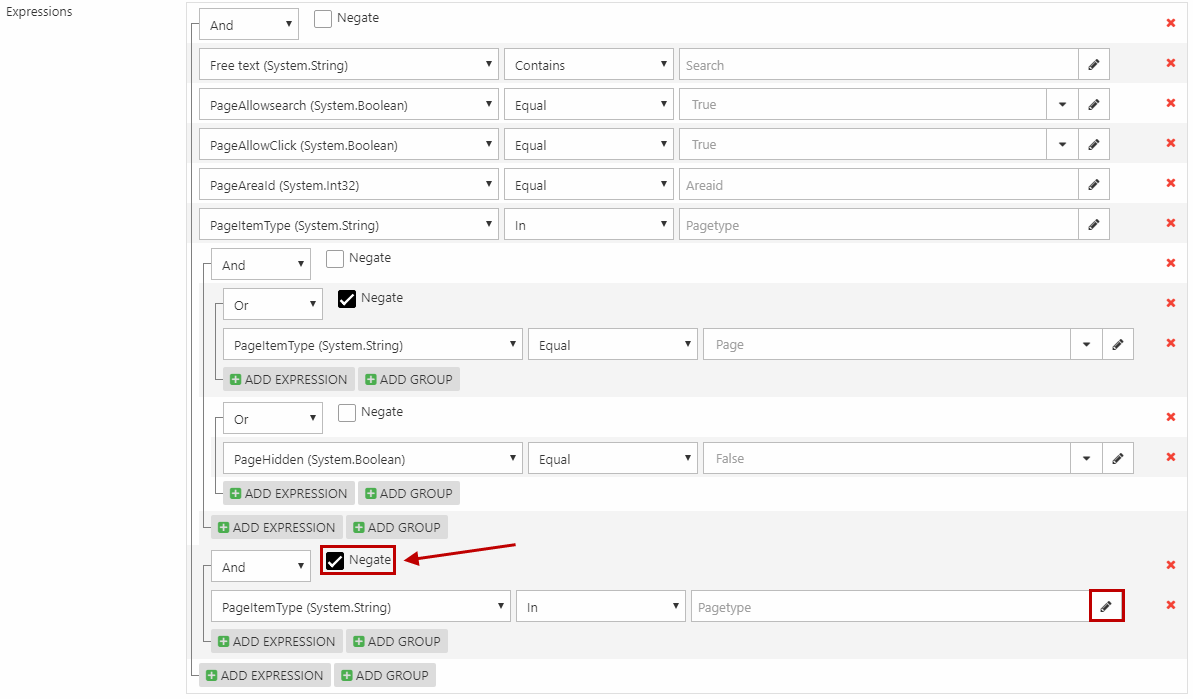
At the bottom, click Add group (Figure 8.2) to add another level 2 group.
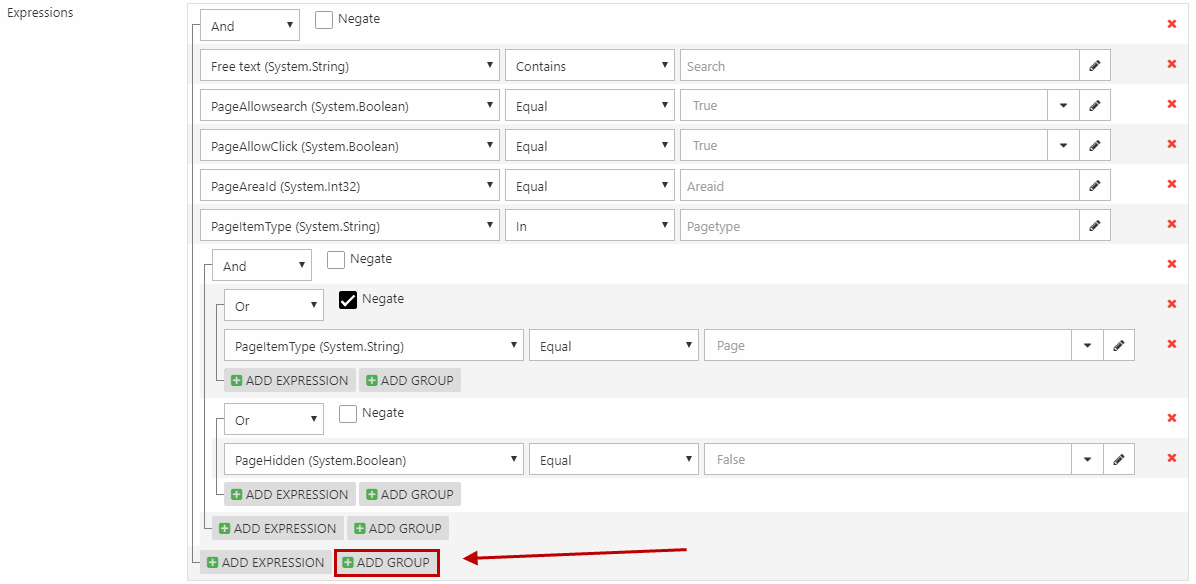
Check the Negate checkbox for the group. Then:
- Select the PageItemType field and the In operator
- Click the pencil icon and select the Parameter > Pagetype
After that, your query should look like Figure 8.3.
Creating the facets
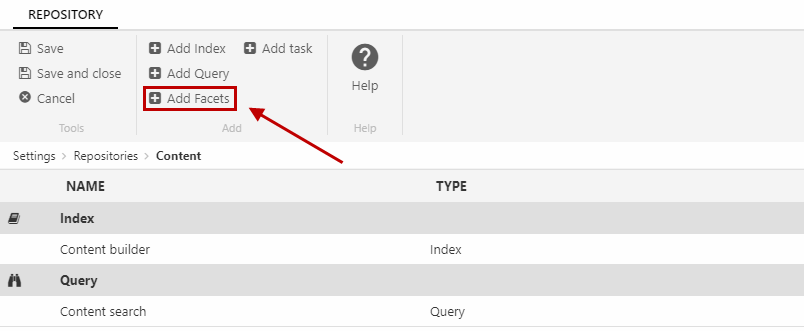
The last step in creating the Content repository is to create the Content facets. Click Add Facets in the repository toolbar (Figure 9.1). Name them Content facets and select the Content search query.
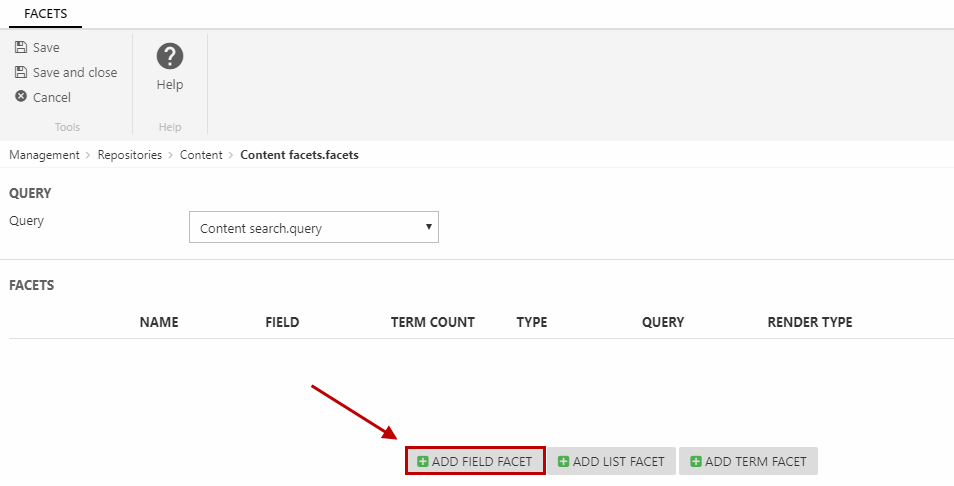
In the facets configuration view, click Add field facet (Figure 9.2).
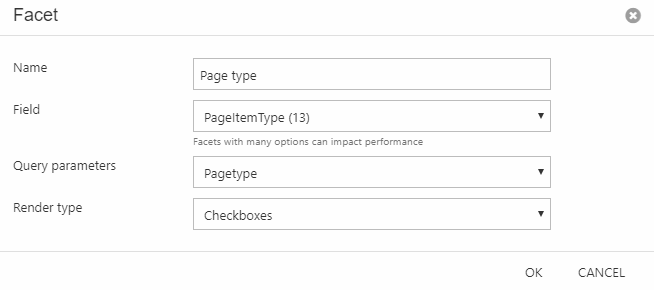
You must (Figure 9.3):
- Name it Page type
- Select the PageItemType field
- Select the Pagetype query parameter
- Choose checkboxes as the render type
- Click OK
Now, click Save and close and your Content repository is done!
Content search feed (JSON)
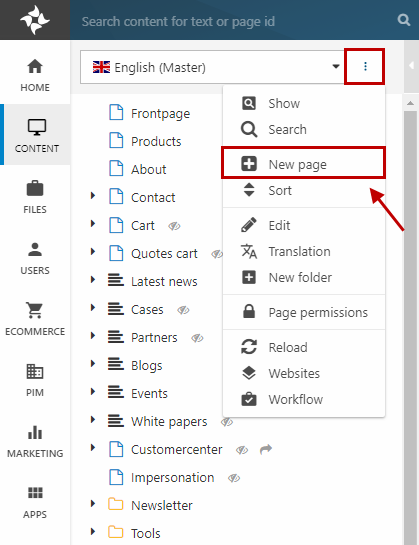
Now that you have your Content repository set up, you must configure a search feed using JSON. Start with going to Content and create a (blank) page (Figure 10.1). Name it Content search feed and set it to Hide in menu.

Create a (simple) paragraph called Search feed and go to App to attach the Query publisher app (Figure 10.2).
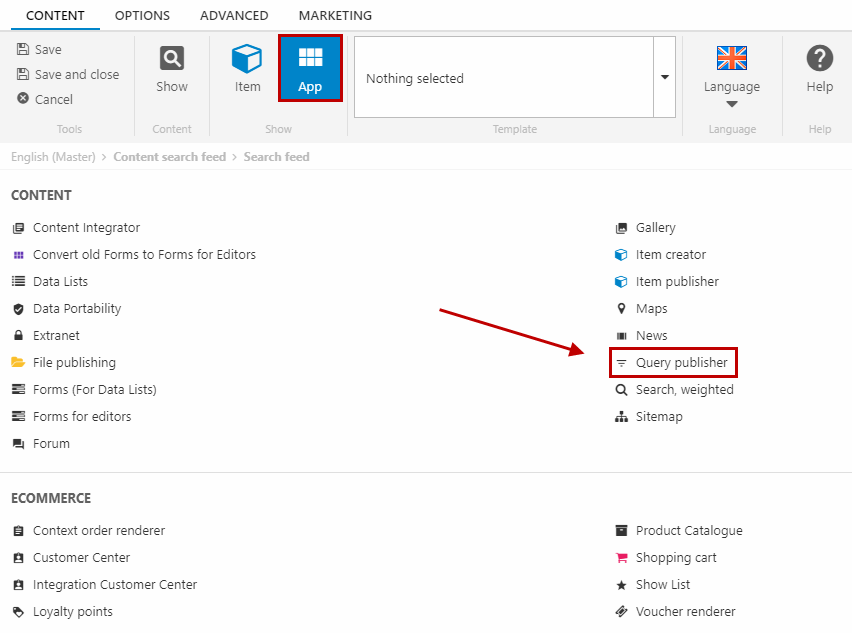
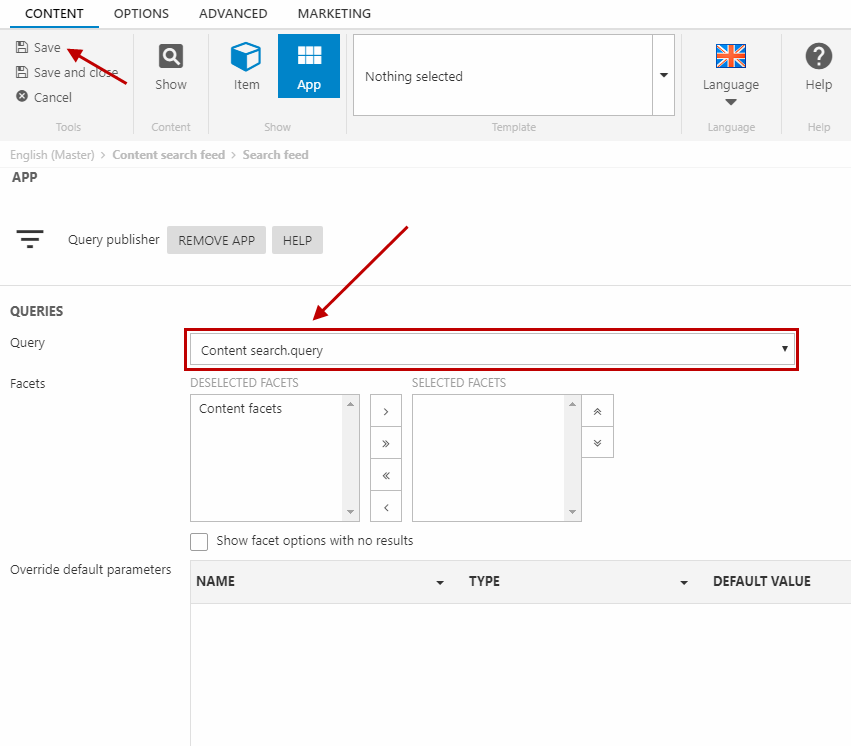
Under Queries, select the Content search.query that you created earlier as the Query content. Click Save.
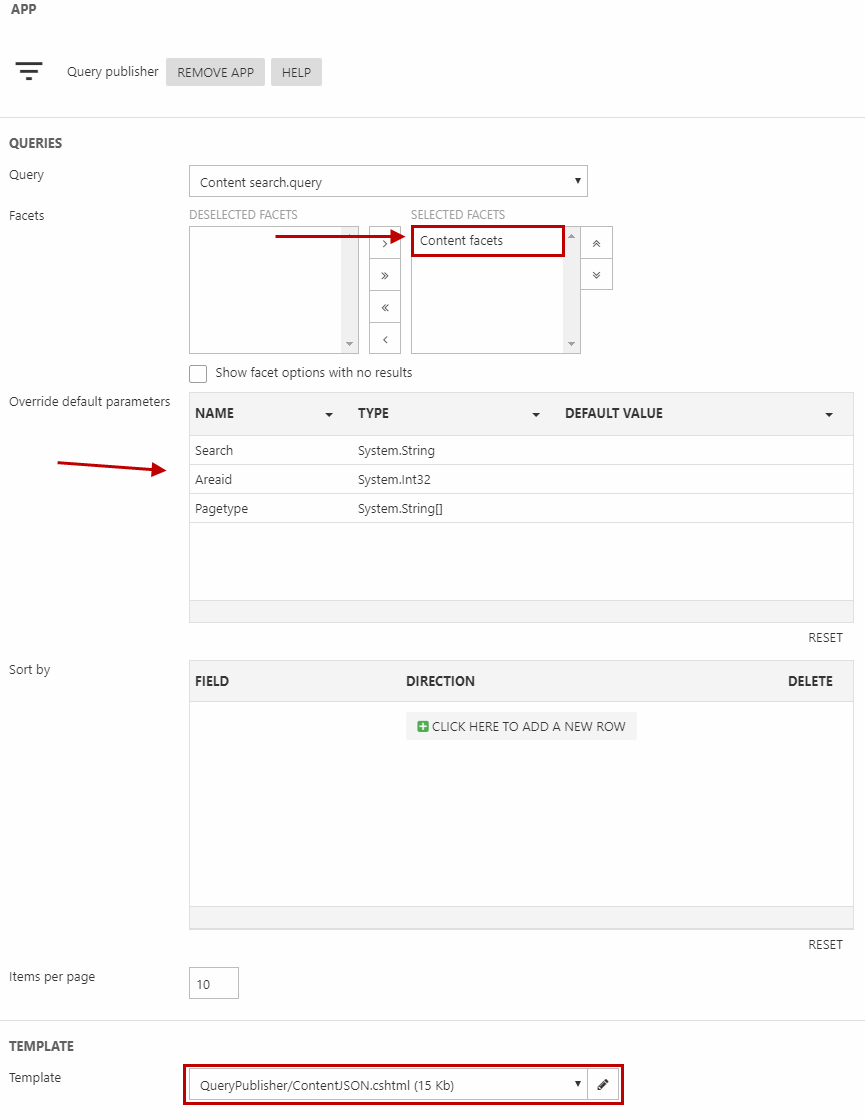
Still inside the paragraph's app settings, you must (Figure 11.1):
- Under Facets, select the Content facets and move them to selected facets
- Check that the Override default parameters include the same three parameters as in Figure 11.1
- At the bottom under Template, select the QueryPublisher/ContentJSON.cshtml template
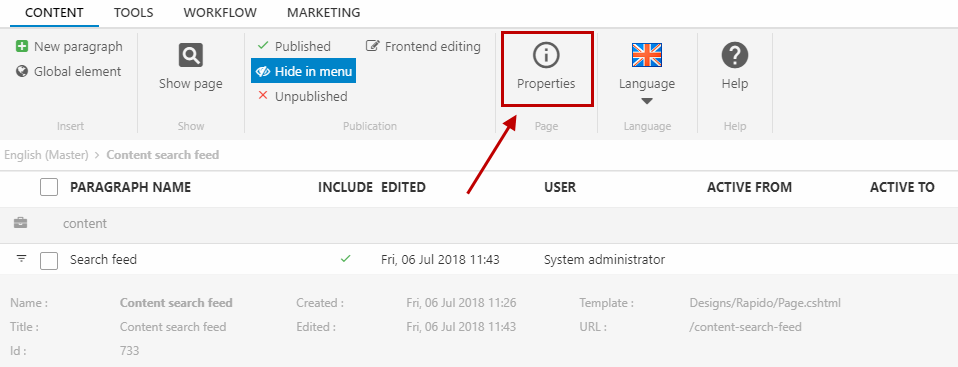
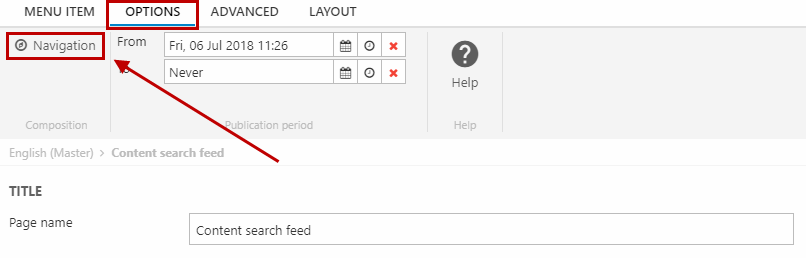
Save and close the paragraph and return to the page overview. In the ribbon bar, click Properties (Figure 11.2).
Go to the Options tab and click Navigation in the ribbon bar (Figure 11.3).
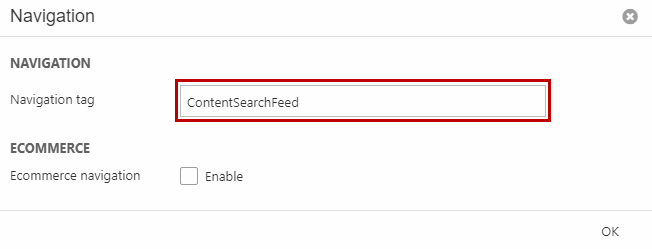
Enter ContentSearchFeed as the navigation tag (Figure 12.1). Click OK.
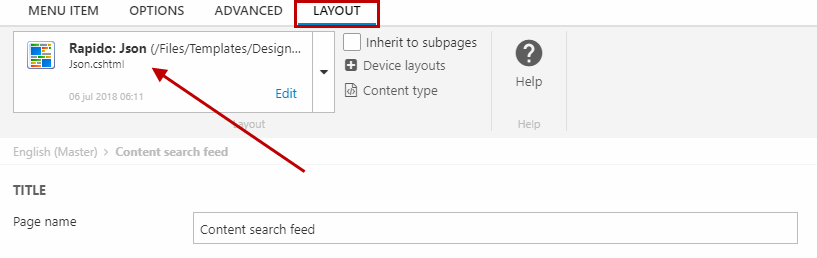
Go to the Layout tab and in the ribbon bar, select the template Rapido: Json with the file name Json.cshtml (Figure 12.2).
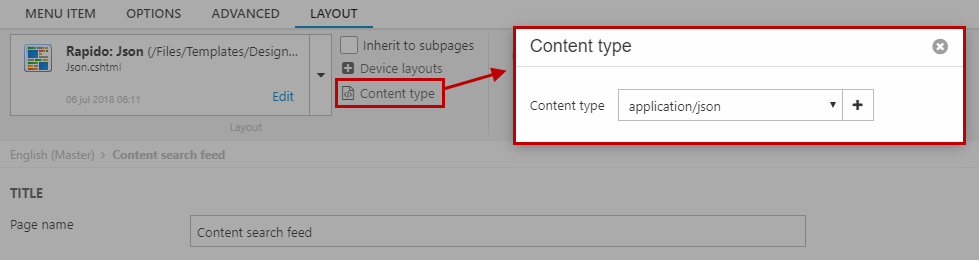
Click on Content type in the ribbon bar and select application/json (Figure 12.3).
And then you're done with the configuration of the JSON feed! This content search feed will be used by another page to render the search results. So what's left now, is to make that "another page".
Search results page
With the Content repository and the JSON feed set up, you can create the page for the search results.
Start with creating a new (blank) page (Figure 13.1) called Search results and set it to Hide in menu.
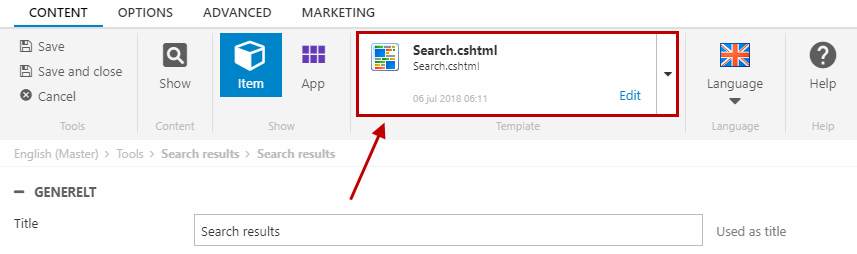
Create a (simple) paragraph called Search results. In the Template section in the ribbon bar, select the Search.cshtml template (Figure 13.2).
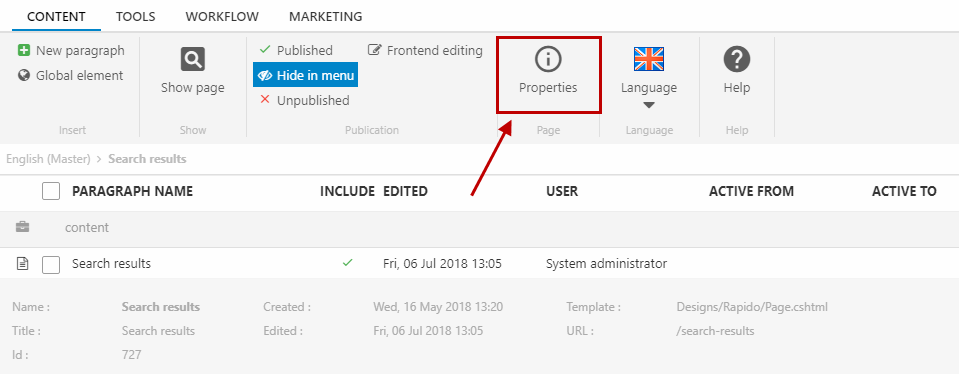
Save and close the paragraph and return to the page overview. In the ribbon bar, click Properties (Figure 13.3).
Go to the Options tab and click Navigation in the ribbon bar (Figure 14.1).
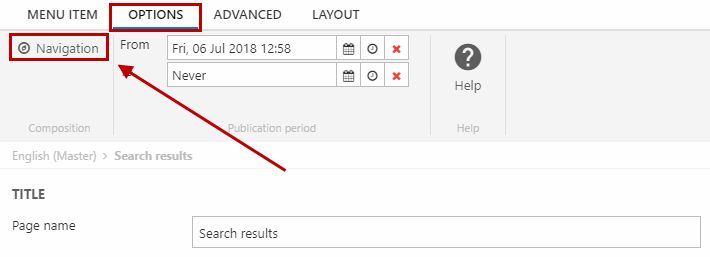
Enter ContentSearchResults as the navigation tag (Figure 14.2). Click OK.

You have now set up your content search!