
Checkout configuration
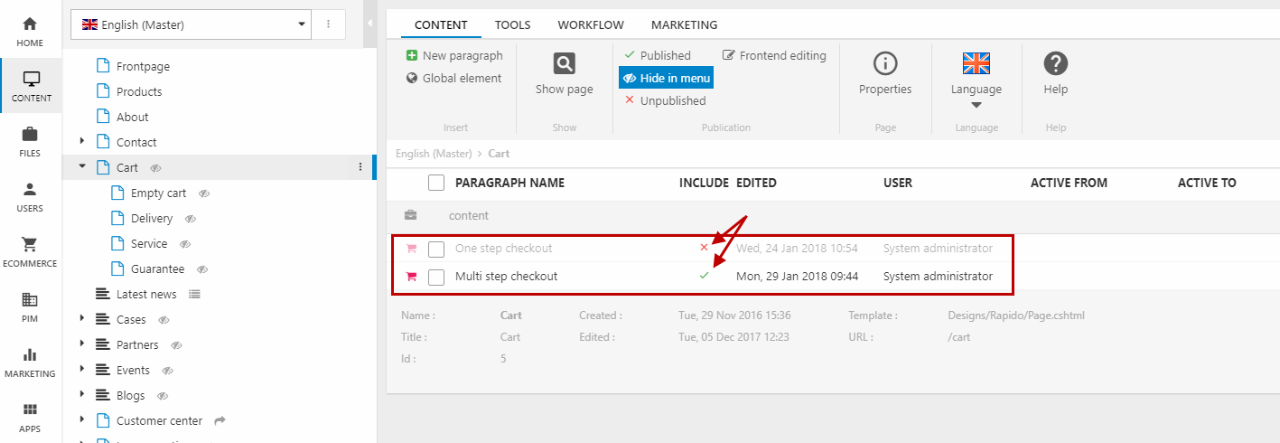
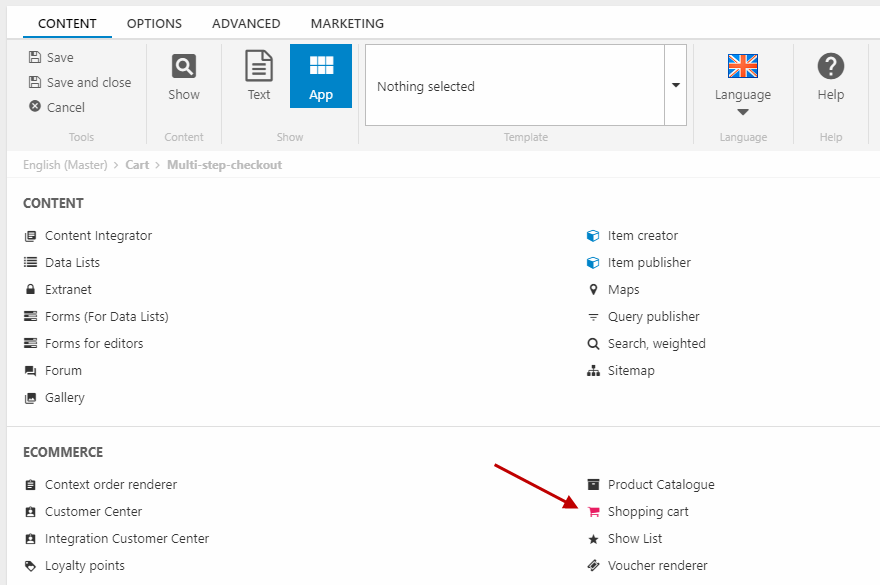
Rapido ships with both a one-step-checkout cart and a multi-step-checkout cart upon arrival. These can be found under the Cart page (Figure 1.1).
Only one of these checkout flows can be active at a time, so you can switch between the two by changing the Include setting for the paragraphs in the list.
Below, you can see how each of the two paragraphs differ in setup.
You can read more about checkout in Rapido in this article.
Using the website settings, you can hide different elements in the checkout flow.
This guide is based on an empty Rapido solution (no products & PIM).
One-step-checkout
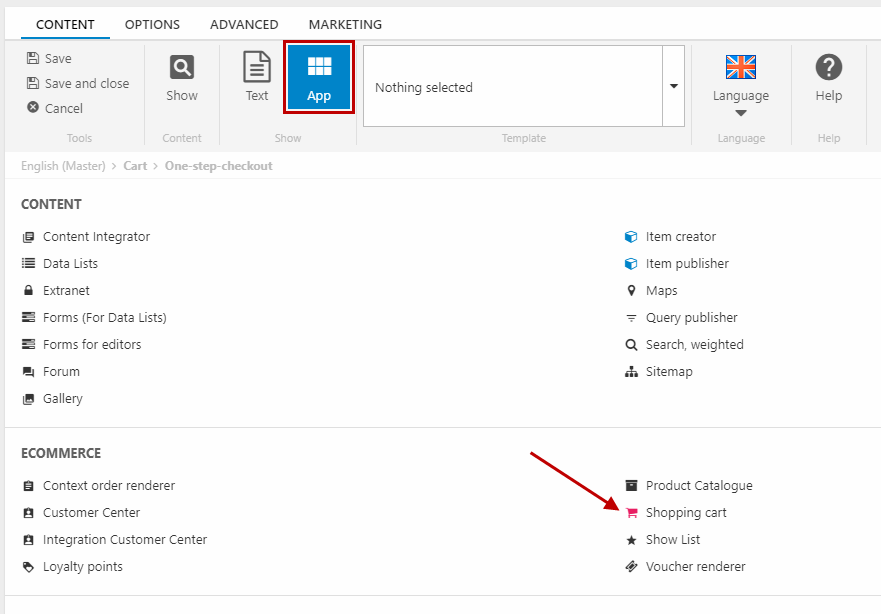
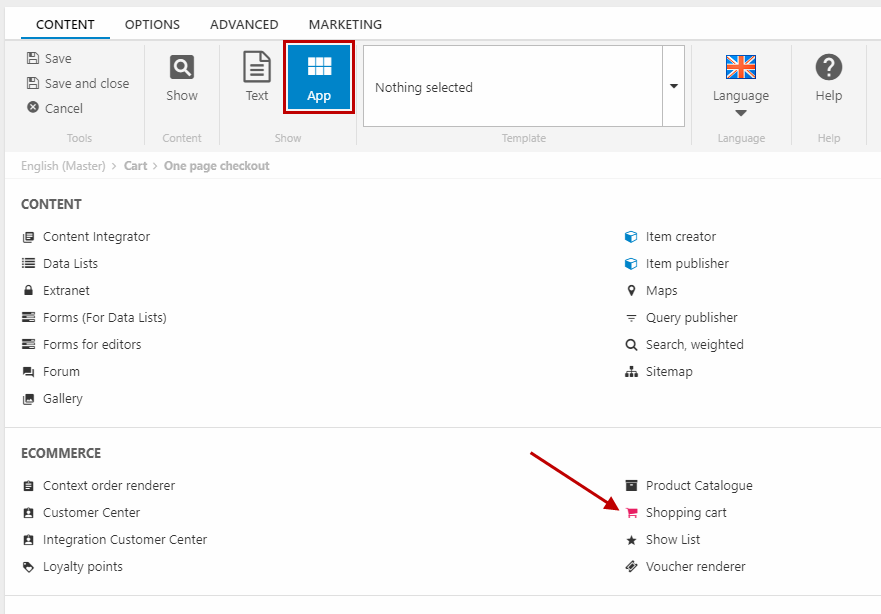
To set up the one-step-checkout flow from scratch you must create a paragraph and attach the 'Shopping cart' app to it (Figure 2.1).
The one-step-checkout flow is build up of these steps:
- Show Cart
- Checkout
- Receipt
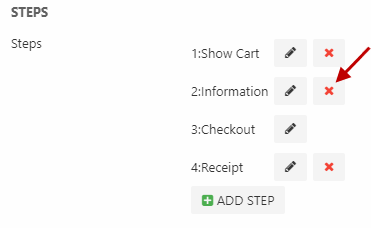
These are set up under Steps (Figure 2.2). By default, there's a second step, 2. Information. We wont use this step, so simply delete it.
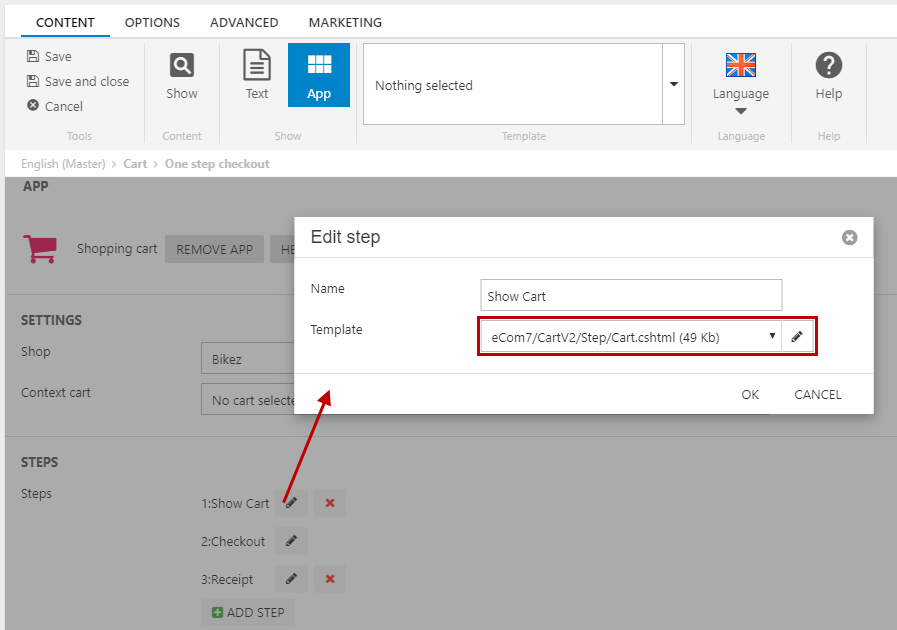
The important step for the one-step-checkout flow is the Show Cart step. Click the edit button for this step and select the template called Cart.cshtml (Figure 2.3).
For the Receipt step, you must select the template called Receipt.cshtml.
After that, you're done! The one-step-checkout flow has now been configured.
For more information about the configuration options for the Shopping cart app, see the documentation site for Dynamicweb.
Multi-step-checkout
To set up the multi-step-checkout flow from scratch you must create a paragraph and attach the 'Shopping cart' app to it (Figure 4.1).
The multi-step-checkout flow consists of the following steps:
- Show Cart
- Delivery
- Payment and Shipping
- Checkout
- Receipt
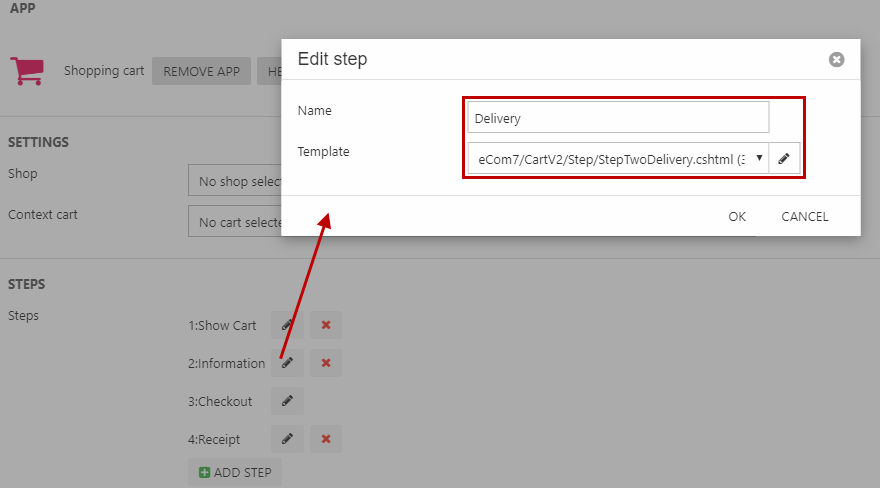
These are set up under Steps in the app settings. By default, there's a second step, 2. Information. Since we will be needing two additional steps in between Show Cart and Checkout, we can just modify this step:
- Click the edit button (Figure 4.2) for this second step and rename it to Delivery
- Select the template StepTwoDelivery.cshtml
- Click OK
Now, add another step with the 'Add step' button (Figure 4.3) and name it Payment and shipping. Select the template StepThreeShippingPayment.cshtml and click OK.
Then, move this step to make it step number 3 by dragging it in the list.
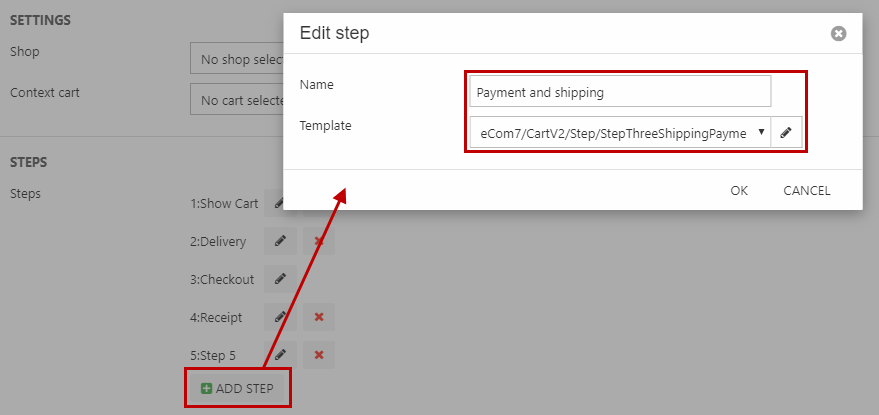
Now we have the correct order and the steps Delivery, Payment and shipping, and Checkout (this step only requires a name) are done.
The first step, Show Cart, needs a template. Click the edit button for this step and select the template called StepOneCart.cshtml (Figure 5.1).
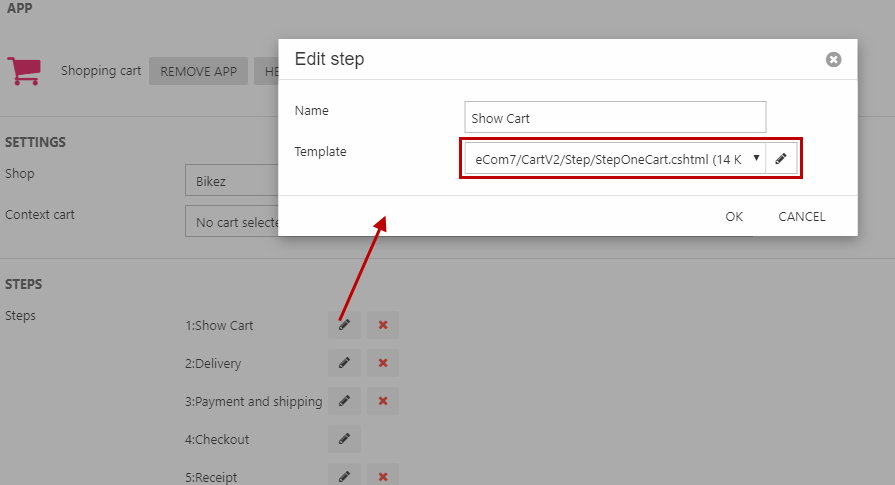
Lastly, click the edit button for the Receipt step and select the Receipt.cshtml template (Figure 5.2).
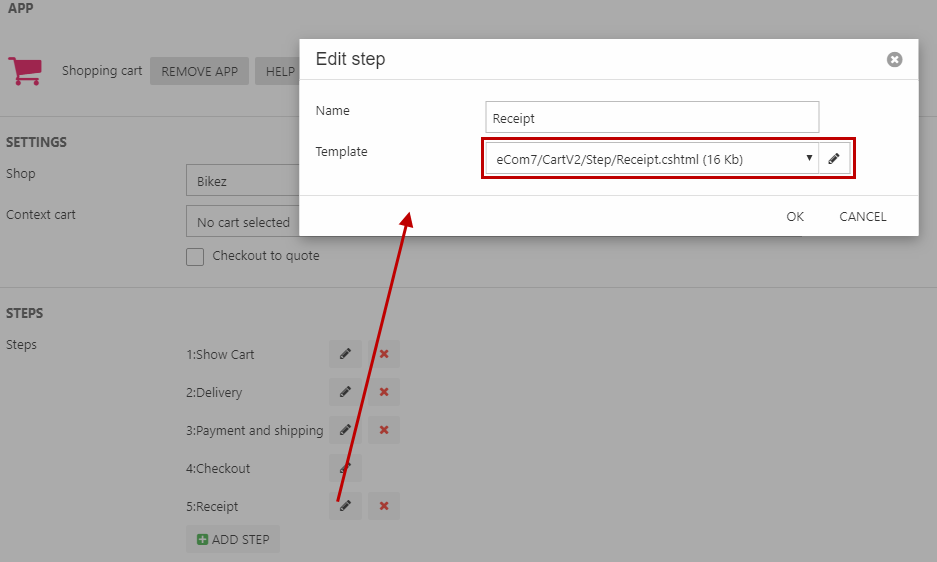
And that's it! You have now set up your multi-step-checkout flow.
For more information about the configuration options for the Shopping cart app, see the documentation site for Dynamicweb.
One-page-checkout
To set up the one-page-checkout flow from scratch you must create a paragraph and attach the 'Shopping cart' app to it (Figure 7.1).
The one-step-checkout flow is build up of these steps:
- Show Cart
- Checkout
- Payment
- Receipt
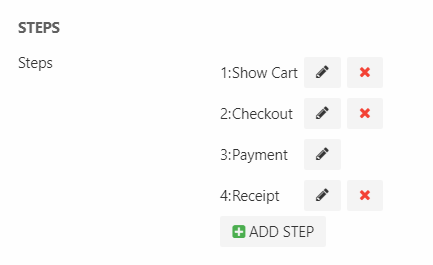
These are set up under Steps (Figure 7.2). Right now, the order is not what we want, so:
- Rename the Checkout step to Payment
- Rename the Information step to Checkout and select the OnepageCheckout.cshtml template
The setup should now match Figure 7.2.
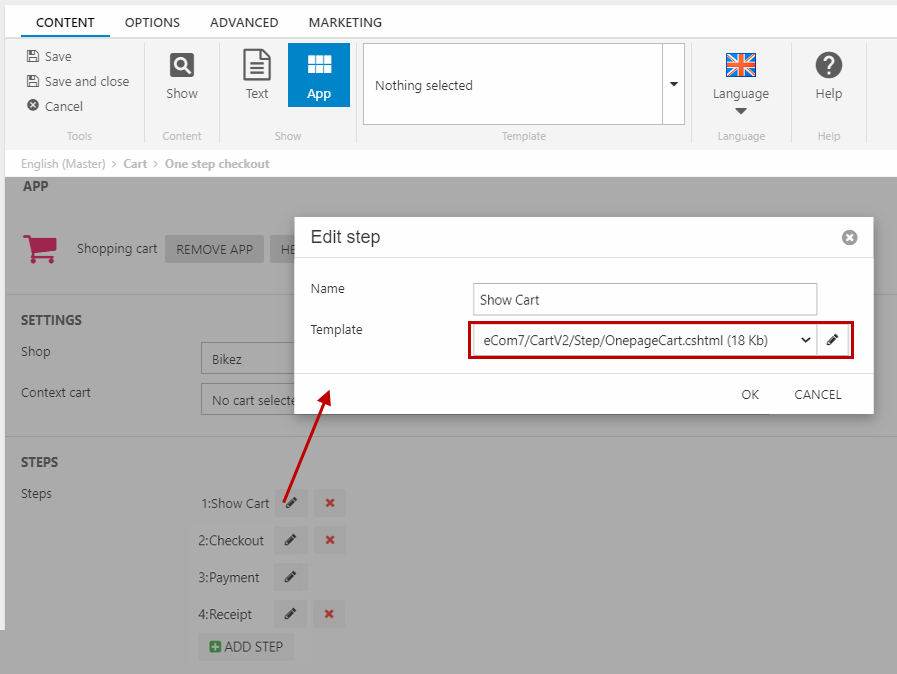
Lastly, change the template for the Show Cart step to OnepageCart.cshtml, and for the Receipt step, change it to OnepageReceipt.cshtml (Figure 7.3).
After that, you're done! The one-page-checkout flow has now been configured.
For more information about the configuration options for the Shopping cart app, see the documentation site for Dynamicweb.