Products on frontpage
This item is only compatible with Rapido 3.2 or earlier versions.
You can use the Rapido Content Model to create similar types of content.
Rapdio features two ways to present products or product groups on a page.
- The PromotionProducts item type: displays products (also from different product groups)
- The Product Catalogue app: can display product group categories
Products from different groups
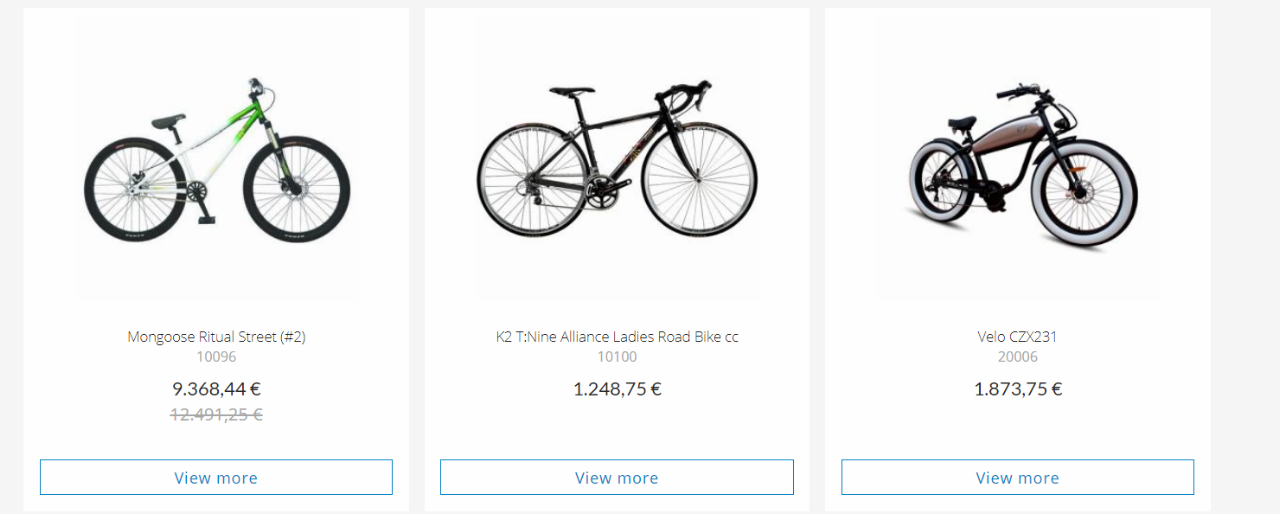
Rapido features a PromotionProducts item type. With this item type, you can select specific products to be displayed (Figure 3.1).
The products will be presented in a grid and show the following information: product image, name, number, and price. A view more button will redirect the customer to the product card.
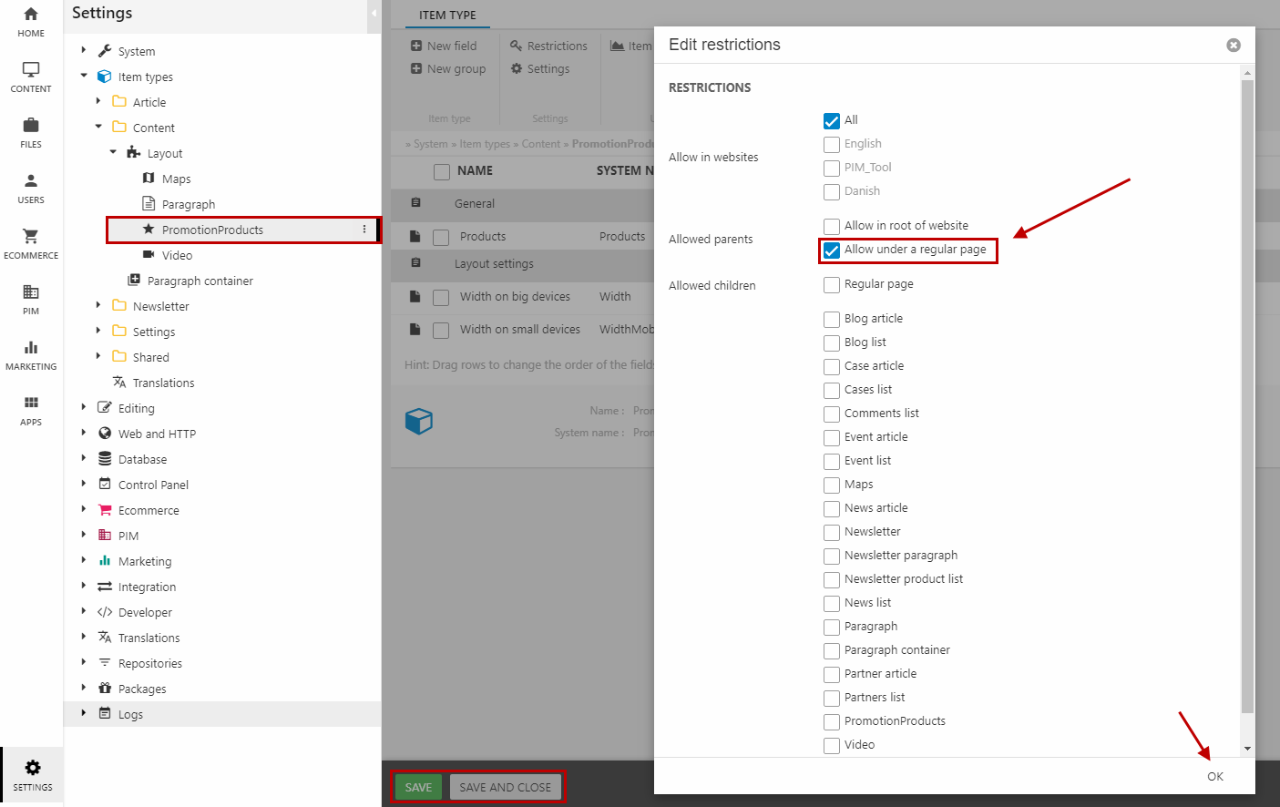
Before you can select the PromotionProducts item type, you must go to Settings > Item types > Content > Layout > PromotionProducts.
Click Restrictions in the ribbon bar and check the Allow under a regular page checkbox (Figure 3.2). Then, click OK.
Remember to click Save after the Edit restrictions window has been closed.
Once you've edited the restrictions, you can proceed to use the item type:
- Create a new paragraph
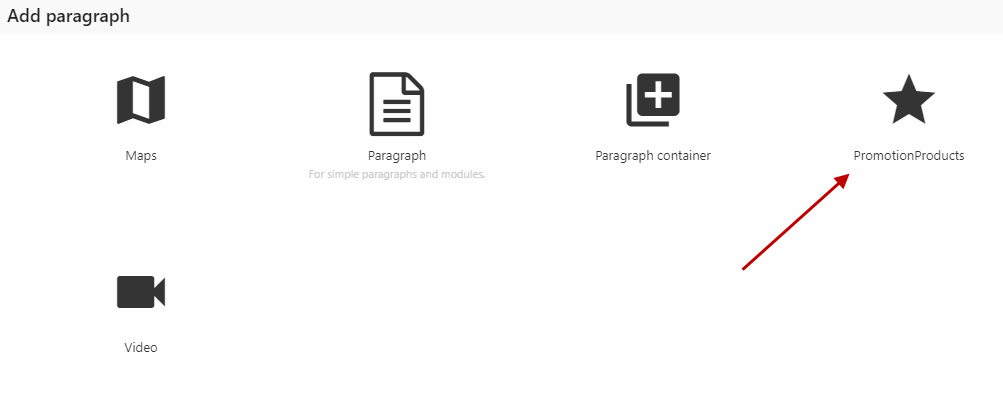
- Select the PromotionProducts item type (Figure 3.3)
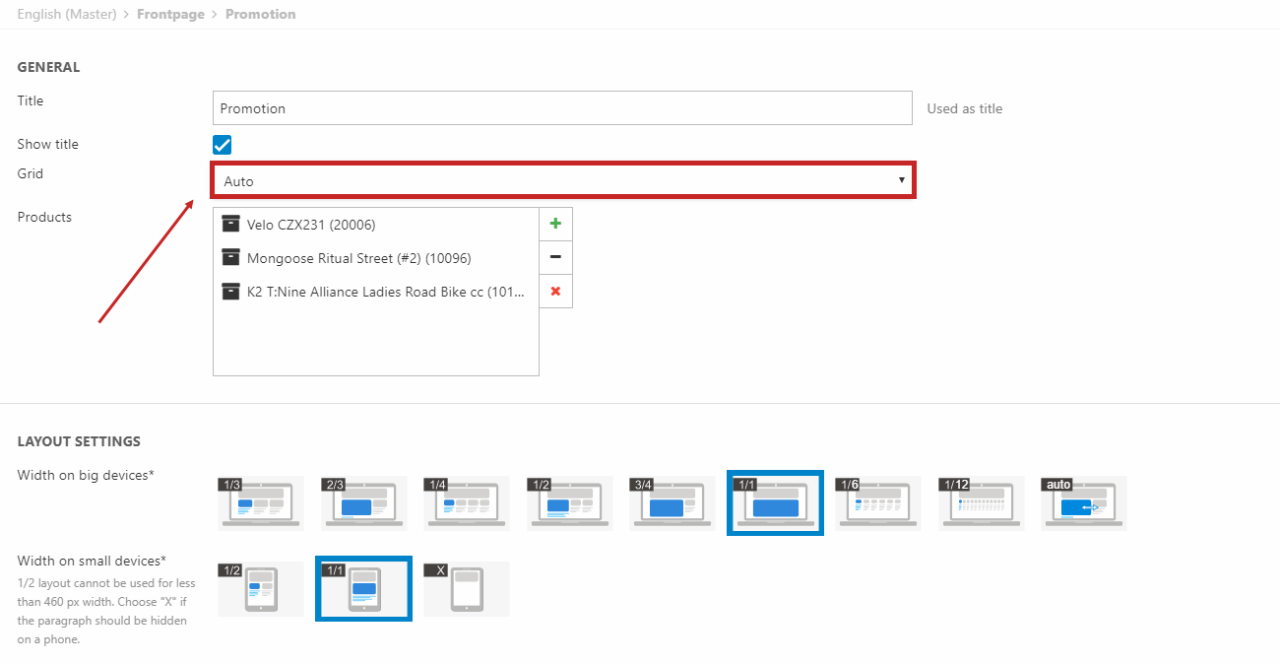
Under General (Figure 4.1), select the products you want to display on your page using the + icon.
The PromotionProducts item type, has a dropdown that features different grid options for your promotion products. You can choose between these predefined design options, from the grid dropdown:
- Auto (this will fill out the entire width of the section in one row. However, if more than 4 products are chosen, it will then shift to the next line/row instead)
- 2 columns
- 3 columns
- 4 columns
- 6 columns
If the checkbox '' Show title '' is enabled, it will be visible in the frontend.
You can also set the width on big and small devices using the Layout settings.
Show product group categories
You can use the Product Catalogue app to display your product group categories on another page (Figure 5.1).
In frontend, it will show the product group name and the product group image. The "image - small" is attached in Ecommerce for each main product group.

To use it, you must:
- Create a new (simple) paragraph
- Click App in the ribbon bar and select the Product Catalogue app (Figure 5.2)
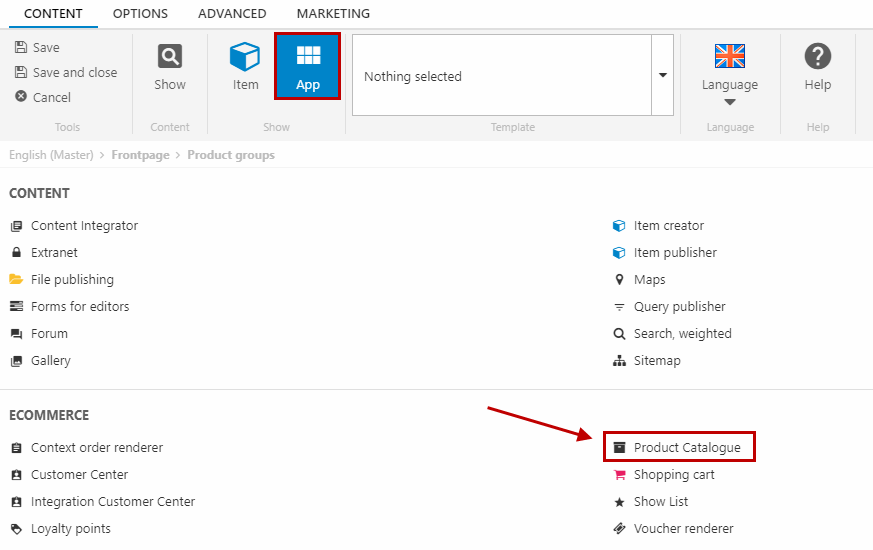
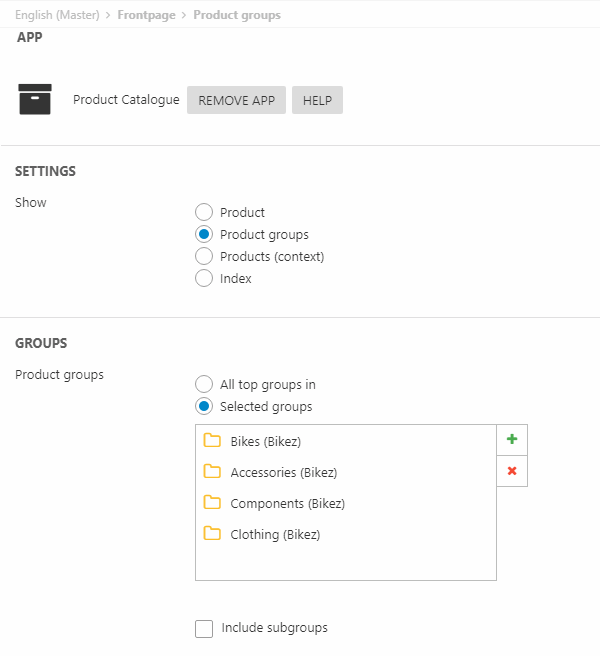
In Settings, choose to show product groups and under Groups, choose selected groups. Click the + icon to add some main product groups e.g. Bikes, Accessories, Components, and Clothing (Figure 5.3).
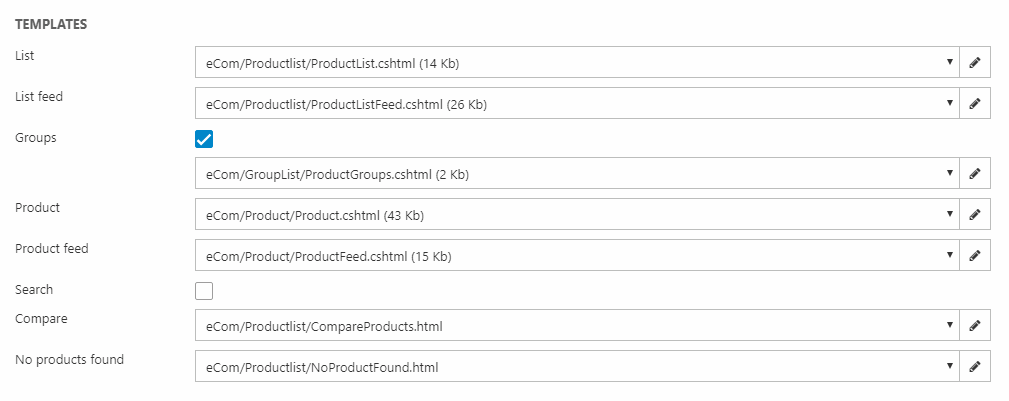
In the Template section, check the Groups checkbox and select the eCom/GroupList/ProductGroups.cshtml template (Figure 6.1).
Under Additional settings (Figure 6.2), you can decide which paragraph it should redirect to when clicking on a product group category.
If you e.g. choose Products, then clicking on a category will open the products page on your site with the product group cateogry preselected.

