
Ecommerce - Advanced Configuration
In this article, you will have an overview of the settings available under Settings > Ecommerce > Advanced configuration.
You can find settings regarding fields, images, product catalog, and more.
Some settings are described elsewhere such as:
The other settings are described below.
For more information about the settings in the Settings > Ecommerce area, see this other article.
General
In the General settings, you will find misc. settings regarding the shopping cart, product navigation, additional fields, and more.
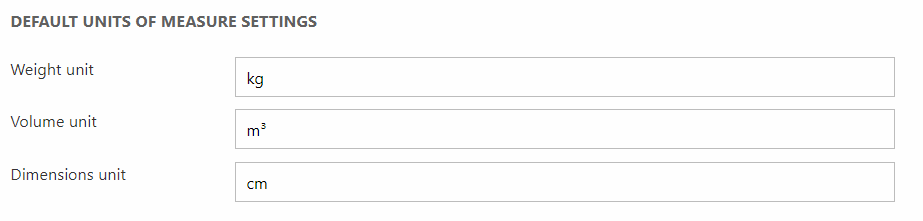
Default units of measure settings
Under Default units of measure settings (Figure 3.1) you can define the default unit for weight, volume, and dimensions.
Indexing
The Indexing settings (Figure 4.1) allows you to control the default behavior of schema extenders for new indexing. Currently these settings only apply to the ProductIndexSchemaExtender.
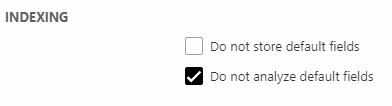
The following settings are available:
- 'Do not store default fields' - if checked, fields are not stored by default
- 'Do not analyze default fields' - if checked, fields are not analyzed by default
You can read more about stored and analyzed here.
Navigation
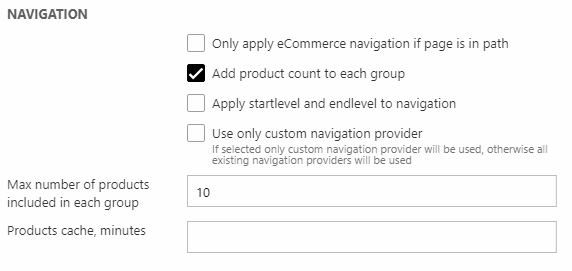
Under Navigation (Figure 5.1), you control settings for navigating through your products. You can:
- Choose to apply eCommerce navigation ONLY if the page is showed in the path
- Show the product count next to each group name
- Specify start- and endlevel to the navigation
- Discard all existing navigation providers and only use custom navigation provider (this checkbox only appears on solutions where custom providers are present)
- Specify the maximum number of products in each group
- Specify for how long (in minutes) products should be saved in the cache
Language
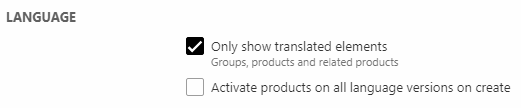
By default, unlocalized product catalog content – products, product groups and related products – is not shown in the frontend, but you can change that by force-showing unlocalized content. With the Language settings (Figure 6.1), you can:
- Uncheck the "only show translated groups" checkbox to force-show unlocalized groups, products and related products
- Check the "Activate products on all language version on create" to create a version of the newly created product on all language versions (read more about what this setting does in this article)
You can read more about localizing content here.
Only show products & Only show variants
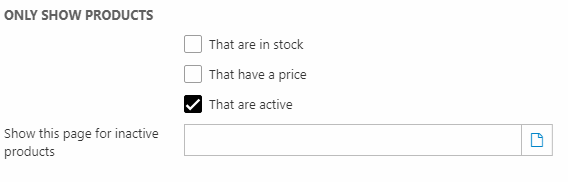
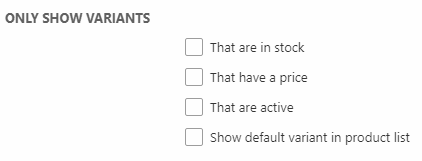
With the Only show settings (Figure 7.1), you can control how products and variants are displayed across product catalog apps by setting up requirements for showing products in frontend:
- If the product is in stock
- If the product has a price
- If the product is active
Please note that if you are publishing a query, most of these settings can be replaced by expressions on the query. These settings also have no effect on Product Catalog for ViewModel instances.
Special for products:
If the product is inactive, you can also choose a custom page to show instead (Figure 7.1).
Special for variants:
You can also choose to show the default variants in the product list instead of the main product by checking Show default variant in product list.
Product - Group display cache
Under Product - Group display cache (Figure 8.1), you can choose to cache product group displays in the server memory. This will result in a faster browsing of products.
You must then specify how many minutes the products should be cached in the server memory.

Additional fields
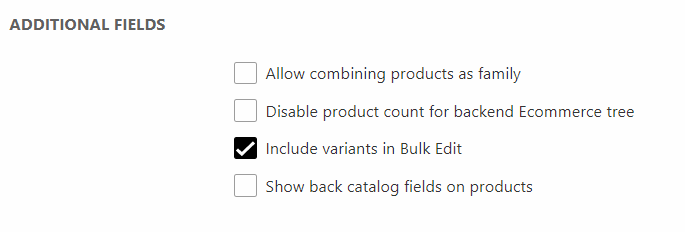
Under Additional fields (Figure 9.1) you can:
- Allow combine products as family (read more about this function here)
- Disable product count for backend Ecommerce tree to reduce data traffic load and increase performance when navigating the Ecommerce tree
- Enable Bulk edit for (simple/extended) variants to edit multiple variants at once
- Check Show Back Catalog checkboxes on products to enable three performance-related fields on all products
The back catalog fields are:
- Exclude from index
- Exclude from customized URLs
- Exclude from "All products"
These fields are primarily of interest on solutions with more than 250.000 products, if a large part of those products form a back catalog which should not be included in the list of active products.
Taxes in backend
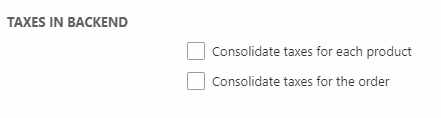
Under Taxes in backend (Figure 10.1), you can consolidate taxes for orders to make the order details less confusing. You can:
- Show the total tax for each product in the order
- Show the total tax for the entire order
Read more about orders and consolidating taxes in this article.
Power pack
With the Power pack settings (Figure 11.1), you can set a minimum number of views a product should have to appear on a "Customer who saw this also saw this"-list.

Edit and delete permissions
With the Edit and delete permissions settings (Figure 12.1), you can:
- Allow all backend users to edit orders
- Allow edit order price to exceed original order price
For security reasons you cannot capture more than the amount the order was created and authorized with by the payment provider - Disallow backend users from deleting orders
- Disallow non-administrators from deleting shops, groups and products

You can read more about editing orders in this article.
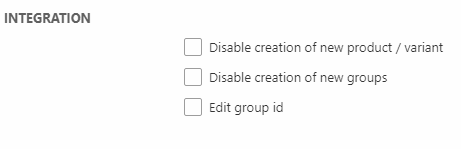
Integration
The Integration settings (Figure 13.1) are useful if you integrate with an ERP system e.g. NAV or AX. With the settings, you can limit the available actions from the Dynamicweb backend, to ensure that the ERP system has full control over your product catalog:
- Disable the creation of products, product groups and variants from backend
- Enable group ID editing for integrational purposes (this is not recommended though)
You can read more about integration in this article.
Fields
You can control product field behavior by going to Settings > Ecommerce > Advanced configuration > Fields and modifying the field settings (Figure 14.1).
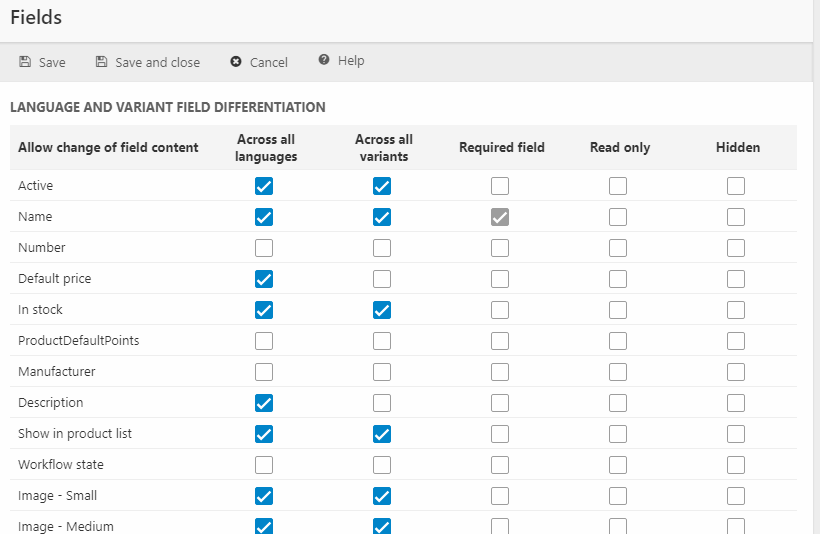
You can:
- Allow differentiation of fields across all languages – read more about languages here
- Allow differentiation of fields across all variants – read more about variants here
- Make fields required, read only, or hidden (for non admin-users - admins and administrators will continue to have access to all fields).
- Required fields will be validated when saving a product in either details or bulk edit mode, and if no values is entered in the field, the product cannot be saved.
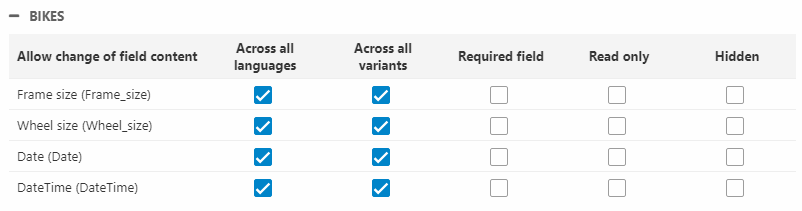
If you have created any product categories they will appear below the standard product fields, and can be modified in the same manner.
Below the Language and variant differentiation section, you can also modify the field settings for your shops (Figure 14.2).
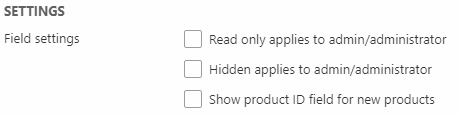
By default, admins and administrators can see and edit all fields - also if the field is marked as Read only or Hidden in the field settings.
However, if you check the fields in the Settings section at the bottom (Settings > Ecommerce > Advanced configuration > Fields), you can:
- Make the Read only state apply for admins/administrators too
- Make the Hidden state apply for admins/administrators too
- Allow editing of the system ID when creating new products
Prices
The Prices section contains advances settings primarily related to VAT and price calculations (Figure 15.1).
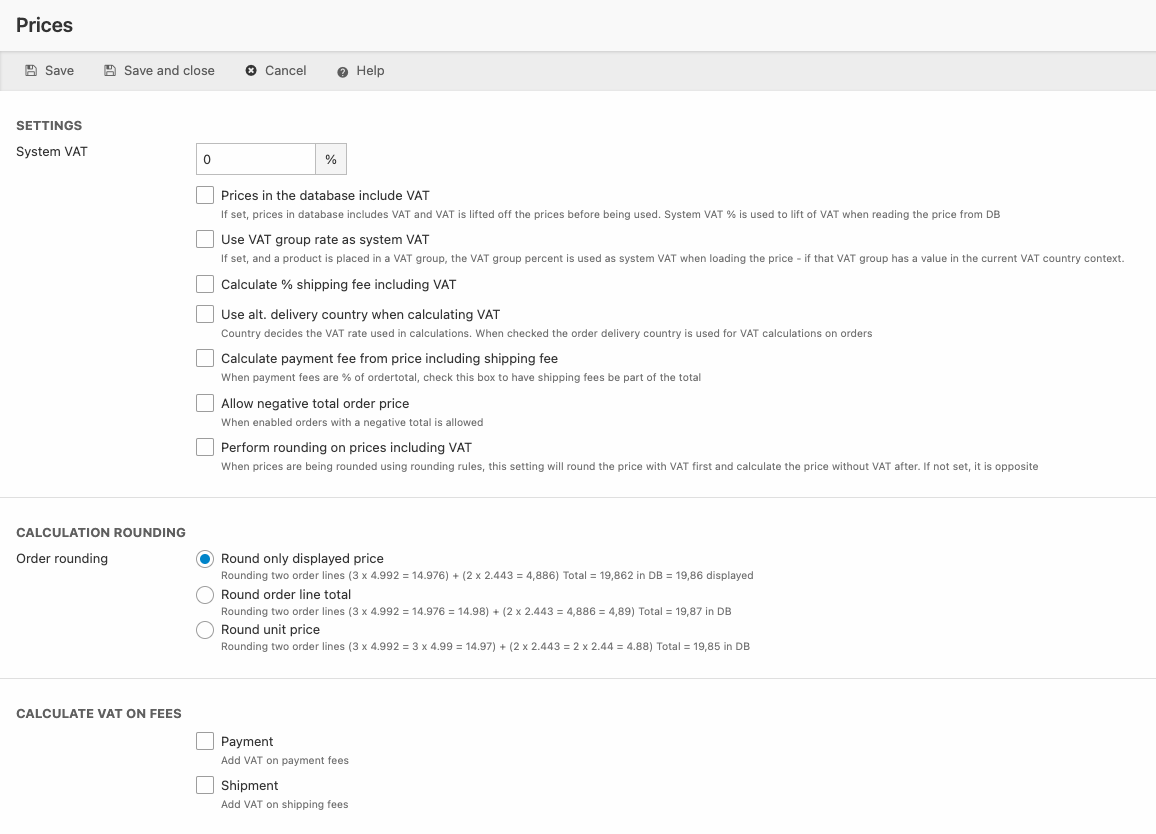
The Settings section contains the following advanced settings:
|
Setting |
Used for |
Comments |
|
System VAT |
Use this to set the System VAT rate |
|
| Prices in the database include VAT | If set, prices in database includes VAT and VAT is lifted off the prices before being used. System VAT % is used to lift of VAT when reading the price from DB |
Process:
|
|
Use VAT group rate as system VAT |
Replaces system vat with vat group rates (when available) in price calculations. |
Use this in conjunction with Prices in the database include VAT to subtract VAT group rates instead of system VAT rates for price calculations. This is appropriate if the database VAT is differentiated. |
|
Calculate % shipping fee including VAT |
Adds VAT to shipping fees set to a fixed percentage of the order price. |
|
|
Use alt. delivery country when calculating VAT |
Calculate VAT based on the delivery country rather than the billing country |
Often required by law, check your local VAT authority for clarification. |
|
Calculate payment fee from price including shipping fee |
Calculate payment fees based on the order price including any shipping fee |
If unchecked, payment fees are calculated based on the order total before shipping charges |
|
Allow negative total order price |
If checked, discounts and vouchers may result in a negative total order price. |
|
| Perform rounding on prices including VAT | When prices are being rounded using rounding rules, this setting will round the price with VAT first and calculate the price without VAT after. If not set, it is opposite | |
| Round only displayed price | Keep the unrounded prices in the database and only round the displayed price | Rounding two order lines (3 x 4.992 = 14.976) + (2 x 2.443 = 4,886) Total = 19,862 in database = 19,86 displayed |
| Round order line total | Calculate order line total based on unrounded unit prices | Rounding two order lines (3 x 4.992 = 14.976 = 14.98) + (2 x 2.443 = 4,886 = 4,89) Total = 19,87 in database |
| Round unit price | Round the unit price before calculating the order total | Rounding two order lines (3 x 4.992 = 3 x 4.99 = 14.97) + (2 x 2.443 = 2 x 2.44 = 4.88) Total = 19,85 in database |
The Calculate VAT on Fees section makes it possible to toggle VAT on payment & shipping fees.
Images
With the Images settings (Figure 16.1), you can select default images for products and product groups and define image patterns to render images in frontend. You can also setup the Autoscale tool.
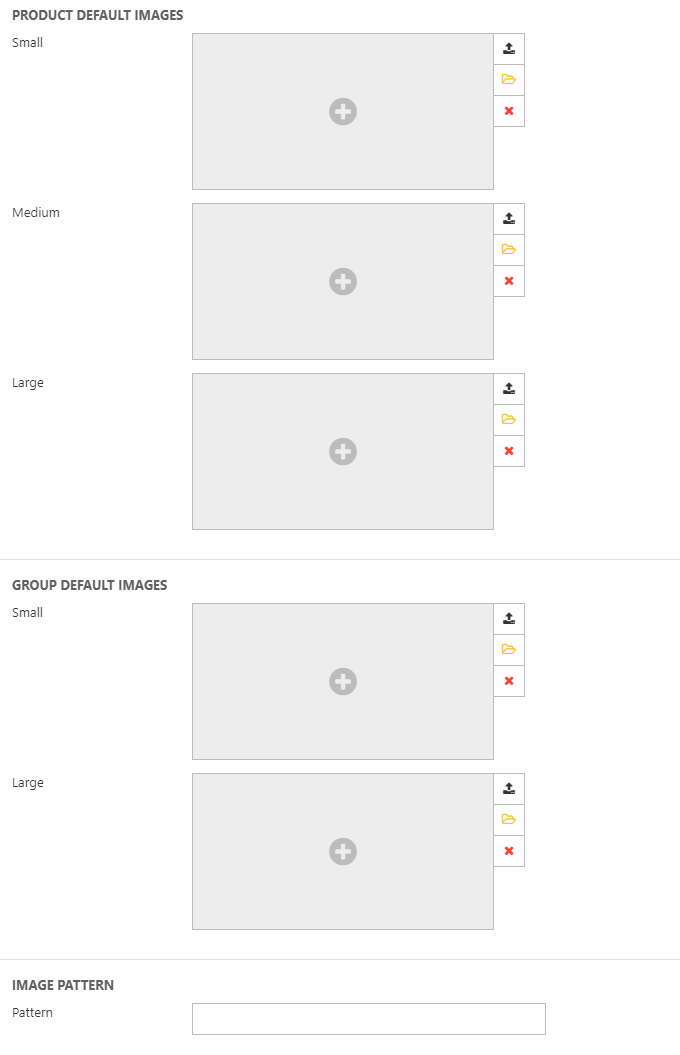
You can:
- Choose a small, medium, and large default image for products
- Choose a small, medium, and large default image for product groups
- Define an image pattern to render the images in frontend
You can read more about image patterns on shops here, and more about image patterns on Product Catalogs here.
Below, is the settings for the Autoscale tool (Figure 16.2).
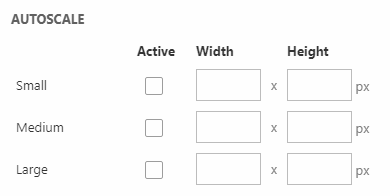
The Autoscale tool enables automatic resizing of images in frontend. Autoscaling ensures that product images are always displayed in sizes you can configure, preventing your design from breaking due to different image sizes.
You must:
- Specify a width and height for your small, medium and large image sizes
- Activate the sizes you want to work with on your solution.
If the scaling parameters are larger than the original picture size, then the image will not be resized. An image placeholder will still be rendered displaying the excess pixels, but Dynamicweb will not upscale images, since that looks just awful.
You can read more about autoscaling in this article.
Shopping Cart
The Shopping Cart settings (Figure 17.1) lets you control the behavior of the Shopping Cart-app.
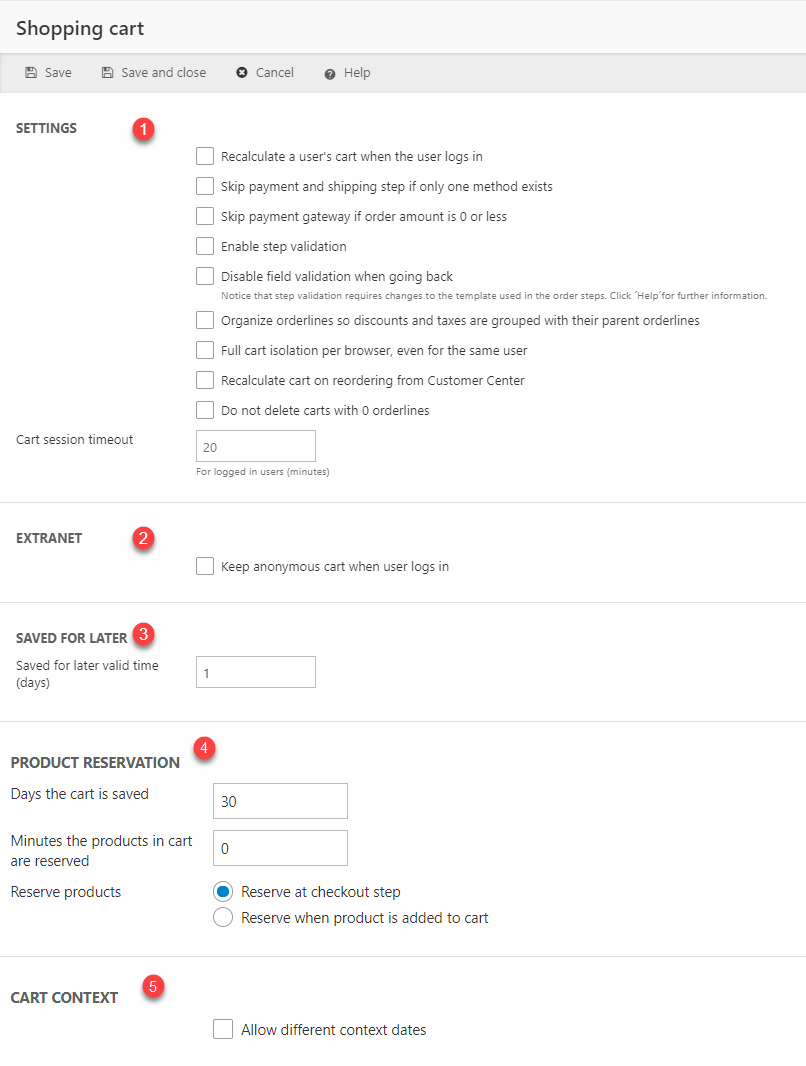
The options are:
|
# |
Setting |
Use |
Comment |
|
1 |
Recalculate a user’s cart when the user logs in |
- |
Usually relevant if customer-specific prices & discounts are used on the solution |
|
Skip payment and shipping steps if only one method exists |
- |
||
|
Skip payment gateway if order amount is 0 or less |
- |
You must also check 'Allow negative total order prices' in Settings > Ecommerce > Advanced > Prices |
|
|
|
Do not render user address in address loop |
When this checkbox is enabled,the default alternative address is not rendered as customer info and cannot be used as billing address. |
This setting is used in scenarios where addresses are imported from an external system and you don’t want the address from the standard user fields to show up in the addresses loop. A better solution would be to set a default address during the addresses import. |
|
|
Copy customer info to delivery info fields if empty |
If checked, customer information from the billing address fields will be copied to delivery address fields if no delivery address is provided. |
This ensures that orders have delivery address information when accessed via the backend – or when exported to an external system. All delivery fields must be empty for the copy to happen. |
|
Enable step validation |
Activates the built-in order step validation |
||
|
Disable field validation when going back |
- |
||
|
Organize orderlines so discounts and taxes are grouped with their parent orderlines |
- |
For product discounts the parent is the order line. For order discounts the parent is still the order, so you will probably see no change. |
|
|
Full cart isolation per browser, even for the same user |
- |
Not recommended, if you need this you’re going down a weird and dangerous road… |
|
|
Recalculate cart on reordering from customer center |
- |
Should be default behavior on all new installations |
|
|
Do not delete carts with 0 orderlines |
- |
This is primarily useful if you are extending or manipulating carts/quotes locally or on an external system, as quotes need to be returned with the correct ID, and this is not possible if the empty cart is deleted before being enriched externally |
|
|
|
Do not delete orderlines with 0 quantity |
By default, orderlines with a quantity of 0 are removed from a cart – but by checking this setting they are instead retained. |
|
|
Cart session timeout (minutes) |
Defaults to 720 minutes |
||
|
2 |
Keep anonymous cart when user logs in |
If active, an anonymous cart will be merged with any cart saved on the user. |
|
|
3 |
Saved for later valid time (days) |
- |
This setting specifies for how long a product should be present on a Saved for later list |
| 4 | Days the cart is saved | - | This setting specifies how many days the cart is saved for if not fully completed |
| Minutes the products in cart are reserved | Value must be > 0 | See more below | |
| Reserve products | - | This setting specifies when a product is reserved:
|
|
| 5 | Allow different context dates |
- | Allow different context dates to change the OrderTime context (see more below) |
Product Reservation
With product reservation a product which is added to the cart becomes unavailable to other customers for a time.
To use product reservation, you need to:
- Toggle Only show products - That are in stock on this page
- Toggle A check for stock status in the shopping cart app settings - this makes it possible to show notify customers during checkout if the product is out of stock (incl. reserved).
As described above you must also specify how long and at what point the product should be reserved for.
Allow different context dates
Occasionally, you may need to change the Context.OrderTime parameter of an order - e.g. if you want to test whether price calculations, discounts, or product publication periods work as intended.
To do so, simply use the OrderTime parameter in your query string, using one of the following formats:
- OrderTime=MM/dd/yyyy
- OrderTime=MM.dd.yyyy
- OrderTime=MM-dd-yyyy
The Allow different context dates checkbox must be checked.
Order discounts
The order discount settings (Figure 19.1) control advanced behavior related to discounts:
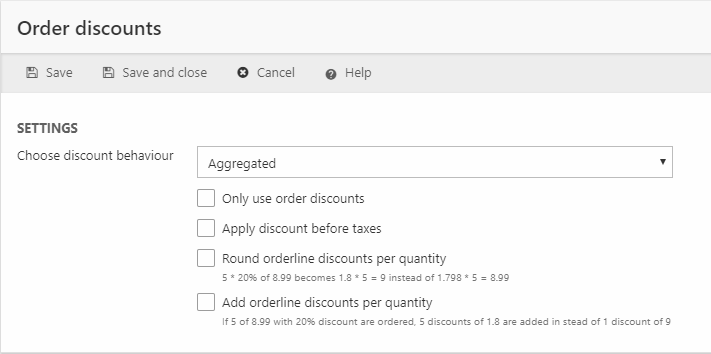
The following settings are available:
- Choose discount behavior controls how discount are applied:
- Aggregated allows discounts to stack (default behavior)
- Highest forces the system to apply the highest value discount
- Lowest forces the system to apply the lowest value discount
- Only use order discounts disables discounts (old) on the solution
- Apply discounts before taxes forces the system to apply discounts based on prices before taxes
- Round orderline discount per quantity forces discount calculations to use rounded numbers
- Add orderline discount per quantity forces the system to list each product discount as a separate order line
Read more about discounts in this article.
Sales discounts
An older implementation of discounts called Sales Discounts may be present on some solutions. Don’t use it – it’s been replaced by Order Discounts. If you are already using Sales Discounts, don’t use Order Discounts, as the combined results may be unpredictable and are untested.
We recommend switching your older solutions to Order Discounts instead.
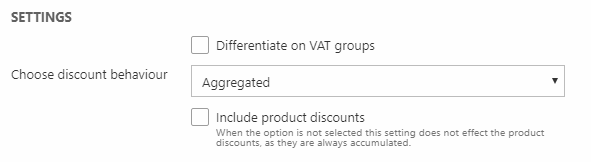
In the Sales discounts settings (Figure 20.2), you can:
- Choose to differentiate on VAT groups
- Select a discount behaivour
- Aggregated allows discounts to stack
- Highest makes the system use the discount with the highest value
- Lowest makes the system use the discount with the lowest value
- Enable inclusion of product discounts
Loyalty points
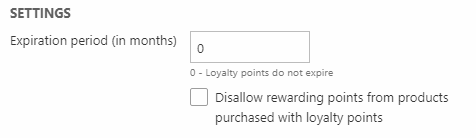
In the Loyalty points settings (Figure 21.1), you can set an expiration period for rewarded loyalty points.
You can also check Disallow rewarding points from products purchased with lotalty points to keep loyalty point transactions from triggering new loyalty point awards.
Read more about loyalty points in this article.
Gift cards
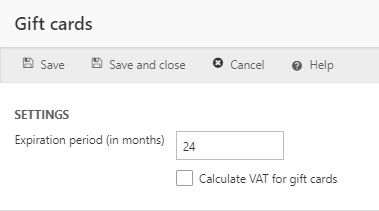
Per default, the expiry date for gift cards is 24 months ahead of the time of purchase, as per Danish law, but if you do business in other countries you can change it to suit your needs.
In the Gift cards settings (Figure 22.1), you can
- Specify an expiration value in months
- Check Calculate VAT for gift cards
The expiry date is defined as the purchase date + the number of months defined in this field. The expiry date is calculated once - upon creation of the gift card.
When 'Calculate VAT for gift cards' is checked, VAT calculated based on the VAT group or if this is not set the country VAT rate.
You can read more about gift cards in this article.
Auto-numbering
Dynamicweb auto-numbers every order registered in the system – ORDER1, then ORDER2, etc.
However, you can customize the way orders are assigned a number with pre/postfixes and different numbering:
Go to Settings > Ecommerce > Advanced configuration > Auto-numbering (Figure 23.1)
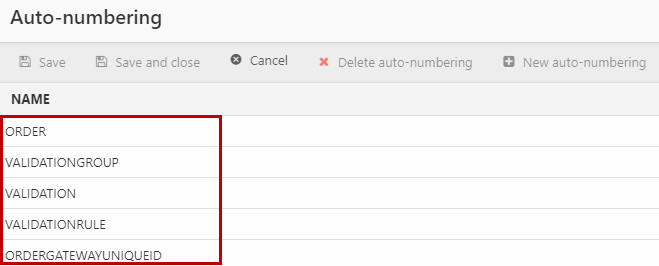
Click any of the auto-numbering schemes (e.g. "ORDER") to open the edit view (Figure 23.2)
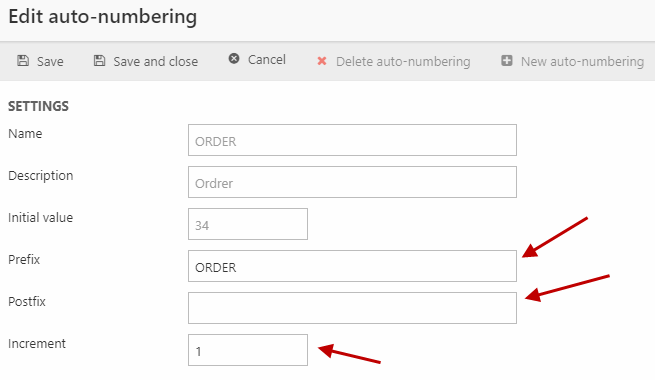
From here, you can change:
- The order prefix (ORDER by default)
- The order postfix (empty by default)
- The increment by which an order value should increase when a new order number is generated
You can read more about orders here.
Auto assign products
The Auto assign products node allows you to create product assignment rules - they are used on PIM groups to automatically assign products to groups based on various criteria - read more here.