
Load Balancing
Load balancing is the process of distributing incoming traffic across multiple backend servers.
If properly configured, load balancing improves responsiveness and reliability, and allows for hundreds of thousands – of not millions – of concurrent requests from users and clients.
Load Balancing is an advanced subject, and we highly suggest you contact us before attempting to use the feature.
Please also note:
- You must have your own load balancer, e.g. Microsoft ARR or NGINX Plus
- All solutions must run on the same database OR you must handle replication
- All solutions must use the same files folder OR you must handle replication
- All solutions must run the same version of Dynamicweb
To enable Load Balancing on your solution, download a Load Balancing dll:
- Connect to myget.org
- In the dynamicweb-packages feed, locate the Dynamicweb.LoadBalancing.Providers package
- Download & unpack the NUPKG file
- Go to lib > net46
- Move the Dynamicweb.LoadBalancing.Providers.dll to the bin folder on your solution
You can remove this dll again at any time to stop load balancing immediately, without anything breaking (except load balancing, of course…).
Adding instances
When the dll-induced IIS reset is finished, you can access the Load Balancing feature from the solution backend(s):
- Go to Settings > Web & Http
- Click the Load Balancing node
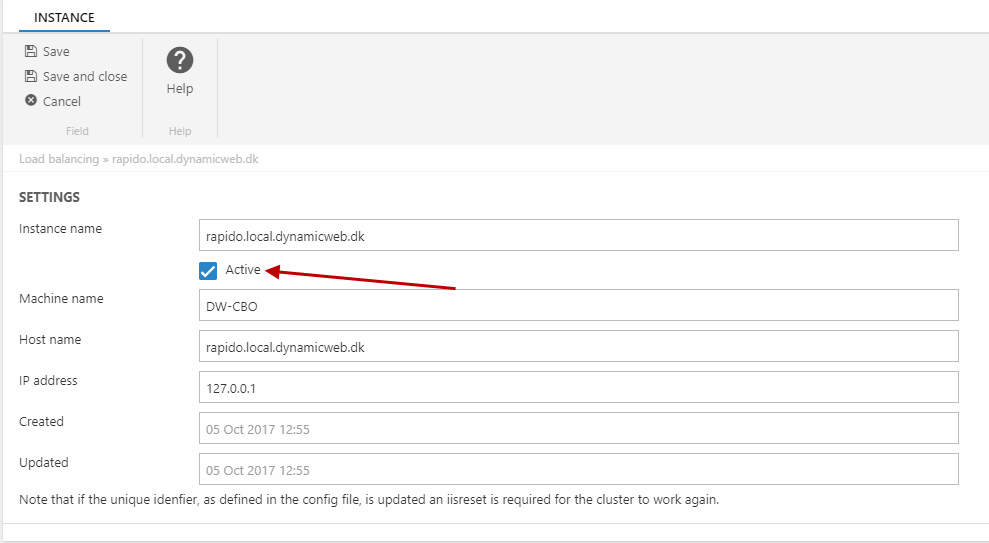
When Load Balancing starts up, your solution will register itself (Figure 2.1).

If the details are not correct, right-click and edit the instance (Figure 2.2) – you must edit an instance to set it to active.
To add more instances – the other servers – you can open up the other solutions and repeat the process above, and the instance will be added automatically. If you like to live dangerously, you can also simply click Add in the toolbar and fill in the details manually.
In the global settings, you can change the primary host - this is the machine executing e.g. sheduled tasks. It is possible to use an IP as the unique identifier instead of a hostname, but it requires some customization. Please contact us on the developer forum before doing so.
Please also note that in NLB setups, the Settings area might have discrepancies between nodes due to clientside caching. Admins should make sure they alway fully refresh the Settings tree (doubleclick Settings in the area menu) before making changes.
Notifications
You can set up email notifications when one of your clusters fails repeatedly:
- Go to Settings > Web and Http > Load Balancing
- Click the Email notifications button
- Configure the notification (Figure 3.1).
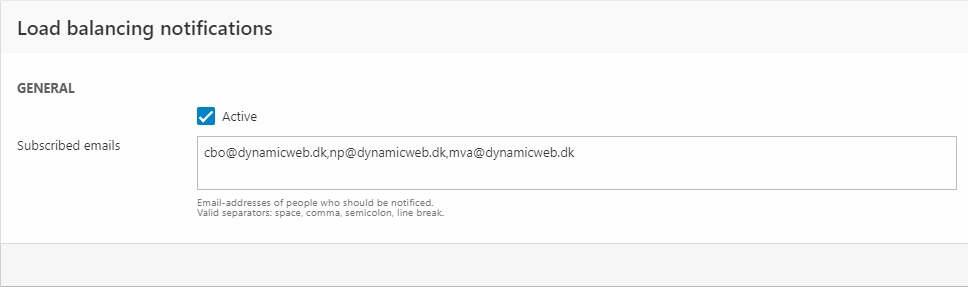
Simply check the Active checkbox and add a list of emails to notify on failure.
Load Balancing also contains a number of system notifications you can subscribe to:
- LoadBalancingCommandNotification.Discarded
- LoadBalancingNodeNotification.BeforeInitialized
- LoadBalancingNodeNotification.AfterInitialized
- LoadBalancingNodeNotification.BeforeBanLifted
- LoadBalancingNodeNotification.AfterBanLifted
- LoadBalancingNodeNotification.TemporarilyBanned
- LoadBalancingNodeNotification.BeforeDisabled
- LoadBalancingNodeNotification.AfterDisabled
For more information on these, please contact us on the forum.