
Warehouses
Warehouses are fixed structures parallel to shops in Dynamicweb Ecommerce – but they can be organized in a manner which makes sense for the product enrichment process, independent of how the products are presented across channels.
The primary function of a warehouse is as a container for warehouse groups. Since warehouse groups are functionally identical to product groups in Ecommerce, you can do two important things on them:
- Select a workflow for the products in the group
- Select a product category for the products in this group
In contrast to product groups in Ecommerce, the warehouse group structure is only for administrative purposes, and can reflect anything you like without impacting how the products are published across channels. Name them after ERP codes, after manufacturers, or something else which makes sense for a particular project.
A single warehouse is typically enough, except for PIM projects with multiple data sources.
To create a warehouse:
- Go to Settings > PIM > Warehouses
- Click New warehouse in the toolbar
- Name the warehouse
- Select a preview page – this page must contain a product catalog app, and will be used to render previews
- Under Indexing
- Check the Auto-build index when products are updated checkbox
- Select a Product index to auto-update when products in this warehouse are saved
- Save
After saving, the settings not related to PIM warehouses disappear – this is normal and nothing to worry about.
In addition to these basic settings, you can also define image patterns on a warehouse – or specify a folder to upload images to when using the images field in PIM.
Groups
Warehouses contain warehouse groups, which are used to group products and product containers.
They are in all respects identical to product groups in Ecommerce, except of course that they are not published to frontend – and can therefore be named and organized in a way which makes sense in a PIM context (Figure 3.1).

Most of the time, groups will be imported from an external system to PIM along with the products. As of Dynamicweb 9.9 you can also copy the group structure from an existing Ecommerce shop by right-clicking the warehouse and selecting Copy group structure.
To create a group manually:
- Right click on a warehouse or an existing group to open a context menu
- Click New group/New subgroup
- Fill in the appropriate fields (e.g. Name and Number)
- Save
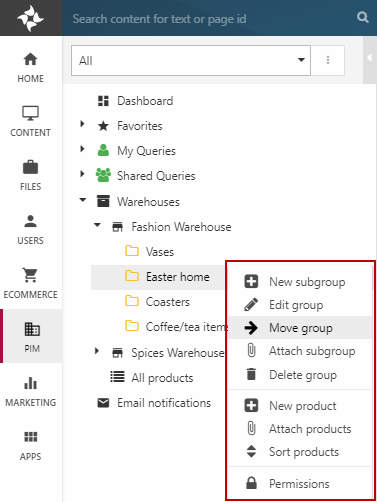
The context menu (Figure 3.2) also gives you access to other group-related functions, such as:
- Creating subgroups
- Editing the group settings
- Moving or deleting the group
- Attaching groups and products to the group
- Sorting products inside the group
- Setting permissions
Groups and subgroups may be sorted by right-clicking a warehouse/group and pressing sort subgroups. Then, you can rearrange the groups in the content pane and save the changes (Figure 3.3). You can use the Sorting button in the toolbar to sort alphabetically in ascending or descending order - this is useful if you have a lot of warehouse groups.

From all view modes you can select products and use the Add to group button manage group membership (Figure 4.1).
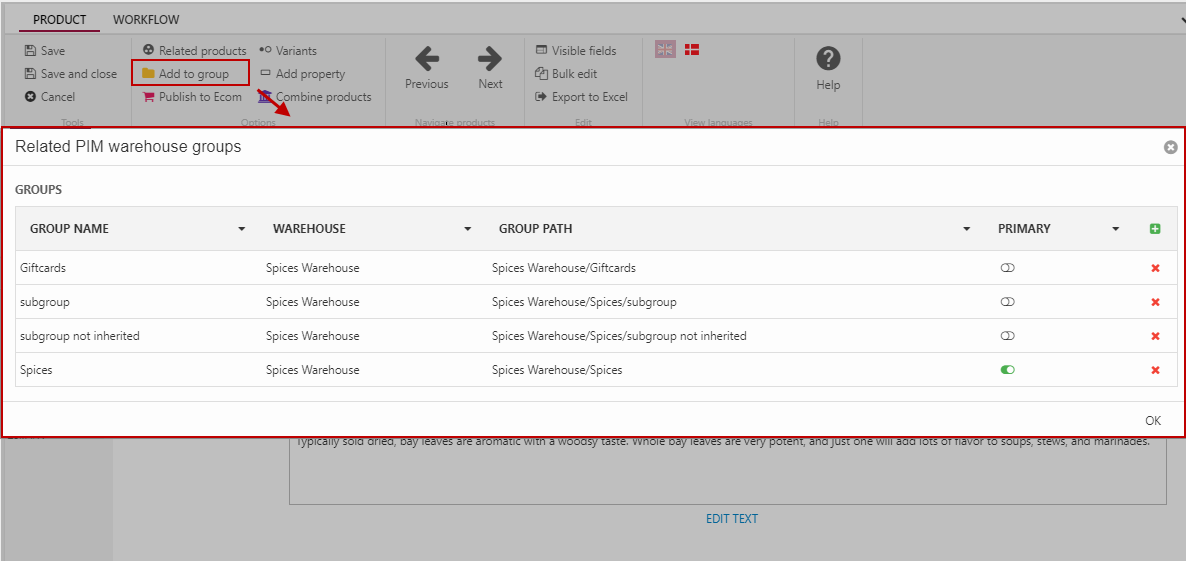
This allows you to review basic information for each group the product belongs to;
- Name
- Warehouse
- Group path
- Primary group status
Use the green plus-icon to add the product to a new warehouse group.
The "All Products" lists
Two special product list nodes – All products and All PIM products – exist outside of the regular warehouse group structure (Figure 5.1).
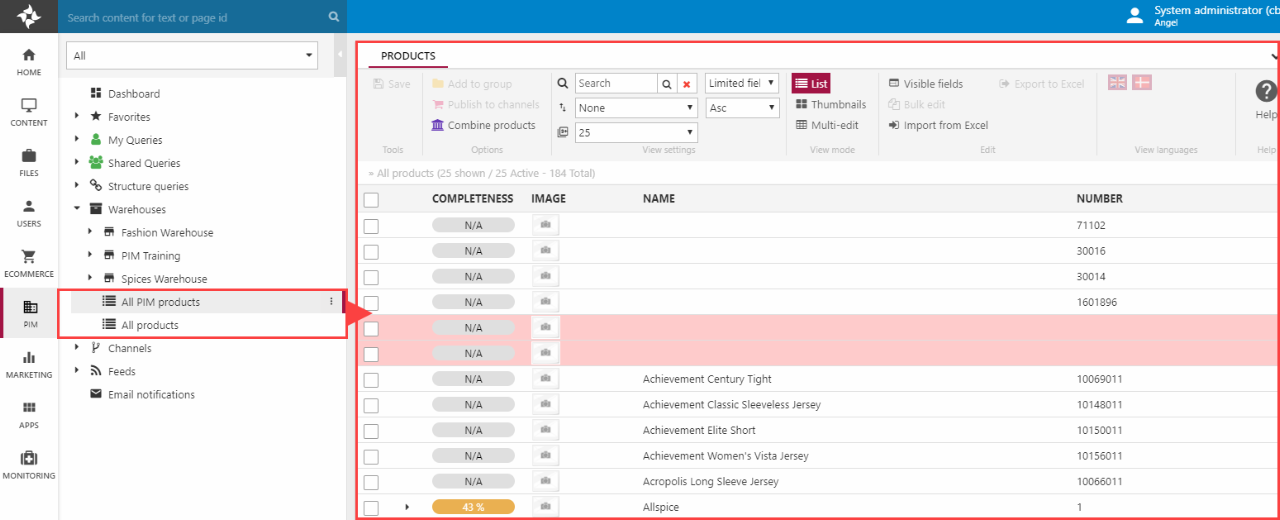
These lists have a limited scope, and are primarily used to locate ”marooned” products and add them to a product group – or simply to quickly search the product catalog.
The following colour indicators are used in the All products-list:
- Greyed out products do not exist in the current working language
- Red products are inactive – activate them by right-clicking them and selecting activate or by clicking the little red inactive-icon on the list
- Products with a red background are not members of a product group – right click the product and select add to group to add them to a group
Other products – black-text & white background – are active in the selected language and is placed in at least one product group on the solution.