
Deployment
Deployment is the process of moving data from one environment to another, e.g. from a staging website to production website. The Deployment tool in Dynamicweb provides some basic functionality that makes it easier to transfer data from one installation to another, and removes some of the time consuming manual work that is usually required when doing so.
Deployment provides a one-way data transfer where data is pushed from source to destination:
- It is not meant to be a merge tool, so it is not possible to push and pull changes between two installations at the same time.
- It is not intended for transfering large amounts of data such as products or users - only settings related to these. To transfer data such as products or users please use data integration.
We provide a set of basic configurations for deploying data to the following areas of DW:
- Content
- Ecommerce
- Users
- Forms for Editors
On a technical level the Deployment tool uses a series of providers to move data – files, records in the database, configuration setting, content, etc. – from the source to the destination. It is fairly trivial to use these providers to extend the default data configuration – or create your own from scratch.
It is highly recommended that both installations (source and destination) run on the same assembly versions. Any differences in assembly versions might lead to errors or unexpected results.
Limitations & Recommendations
The Deployment tool is a “dumb” tool, which means that you have to make sure you do some of the operations in the correct order to avoid errors and odd behavior.
The generally recommended order of operations when deploying is:
- Copy the templates folder to your files folder before transferring any content dependent on templates
- Item types must be transferred BEFORE content using tjem (websites, pages, gridrows, paragraphs, items)
- Content should be deployed in the following order:
- Areas
- Pages
- GridRows
- Paragraphs
- If deploying to Ecommerce you must:
- Transfer EcomLanguages before anything else
- Transfer the rest of the internationalization settings (Currencies, Countries, VAT groups, etc.)
- Transfer the rest of the Ecommerce data while keeping in mind to e.g. deploy custom field types before deploying fields relying on them, etc.
Bear in mind, that not everything can be deployed yet – please consult the provider descriptions below for details.
Destinations
Before data can be transferred, at least one destination should be created and configured.
Destinations can be configured by going to Settings > Developer > Deployment > Destinations and clicking Add in the toolbar.
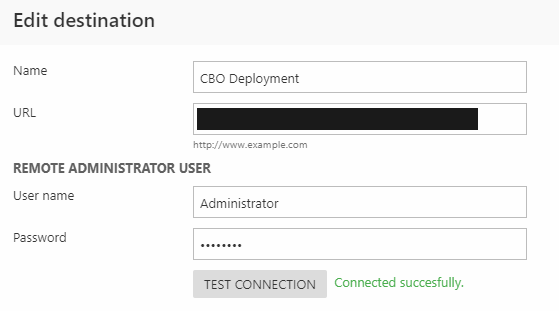
A destination must have the following (Figure 2.2):
- A name
- An URL that points to a Dynamicweb installation
- Administrator credentials for the remote Dynamicweb installation
You can verify the URL and credentials by using the Test connection button which will try to communicate with the destination and authenticate using the administrator credentials.
Destination settings are stored as files in the /Files/System/Deployment/Destinations folder.
Deploying Data
The default data configurations supplied by us are not automatically available – download them here. They must be placed in the /Files/System/Deployment/DataGroups folder.
Once a destination has been configured, you can deploy data from the source to the destination using either the default data configurations or a custom data configuration:
- Go to Settings > Developer > Deployment > Deploy
- Select one of the data configurations, e.g. Content
- Select a Target and the data you want to deploy (Figure 4.1)
- Click compare selected to compare the data – or select and continue to skip the comparison step
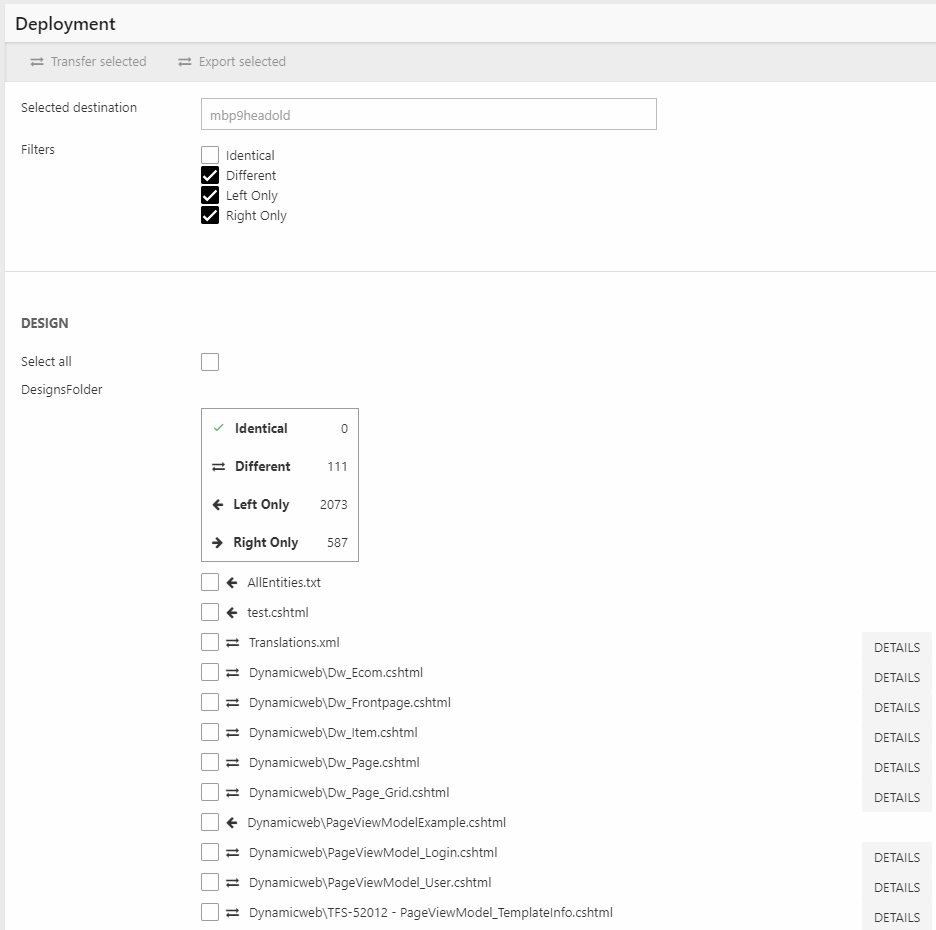
The comparison view provides you with an overview of the differences between the source and the destination. Use the filters on top to limit the selection to only a subset of the compared items, e.g. those only on the left (source), right (destination), or which are different from each other.
For data which exists on both solutions but with differences, you can click the Details button to get an idea of what the differences are.
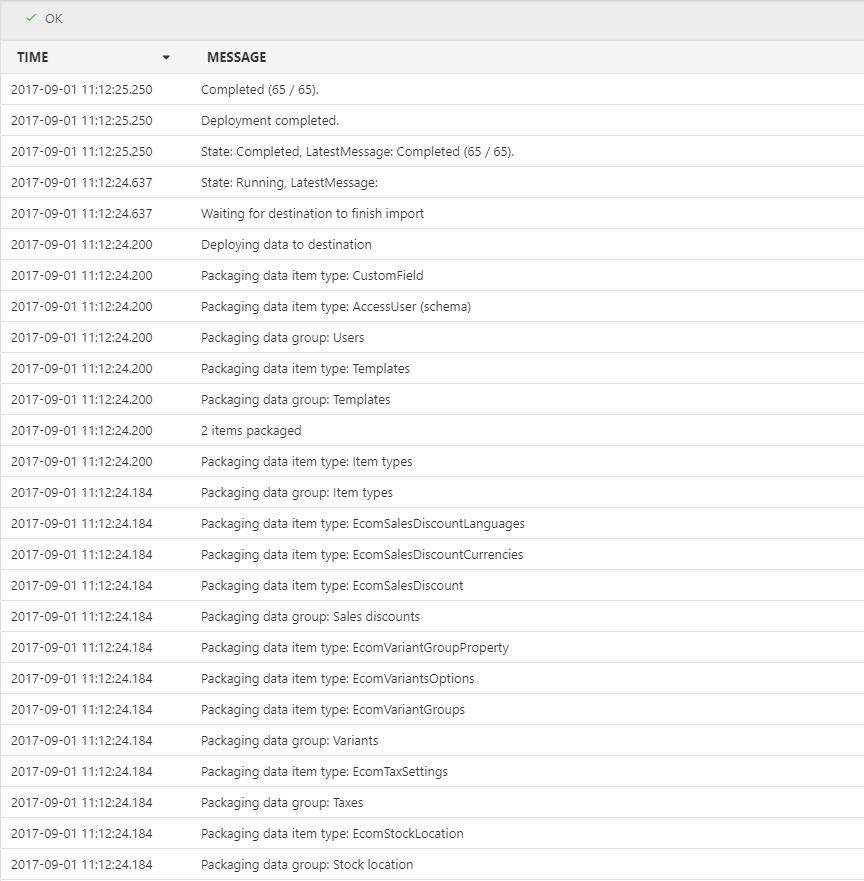
After comparing, select the data you want to transfer and click Transfer selected – the data will be transferred and you will be presented with a log, hopefully with a positive outcome (Figure 4.3). Old logs can be accessed from Settings > Developer > Deployment > Deployment logs.
On a technical level, the data selected is retrieved from the source, then serialized as a package file before being transferred to the destination, where it is deserialized and the data is restored.
Data configurations
A data configuration is a configuration which details what kind of data you want to transfer to a destination. Since all solutions are different no default data configurations are shipped with a solution, but we do have a set of configuration for download which you can then modify to your liking – find them here. They must be placed in the /Files/System/Deployment/DataGroups folder.
At the time of writing this set of data configurations covers:
- Content
- Ecommerce settings
- Users
- Forms for Editors
They are far from comprehensive – and some of the most explicit limitations are:
- Draft & Workflow information is not deployed
- Language layers are deployed as regular websites – don’t select them when transferring areas/websites unless this is what you want
- Permissions, split tests & personalization settings are not deployed
Please note – and I know we’ve stated this numerous times but it’s that important – that if you’re looking to move data such as users or products you should use the data integration framework and not deployment.
When you create a data configuration you can also specify which services caches you want to flush when this configuration is used to deploy data (Figure 5.1).
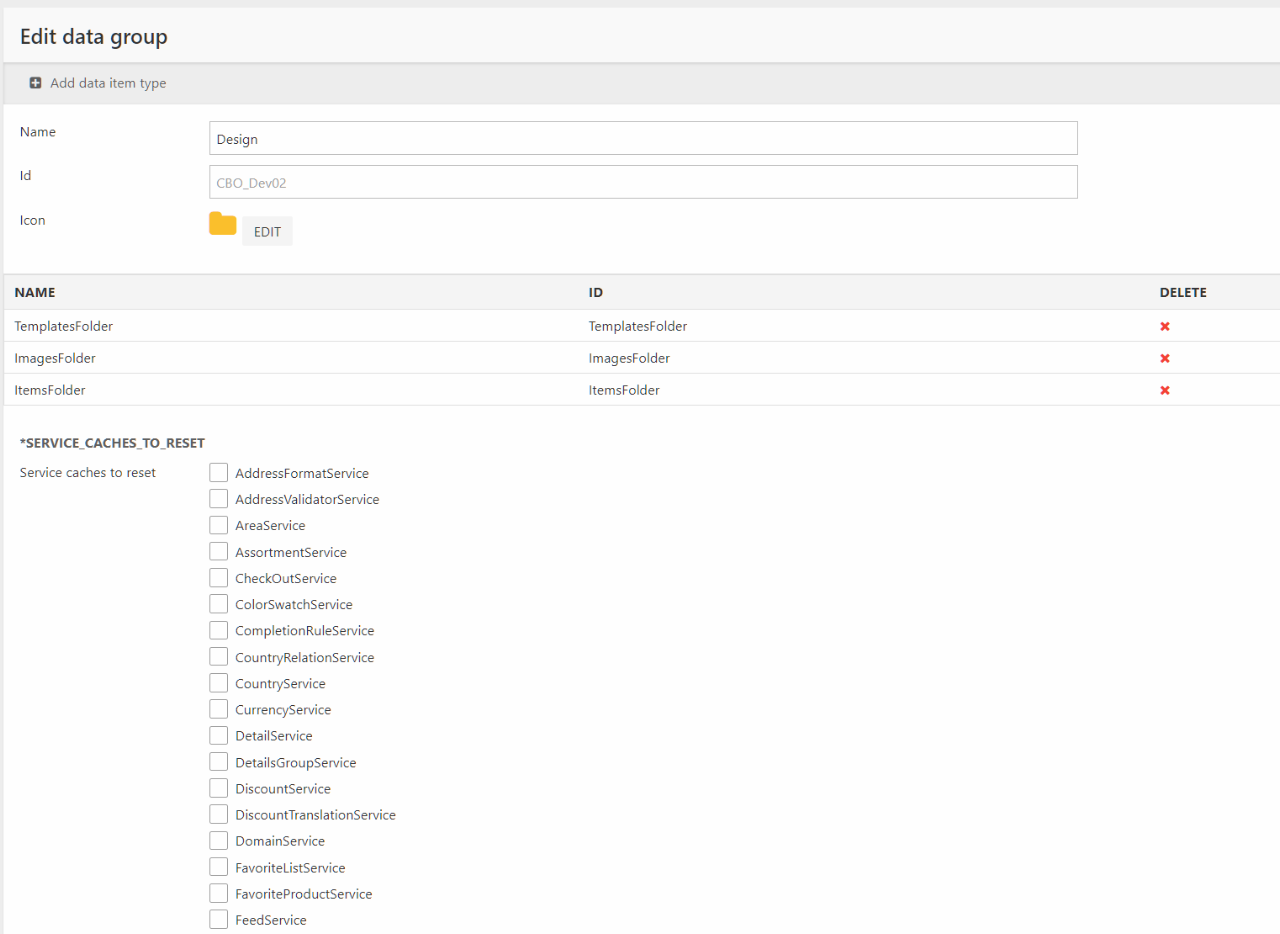
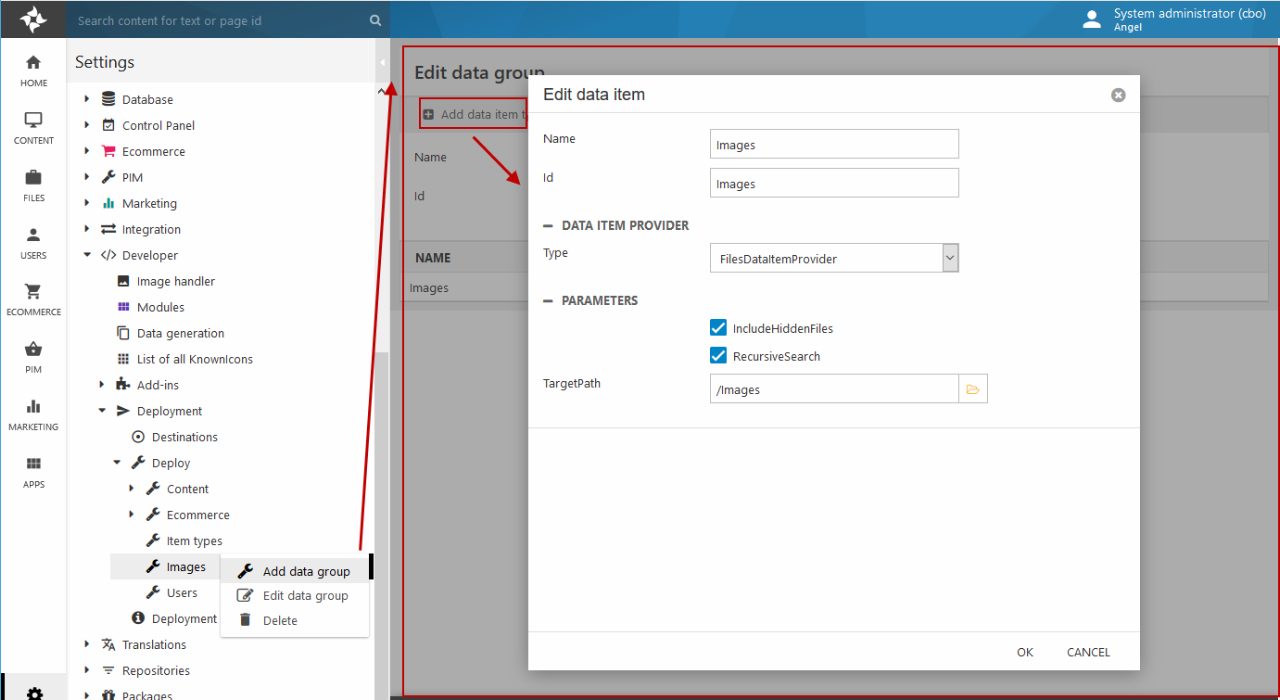
To create a custom data configuration (Figure 6.1):
- Go to Deployment and open the context menu for a configuration
- Click Edit data group or Add data group
- Click Add data item in the toolbar or click an existing data item to edit it
- Fill in name and id, then select a data item provider and configure any relevant parameters
The following standard data item providers are available:
|
Provider |
Function |
Parameters |
Comments |
|
ContentDataItemProvider |
Transfers content – areas, pages, and paragraphs |
None |
Includes the Area, Page, Paragraph , and Gridrow providers |
|
AreaDataItemProvider |
Transfers websites (areas) |
None |
Language layers are deployed as regular websites |
|
PageDataItemProvider |
Transfers pages |
Can be limited to a specific area (website) |
|
|
ParagraphDataItemProvider |
Transfers paragraphs |
Can be limited to a specific area (website) |
|
|
GridRowDataItemProvider |
Transfers gridrows |
Can be limited to a specific area (website) |
|
|
FormsForEditorsDataItemProvider |
Transfers Forms for Editors forms with fields & options |
None |
Includes the Form, Field, and Option providers |
|
FormDataItemProvider |
Transfers Forms for Editors forms |
None |
|
|
FieldDataItemProvider |
Transfers Forms for Editors fields |
None |
|
|
OptionDataItemProvider |
Transfers Forms for Editors field options |
None |
|
|
|
|
|
|
|
SchemaDataItemProvider |
Transfers schema changes (table columns) |
|
|
|
SettingsDataItemProvider |
Transfers configuration settings |
|
|
|
SqlDataItemProvider |
Transfers database records |
|
|
|
FilesDataItemProvider |
Transfers files |
|
Typically used to transfer e.g. Design files and Images. |
Deployment packages
If your source and destination solutions are in separate networks you can export a deployment package on the source, move it to the destination, and then import the deployment package on the destination solution using a scheduled task.
To export the deployment package:
- Select a data configuration like normal
- Click Select and continue
- Select the data you want to deploy
- Click Export selected
- Specify a folder – defaults to /System/Deployment/Packages – and a name
To import the deployment package:
- Move the deployment package file to a folder on the destination solution file system, e.g. /Files
- Create a new scheduled task using the Deploy data items from upload folder scheduled task add-in
- In the scheduled task add-in settings, point to the folder where you placed the deployment package
- Optionally add an email to notify if an import fails
- Run the scheduled task
SkipCompatibilityCheck
Normally the Deployment tool relies on both the source and the destination running the exact same version of Dynamicweb, but it's possible to override this at your own risk. To override this check add the following to your GlobalSettings file: