
Item types
An item type is a kind of template which can be used for two things:
- Creating custom content types with exactly the fields required for a particular kind of content, e.g. a newsletter, a blog post, etc.
- Creating custom settings for websites, pages, users, etc.
Item types are created and administered from the Item types node under the Settings-area in the Dynamicweb backend (Figure 1.1).
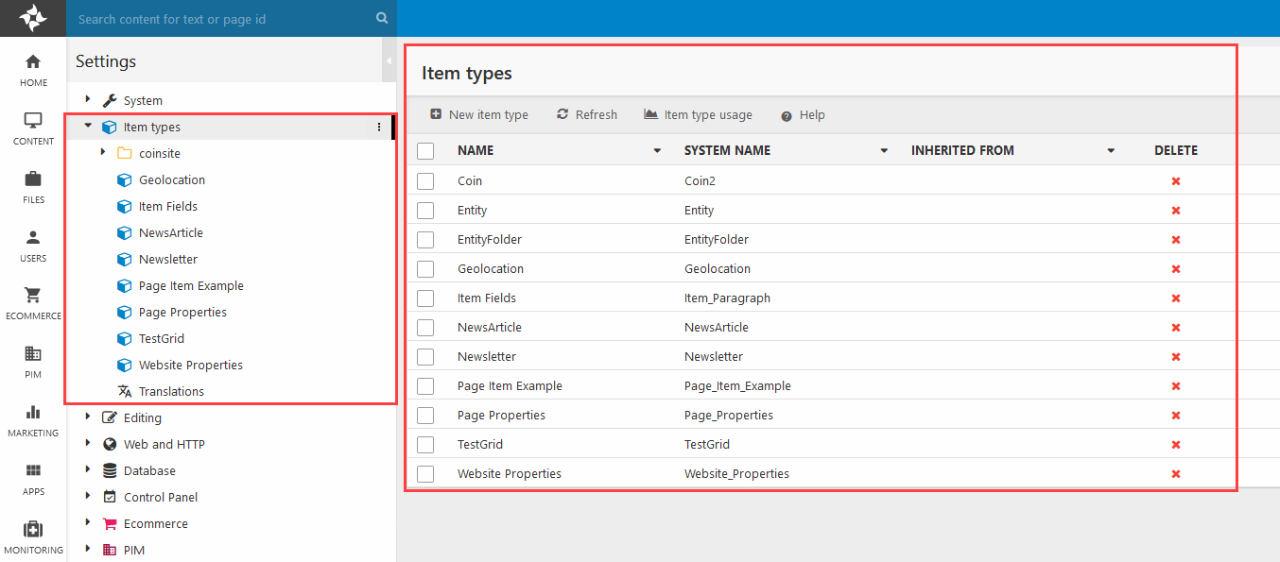
You can use the area tree to browse for, and open, any of the existing item types on the solution. The existing item types are also listed in the content pane.
Using the toolbar you can:
- Create new item types
- Refresh the item type list
- View the item type usage
When creating a new item type, you will first be presented with the item type settings interface – this interface is described below.
Item type settings
When you create a new item type you will be presented with the item type settings (Figure 2.1). This is where you define the kind of item type being created and other basic properties.
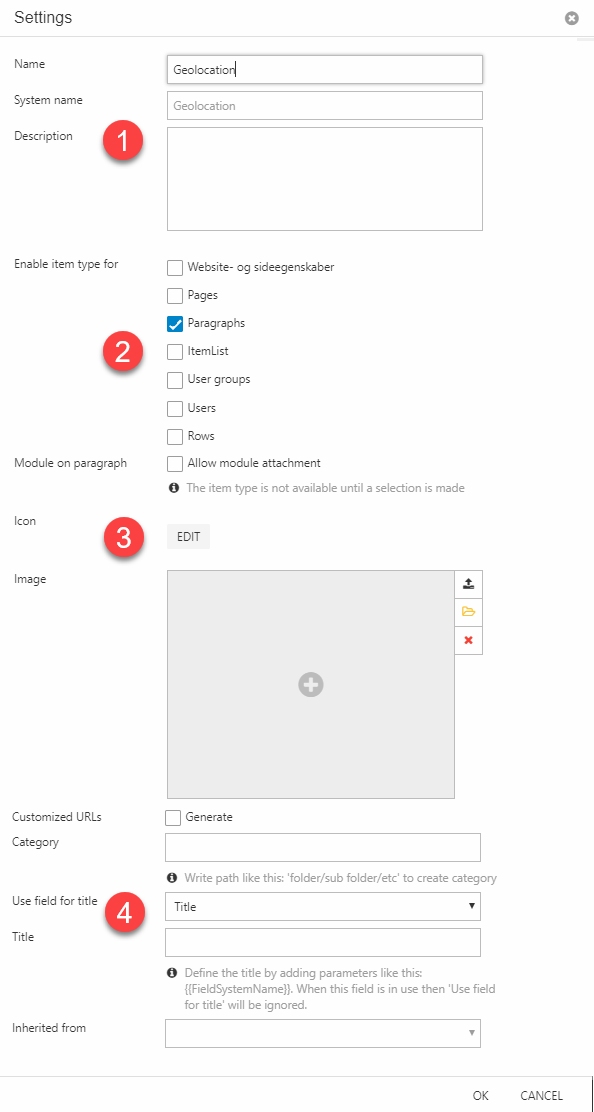
The settings contain the following:
- A section for providing a name, a system name, and optionally a description
- A section for defining what this item type can be used for:
- Extending Website- and page properties
- Creating pages and/or paragraphs
- Creating items in an ItemList
- Extending user group and/or users
- Extending visual editor rows
- A section for customization options:
- Icon - shown in lists and when creating an item of this type if an image has not been selected. If nothing is selected we use a default box-icon
- Image - shown when creating a new page/paragraph based on this item type
- Customized URLs enables custom URLs for paragraph and page items – these are generated from paragraphname and PageMenuTitle respectively, unless the Use in URL field is set in the page properties
- Category generates a group with that name in the item types tree(or adds the item type to an existing group)
- A section for title and inheritance options:
- Use field for title lets you select an item field to use as the title – no fields can be selected before they are created, of course, so this setting is set after fields have been created
- Title allows you to specify item field system name to create a title, in the {{Field1SystemName}} {{Field2SystemName}} format
- Inherit from allows you to select another item type to inherit fields from
These options may seem overwhelming to begin with – it’s easy to get lost in the sheer number of settings and options available to you – but when you have some experience with items, you already know from the beginning what you’re trying to accomplish with the item type, and so checking the right boxes becomes trivial.
Item Fields
An item must always contain one or more item fields (Figure 3.1) – these are the input fields which are used when creating content or configuring a website or a page using the item type.
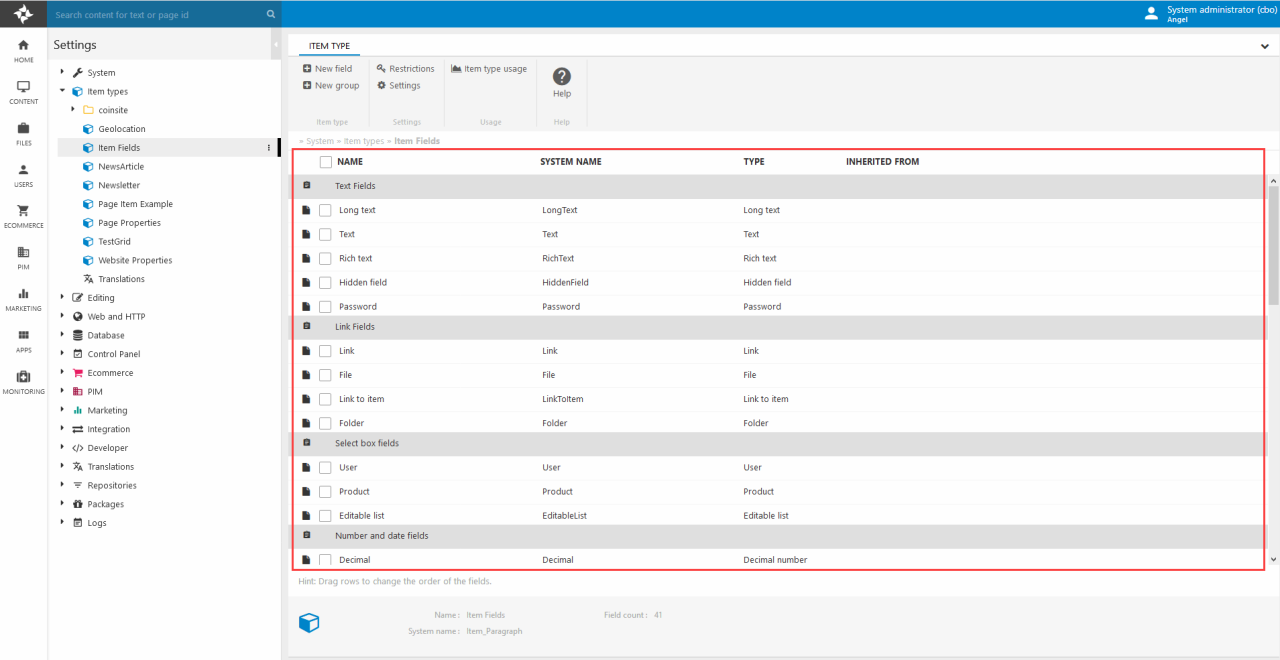
To add a new field click New field in the toolbar - this opens the field settings (Figure 3.2).
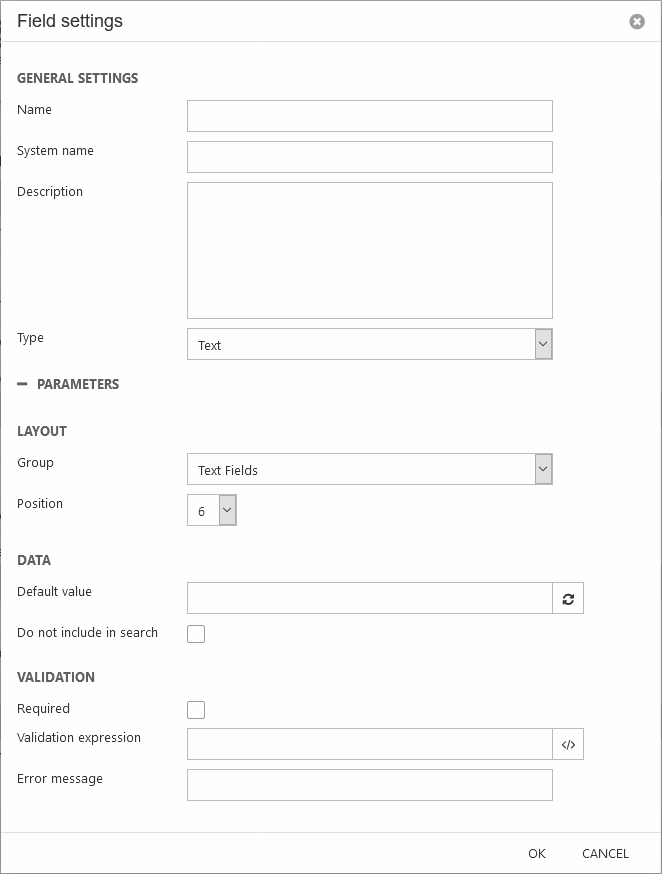
The field settings are used to define the type of field and how it should behave:
- Enter name, a system name, and optionally a description
- Select a field type – see more about the various field types in the next section
- Use the Layout section to set a field group and a position within the group
- Use the Data settings to:
- Set a default value for the field
- Check Do not include in search checkbox is to exclude this field from repositories using the default ContentIndexBuilder
Finally, you can use the Validation settings to set up validation for the field:
- Make the field required
- Enter or select a JavaScript RegEx validation expression
- Write an error message to show to users when the validation fails
You can use values from the context as default values in item type fields.
To do so, use these context objects:
@Request() – get value from System.Web.HttpContext.Current.Request
@Session() – get value from System.Web.HttpContext.Current.Session
@Page() – get value from current Page object, if any. (Current page exists if a valid PageID is in the query string).
@User() – get value from the current User object.
@Code() – evaluate C# code
@Paragraph() – get value from current paragraph object, if any. (Current paragraph exists if a valid ParagraphID is in the query string).
@ProductID() – get value from current product object, if any. (Current product exists if a valid ProductID is in the query string).
For example:
@Page(MenuText) – Get title of page
@User(Name) – get name of user
@User(Email) – get email of user
@Code(System.DateTime.Now.AddDays(1)) – get tomorrow’s date
@Code(1+2) – get 3 (possible, but stupid, granted)
Field types
An item type consists of a number of fields - and you have a lot of options when it comes to item type fields:
- Text fields are for rendering various input fields for text
- Link fields are for linking to folders, files and items
- Select box fields are for letting people select users or products, or for creating lists on the fly
- Number and date fields are for specifying number or dates
- List fields are for letting users select values from various types of lists (with static or dynamic options)
Additionally, you have access to all the HTML5 input fields - and a number of cool-but-unique fields (like the color field and the geolocation field) grouped under the other fields label.
See this article for more information on the different item field types.
Field groups
Item fields may be organized in groups (Figure 6.1) – this is useful for two reasons:
- It’s easier to see what’s going on when fields are groups
- You can set conditions on when to show a particular field group

To create a field group click New group in the item type toolbar and fill in the field group settings (Figure 6.2).
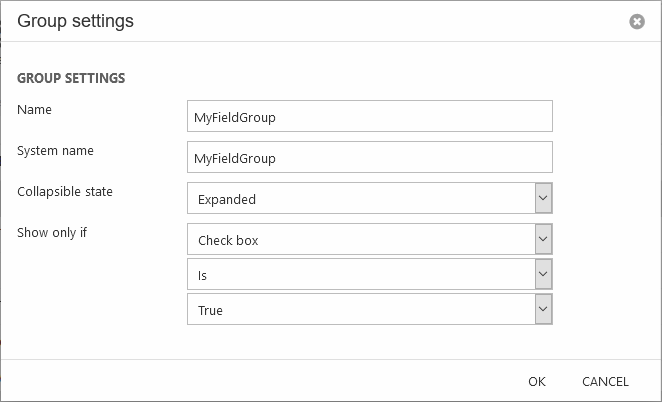
When you’ve created a field group, remember to move (drag & drop) or create a new field under it – if you save an empty field group, it is removed by the system.
Restrictions
By default, new item types are unavailable – they can’t be used anywhere. To enable an item type you must open and configure the item type restrictions, which specify precisely where the item type can be used.
- Click Restrictions in the toolbar to open the restrictions interface (Figure 7.1).
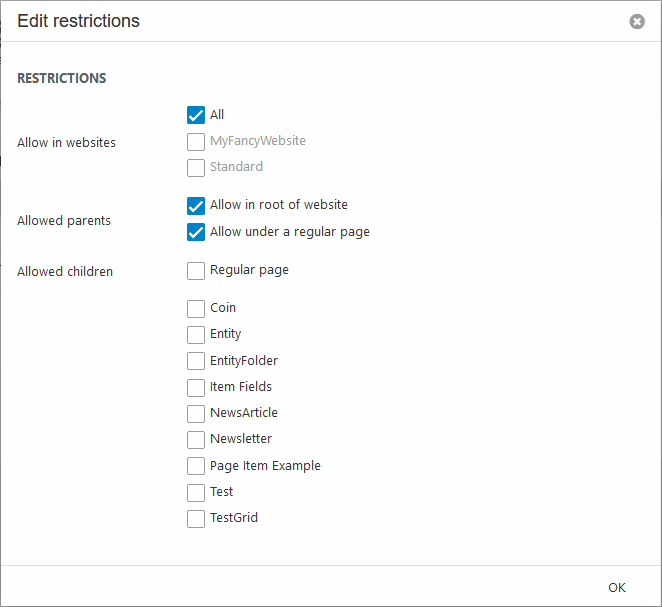
The restrictions interface allows you to specify exactly where the item should be available; allowed websites, parents & children.