
Product Catalog module
The Product Catalog module is used to publish your products on the frontend, and is therefore an essential part of working with Dynamicweb Ecommerce.
You can use the Product Catalog to publish either:
- A single product
- Selected product groups (such as all the top groups of a particular shop)
- A selection of products based on an index-query
And, of course, you can control how they are displayed, searched, and rendered – and much more. Read more below.
Basic Concept
In this section, you will learn about:
- Adding the module to a paragraph – and the module settings available to you when you do
Adding the module to a paragraph
To get started with the Product Catalog module, you must add it to a paragraph on a page.
From the paragraph, you then have access to the module settings window (Figure 3.1).
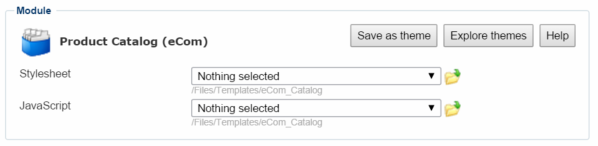
From here, you can control the behavior of the module – or remove it altogether.
We strongly discourage you from creating new sites using stylesheets, Javascript, or the theme-functionality. This is old technology, and is supported for legacy reasons.
Module settings and configuration
Once added to a paragraph, you will have access to all the settings and configuration options available for the Product Catalog module.
These are described below – except for Catalog publishing, which is described in the Implementing section below.
Publish a single product
The Product Catalog show settings (Figure 5.1) are used to control what to publish with the module.

If you select Product, you must select a product from your backend Product Catalog to publish – you do so with the Display > Product setting.
Publish product groups
The Product Catalog show settings (Figure 6.1) are used to control what to publish with the module – in this case product groups.
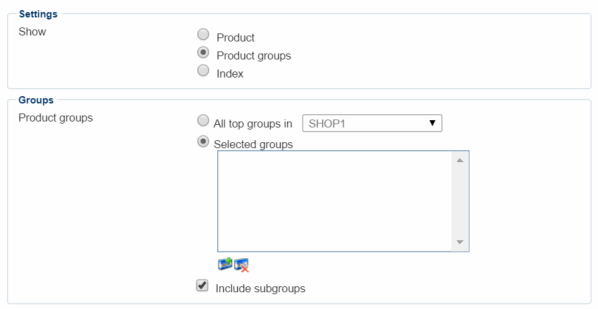
If you select Product groups, you can specify one or more groups to publish.
You can:
- Publish All top groups in a particular shop
- Publish a custom selection of groups
- Specify, if you want to publish products in subgroups as well.
Publish an index-query
With the Index option (Figure 7.1), you can publish the result of a query.
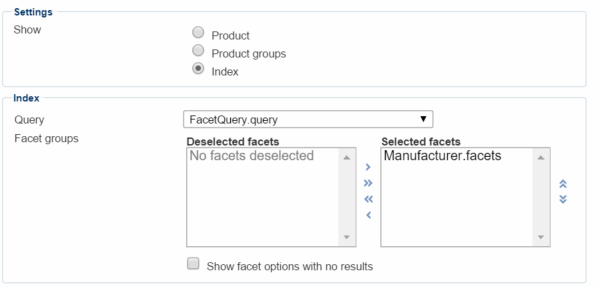
To do so, you must:
- Select a query from the dropdown
- Optionally, select one or more facet groups you want to use with the query, to help customers refine their searches.
- Decide if you want to show empty facet options or not
Read more about indexing here.
Display-settings
If you choose to publish more than one product, you will see the extended display settings, and the alt. images settings (Figure 8.1).
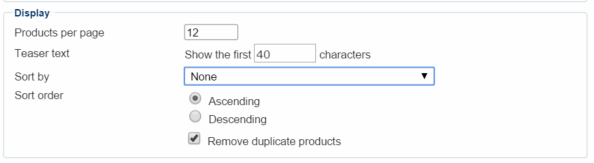
With the display settings, you can customize:
- How many products you want to display on each catalog page
- How many teaser-text characters you want to render
- Which property to sort the products by, and in which order - if publishing product using new indexing, the sorting here will be used if no sorting has been set on the query
You can also check the remove duplicate products checkbox, if you want to make sure no products are listed twice – this is normally a good idea, but if you have a lot of legacy code on your solution, you may be removing them in other ways.
Image patterns (alt. images)
Image patterns are a way to avoid having to manually configure product media for each products. Instead, you specify an image folder and a pattern by which the product catalog should assign pictures to products.
Using image patterns does not conflict with images
If you want to use image patterns, check the use alt. images checkbox to bring up the alt. images settings (Figure 9.1).
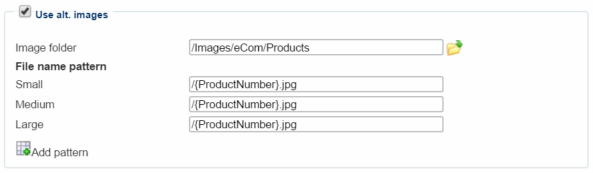
You can specify a pattern based on the following product fields:
|
Field |
Example |
|
ProductID |
{ProductID}.jpg |
|
ProductNumber |
{ProductNumber}.jpg |
|
ProductName |
{ProductName}.jpg |
|
ProductManufacturer |
{ProductManufacturer}.jpg |
|
VariantID |
{VariantID}.jpg |
|
VariantComboName |
{VariantComboName}.jpg |
You can combine these fields in any way you’d like, e.g. {ProductNumber}_{ProductManufacturer}.jpg, {ProductNumber}_{VariantComboName}.jpg or {ProductID}_{ProductName}.jpg, and image patterns support using the wildcard characters ‘?’ and ‘*’.
If more than one image matches the pattern, the first one in alphabetical order will be used.
Creating an image pattern for default images
Under Management Center > Ecommerce > Advanced configuration > Images, where you can set default images for your products and product groups, you can also create an image pattern for your default images. This can be useful if you want to render default images based on e.g. ProductID or VariantComboName.
Templates
The templates section (Figure 10.1) is where you control how your products are presented in frontend.
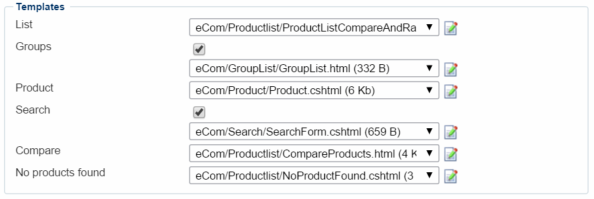
The templates you can modify or access here are:
:
|
Template |
What it controls |
Location |
|
List |
How the product list is displayed |
/Templates/eCom/ProductList |
|
Groups |
Showing a list of product groups |
/Templates/eCom/GroupList |
|
Product |
How a single product is displayed (when clicked on) |
/Templates/eCom/Product |
|
Search |
The search function |
/Templates/eCom/Search |
|
Compare |
How to render product comparison |
/Templates/eCom/Productlist. |
|
No products found |
What to display, when no products are found by a search |
/Templates/eCom/Productlist |
You can read more about working with templates in the template tag manual.
Additional settings
The additional settings area (Figure 11.1) is a hotpot of various settings, primarily for those using multiple product catalogs on the same page, for display caching, and for SEO purposes.
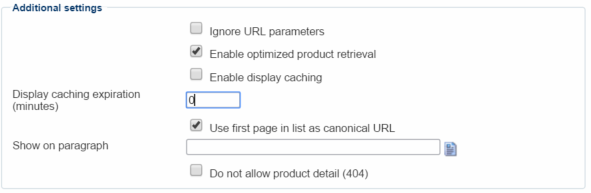
From the additional settings area, you can:
- Check Ignore URL parameters box to have the module ignore any parameters, e.g. GROUPID in the query string.
- This is primarily used when using multiple product catalogs on the same page (where you want only one of them to react to query string parameters=).
- Check the enable optimized product retrieval to use a more efficient method of retrieving products from the database. Enabled by default since 8.8.0.2. Exists primarily for legacy reasons.
- Enable (or disable) display caching – which caches product group displays in server memory.
- This will result in faster browsing of products for your customers. If this is enabled, you can set the display caching expiration in minutes. (If not set on the paragraph, the solution-wide caching settings are used. They are defined in Management Center > Ecommerce > Advanced > General).
- Enable using the first page as a canonical URL.
- Online shops can often have identical or similar content that is accessible through multiple parameter variations of the same URL. Most search engines will try to cluster such duplicate content into one search result and then try to guess which version of the URL is the best to represent the entire cluster of results. By enabling Use first page in list as canonical URL, you basically tell search engines that the first page in a list is the URL that you prefer to be returned by search engines. This is useful for search engine optimization purposes.
- Specify a different paragraph to display the product catalog on than the one you are editing. The other paragraph also needs to have a product catalog module attached. If you use this feature, you may want to disallow product details on this instance of the module by checking the Do not allow product details (404) checkbox. The details will, of course, be shown by the other instance of the product catalog module, and by disallowing product details for this one, you can prevent Google from indexing duplicate content.

Implementing
In this section you will learn about:
- Catalog publishing and how to set it up
- Switching product list templates with querystring parameters
- Sorting a product list with querystring parameters
- How to set up autoscaling of product images
Advanced product catalog display settings
From the management center, you can control how products are displayed across all your product catalog modules.
To access the advanced settings:
- Go to Management Center > Ecommerce > Advanced configuration > General
- Locate the Only show product settings (Figure 13.1)
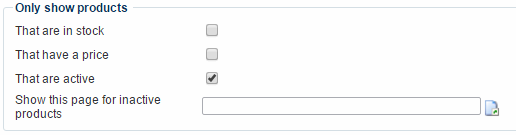
From here, you can choose to:
- Only show variants which are in stock, have a price, and are active
- Specify a custom page to show if people try follow a direct link to a hidden, inactive product
From the templates-section of the advanced configuration settings ({figurerref}), you can also choose to use the product description text if the teaser text on the products is empty.

Catalog publishing
Catalog publishing is a feature, which allows users to add products to a catalog, which can then be generated as a pdf. This can be useful if you want to create and print/email customer-specific offers – or allow your customers to do the same thing.
To use catalog publishing, check the catalog publishing checkbox to access the catalog publishing templates (Figure 14.1).
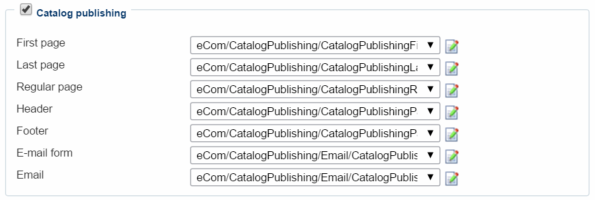
In this section, you can select (and modify) the templates used to generate your catalog pdf.
You have separate templates for:
- The first and last page of the pdf
- Regular (content) pages
- The header and footer used on content pages
- Email and email form templates
The Catalog Publishing templates are located in the Templates\eCom\CatalogPublishing folder in your File Archive.
Catalog publishing in the frontend – an example
In order to use catalog publishing, you must modify your templates (e.g. your product list & product templates) to render an Add to catalog and Catalog Publishing button.
An Add to catalog example:
A Catalog Publishing example:
Following the Catalog Publishing link will take you to a list view (Figure 15.3).
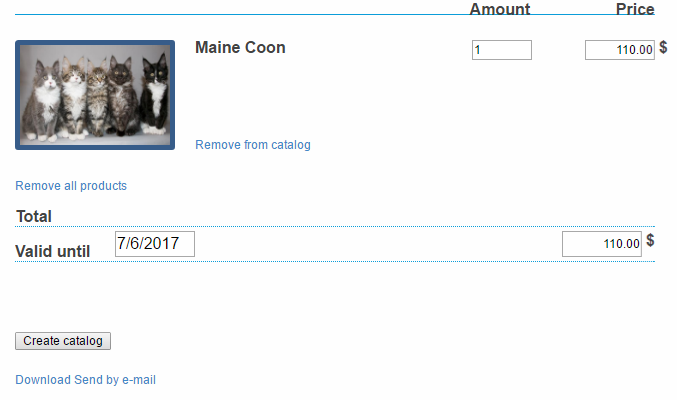
From the catalog publishing list, you can:
- Remove one or more products
- Change the price and number of each product
- Click the Create Catalog button to create the pdf-catalog – you will be presented with two new links: a download link and an email link.
Limitations
The following limitations and quirks exist for Catalog Publishing
- Headers and footers cannot be resized
- You cannot control the number of pages in the PrintPublishingRegularPage template
- You cannot put more than one page before the content pages with selected products. Insert blank pages after first page, or before last.
- First and last pages cannot have numbers.
Product list query string operations
Dynamicweb natively supports a number of querystring operations for manipulating the product catalog.
You can:
- Change between different product list templates
- Sort products in a product list by various values
Changing between two product list templates
To change between product list templates, you can use the View parameter in your query string, provided that your templates names are suffixed correctly, for instance:
- MyTemplate.cshtml
- MyTemplate_tiles.cshtml
- MyTemplate_list.cshtml
- MyTemplate_whateveryoulike.cshtml
If you select the MyTemplate.cshtml template as your product list template, you can then change between that and your suffixed templates by specifying View=suffix in the query string:
Changing between two product list templates through the query string is intended to support changing between e.g. a list view and a tiles view when viewing a product catalog, but you can of course use it any way you want.
You can also reference the full template name, e.g. mypage.com/Store.aspx?View=MyAlternativeTemplate.cshtml – in that way, you are not limited by the default template chosen in the Product Catalog module, but can select any template in your /Templates/eCom/ProductList folder.
Sorting products in a product list
Per default, products published are sorted by the sort order and field you select under the product catalog display settings, but you can add sorting criteria to the query string to sort your products further.
To do so, simply use the SortBy parameter with one of the following values:
- Name
- Number
- Price
- Created
- Updated
- ShortDescription
- LongDescription
- ImageSmall
- ImageMedium
- ImageLarge
- Link1
- Link2
- UnitStock
- Weight
- Volume
- Active
You can specify a sort order by using the SortOrder parameter, with the values ASC (for ascending) or DESC (for descending), for instance:
-
yourpage.com/Store.aspx?Sortby=Number&SortOrder=ASC
Parameter-based filtering
You can filter products in a product list by adding the parameter eComSearch to your query string, followed by one or more filtering parameters.
The following query finds all products manufactured by a company called ‘Dimmers Inc’:
The following parameters are available to you and can be used to filter your product catalog:
- LanguageID
- ProductPrice
- ProductName
- ProductNumber
- ProductWeight
- ProductVolume
- ProductStock
- ProductType
- Manufacturer
- GroupID
You can combine a parameter with a matching operator statement to further control your filter result. To do so, simply match the parameter with a corresponding parameter with a _type suffix and an operator value matching your needs:
|
Operator |
Function |
|
0 |
LIKE |
|
1 |
NOT LIKE |
|
2 |
<> (not) |
|
3 |
= (exact match) |
|
4 |
< (less than) |
|
5 |
> (greater than) |
For instance, the following query string will find all products with a price less than 500:
Filtering a product list using the eComSearch parameter is outdated and supported for legacy reasons – and we strongly recommend that you use the indexing engine to index your products and create the parameters you need to do the same thing – but quicker, easier and with more flexibility.
Autoscaling product images
Product images are normally managed either by attaching the images in the different sizes to the product or by using the image patterns functionality, which allows you to use a special image pattern to display product images.
In both scenarios, you need to attach or load differently sized images if you want to work with them, unless you use autoscaling.
Autoscaling ensures that product images are always displayed in sizes you can configure, preventing your design from breaking due to different image sizes.
To configure product image autoscaling:
- Go to Management center > Ecommerce > Advanced configuration > Images
- Locate the Autoscale area (Figure 21.1)
- Specify a width and height for your small, medium and large image sizes – and activate the sizes you want to work with on your solution
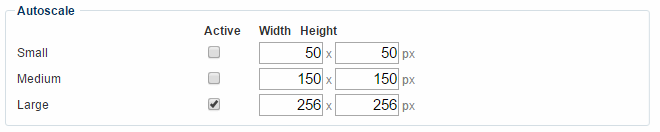
Your images, whether attached manually or loaded through an image pattern, will then be automatically resized in the frontend
On upscaling pictures
If the scaling parameters are larger than the original picture size, then the image will not be resized. An image placeholder will still be rendered displaying the excess pixels, but Dynamicweb will not upscale images, since that looks just awful.


