Loyalty Points
With the Loyalty Points feature, you can create complex points-based loyalty programs. Programs which will encourage your customers to continue to shop at or use the services offered by your business.
To break it down, the loyalty points feature allows you to award customers with a virtual currency – Loyalty Points – when buying your products, and then create ways for them to spend those products, e.g. allow certain goods to be purchased with points instead of money.
In this document, you can read about setting up Loyalty Points.
This covers:
- Creating loyalty point rewards and rules which trigger them
- Adding a points price to one or more products
- Modifying your shopping cart templates to allow user to buy products with points
- Customizing the loyalty points lifetime
Typically, you will create only a few rewards for a website – e.g. a 2% cashback (in points) reward – and then create and remove trigger rules as you go along, e.g. for specific products or product groups on sale, or perhaps for all products during a particular timespan, e.g. the Christmas break.

Basic Concepts
In this section, you will learn about:
- Creating loyalty point rewards and rules
- Manually awarding loyalty points to a user – and viewing loyalty point transactions from the backend
- Adding a points price to a product
Creating loyalty point rewards
With Loyalty Points, customers earn points by buying selected products, in transactions which match a set of predefined rules.
The rules allow you to specify which products, product groups and shops should be part of the loyalty points program, and to control whether a fixed number or a percentage of the total price should be awarded as points.
Only one order line with points for a product is possible, so if two rewards are triggered by an order, the largest reward is used.
To create a loyalty points rule:
- Go to Management Center > Ecommerce > Orders > Loyalty Points to open the rewards overview (Figure 3.1)

- In the menu, click New to open the interface for creating a new loyalty point reward (Figure 3.2)
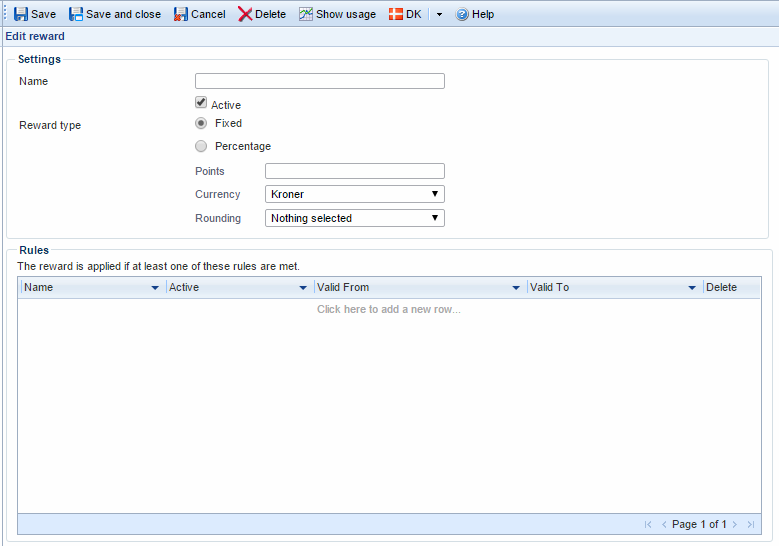
From here, you must:
- Name the reward – and specify if it should be active or not
- Select a reward type –fixed or percentage.
- A fixed reward requires you to specify a fixed number of points to award to your customers
- A percentage reward requires you to enter a percentage of the product price – incl. VAT & excluding discounts – to award as points.
- Select a currency which the rule should be active for – no use in having the same rule for pound sterling as for Turkish lira – and maybe a rounding practice.
Once these basic reward settings are created, you can start creating rules for triggering the reward.
A reward is triggered when at least one of the rules in the rules window returns true.
Triggering a loyalty point reward
To create a rule for triggering a reward, click Click here to add a new row in the rules window to open the rule window (Figure 4.1).
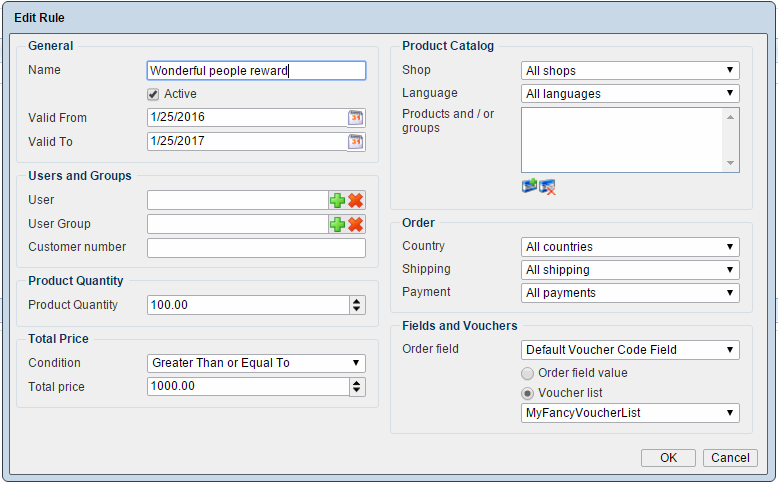
You must:
- Name the rule and activate/deactivate it (as appropriate).
- Specify a timespan during which the rule is valid (can be triggered)
This may be all you need to do – e.g. for a Holiday Reward program – but you can also further refine the trigger criteria.
You can:
- Limit the rule to specific users, user groups, or to everyone with a particular customer number (e.g. everyone coming from a particular company)
- Control the quantity of products needed to trigger the rule. The default is 1, and a value of 0 causes product quantity to be ignored as a criteria for triggering the rule.
- Trigger the rule based on the total price of the order. Select a condition – like equal to, less than or greater than – and a total price in the currency set on the reward.
- Limit the reward to only the specified shop, language, product group(s) or product(s). If blank, all may trigger the rule.
- Limit the reward to only the specified countries, shipping methods and payment methods. If blank, all may trigger the rule.
Finally, the nested Field and Vouchers settings allow you to award point to customers who enter a unique voucher code from a voucher list, or a non-unique value in a voucher field or an order field during checkout.
Manually awarding loyalty points to a user – and viewing transaction details
Aside from awarding loyalty points through the reward rules, you can also add loyalty points to a user manually.
To do so:
- Go to your user management area and locate the user.
- In the ribbon bar, click the Loyalty points button to open the loyalty points overview (Figure 5.1)
- Click Click here to add a new transaction to add points – and optionally a comment about the transaction – to the user
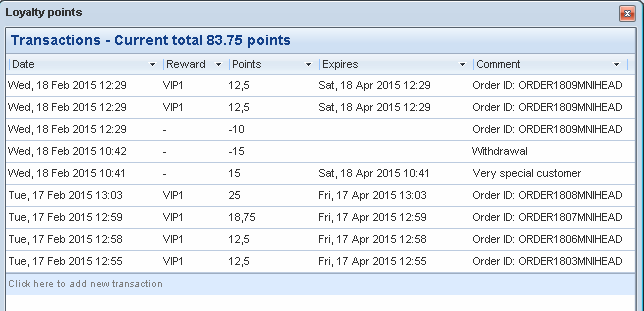
From the loyalty points overview, you can also view all points transactions for the user, e.g. the expiry date of points awarded on the basis of orders, any points awarded manually, and the OrderIDs of transactions involving points.
Giving products a price in points
What use are points which cannot be used? I’ll tell you. They are not very useful at all.
To make points useful, you should allow users to buy products with points – and that requires you to give one or more products a price in points.
To do so:
- Go to Ecommerce > Product Catalog and locate the product(s) you want make purchasable with points
- Open the product details and locate the Loyalty Points settings
- Enter a loyalty points value for the product(s)
Once you’ve added a loyalty point value to the product(s) you want to, you must allow your users to check out and pay using loyalty points.
To do so, you must modify your shopping cart templates – read more in the implementing section of this document.

Implementing
In this section you will learn about:
- Modifying your shopping cart templates to support buying products with loyalty points
- Creating or modifying the loyalty points expiration period
- Listing loyalty points transactions in frontend with the Loyalty Points module
Modifying your shopping cart templates
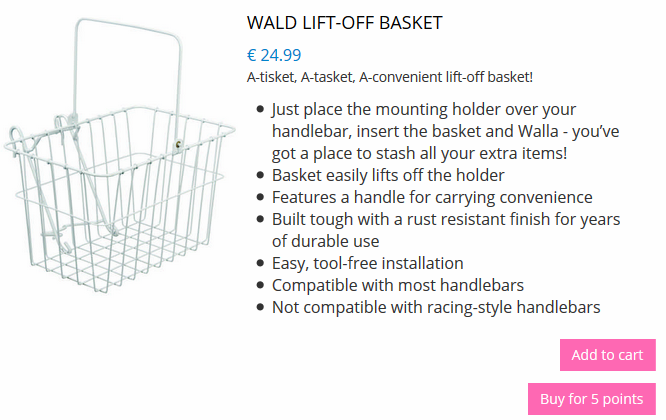
To allow your customers to buy and check out using loyalty points (Figure 8.1), you must modify your shopping cart templates.
To do so:
- Go to the paragraph with your product catalog module and open the module settings
- In the templates section:
- Modify the product template to render a ‘buy with points’ button. See ProductLoyaltyPoints.html for an example.
- Modify the product list template to render a ‘buy with points’ button. See ProductListLoyaltyPoints.html for an example.
- In both cases, you can create your own implementation using the cartcmd addwithpoints.
Once completed, a customer wishing to add a product to the shopping cart must choose between paying with points or with money. Selecting points initiates a points balance validation procedure, checking that the customer has enough points to buy the product.
Once the checkout flow is begun, we validate that the customer has enough points to pay for all products added with point. When the order is complete, the points total is withdrawn from the customer’s point balance.
Discounts, taxes and loyalty points 2.0
Discounts and taxes are not calculated for order lines paid with loyalty points.
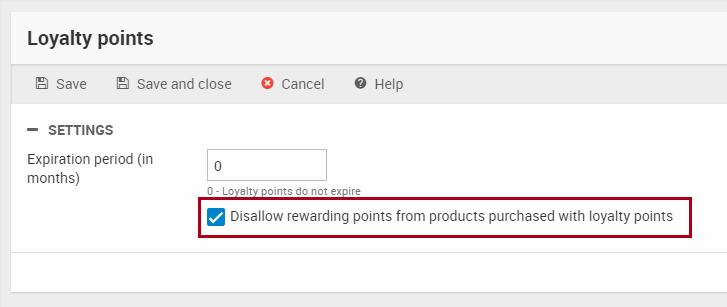
By default, loyalty point transactions may themselves trigger new loyalty point awards – but you can overrule that.
To do so:
- Go to Management Center > Ecommerce > Advanced configuration > Loyalty points
- Check the Disallow rewarding points from products purchased with loyalty points checkbox (Figure 8.3)
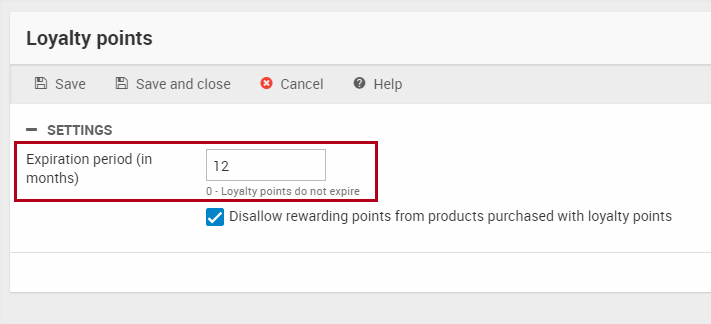
Customizing the loyalty points expiration period
By default, loyalty points are valid forever and ever.
If, however, you want to make them valid only for e.g. six months, you must:
- Go to Management Center > Ecommerce > Advanced configuration > Loyalty points
- Specify for how many months you want the loyalty points to be valid (Figure 9.1)
The Loyalty Points module – listing transactions in frontend
Loyalty points have their own dedicated module – called Loyalty Points – which can display any loyalty point transaction details in the frontend.
This module must be behind an extranet setup – just like the Customer Center – and here’s how to set it up:
- Create a page and go to Page Properties > Advanced > Permissions and set up permission for the page – or use the Customer Center page.
- Create a paragraph and insert the Loyalty Points module (Figure 10.1) on the page
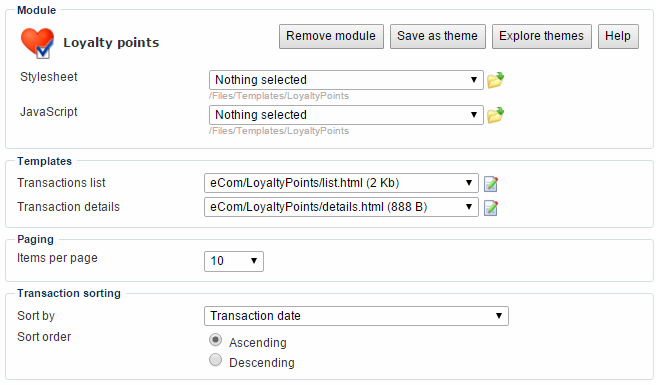
- In the templates section, create or modify the templates to suit your purpose – see the list.html and details.html templates for examples
- Select a paging and a sorting setting
- Save your setup
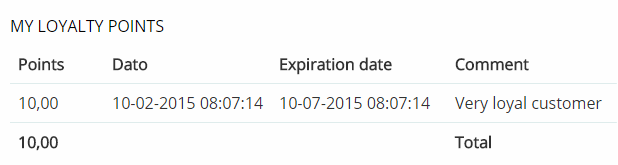
You can now go to the frontend and login with a user to view a list of loyalty point transactions (Figure 10.2) (if any) for that user.