RMA (Returned Merchandize Authorization)
Handling returns and return procedures natively in Dynamicweb
Sometimes a customer wants to return a product for various reasons – wrong color or size, malfunction, transit damage, etc.
Dynamicweb Ecommerce comes with a dedicated RMA system, allowing you to manage such returns with a minimum of hassle.
Working with returns in Dynamicweb Ecommerce consists of three things:
- Creating RMAs
- Viewing RMAs
- Taking action on RMAs
You can also set up email notifications when an RMA reaches a particular state to staff and customers alike, and create your own custom RMA states.
Read more below!
Basic Concepts
In this section, you will learn about:
- Creating an RMA
- The RMA list view, and how to filter and search for RMAs from it
- The RMA details view, and how to take action – e.g. by creating replacement orders from the RMA details view
Creating an RMA
RMAs can be created either manually or through the customer center module.
To create an RMA manually:
- Locate the relevant order in your order list
- Select the RMA tab in the ribbon bar (Figure 3.1) and click Register new RMA
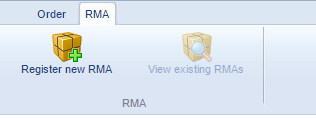
This opens up the RMA creation window (Figure 3.2).
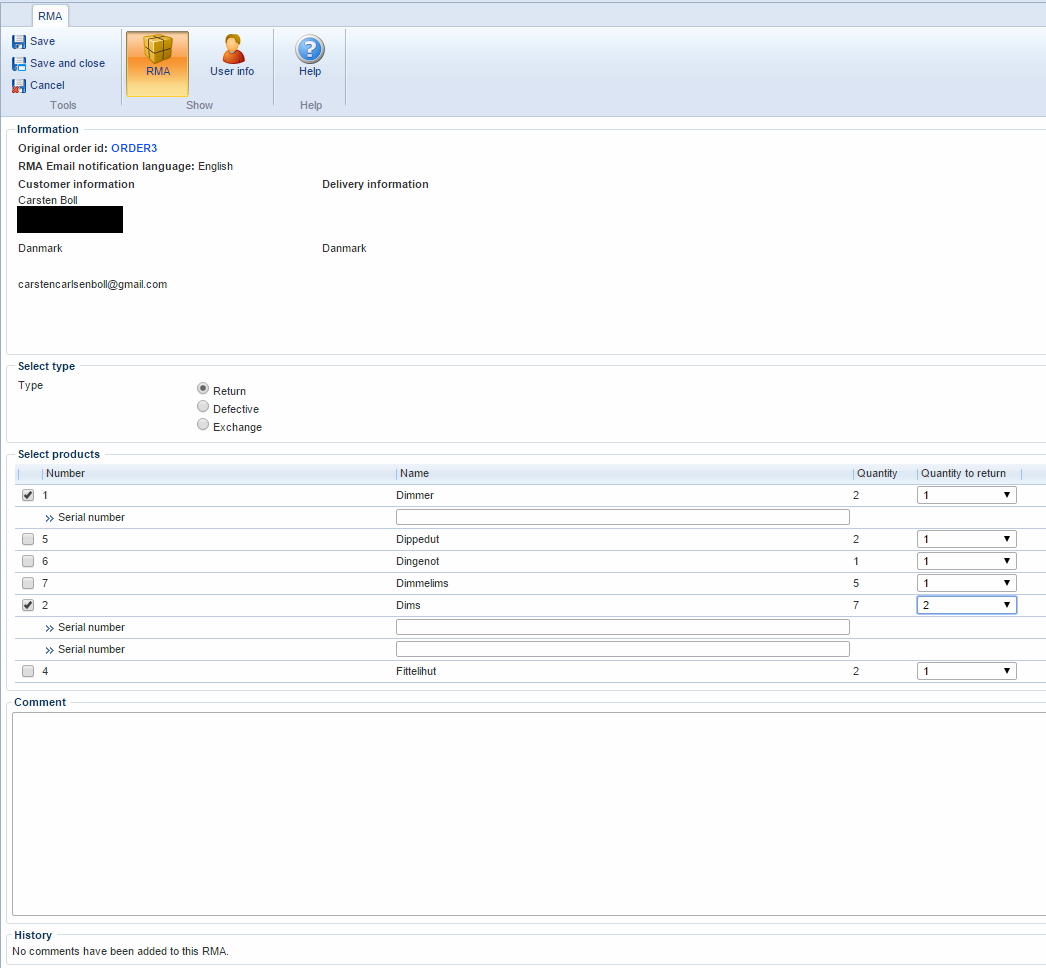
From here, you can:
- View basic information about the order
- Select a type of RMA – return, defective or exchange
- Select which products in the order you wish to create an RMA on – and select the quantity. You can optionally enter a serial number for each of the products.
- Add comments (and view previous comments) to the RMA
Once saved, an RMA per item will be created – and will be available from the RMA list view.
You can also set up the Customer Center module to allow your users create RMAs on their own. Read about the Customer Center module here.
The RMA list view
To access the RMA list:
- Click Ecommerce on your accordion
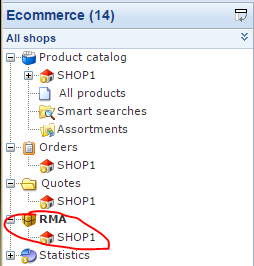
- Locate the RMA node in your Ecommerce tree (Figure 4.1)
- Click the RMA node to go to the RMA list. Clicking a shop located under the RMA node shows an RMA list for that shop only.
This opens the RMA list view (Figure 4.2).

From the RMA list, you can see the following for each RMA:
- The unique RMA ID, the parent order number, and the customer name
- The type of RMA (return, defective or exchange)
- The activity status (open/closed/deleted) and RMA state. An RMA state is a customizable step in an RMA flow, read more below.
- The creation date and date of last change
From the list view, you can also click an RMA to view the RMA details.
Filtering & searching the RMA list
From the RMA list toolbar (Figure 5.1), you can filter and search the list.

To do so:
- Select a state, status or type of RMA to isolate, or type something in the search field (you can search all available columns)
- Click Apply in the toolbar (you can click reset to return to the default view from a filtered list)
From the list view, you can also click an RMA to view the RMA details.
RMA details
Clicking an RMA in an RMA list opens a detailed view of the RMA (Figure 6.1).
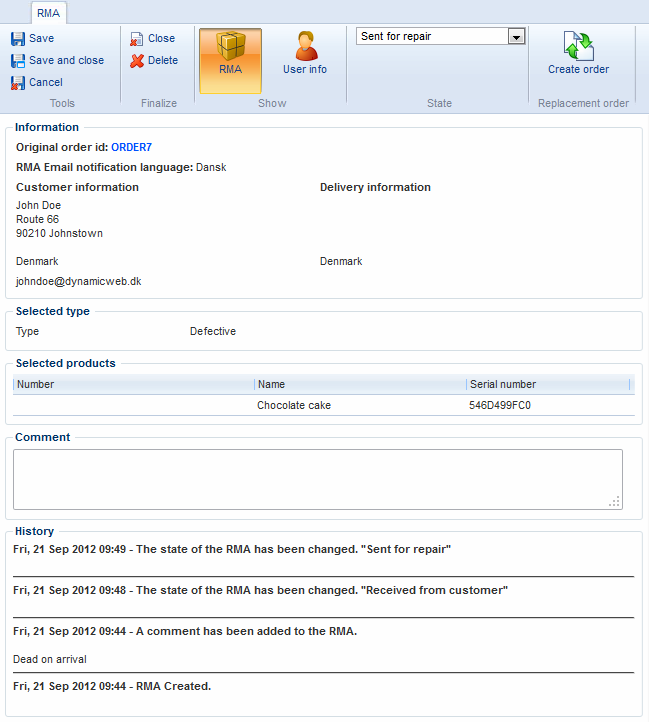
From the RMA details view, you can:
- View the basic order information and the RMA type
- See the product which the RMA concerns (possibly including a product ID and a serial number)
- Enter a comment in the comment field
- See the RMA history (event log)
You can translate the event messages which occur in the RMA history log.
To do so:
- Go to Management Center > Ecommerce > RMAs > Events
- Switch to the language you want to translate your event messages into
- Click the red X in the Translated column
- Translate the name and description
- Save
You can read more about internationalization in Dynamicweb here.
User info details
If you wish, you can click the user info button (Figure 7.1) in the toolbar to view and edit the extended information about the user who created the RMA.

This opens the following user information view (figureref}).
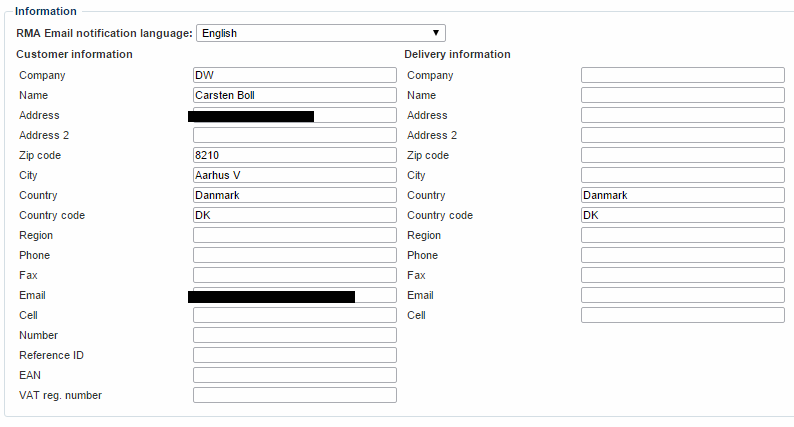
Of course, the primary reason to view the RMA details at all is because you want to take action on an RMA case.
Taking action on an RMA
From the RMA details toolbar ({figureref) you have access to a number of tools and actions for the RMA.

From the toolbar, you can:
- Save, save and close or cancel your changes to the RMA
- Finalize the RMA by Closing or Deleting it – a finalized RMA cannot be edited or reopened
- Switch between the RMA view and the User info view
- Select a state for the RMA
- Create a replacement order
Creating a replacement order
You can create a replacement order directly from an RMA by clicking the Create order button from the toolbar. This opens a dialog (Figure 9.1) allowing you to create different kinds of replacement orders.
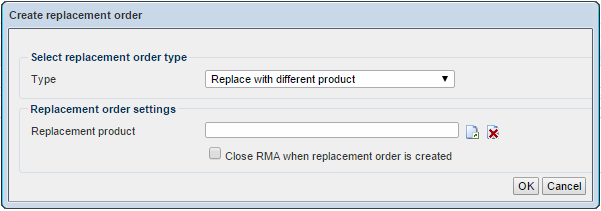
You can:
- Issue a refund
- Replace the product with a different product
- Replace the product with the same product
For all types of replacement orders, you can check the close RMA when replacement order is created if it fits your RMA flow.
When using the replacement order functionality, we advise you to activate the Replacement for RMA column in the order list. Read more about changing the order list columns here.
Right on the money
When creating refund replacement orders, be aware that you must refund the customer manually, as Dynamicweb does not currently supports direct refunds through your payment provider.
This is also the case if there is a price difference between products when replacing the product with a different product – you must charge or refund the customer manually via your payment provider.
Implementing
In this section you will learn about:
- Creating custom RMA states
- How to create and configure RMA email notifications
Creating custom RMA states
RMA states are custom states for controlling your RMA process. A Dynamicweb solution is born with a number of default states, such as ‘Waiting for product(s) from customer’, ‘Rejected’ and ‘Sent for repair’ – but you can easily create new RMA states
To create a new RMA state:
- Go to Management Center > Ecommerce > RMAs > States
- Click New state in the toolbar (Figure 11.1)

This opens the RMA state view (Figure 11.2).
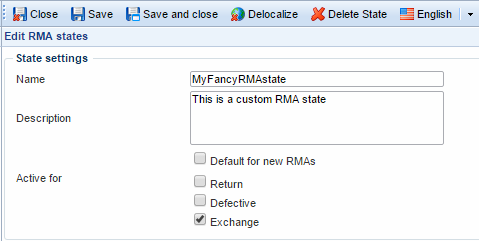
From here you can:
- Name the state and optionally provide a description for it
- Decide if this is the default state for new RMAs
- Select which type of RMA is should be active for
In this manner, you can easily create custom RMA steps to suit your business needs.
RMA email notifications
When working with RMAs, it can be useful to inform customers and employees alike when an RMA is created or closed, or when it enters a new state. Happily, the Dynamicweb RMA management system comes with a built-in engine for handling email notifications to customers and employees.
To configure RMA email notifications, go to Management Center > Ecommerce > RMAs > Email configuration and open the email notification view (Figure 12.1).
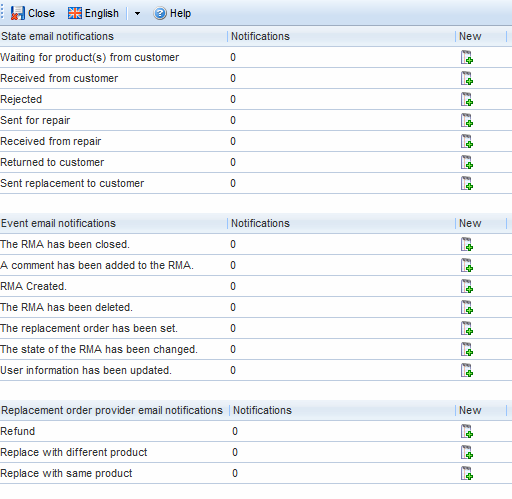
From here, you can:
- Create a new RMA email notification
- Edit or translate a notification
Creating an RMA email notification
To create a new notification click on any state in the RMA email notification view to open the view in Figure 13.1.

Next, click Add notification to open the dialog in Figure 13.2
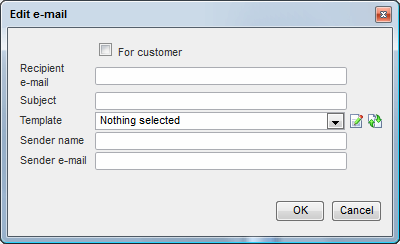
From here, you can:
- Check the for customer checkbox OR specify a recipient email (to send notifications to both customer and staff, create separate notifications).
- Specify an email subject
- Select (or create/modify) an email template to use (The templates for RMA emails are located in the files/eCom/RMA/ folder)
- Provide a sender name and sender email
Click OK and Save and close your email notification settings for the state, event or replacement order type.
Notifications are created in the current language context only, and must be created separately in each language context.
Editing and deleting an RMA email notification
To edit or delete an RMA notification, click the relevant button next to the notification


