
Digital Asset Portal
To access the features of the Digital Asset Portal you need to have the right license. Otherwise, you cannot use this feature.
Sometimes customers or potential customers want to download information about some products before either buying or requesting a quote. The digital assets portal will help with this, as it creates a shopping like area, where products can be added to a download cart and later downloaded. The setup of the digital asset’s portal exploits the product components tool, as you will have to customize the product list card and/or the product detail page.

Product assets
This part of the digital assets portal allows users to select different products and download assets, such as images, about them. This is based on the same flow as shopping, meaning the user will scroll through the products in a product list and even on a product details page before choosing which product to download assets from.
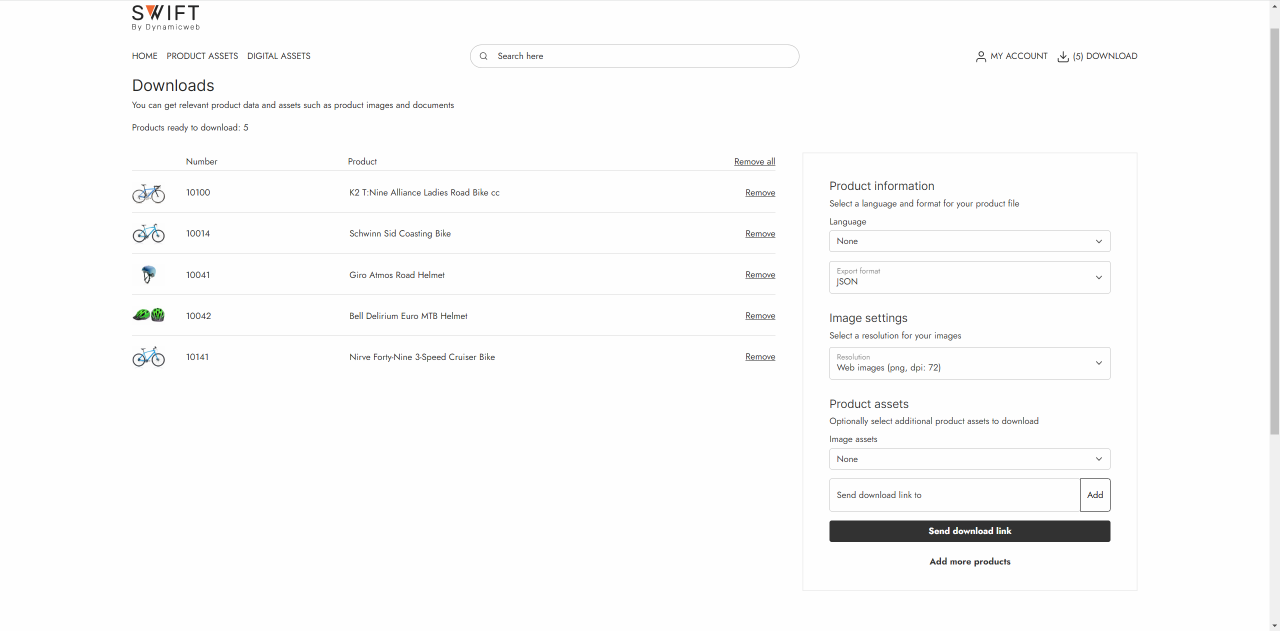
The download cart process allows the users to choose one or more languages and export format. If the assets include images, users can choose the quality (dpi) of the images. Users can also choose additional product assets to download. Lastly, users are able to add multiply receivers of the download link.
Manual setup
Through this guide it will be explained how to manually set up the Digital assets tool. The first thing you must do is to create a new order context. To do this:
- Locate order context settings in Settings > Ecommerce > Orders > Order context
- Create a new order context and call it “Download cart”
- Choose your shop
You can either create the digital assets portal on the same website as your shop or as a second website. Both solutions will require the use of our product components tool, as you will have to change the design for the product list card and/or product details page. If you want to use the digital assets tool on the same site as your shop, you might want to use our Permissions. That way you can make sure that only the right users have access to the digital assets.
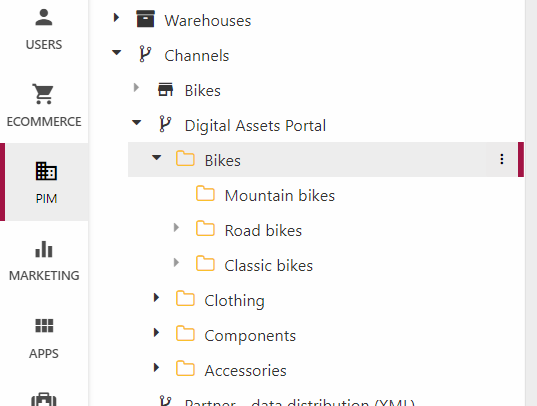
For this guide we will create a second website for the digital assets portal. To makes things easier we will create a copy of the existing site. This does require attention to the PIM structure, as shops with multiple product details pages links to the actual shop site. Instead, we recommend creating a channel specifically for the Digital Assets Portal as seen on Figure 4.1 and making sure to only have one product detail page on the digital assets portal site.
We will start the guide by copying the existing website:
- Click the three vertical dots next to your website name
- Click on Websites
- Right click on your website and click copy
- Name the new site something like “Digital assets portal”, choose the same Regional settings as the original, and hit OK
- When the new website has been built you should make the appropriate design adjustment to make sure it is clear that this is the digital assets portal.
The design changes will differ depending on how similar you want your shop and digital assets portal to be. One thing you should change is the design of the product list and product detail pages. These should use an Add to download cart column instead of the default Add to cart column. For these changes we recommend you use our product component tool. This will help make your product pages ready for customers to download the digital assets instead of purchasing the products.
The digital assets portal will have the same process as a normal shop, where customers add products to the cart and then do checkouts. In this case the customers will add the products they want information about to the download cart and then afterwards checkout and download the information. For this to work you will have to create a new cart, a new confirmation page, and a new empty cart page. We will start with the new download cart page and the confirmation page.
- In the utilities folder delete or unpublish the copied Cart page
- Right click on the Utilities folder and click “create new page”
- Choose the Cart and call it something like “Download cart”
- Enter the page settings of the Download cart page and choose the right context cart. This is important for the mini cart to work properly.
- We recommend ticking the Render orderline count instead of product count box. This will ensure that products with a "Purchase minimum quantity" setting applied still only adds one product to the download cart.
- Hit Save
- Right click on the Download cart page in the content tree and create a new page
- Choose a normal page and name it “Confirmation”
- On this page, you should have a simple design confirming the download process
- Additionally, you should make it "hidden in menu"
Now we need to design the Download cart page
- Enter the Visual Editor on the Download cart page
- Add a 1 column row
- Add the “Download cart App” column to the empty row
- In the item settings match the fields with the matching links
- Shop page link = Product list page
- Product page link = Product detail page
- Confirmation page link = Confirmation page
Next is the App settings:
- In the App settings choose the Shopping cart app and configure it
- Choose the right shop and context cart in the Settings section
- In the Steps section delete all steps except Show cart and Checkout
- Edit the Show Cart step and choose “DownloadCart.cshtml” as the template
- Hit OK.
- In the Field Validation section untick the Customer acceptance field
- Hit Save and close
When this is done, you have configured the digital assets portal. If you changed the design earlier and added the Add to download cart column, then your site is done. Otherwise changing the design, so the customers can use the download cart properly will be the last thing to do.
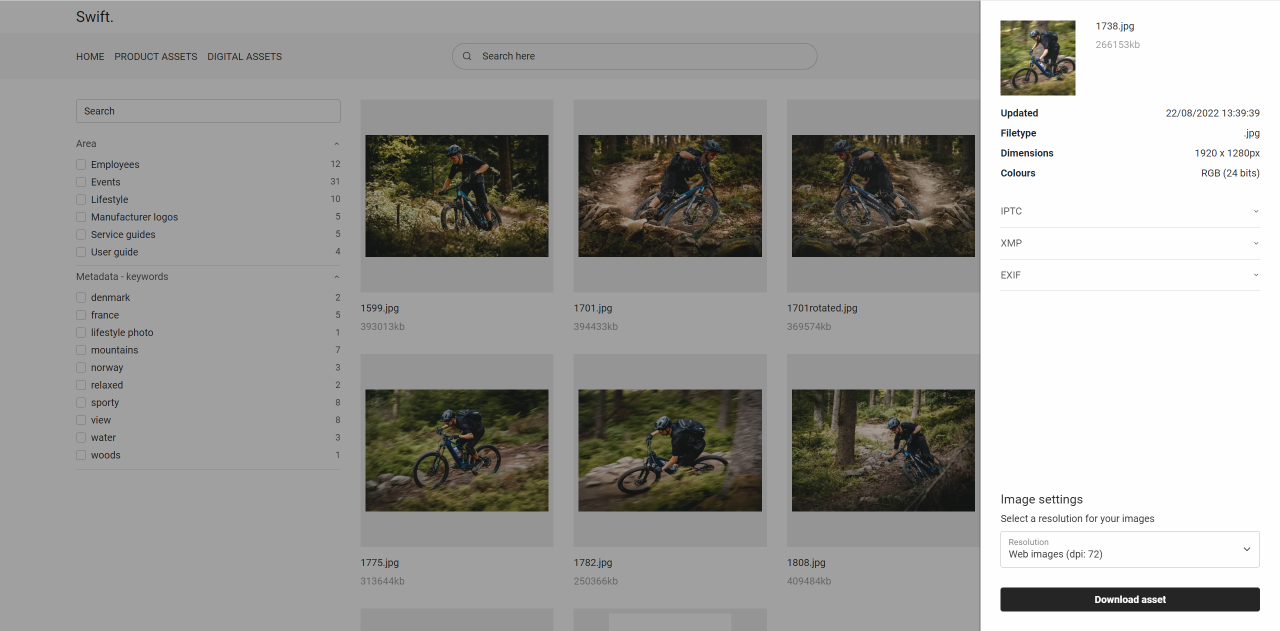
Digital assets
The Digital Assets portal is not only for downloading assets about product. Sometimes you (as a salesperson, Store, etc.) want to download assets about the company itself. This is done with the Digital Assets. Below will follow a guide on how to set it up manually.
Manual setup
The first thing to do is making sure the files index has been built in the repositories.
- Go to Settings -> Repositories -> Files
- In the Index section click on “Files”
- Build the two Files indexes by clicking on the two orange buttons
- Hit Save and close
Next, you should create a product list page for your digital assets to be shown on.
- On your Digital Assets portal website, click the three vertical dots next to the website name in the content tree
- Click New page and choose the product list page
- Name it something like “Digital Assets” and hit OK. If you want to sort your pages on the site, you can do it by clicking on the three vertical dots again and clicking Sort
For the Digital Assets page to work properly you need to use the “Product catalog app” column.
- Enter the Visual Editor on your newly created Digital Assets page
- Add a 1 column row to the empty page
- Add the “Product catalog app” column to the empty row
- Name the column something suiting like “Digital assets” and enter the App part of the column
- Choose the “Query publisher” as the app
- In the Queries section in the Query dropdown choose “Files.query”
- Scroll to the Template section. In the Template dropdown choose “QueryPublisher/Assets.cshtml”
- Hit OK
Next is creating an Asset info page in the Services folder in the Swift tools. This is done by copying the Favorites list service page and changing the app column to a Query publisher instead.
- Go to Swift tools -> Services
- Right click on the Favorites list service page. It is called something like: “Favorites list service”
- Click “Copy here” and name the new page “Asset info”
- Click on the App column called “Related products list” to edit it
- Name the column “Asset info” and enter the app part of the column
- Change the App type by clicking “Remove app” and choosing the Query publisher instead
- In the Queries section in the Query dropdown choose “Files.query”
- Scroll to the Template section. In the template dropdown choose “QueryPublisher/AssetInfo.cshtml”
- Hit Save and close
The last thing to do is to change the navigation tag of the Asset info page.
- Enter the properties of the Asset info page
- In the top menu bar click on “Options”
- Click on “Navigation” and change the Navigation tag to “AssetInfoService”
- Hit OK
- Hit Save and close.
That’s it. Now the digital assets page is done, and users are now able to download the relevant assets.