File Publishing
With the File Publishing module, you can publish the contents of any folder on your solution on your website. You can also allow your users to upload files to a folder.
For instance, you could:
- Publish a list of training pdf’s on your intranet
- Create a file-exchange where users can upload and download files from one central location
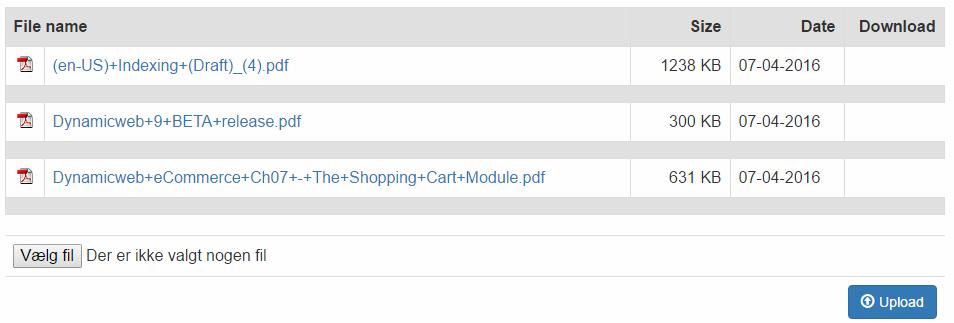
To visitors, a list of published files could look like (Figure 1.1) – although I hope you’ll style it nicer than I’ve done here.
In this article, you will learn how to set up and configure a File Publishing module on your solution.

Basic Concepts
In this section, you will learn about:
- Adding the File Publishing module to a paragraph
- The basic module settings and configuration options available to you
Adding the module to a paragraph
To use the File Publishing module, it must be added to a paragraph on a page.
From the paragraph you then have access to the module settings window (Figure 3.1).

From here, you can control the behavior of the module – or remove it altogether.
Read about your settings and configuration options below.
We strongly discourage you from creating new sites using stylesheets, Javascript, or the theme-functionality in this area. This is old technology, and is supported for legacy reasons.
Module Settings
Once added to a paragraph, you have access to all the module settings and configuration options available for the File Publishing module.
Here’s a quick view at what they allow you to do.
Display settings
The display settings (Figure 5.1) let you control what to publish using the module.

You can:
- Select the folder containing the files you want to publish
- Check force download to for the file to download, rather than open in a browser
- Check show subfolders to allow users to access the subfolders to the folder selected above
- Select an icon folder containing alternative icons for the files in the list. Files must be in .gif format (16x16 recommended), and named [extension].gif – e.g. pdf.gif – and you should have a filed called na.gif to be used as a fallback icon.
The Sorting settings
The sorting settings (Figure 6.1) allow you to control how the list is, well, sorted.

You can:
- Sort the list by name, date or file size
- Choose between descending or ascending sort order
Upload settings
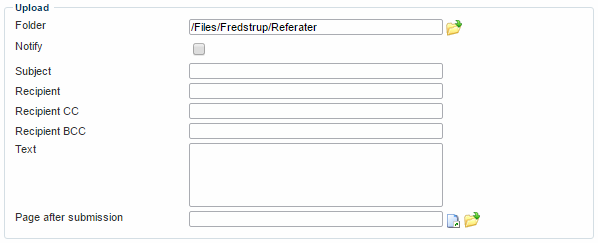
The upload settings allow you to set a folder to upload files to, and to set up notification of key people when a file is uploaded.

You can:
- Specify an upload folder – if identical to the display folder, files uploaded will be immediately published. If not, you must manually move uploaded files to the relevant folders.
- Check notify to enable email notifications when a file is uploaded. You must then:
- Specify a subject
- Enter a recipient, and optionally CC and BCC recipients
- Enter a text – the email content. The email will also contain a path to the uploaded file.
- Select a page to redirect users to after uploading a file
Custom texts settings
If a user is allowed to navigate to subfolders, you can localize how to render the link back up to the parent folder using the custom texts settings (Figure 8.1).

Templates
From the templates section (Figure 9.1), you can select and edit the templates which control the styling and output of the file publishing module.

The templates you can work with are:
- List controls the styling and content of the list for displaying file list elements in
- List element controls how each file is displayed in the list
- Publish controls the styling and content of the upload function
Tags and loops available to you
The File Publishing module templates have a number of tags associated with them – read more about the tags availabel to you in the template tag documentation for the List template, the List Element template, and the Upload template.
Developing
There is no developer-specific information available for this subject.
For tips on improving the searching or indexing speed of your Lucene application, please see the Lucene documentation on improving searching speed or improving indexing speed.


