
File Manager
The File manager in Dynamicweb enables you to save and structure your documents and other file types, in an easy and intuitive manner.
Apart from all the basic functionality you probably don’t need to be told about, the File Manager in Dynamicweb also supports more advanced features, like:
- Create meta fields and set meta tags on a folder or subfolder level, and have all files inherit the metadata
- Built-in link management and validation
- The File manager in Dynamicweb enables you to save and structure your documents and other file types, in an easy and intuitive manner.
Apart from all the basic functionality you probably don’t need to be told about, the File Manager in Dynamicweb also supports more advanced features, like:
- Create meta fields and set meta tags on a folder or subfolder level, and have all files inherit the metadata
- Built-in link management and validation
- Automatic renaming of uploaded files
- Advanced image handling, like rule based resizing of uploaded files
Read more below!
Basic Concepts
In this section, you will learn about:
- Accessing the file manager
- Managing folders and files
- The file upload tool
- How to edit text and image files from within Dynamicweb
Accessing the file manager
To access the file manager on your solution, simply click Files in your main menu – this will take you to the Files area (Figure 3.1).
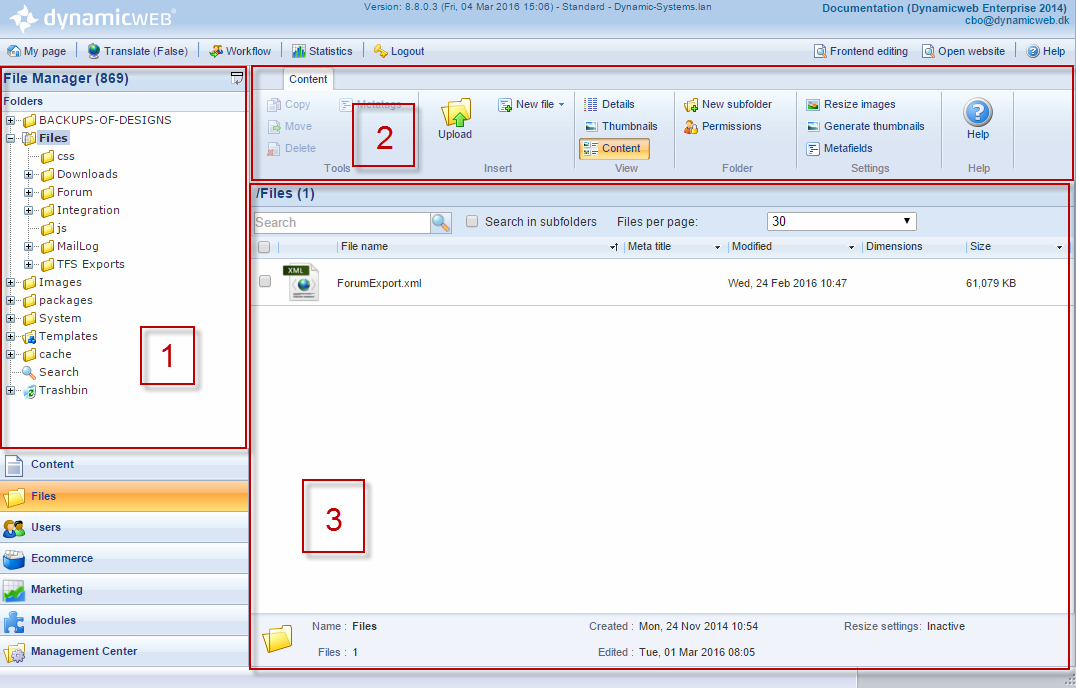
The files area consists of:
- The folder tree (1) from where you navigate to and from your folders and subfolders
- The file manager toolbar (2) which lets you perform various file or folder operations, e.g. upload files, automatic image resizing, and more
- The content area (3) where the files within a particular folder are displayed, and can be worked with
Managing Folders
A Dynamicweb installation is born with a number of system folders – which cannot be deleted, renamed or moved.
Currently, they are as follows (upgraded solutions may have a different folder structure):
|
System Folder |
Content |
Remarks |
|
Files |
Files |
If on a solution upgraded from Dynamicweb 7, the system path may be /Filer/ |
|
Images |
Images |
If on a solution upgraded from Dynamicweb 7, the system path may be /Billeder/. Check your solution settings to see which folder name is used on your solution. |
|
System |
All your system files – including indexes, repositories, editor configuration files and item definitions |
|
|
Templates |
All the templates on your solution – both the ones delivered by us, and the ones created by your or your partner – in the appropriate subfolders. |
Also contains the designs folder, which is where you place new designs and their static content & any translation files added.
Each design has a _parsed folder, whose contents can be deleted if you want to force the system to parse your design-templates anew. |
|
Cache |
Cached elements |
|
You can freely create new subfolders under each system folder, using the folder right-click menu.
Folder right-click menu
You can right-click any folder – system created or not – to bring up a folder menu (Figure 5.1).
The options available to you depend on the folder – system folders, for instance, cannot be deleted, moved or renamed. The screenshot below shows the full breadth of options for a user-created folder.
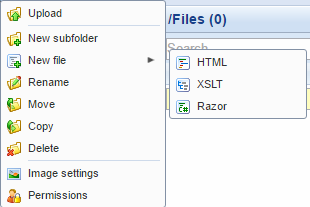
With the folder right-click menu, you can:
- Access the File Upload window for the folder – see below
- Create a new subfolder
- Create a new file in the folder – HTML, XSLT and Razor (CSHTML). After naming the file, the file will be opened in the file editor, see below
- Rename, move, copy or delete the folder (if not a system folder)
- Access the image settings for the folder
If you are logged in as an administrator, you can also set permissions on the folder – read more about permissions in Dynamicweb.
Folder image settings
The image settings (Figure 6.1) for a folder give you access to advanced image handling functionality on a folder-level.
You can activate and configure automatic resizing of the images in the folder, and you can set up automatic thumbnail creation rules.
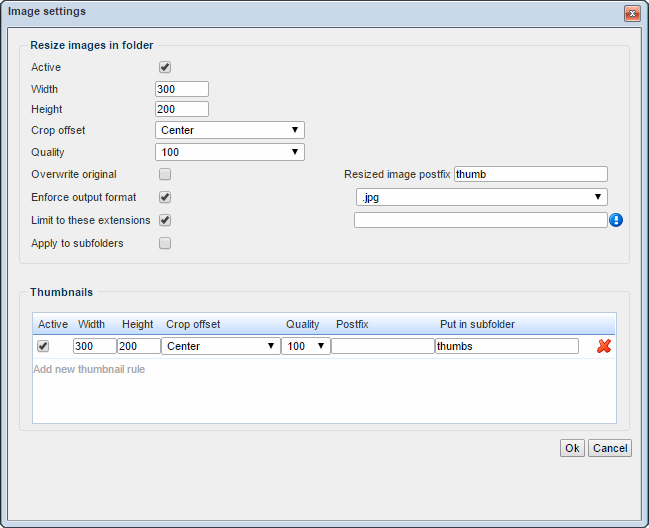
To set up automatic resizing of images in the folder:
- Check the active checkbox
- Specify a width and an height
- Select a crop offset for the resized images and a compression quality
- Check overwrite original to make the resized image replace the original – this cannot be undone.
- If overwrite original is unchecked, you can add a postfix to the resized images (Myimage.jpg -> Myimage-resized.jpg), and you can enforce an output format; .jpg, .gif, .png, .tiff or .bmp.
- Check Limit to these extensions to limit all resize operations to certain image formats
- Check Apply to subfolders to make subfolders exhibit the same behavior as this folder
To automatically generate thumbnails, you can create thumbnail creation rules:
- Click Add new thumbnail rule
- Specify a width and a height
- Select a crop offset and a compression quality
- Optionally specify a postfix for the thumbnails
- Specify a subfolder to put the thumbnails in – if left blank, the thumbnails will be placed in a subfolder combining the name of the current folder and the dimensions of the thumbnail (e.g. MyFolder200x300)
You may also use the Dynamicweb Image Handler (getimage.aspx or getimage.ashx) to display dynamically manipulated images on your website, and keep the original versions as is in the file archive.
Managing Files
Clicking a folder in the folder tree opens a list view of the folder content in the content area (Figure 7.1).
Roughly speaking, the content area here consists of a toolbar(1) and a files list(2) with filtering at the top.
File Manager toolbar
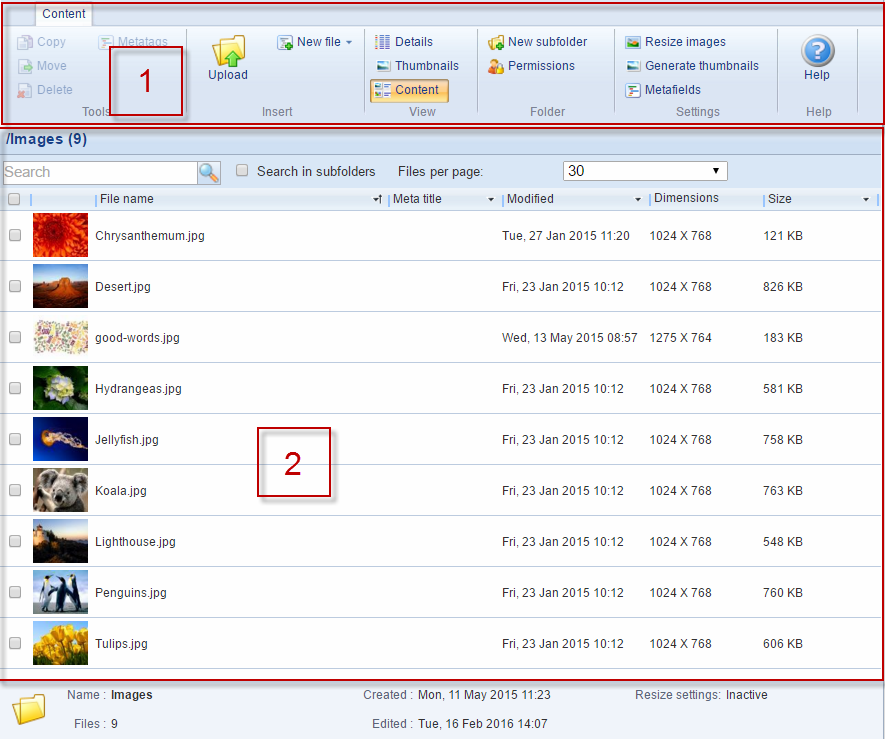
The File Manager toolbar (Figure 8.1) provided access to a number of tools for managing files.

From the file manager toolbar, you can:
- Copy, move, and delete any selected files
- Fill out metadata for the selected files using the metatags button – and create custom meta fields for all files in the folder using the metafields button
- Open the File Upload window for the folder – see below
- Create a new file in the folder – HTML, XSLT and Razor (CSHTML). After naming the file, the file will be opened in the file editor
- Create a new subfolder under the current folder. If you are logged in as an administrator, you can also set permissions on the folder – read more about permissions in Dynamicweb.
The View buttons – Details, Thumbnails & Content – lets you change how files are displayed in the content pane.
The Resize images and Generate thumbnails buttons gives you access to the folder image settings, as described above.
Files right-click menu
To open the right-click menu (Figure 9.1) for a files, simply right-click a file in the files list.
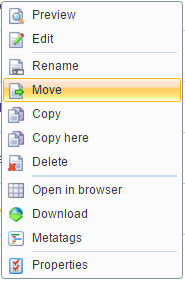
With the right-click menu, you can:
- Preview the file – or open the edit view for it
- Rename, move, copy/copy here or delete the file
- Open the file in a browser
- Download the file
- Set meta tags for the file
- View the file properties
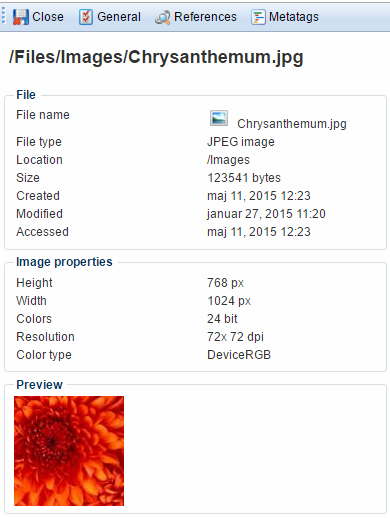
File Properties
The file properties ({figureref]( for a file – accessible from the right-click menu – shows miscellaneous information about a file.
By default, the General tab is shown – as below – but you can click References and Metatags to access information about where a file is used, and which metatags have been associated with the file.
Meta fields & meta tags
With meta-fields, you can add metadata – e.g. titles or authors or labels – to the files in your file manager.
Meta fields are created on a folder-level by clicking the Metafields button on the folder toolbar to open the meta-field list (Figure 11.1).
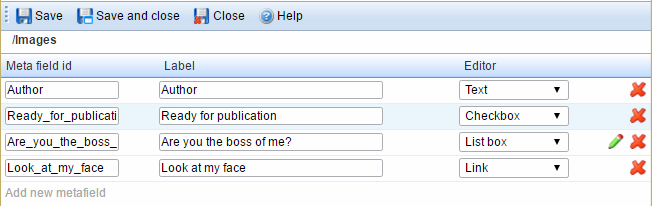
From here, you can create new meta fields. Simply specify an ID, a label and an editor-option; text, checkbox, link or list box.
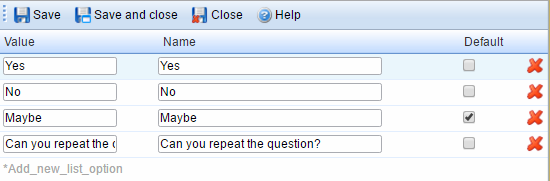
If list box is selected, click the edit-icon to add a list of list box options (Figure 11.2).
Once created, the meta-fields can be filled out for one or more files using either the toolbar button or the right-click menu, as outlined above.
Metadata can be published on the frontend using the Gallery module template tags.
You can create system-wide meta fields on your solution – see more under Advanced configuration below.
File Upload
Dynamicweb File Upload can be accessed both with the right-click menu in the folder tree and from the upload button in the file manager toolbar.
Both ways open the upload window (Figure 12.1).
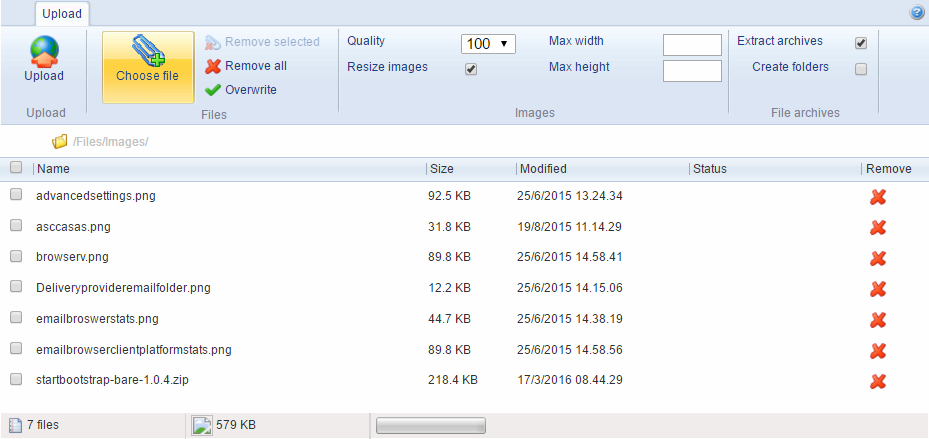
To upload files from the upload window:
- Click Choose file and select your file(s) – Dynamicweb supports uploading several files at the time
- Click Upload and the files are uploaded
You have several configuration options when uploading files:
- Check overwrite if you want to overwrite files with the same names as the files you are uploading
- If uploading image files, you can specify a quality in percentage of the original file quality, and resize the images – if so, specify a max width and max height
- If uploading a zip file, you can check Extract archives to extract the zip file, and create folders to create the folder structure from the zip file in the folder tree and place all files in the original folders
File names and special characters
The following characters are not handled by the upload tool: \ / : * ? " < > | , + ; # '
Apart from that, all letters, numbers and spaces are permitted, including $ % & ( ) _ . @ [ ] ^ _ ` ¨ { } ~ ´ = - ! ¤ § £ as well as language specific characters such as æ, ø, å, ä, ö etc.
If your solution domain name contains non-ascii characters (like æ, ø and å) don’t use Firefox when uploading files – temporarily switch to a less divalike browser.
Editing text files
All text-based files (e.g. txt, HTML, XML, css, js, vbhtml, vbhtm, cshtml and cshtm files) can be edited directly in Dynamicweb using the File Manager edit tool.
This is very useful when working with templates.
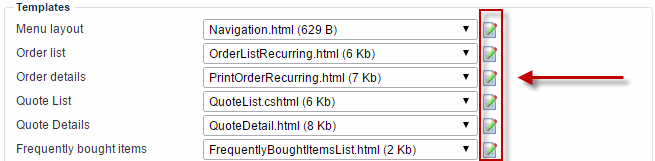
The File editor tool is available from any template selector (Figure 13.1) in the backend, and the files right-click menu as described in this document.
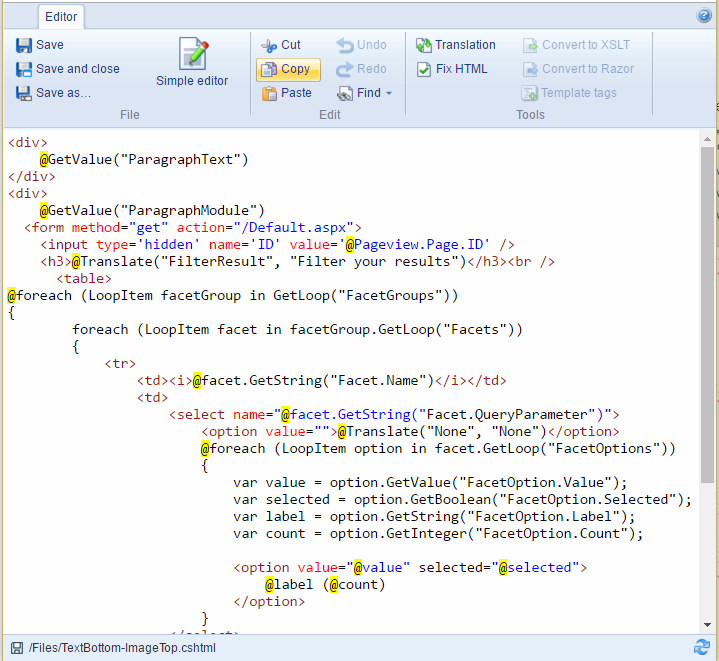
Both methods open the file within the text edit tool (Figure 13.2), from which you can edit your file.
The text edit toolbar
The file editor toolbar (Figure 14.1) provides you with a series of tools when editing text files.

You can:
- Save, save and close and save as the file
- Access the simple editor – with no extended tools and no syntax highlighting
- Use the Edit-tools to cut, copy, paste, undo, redo and find file content and changes
- Click the Fix HTML button to e.g. add missing end tags and missing quotation marks in class declarations
- Use the Convert to XSLT and Convert to Razor tools to automatically convert the file content to either XSLT or Razor.
- The conversion tools are not perfect, and you need basic XSLT or razor skills to verify that everything works as intended after converting. You can always use the undo button to revert the process if things get too messy.
Editing image files
Most image files can be edited directly in the Dynamicweb using the File Manager edit image tool. This is very useful for smaller image adjustments, where more advanced tools are not needed.
The Image editing tool is available from the files right-click menu, as described in this document.
Right-click any image file and select edit to open the image in the edit image tool (Figure 15.1).
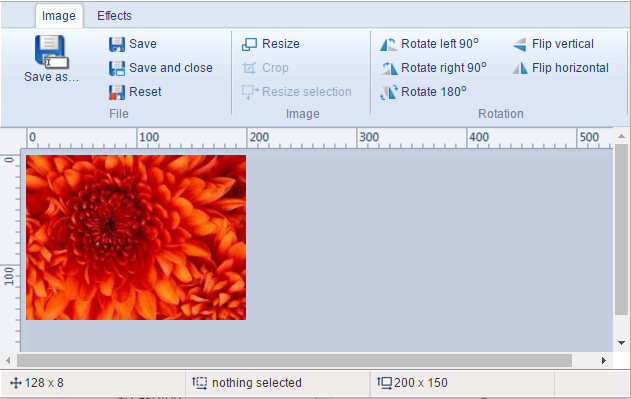
With the image editing tool, you can:
- Resize the image
- Select an area using the mouse tool and crop the image
- Precisely resize the mouse tool selecting using the resize selection button
- Rotate the image, or flip it horizontally or vertically
From the toolbar, you also have access to the effects tab (Figure 15.2).
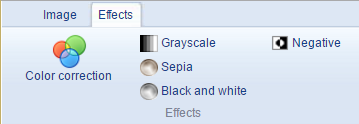
From the effects tab, you can:
- Color correct the image – correcting brightness, contrast or saturation. Click
- Convert the image to grayscale, sepia, black and white or negative
You must switch back to the Image tab in order to save your changes.

Implementing
In this section you will learn about:
- The advanced configuration options available for the File Manager
Advanced Configuration
From Management Center > Control Panel > File Manager you have access to a number of advanced configuration options (Figure 17.1) for the file manager.
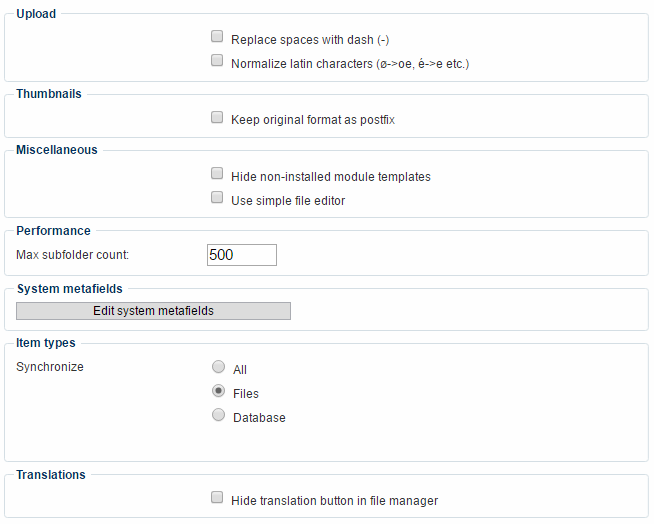
With the advanced file manager settings, you can:
- Use the Upload settings to replace spaces with a dash and normalize Latin characters if necessary
- Use the Thumbnail settings to keep original format as a postfix when enforcing an output format using the folder image settings
- Hide non-installed module templates to get a better overview in the templates folder, and check Use simple file editor to always use the simple editor
- You can limit (or extend) the max subfolder count – the default is a maximum of 500 subfolders
- Create system meta fields, applied to all files in the file manager – read about meta fields above
The Item types settings allow you to synchronize item types between two copies of a solution, running against the same instance of the database. All solutions must be set to the same synchronization settings for everything to work as intended.

Developing
There is no developer-specific information available for this subject.
For tips on improving the searching or indexing speed of your Lucene application, please see the Lucene documentation on improving searching speed or improving indexing speed.

