News
The News module has been replaced by basic Items functionality, and is de facto deprecated.
It is therefore disabled for new solutions – and we highly encourage you to use Items to do the same (and much more, in a more elegant manner) going forward.
The News functionality enables you – and optionally your frontend users – to create and publish news articles on your website.
The module, which is used to publish and optionally create news articles from frontend, features a wealth of adjustment possibilities, providing you with a lot of options when presenting your news to the reader.
The backend News area allows you to create and manage categories, articles and layout templates from the backend.
You may also:
- Set up automatic email notifications when a news item is created
- Add metadata to news items, and use it to manage and structure news items
- Create and present custom information fields to fill out and display on your website
And much more!
Basic Concepts
In this section, you will learn about:
- How to create and manage categories and articles from the backend
- Adding the News module to a paragraph
- The module settings you can use to control module behavior
- Enabling user to create and edit articles from frontend
- How to find and edit or create news templates
The News area
News articles and news categories are created from the News area in your backend. To access the News area:
- Click Modules on your accordion
- Click on News in your Module tree to open the News area (Figure 3.1)

The News area consists of:
- The left side navigation, from where you can navigate between categories and access category content (current or archived)
- The content panel on the right, where news articles under the selected category are listed – and can be created or edited
Right-click any category to open the context menu (Figure 3.2), from which you can edit or delete a category, create a news article, or edit the category permissions settings.
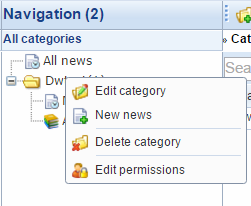
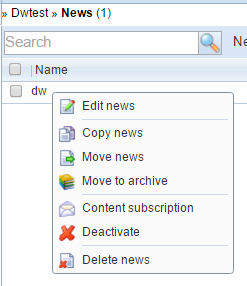
You may also right-click any news article in the right side panel to access the context menu for news articles (Figure 3.3).
From the news article context menu you can:
- Edit, copy, move or archive the article
- Delete or deactivate the article
Creating categories
All articles must belong to a category, the contents of which are then published using the News module.
To create a new category click New category in the toolbar (Figure 4.1).

When creating a category you can:
- Name the category and optionally provide it with a description
- Select a custom field group – read more in the implementing section
You may also set up permissions on the category, and control which users or user groups can access the category - read more about permissions here. The button will be greyed out until the category has been saved for the first time.
The Templates dropdown lets you select a default template to use for news articles belonging to this category – read more about news templates below. You can force news articles to conform this layout by toggling the Enforce for this category button.
Creating an article
To create a news article you can:
- Right-click a category folder and click New news
- Click New news in the toolbar
Either way will open the News article view (Figure 5.1).
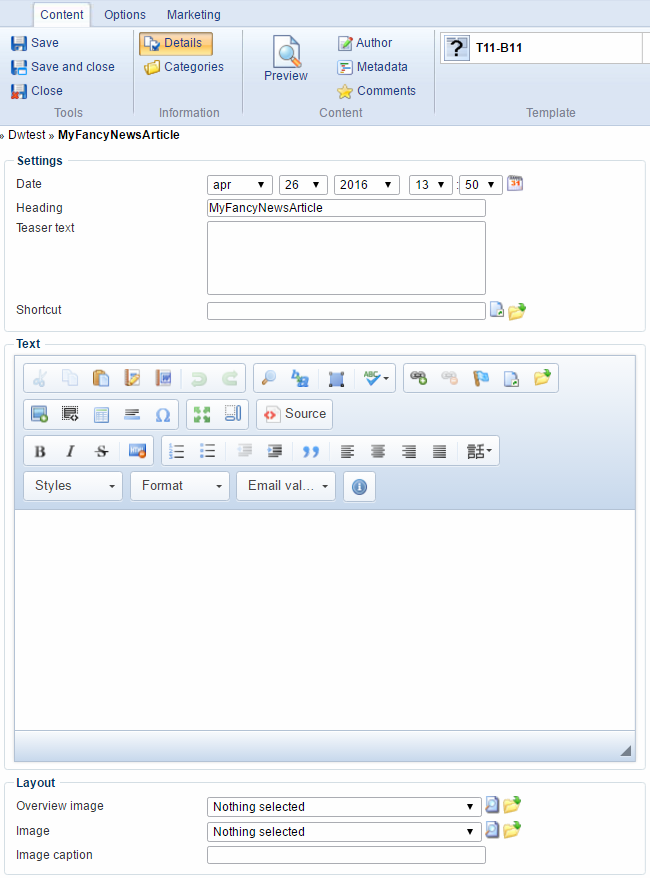
This is where you will create your news article content – and the settings related to the article.
You can:
- Enter a heading (i.e. a headline) and a teaser text for the article
- Specify a creation date (default is the actual date of creation)
- Enter or select a shortcut to a page or file in the file manager
- Enter the news article text (body)
With the layout settings, you can:
- Select an overview image (thumbnail) to use on the list of news items
- Select an image to display in the actual article – and provide a caption for it
Depending on your setup, you may also have access to general or category-specific custom fields or field groups – read more below.
News article toolbars
When creating or editing an article you have access to three tabs in the ribbon bar; content, options and marketing. From these, you may access advanced functionality related to news articles.
From the content tab (Figure 6.1) you can:
- Switch between the details view and the categories view – the categories view allows you to add the news article to more than one category, if you want to publish it in several places (e.g. company news & product news)
- Preview the article
- Specify the author name and initials
- Click the metadata button to provide metadata on the news item – a title, a description, one or more keywords, and an URL
- The keywords you enter will be used to determine relations between different news items. This relation can be shown by using the Show related news option in the News module – read more below
- Access and moderate any comments which have been added to the article
- Select a template to render the article with – read more about news templates below

From the options tab (Figure 6.2) you can:
- Set a publication period during which the article is displayed. Once the period runs out the article will be marked as inactive on the news items list, but will not be moved to the archive automatically
- Set the article to inactive/active manually
- Move the article to and from the archive
- Open the article in a new window

From the marketing tab (Figure 6.3) you can:
- Access the personalization and add profile points settings for the news article –read more about personalizing content in Dynamicweb
- Publish the news article to a one or more of the social medias you integrate with – read more about social media publishing here
The News Module
The News module is used to do one of two things:
- Publish news articles (News list)
- Create news articles from the frontend (Frontend editing)
Whichever function you want to use, add the module to a paragraph to access the module settings (Figure 7.1).
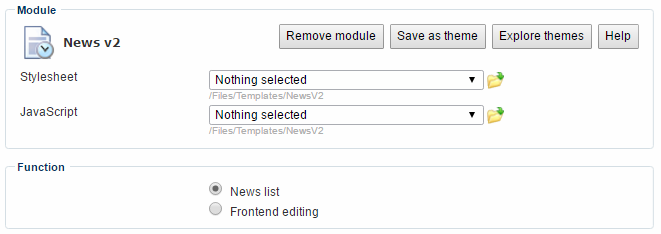
Select the intended function with the function settings – your choice determines the rest of the settings available to you.
General settings
If you selected News list, you will have access to the General settings Figure 8.1).

With the general setting you:
- Select the size of the teaser text in the list view – choose between showing the entire text or a fixed character limit. You may also use the news text as the teaser.
- Select one or more categories to include in the news list
- Select the status of the news articles you want to publish – only active, only archived or all news articles
- Specify which news item to display first (start with number) in the total list of displayed news on your web page (number 1 is the last created news article) and how many items per page you want
Advanced settings - Display
To further control the News module behavior, you may check Advanced to access the advanced settings.
The advanced settings are divided into several areas, the first being the display area (Figure 9.1).
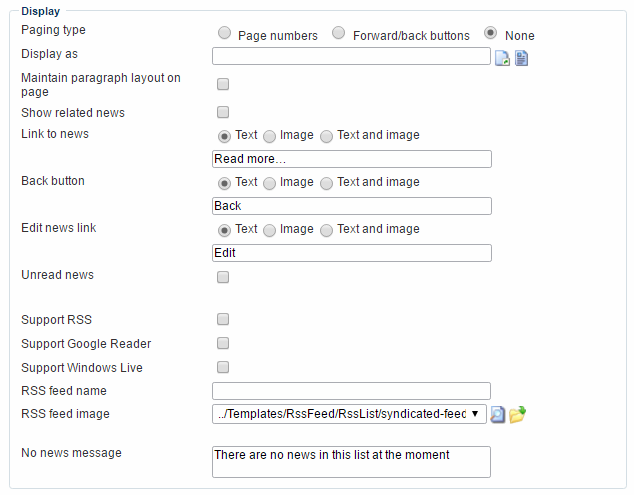
The display area allows you to:
- Select a paging type and style the forward/back buttons if used
- Select a page or paragraph to display the news items on. If you have content on that page which you want to display, check the maintain paragraph layout on page checkbox
- Check the show related news checkbox to show related news articles based on keywords – you add keyword to an article by using the metadata options when creating an article, see more above. If checked, you gain access to settings for sorting, ordering, limiting and displaying the related news section on your page
You can also style the link which takes the reader to an article, the back button which takes them back to the list, and the edit link. The edit link is only visible for logged in users, and will only appear for news editable by the logged in user. Read more about frontend editing below. You may also alert users to unread news, and provide a text and/or image which does so.
The sharing settings let you to add an RSS feed, Google Reader, and Windows live button to the top of your news page, and to supply the RSS feed with a descriptive name and image.
Advanced Settings - List
Next up is the list area (Figure 10.1).

The list area allows you to:
- Create or edit the template used to display the list of news items on your website
- Specify by which criteria you want the list items to be ordered and select a sorting (descending or ascending)
Advanced Settings – Search & Formatting
With the search settings (Figure 11.1), you can let your users search through your previously published news articles.
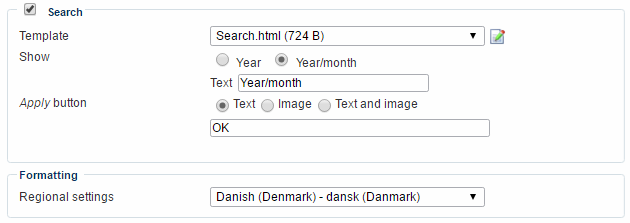
You can:
- Select or create a search template to use
- Specify if you want users to search by year only, or by year and month
- Control the style of the search button
The formatting settings lets you set a region for the news list – this will determine e.g. the date-format used.
Frontend editing & Workflow settings
If you want to use the News module to allow selected users to create and edit news articles from the frontend, you must select Frontend editing in your general settings.
This will give you access to the frontend editing and workflow settings (Figure 12.1).
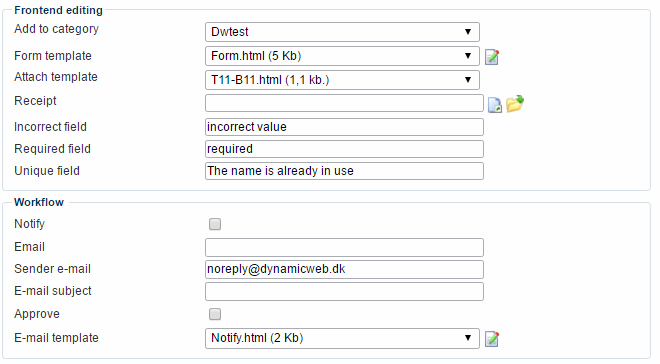
With the frontend editing settings you can:
- Specify a category to add the news article to
- Provide a form template for submitting the article content
- Select a template for news items added by visitors to the news category.
- Provide a link to a receipt page to redirect a user to once the form is submitted
- Customize the field validation messages for an incorrect value, a required field and a unique field
The workflow settings allow you to notify someone (an editor) every time an article is created from frontend. The approve checkbox lets the editor approve or discard a submission – a discarded submission is deleted.
News templates
News templates control the layout of the news articles you publish on your website.
Dynamicweb comes with a number of predefined news templates – but you can modify existing templates or create your own.
To access, edit or create news templates:
- Go to Management Center > Designer > Templates
- Click News v2 in the category list to open the templates overview (Figure 13.1)
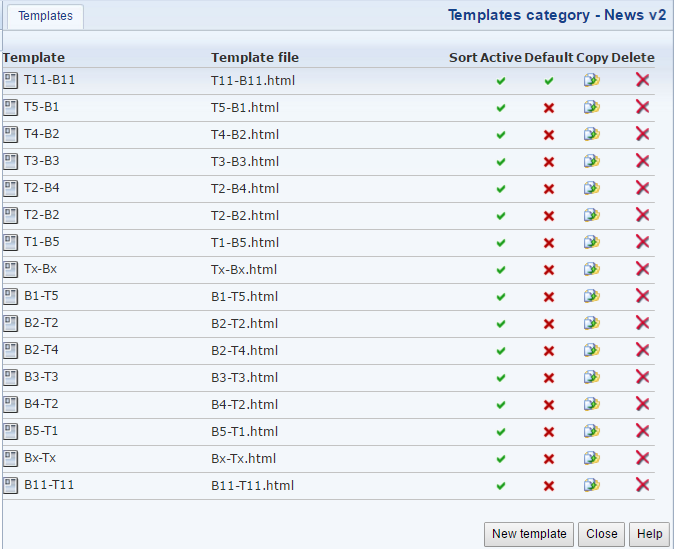
From the templates overview you can:
- View and edit existing templates – and copy, delete and activate/deactivate them
- Create a new template by clicking the New template button – this opens the edit template view (Figure 13.2)
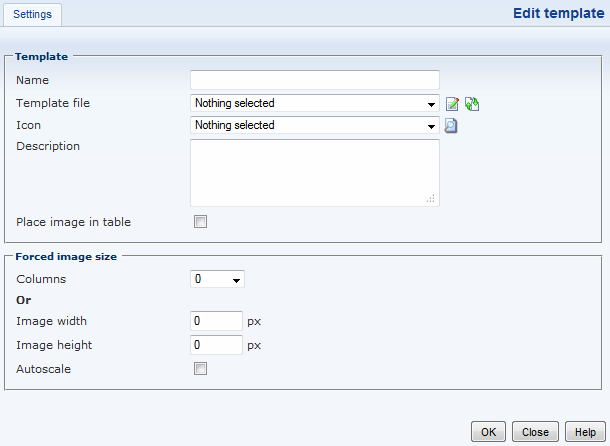
From the edit template view you can:
- Name the template and select an icon to use in the templates dropdown – and optionally provide a description
- Select or create a template file controlling the layout of the news using the template
- Check place image in table to do so
You can use the force image size settings to control how the news article image is rendered – by either specifying how many columns it should occupy or by manually specifying a width and height. With autoscaling, the image may be set to automatically scale to the dimensions you entered.
Implementing
In this section you will learn about:
- Custom fields, custom field groups and other advanced configuration options
Advanced configuration options
To access the advanced configuration options for the News module (Figure 15.1), go to Management Center > Control Panel > Modules and click on News v2.
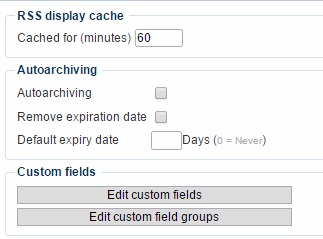
With the advanced configuration options you can:
- Specify for how many minutes RSS feeds from the module should be cached – applies to both RSS feeds, Google Reader and Windows Live feeds
- Toggle and configure auto-archiving – check remove expiration date to be able to show an archive on the frontend, and set a default expiry date in days
- Create and edit custom fields and custom field groups
Custom field & field groups
From the advanced configuration options, you can create custom fields and custom field groups for news items.
Custom fields apply to ALL news articles, whereas custom field groups are attached to one or more news categories.
To create a custom field:
- Click Edit custom fields in the advanced configuration options to open the custom fields overview
- Click the New field button to open the custom field view (Figure 16.1)
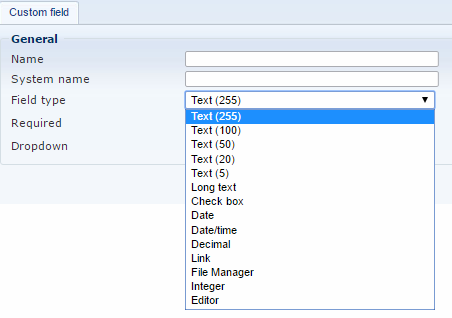
When creating a custom field you must:
- Name the field and set a system name (defaults to name field content, but can be anything you’d like)
- Select a field type:
- Text (character limit 255, 100, 50, 20 or 5)
- Long text
- Checkbox
- Date
- Date/time
- Decimal
- Link (to page or file from file manager)
- File manager
- Integer
- Check required to make the field required
Custom fields will appear on all news articles, and as fields to fill when creating new articles.
Creating custom field groups works in the same manner, except you need to create and name a group before adding fields to it. Once created, they will be available when creating or editing a news category, and consequently on articles created within that category.


