Configuring the Live Integration Framework (On-Prem)
The Live Integration Framework is responsible for the communication between Dynamicweb and Business Central in the scenarios where we need personalized data from Business Central. Examples of this is:
- When the customer opens a product list on the frontend shop, the current prices of the products are retrieved from Business Central in respect to the customer’s trade agreements.
- When the customer adds an item to the basket, removes an item or adjusts the quantity of an item in the basket, the calculation of the basket is retrieved from Business Central in respect to the customer’s trade agreements.
- When a custom completes an order, it is immediately sent to Business Central, and a sales order is created
- When a customer wants to download a list of open orders, invoices or credit notes or the actual documents, they are also retrieved directly from Business Central.
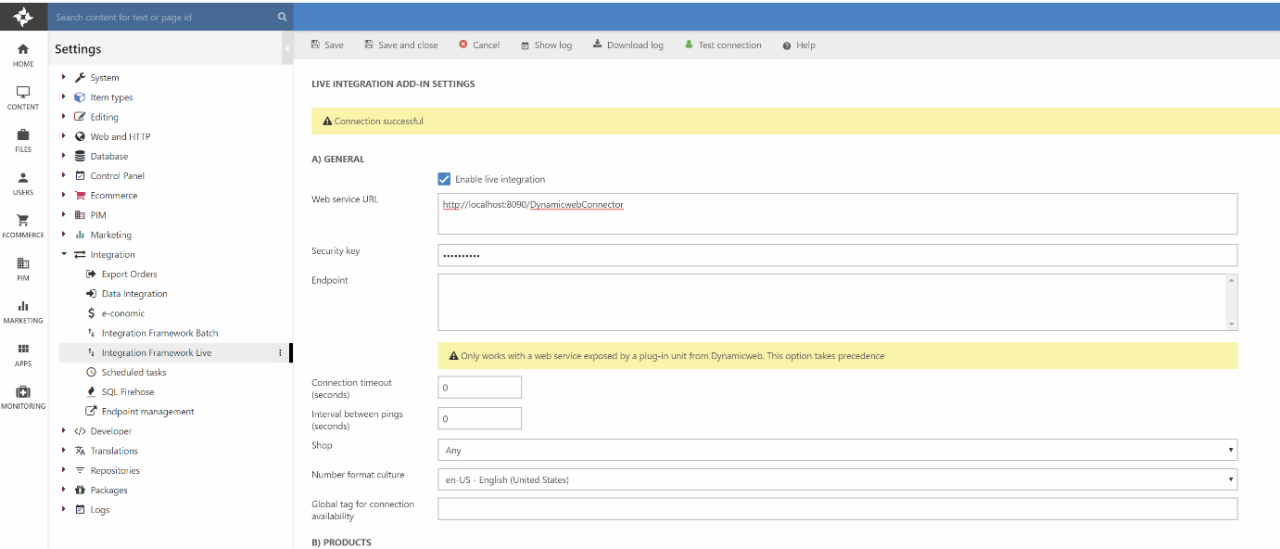
Unless you’re running everything on one box, we now need to do some endpoint configurations on the live and batch integration setup. Starting with live:
Please note that the setup of the live and batch integrations varies depending on whether you are connected to an on-premise Business Central or an Azure cloud hosted Business Central. If you wish to connect to a cloud hosted instance, you should refer to the 5.B Configuring Live and Batch Integration Framework (Cloud) section instead.
Change the Web service URL and the Security key the values, you have configured in your connector webservice. If you are connecting to an on-premise solution, the necesarry steps are as follows:
Configuring the Batch Integration Framework
The Batch Integration framework is responsible for synchronizing larger volumes of data between Dynamicweb and Business Central. This is the case when we want to import products or customer contacts to Dynamicweb. The Batch Integration Framework handles both the scheduling and the transportation of data.
The workflow of a batch integration is the following:
- On a scheduled interval, the Live Batch Framework sends a request to Business Central containing a request string in XML format, e.g. to receive items to populate the product archive:
- Business Central processes the request and returns a batch of e.g. items
- The Batch Integration Framework receives the data and stores it in an XML file in the Files section
- The Batch Integration Framework launches a Data Integration activity that performs the actual import to the Dynamicweb database
When exporting data, the same steps are carried through but in reverse order:
- The Batch Framework launches a Data Integration activity that extracts data from the database and stores it in a file in the Files section
- The Batch Integration Framework wraps the data in a request XML and sends it to Business Central
- Business Central processes the request, e.g. "create sales orders from batch" and returns a response
- The Batch Integration Framework processes the response and finalizes the data, e.g. adding the Business Central sales order no. to the order in Dynamicweb Ecommerce.
The Integration Framework Batch uses the same endpoint for the Live Integration Framework, so also here we should change the Web service URL and Security key similarly for the following jobs:
- Export Failed Orders to BC
- Fetch Customer Data from BC
- Fetch Shop Data from BC
- Fetch Stock Level from BC
In addition, we need to change a property in the request XML for the “Fetch Shop Data from BC” job:
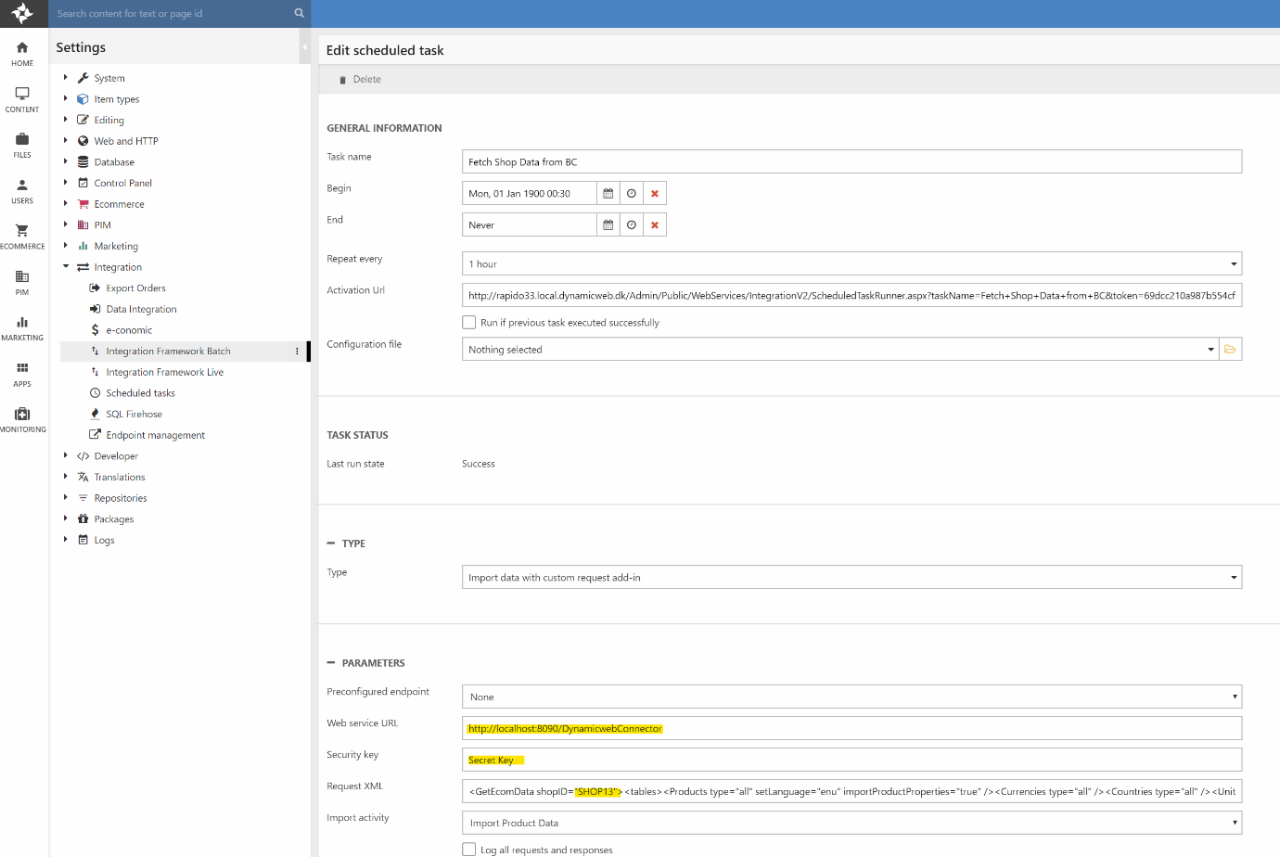
The shopID property should be the ID of the shop we created earlier. Business central will use this property to generate mappings of product categories to the correct shop in Dynamicweb Ecommerce.
Running the Batch Integrations
You can now run the batch integrations one by one. Return to Integration Framework Batch overvied and click the Run icon on the following tasks:
- Fetch Shop Data from BC
- Fetch Customer Data from BC
If you set up a Windows Scheduled Task during the installation, they will also run automatically.
Running the batches should do the following:
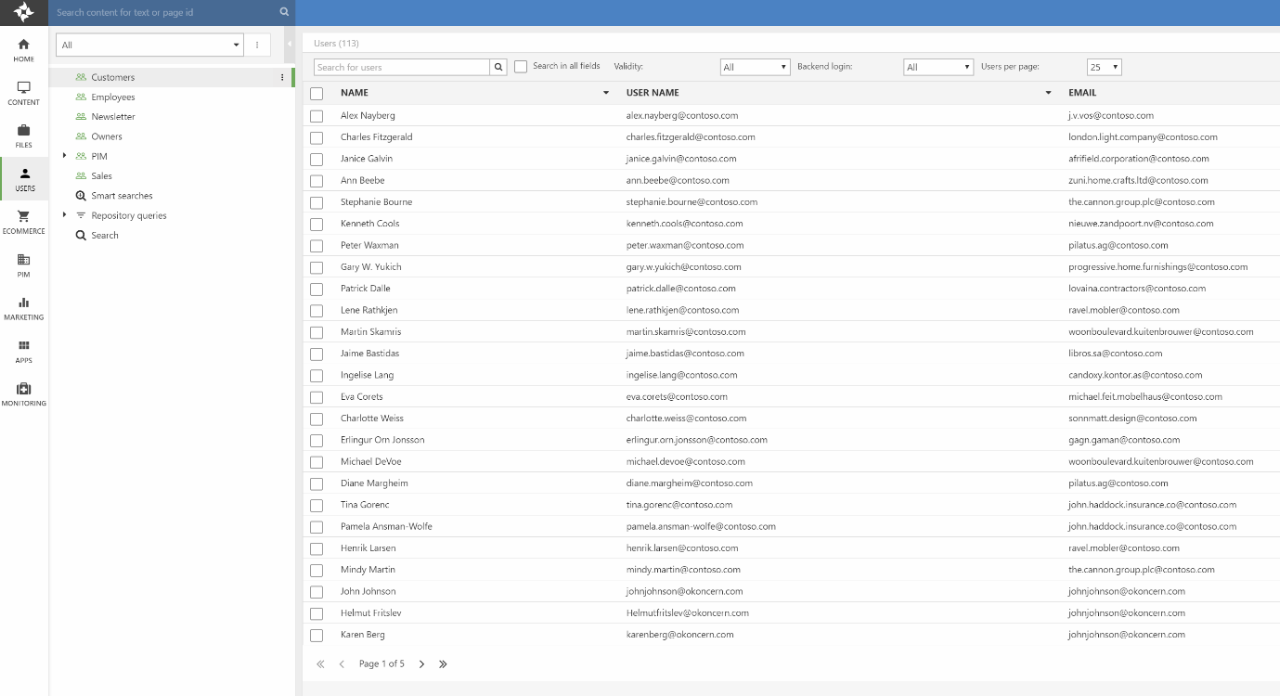
Import contact person and addresses to the Users section:
Import product data to Dynamicweb Ecommerce:
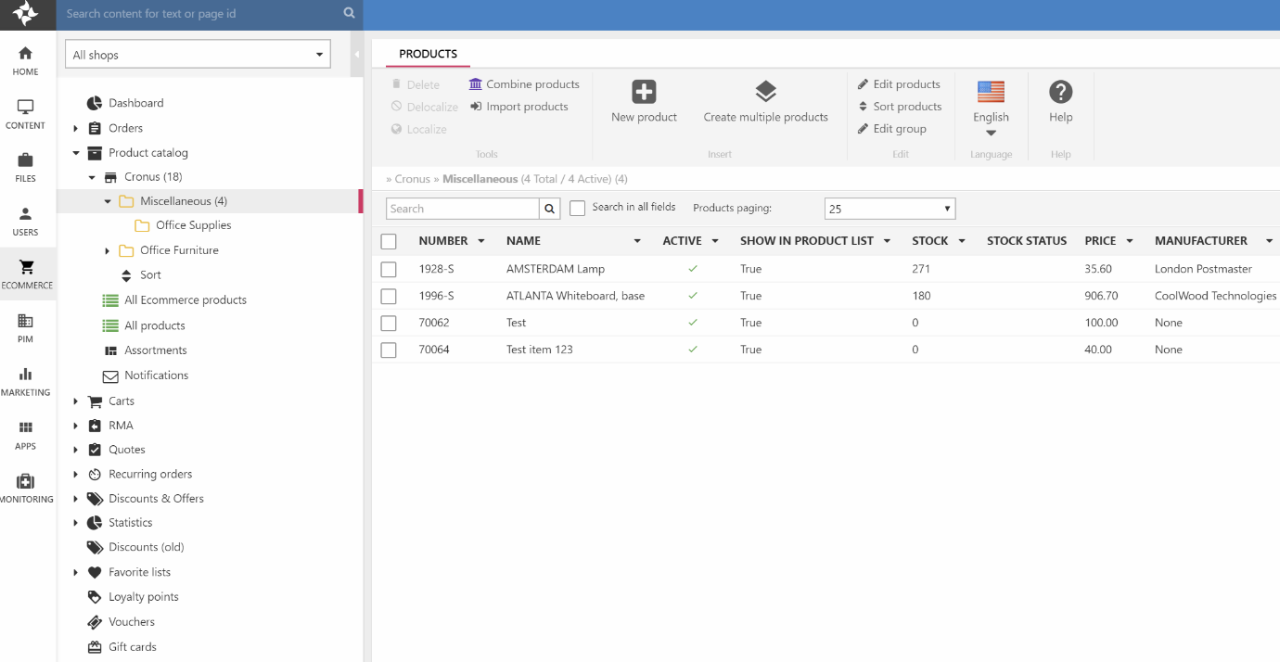
There is a lot more configuration data such as currencies, countries, units also added in the product shop data import, which you will use in the next article.
Background Information
Data from the Dynamicweb Plug-In Unit is laid out in a proprietary XML format structured format with tables, items and columns equivalent to a database table:
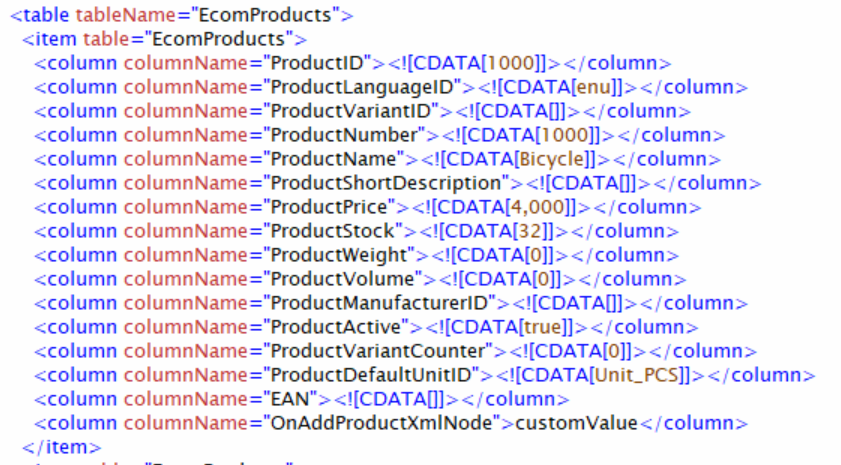
A format like this is in fact interpreted by Dynamicweb as a database table containing rows and columns of data, and when there is a match between a table name and column names in source and destination, Dynamicweb is able to map them automatically.
Clicking on Import Product Data opens the mapping page, which is divided into two sections. The top section contains mapping of all the tables extracted from Business Central:
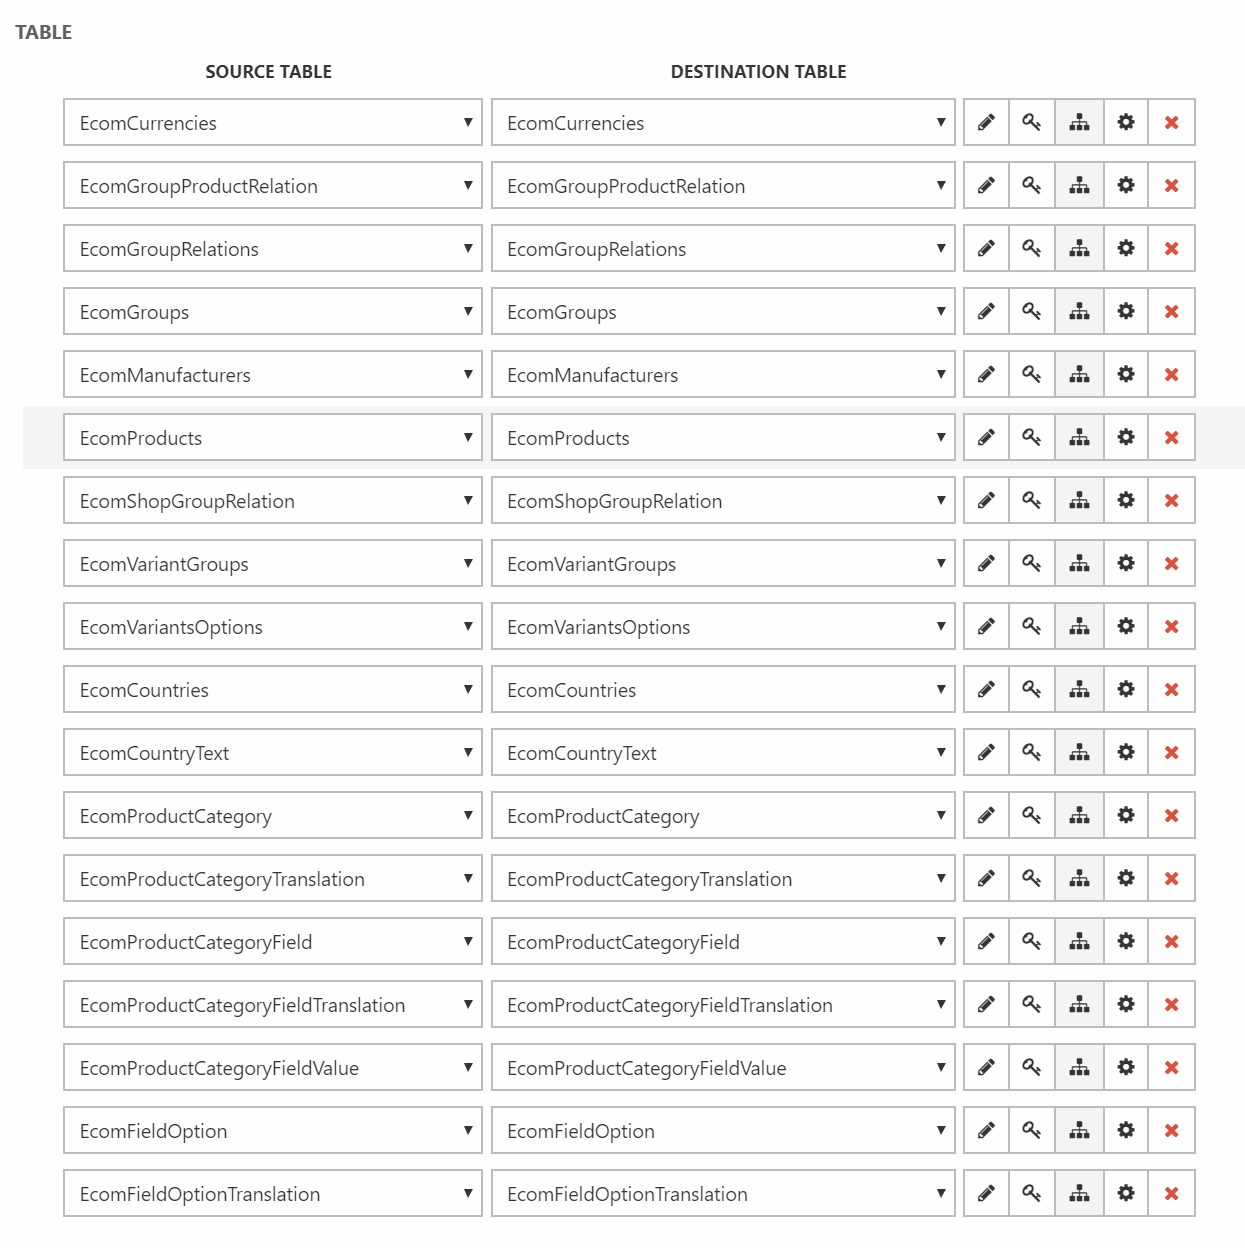
Clicking on a row displays the column mappings of that table.
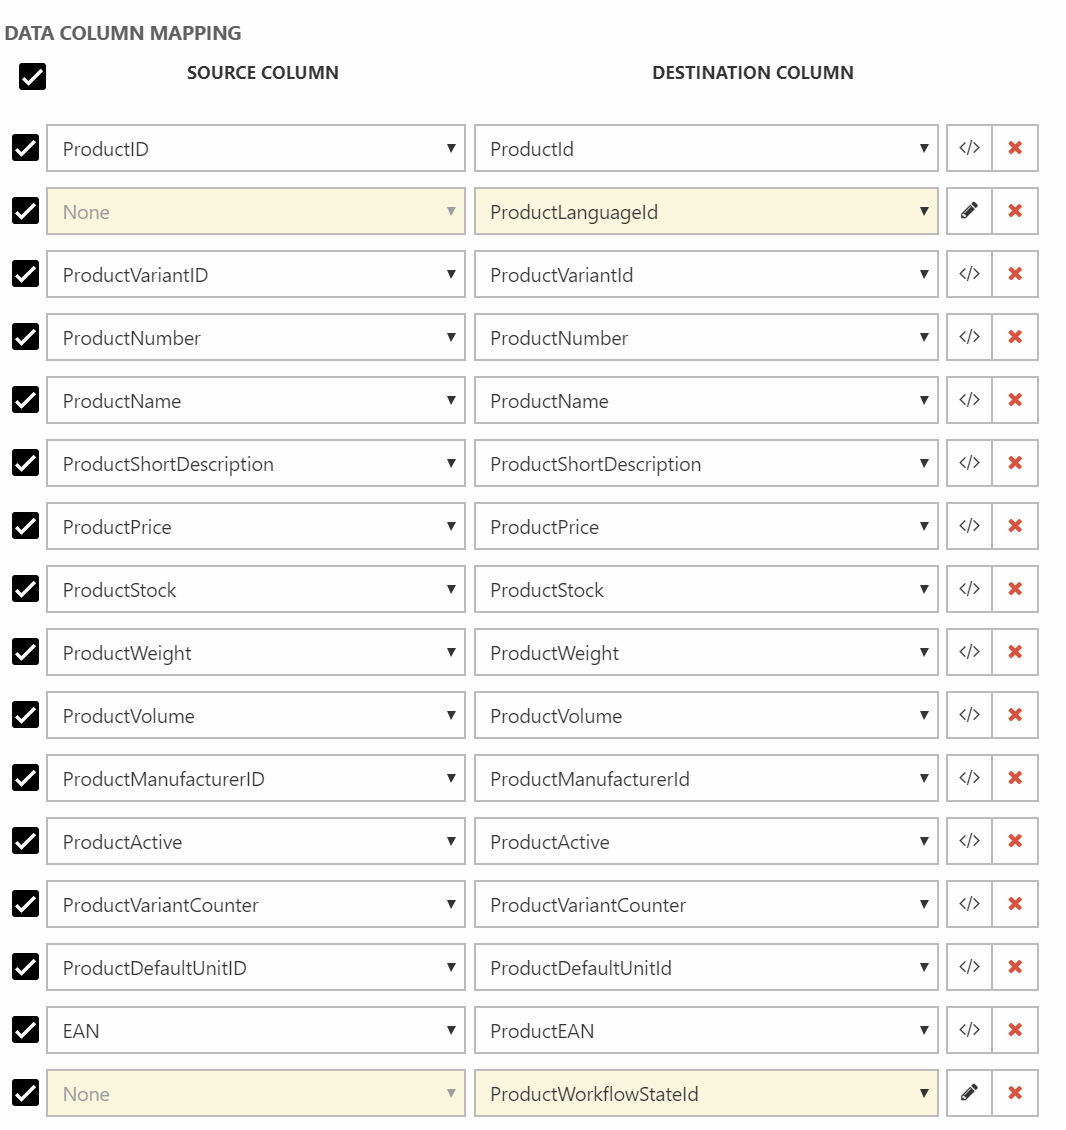
These are mappings between the column nodes in the XML format and the database table columns. The yellow columns are columns, where we add information not available in Business Central constants in our mapping. For further information, the Data Integration app is described in great detail on this page.