Configuration of Dynamicweb CMS
Now we have set up the configuration of the integration and synchronized some data, but there a few settings in the CMS set of Dynamicweb the are necessary for everything to run smoothly.
Currency Setup
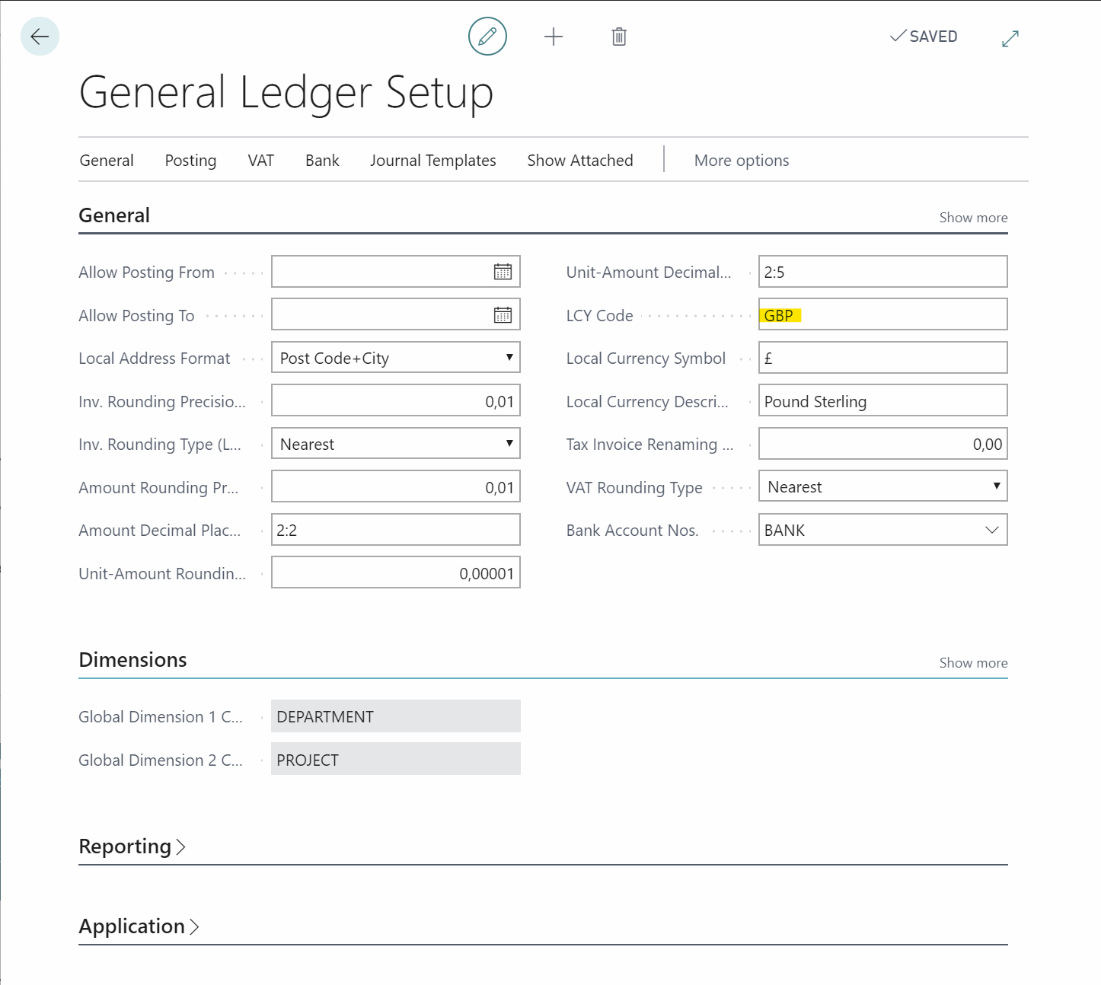
After running the initial batches, we receive a load of data from Business Central including currencies. In order for the price management to work properly, we have to set a default currency for the solution. This is the currency, which the prices in the database are stored in. It must be the same at the Local Currency in Business Central General Ledger Setup:
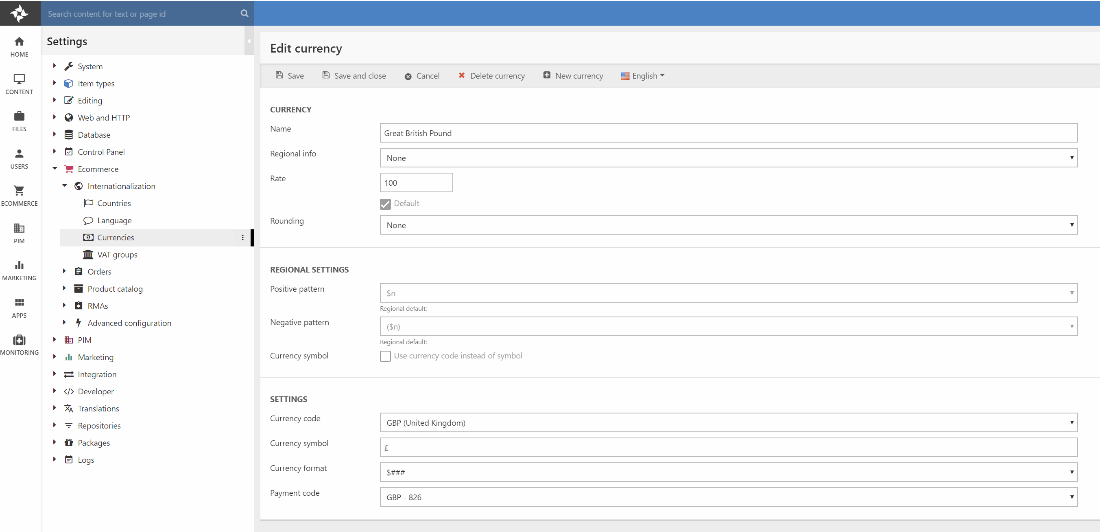
Switch to Settings -> Ecommerce -> Internationalization -> Currencies and locate the currency matching the LCY. Check the Default checkbox, apply a currency symbol and payment code and click Save. Accept the warning.
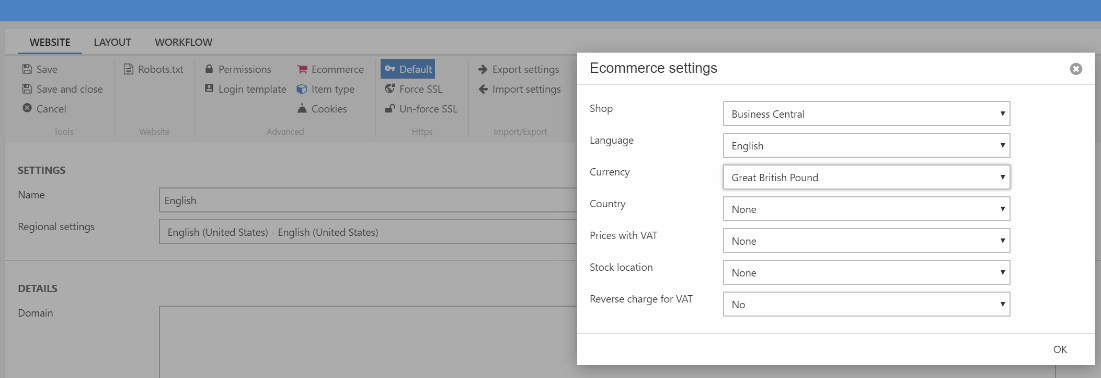
Switch to the Content area and go to the website settings, where you select the LCY currency code in the Ecommerce dialogue:
Integration Customer Center
Swift ships with a Customer Center app which allows customers to review orders created in Dynamicweb Ecommerce. But since the Live Integration Framework relies on data from Business, we can offer customers to review their total purchase history also in relation to sales orders received through other channels than Dynamicweb. For that we used an app called Integration Customer Center. This app can list the customer’s open orders, invoices and credit notes as well as allowing the customer to download the documents as PDF directly from Business Central. It needs some configuration, though, so please do the following:
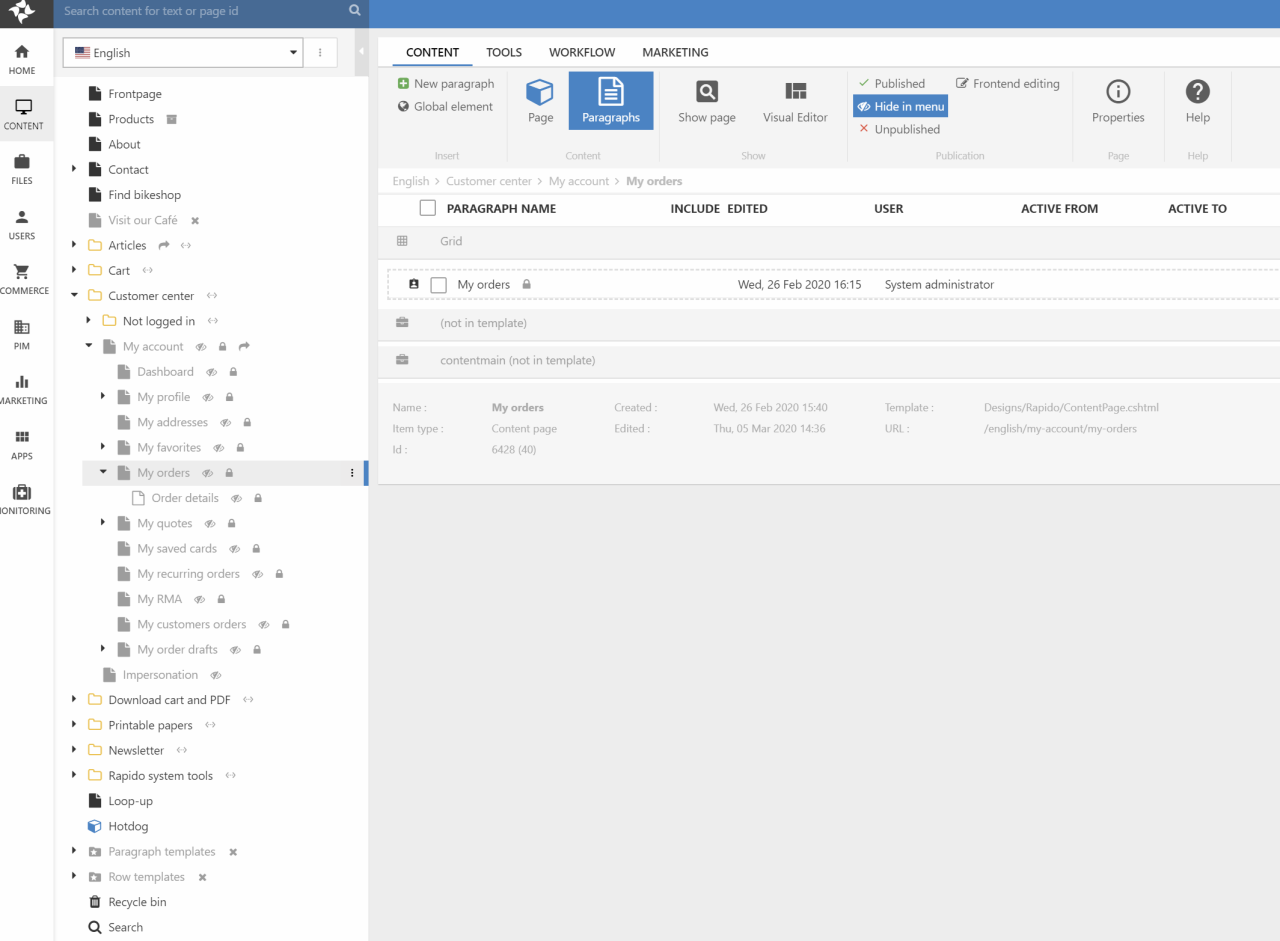
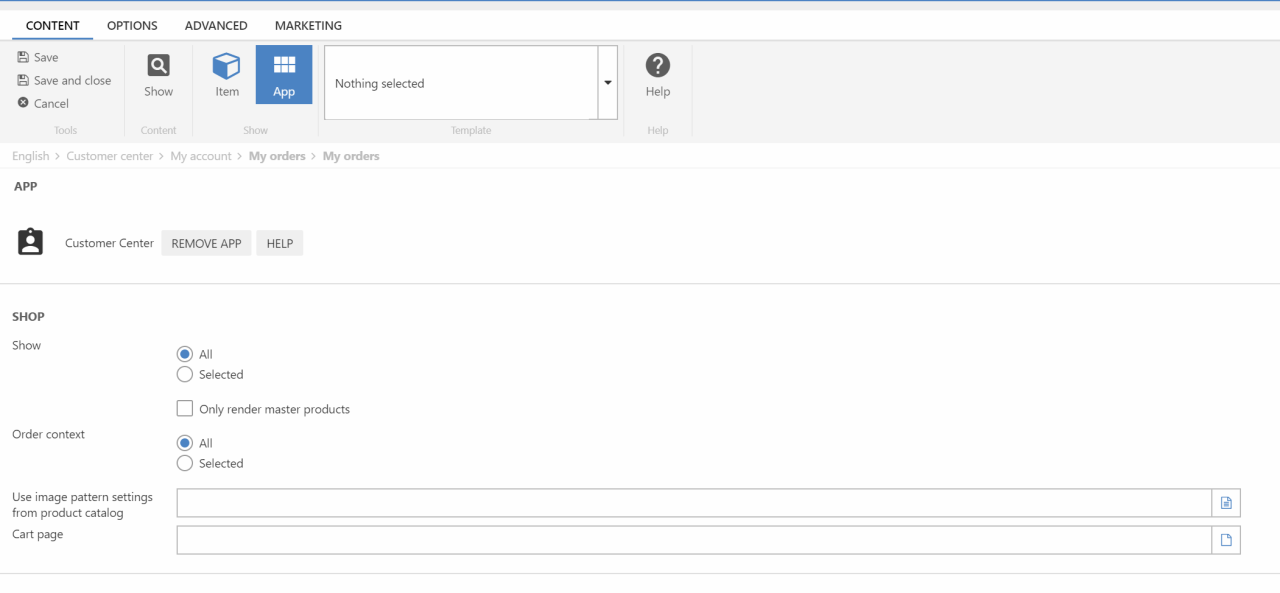
1: In the Dynamicweb navigation expand Customer center, My Account and click the page called My Orders. Once it is loaded, click the paragraph with the same name:
2: Click the App button in the top and then click the REMOVE APP button:
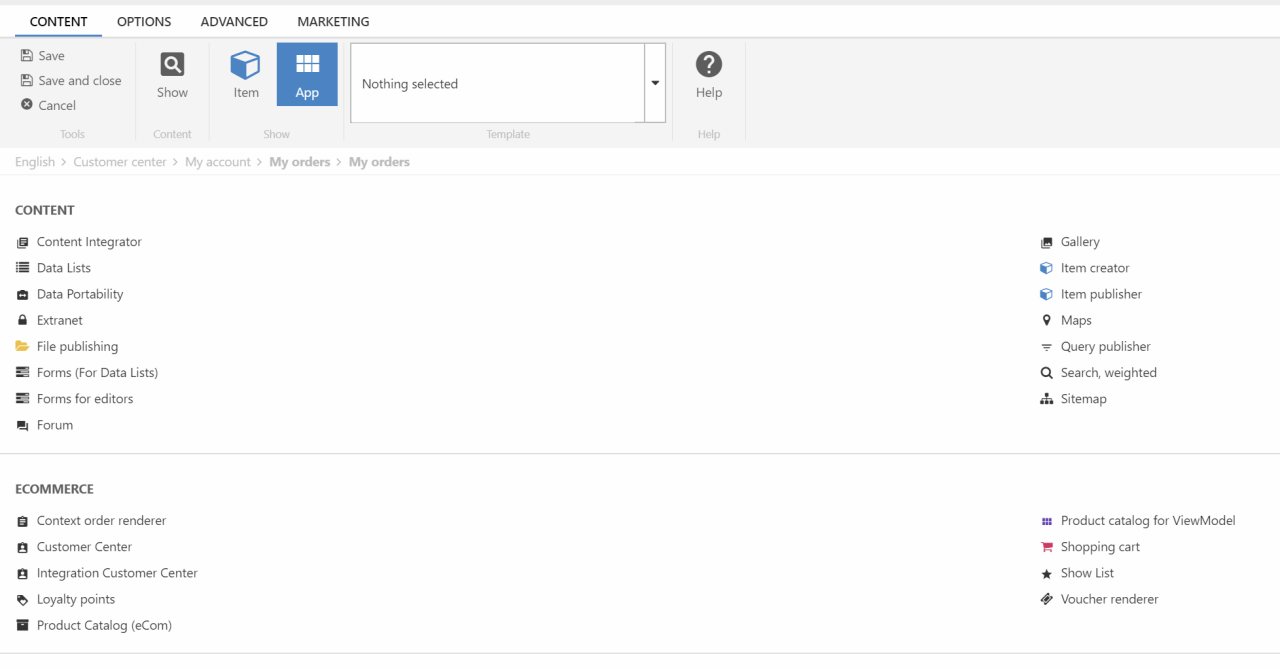
3: The content of the App changes to show the available apps. Click the Integration Customer Center link in the Ecommerce area at the bottom
4: In the Navigation template select “Navigation.cshtml”
5: Click the button for MainPage and fill the fields in the form in accordance to this:
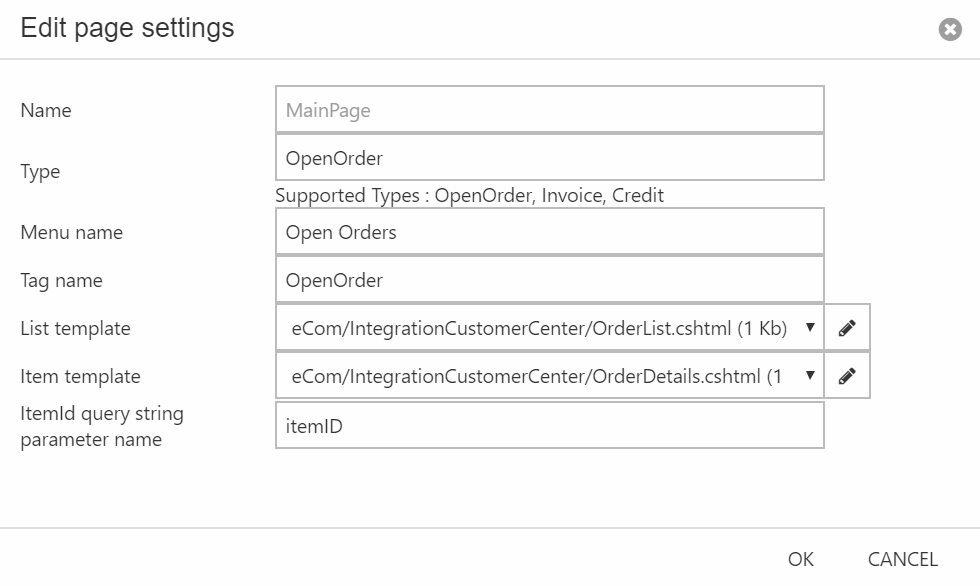
6: Click OK and now click Add Page under MainPage. Add the following registrations:
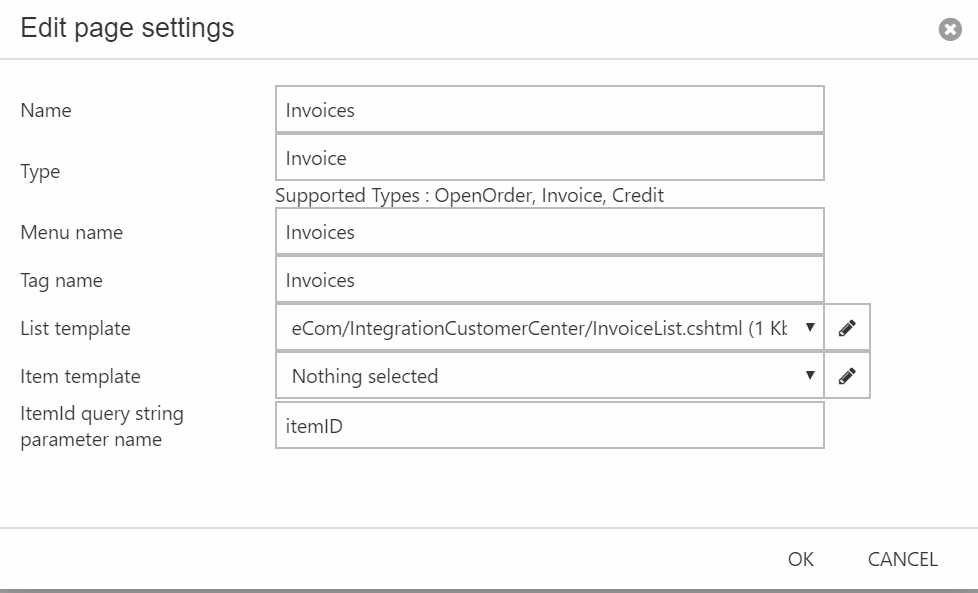
7: Click OK and click Add Page one final time. Make the following registrations:

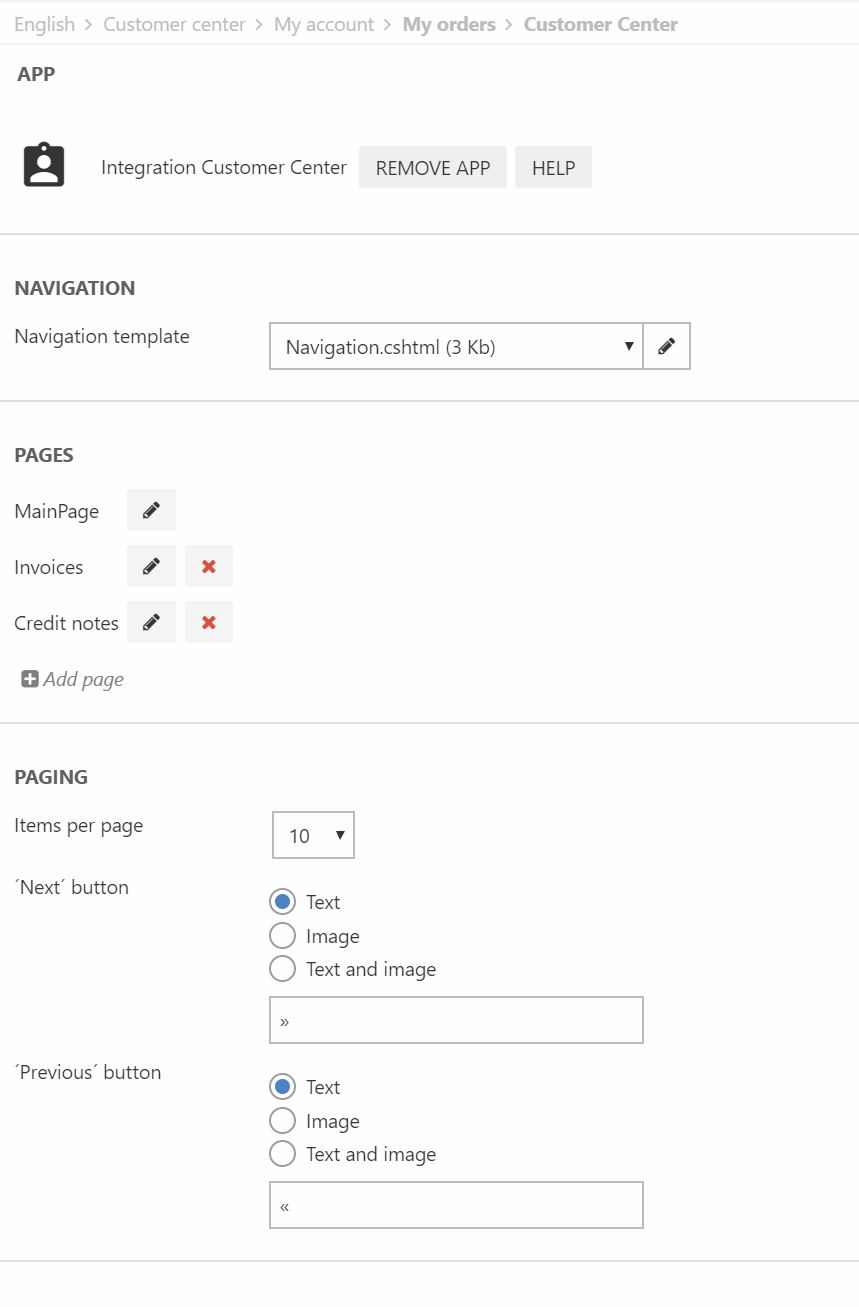
You should end up with the following:
This will add the app to the page allowing customers to review open orders, invoices and credit notes. We will test a bit later.
Custom Requests
The Integration Customer Center may seem simple, but it is actually a very power tool. The type definisions we added earlier, OpenOrder, Invoice, and CreditNote, are supported by the standard Plug-In Unit, but as the Type field is simply a text field and not a dropdown, we can add any text there. This type will then be passed to Business Central in the request, and in the standard Plug-In Unit it will not be recognized, but a Business Central developer may create an extension to the Plug-In Unit that recognizes this type and return some custom data from Business Central. The app expects a response in the following format:
Provided that this format is returned, the app will render this as a loop with tags named after the value in the “columnName” property of the column nodes containing with the value of the nodes.
You can read more about the Integration Customer Center app in this article.