Items overview
Items are the basis of your company – the method with which you make a profit. By integrating your Business Central solution with Dynamicweb your organization is capable of pushing items located in Business Central to your ecommerce platform where they are accessible to customers online.
Your products located in Business Central are simply mirrored and presented in your ecommerce platform – the true power of your integration to Dynamicweb lies in the tools that are made available to you in managing how your products are presented and made available for purchase.
In this chapter of the user guide you will get an introduction to how items are created in Business Central and automatically imported to your Dynamicweb ecommerce platform.
Creating items
The first step for any business working with Business Central and online retail is to create items.
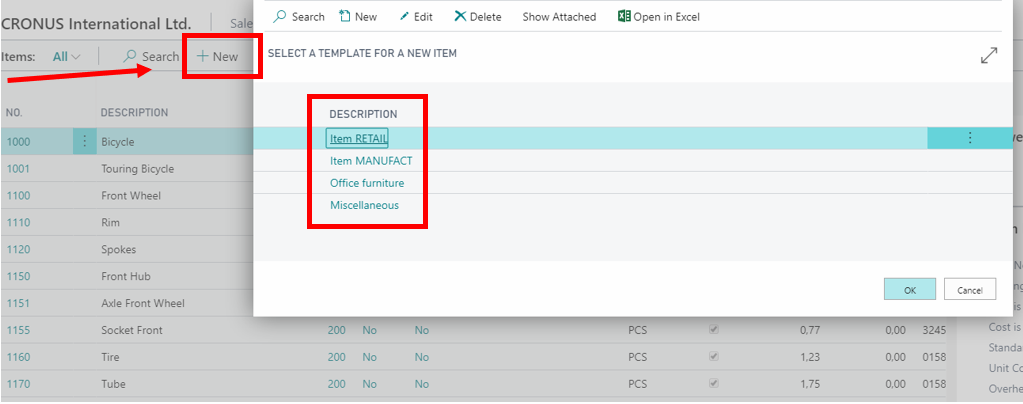
To access your list of items, navigate to the Items page (alternatively search for items and click the corresponding search result).
On the items page, press New. If you already have a list of item templates, press the template you wish to use. Otherwise, set up a new item template.
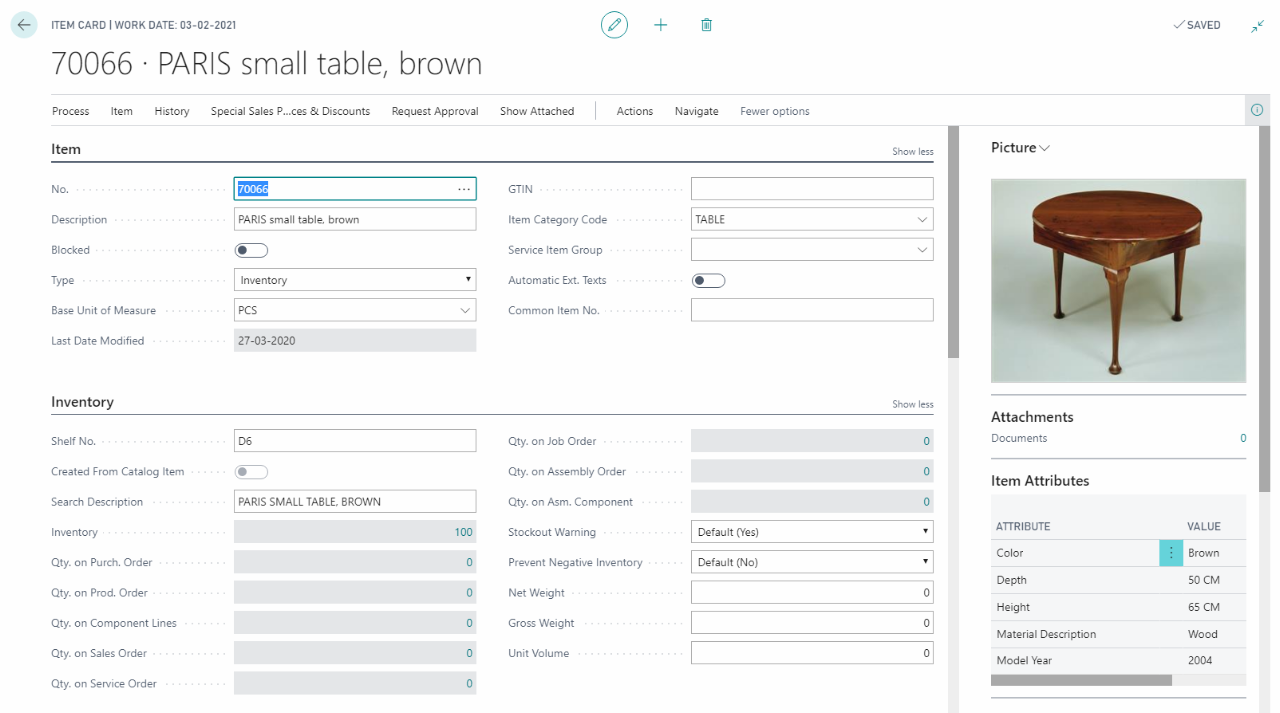
Fill in the item card with the relevant data for your new product. The item should be created with data corresponding to your personal Business Central setup with regards to posting groups, discount groups, item category codes, etc.
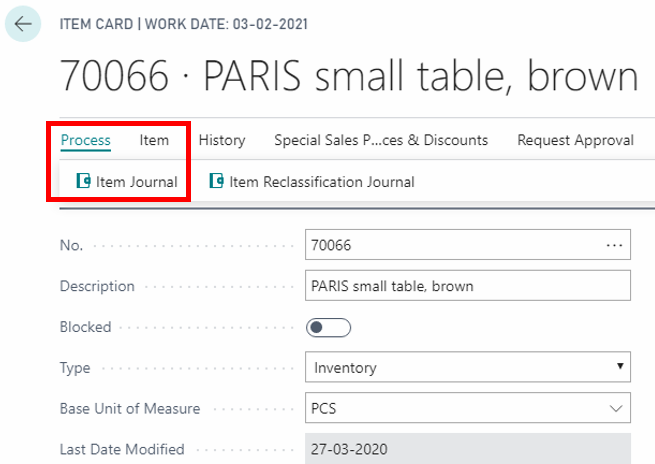
Manage inventory for your item with the Item Journal by folding out Process in the item card.
Integrating and editing items
With an integration between your Business Central and Dynamicweb in place, your item data flows freely unto your ecommerce solution. This means that the data structure in BC – namely how your items are categorized and what data they have been enriched with – determines how they will be presented in Dynamicweb ecommerce.
The seamless integration between BC and Dynamicweb ensures your BC data is automatically transferred unto your ecommerce shop, including product data and inventory changes. By following the above item creation guide, your item can now be viewed in the frontend of your ecommerce shop and managed in the backend of Dynamicweb.
Item images in BC are not automatically transferred to your ecommerce solution and must be uploaded to the product in Dynamicweb. You may also choose to manage other data such as loyalty points and vouchers in Dynamicweb. To add an image to your new item follow these steps:
Log in to the backend of your Dynamicweb solution and press the ecommerce module.
Fold out the Product catalog panel – here you find your BC item category structure reflected in Dynamicweb ecommerce. This is also the standard product category menu layout in the frontend of your ecommerce shop.
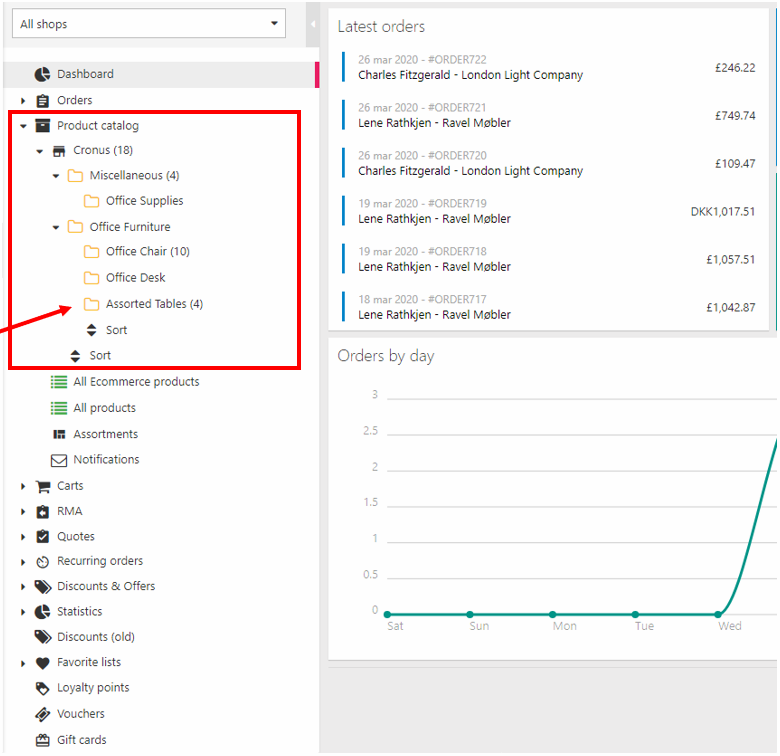
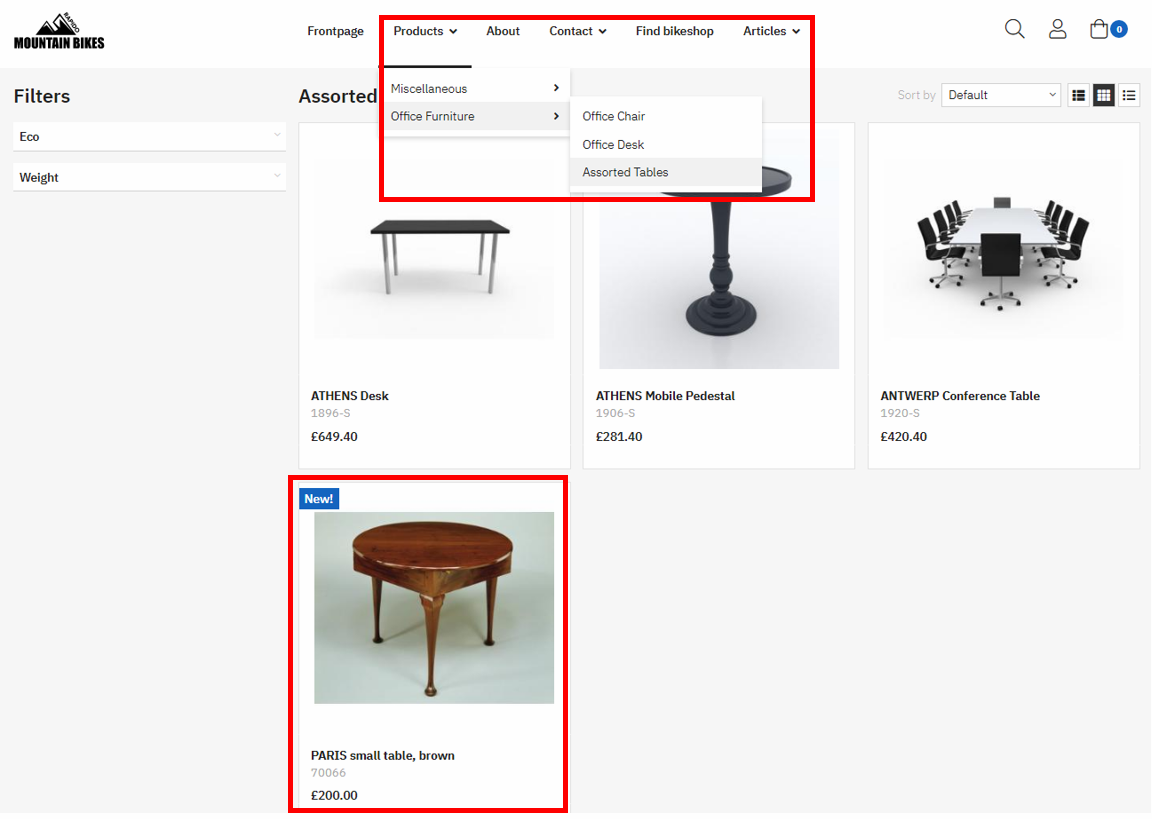
Navigate to the folder corresponding with the item category your item was placed in, in Business Central – in this case, the Assorted Tables folder.
Press the Assorted Tables folder.
Editing items in Dynamicweb
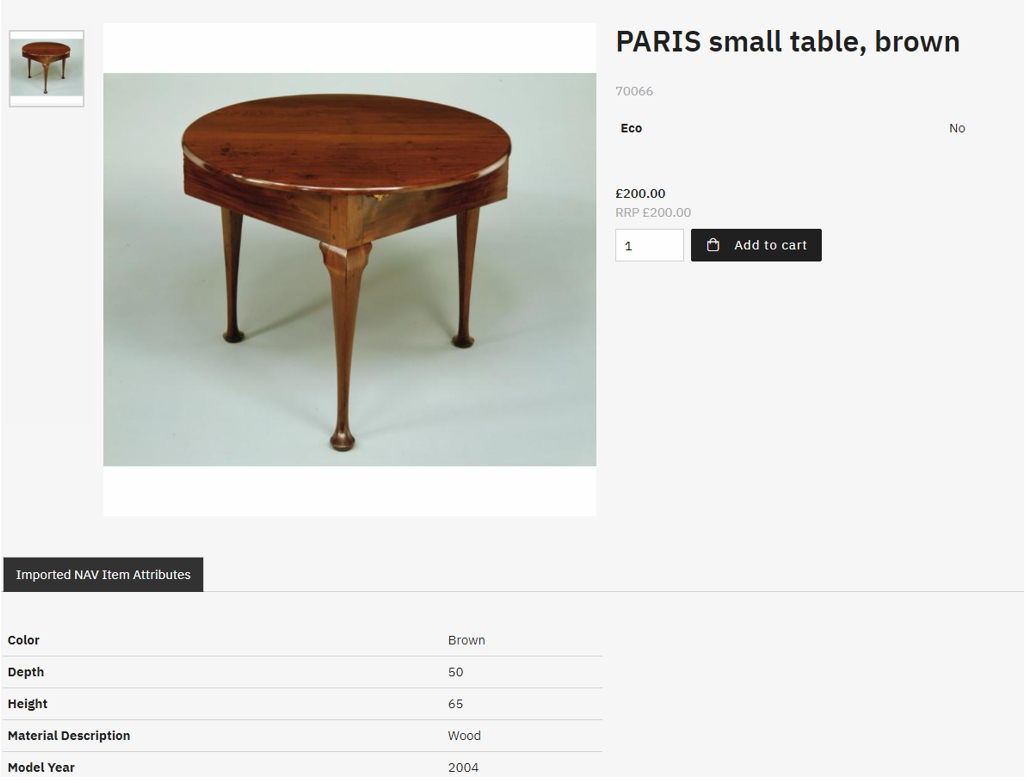
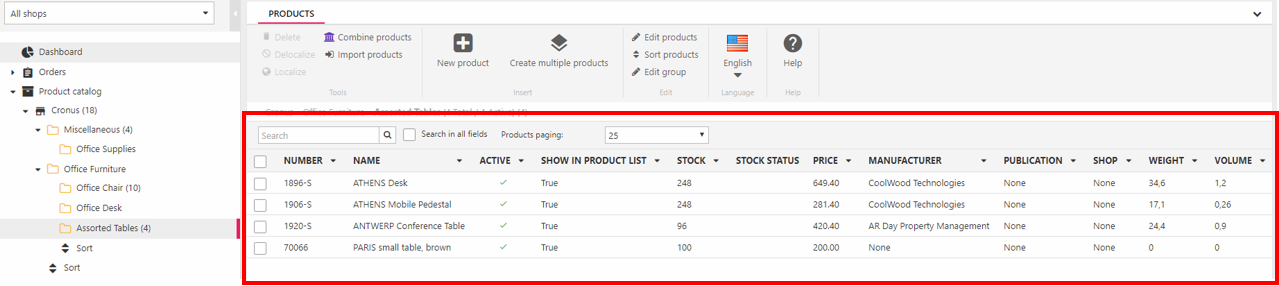
Within this folder you find the products related to the item category. In this case, the ‘PARIS small table, brown’ corresponds with the newly created item in Business Central. Notice how information posted in Business Central such as the product number, name, cost (price) and inventory (stock) is automatically posted in Dynamicweb ecommerce.
Hover the ‘PARIS small table, brown’ item with your mouse and press it to enter the product card.
On the product card you can edit various types of information related to your product. Information is automatically retrieved from Business Central if the product fields are available in Dynamicweb.
Due to this relationship it is often advisable not to edit product information in the ecommerce system, as that can lead to information gaps where products enriched in the ecommerce system end up with differing information from BC. Instead, BC should be seen as the product information master – Dynamicweb handles the digital presentation of the products and enables online commerce.
Should you decide to edit product information in Dynamicweb ecommerce, simply press the field you wish to edit and make changes. When finished, press the ‘Save’ button to save your work.
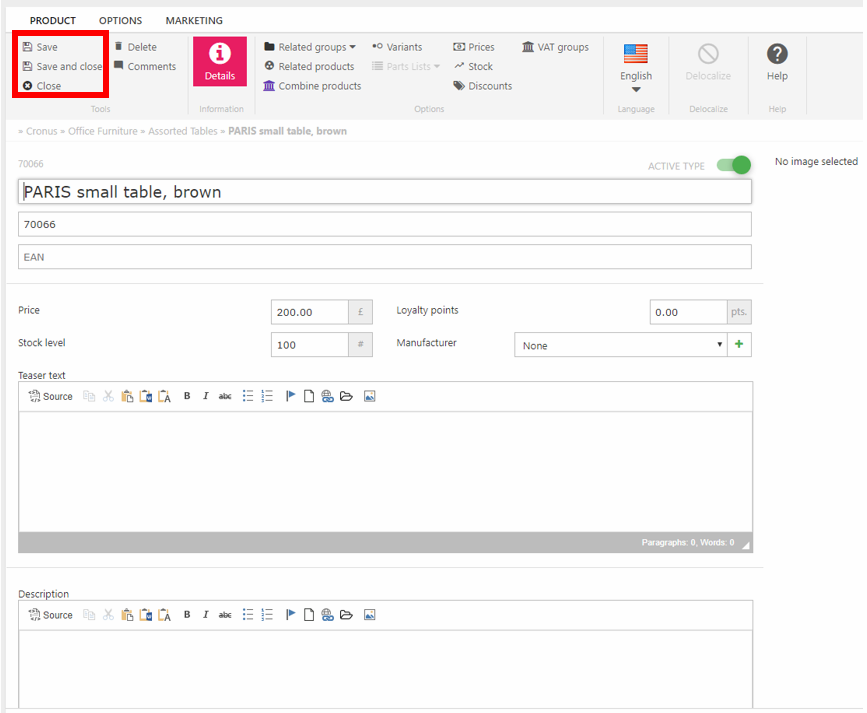
Scroll down the page to view more fields that can be edited.
Images are not automatically retrieved from Business Central during the integration. There are different ways to automate the process, but this guide will show how to manually add a product image to our item integrated from BC.
On the product card of the item you wish to edit, navigate a bit down the page to where the Product Images heading is found. Here it is possible to upload images depending on their size, and uploads can be done either from Dynamicweb’s internal file storage system or from your own server.
In this case the image of the item is already saved in the internal file storage of Dynamicweb. Press the Folder button and navigate to where the image is located. Press the image to upload it. Remember to save your work once the image is uploaded to the product card.
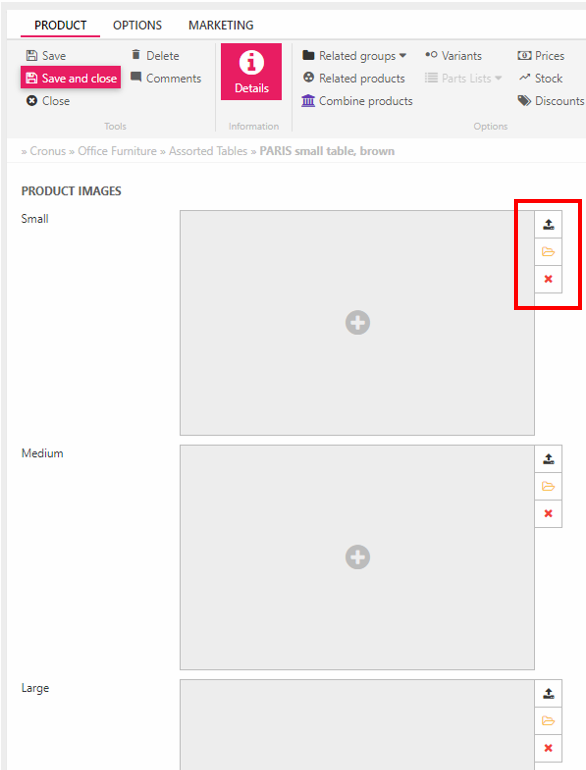
In the list you must search for and press the specific image to upload it.

Items presented online
Once your item is integrated from Business Central it is automatically published to your ecommerce shop. Depending on the item category structure and item type, you can navigate to your item by filtering through the categories in the menu dropdown on the website.
Alternatively, you can press ‘Products’ button in the menu to see the full list of items in your ecommerce shop where you will also find the newly created item.
Press the item to access the product page. On the product page you can access the item data you enriched in Business Central or the ecommerce module such as price and information, and add the product to card in order to initiate a sales order.