
Custom Fields
Lucene indexes are composed of small documents, with each document divided into named fields which can contain either content which can be searched or data which can be retrieved. For our standard index types – product, content, user, and file – we’ve created default field collections which are added via so-called schema extenders.
Naturally, we’ve made some basic choices when it comes to the default collections, especially when it comes to how the fields are indexed – in Lucene indexes each field can be stored, indexed and analyzed:
- Stored fields have their values stored in the index
- Indexed fields can be searched, the value is stored as a single value
- Analyzed fields have their values run through an analyzer and split into tokens (words)
Generally speaking...
- ... a field you want to display in frontend must be indexed
- ... a field where you want the user to search for parts of the value in free-text search must be analyzed.
- ... a field which will be published using the query publisher should be stored.
- ... a field you want to use for facets should be indexed but not analyzed.
The preconfigured default field collections will likely cover 95% of your needs – but there are also cases where you want to add fields to the index manually – e.g. when you want to create facets based on string-fields, as all string-fields are analyzed by default on the ProductIndexBuilder which makes them unsuitable for faceting (but well suited for free-text search).
To add a field to an index manually go to Settings > Repositories > YourRepository and open an index – then click Add Field to open the Field modal:
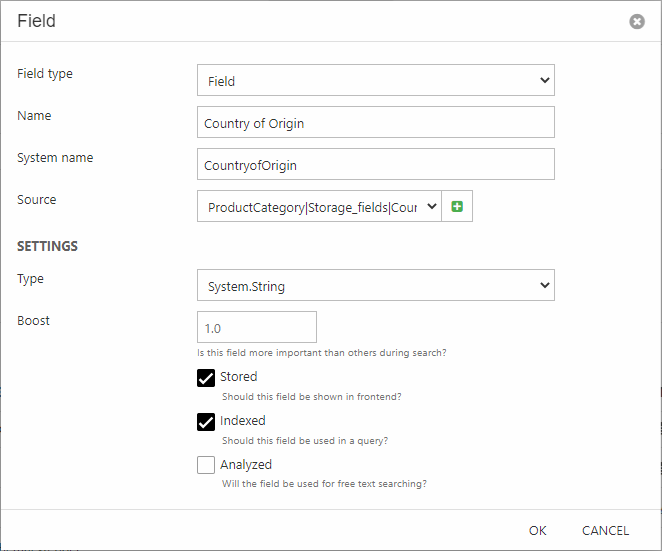
Configure the field:
- Select the Field field type – the other options are explained later in this article
- Provide a name and a system name
- Select a source – you can choose between all the source fields made available by the index builder, and if you’re mapping to a custom source from a builder extender use the plus-icon to provide a source name matching the code
- In the settings area:
- Select the data type you want the source data to be indexes as. In more advanced scenarios you can use a custom field type as described later in this article
- Set a boost value (how important this field is when ranking results)
- Check Stored, Indexed and/or Analyzed as appropriate
Typically – if you’re adding a field to use it to generate facets from – you want the field to be stored and indexed.
Summary field
Summary fields (Figure 2.1) add data from more than one source field to a single index field, converts it to text and splits the field into tokens on whitespace.
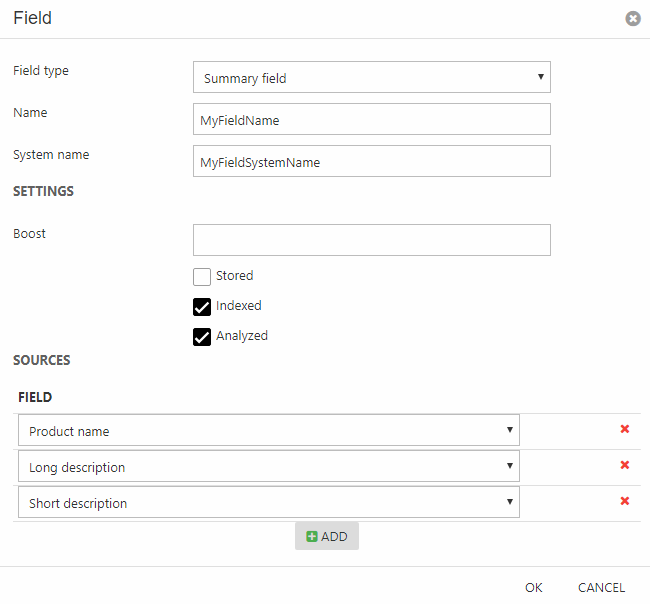
To create a summary field:
- Select the field type Summary field
- Provide a name and a system name
- In the settings area:
- Set a boost value (how important this field is when ranking results)
- Check Stored, Indexed and/or Analyzed as appropriate
- Add a number of source fields
As you can see, you don’t need to select a data type for a summary field – as the content is always converted to a string.
Grouping field
Grouping fields (Figure 3.1) make it possible to group values together under a label – this can be used to create facet-friendly index entries from values not inherently suited to faceting, e.g. because there are too many different terms.
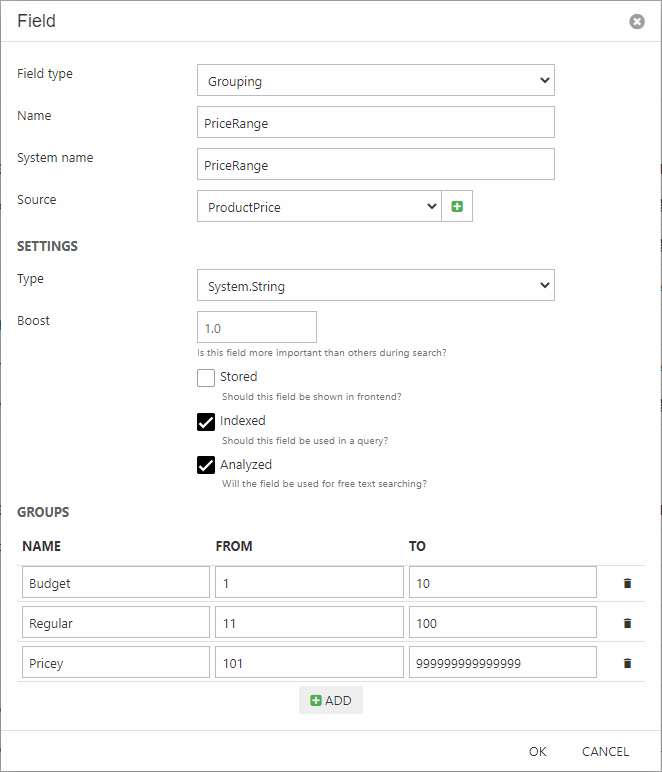
To create a grouping field:
- Select the field type Grouping
- Provide a name and a system name
- Select a source field
- In the settings area:
- Select the data type you want the source data to be indexes as
- Set a boost value (how important this field is when ranking results)
- Check Stored, Indexed and/or Analyzed as appropriate
- Specify a number of groups with non-overlapping intervals befitting the data
When you create a facet based on the grouping field, each facet will show the values in the selected interval.
Analyzers & Custom field types
All (analyzed)) standard fields added to an index uses the Lucene StandardAnalyzer to parse and tokenize the source data before adding it to the index – it behaves in the following manner:
- Splits words at punctuation characters, removing punctuation. However, a dot that’s not followed by whitespace is considered part of a token.
- Splits words at hyphens, unless there’s a number in the token, in which case the whole token is interpreted as a product number and is not split.
- Recognizes email addresses and internet hostnames as one token.
It also has a built-in list of stop words which will not be indexed (and cannot be searched for). The default stop words are “a”, “an”, “and”, “are”, “as”, “at”, “be”, “but”, “by”, “for”, “if”, “in”, “into”, “is”, “it”, “no”, “not”, “of”, “on”, “or”, “such”, “that”, “the”, “their”, “then”, “there”, “these”, “they”, “this”, “to”, “was”, “will”, “with”. You can override the default list by creating a file called stopwords.txt in the /Files/System/Repositories folder – the format must be 1 stop word per line.
While the StandardAnalyzer is perfectly adequate for most applications, you may occasionally need to do more advanced processing of the data before it is indexed.
In those cases you can create a custom field type with one or more analyzer applied:
- Go to Settings > Repositories > YourRepository and open an index
- Click Add field type
- Provide a name and a system name
- Select a data type
- Select a custom boost value
- Add one or more analyzers to the field type

Once a custom field type has been created it can be selected under Settings > Type when adding a field to the index, as described above.
Dynamicweb uses Lucene 3.0.3 – the most recent version of Lucene.Net – and most of the available analyzers are based on that framework. Two are in-house:
- DynamicwebCaseInsensitiveWhitespaceAnalyzer – this analyzer splits on whitespace and converts all tokens to lowercase
- DynamicwebMetadataKeywordAnalyzer – this analyzer splits on [;], [,] and [|], and is primarily used when indexing fields with IPTC or XMP metadata