Installing the Dynamicweb Plug-In Unit
There are two approaches to installing the plug-in unit depending on which hosting model your Business Central is running.
Cloud hosted in Microsoft Azure allowing access to only the Business Central Web Client
On-Premise hosted either on perimeter network or cloud hosted Windows server, which allows access to both the Business Central Web Client as well as the Dynamics NAV desktop app.
For installing the plug-in in an on-premise environment you need to obtain the runtime package for your version of Business Central from the Downloads section. Dynamicweb is committed to always support the newest versions of Business Central, so when you upgrade Business Central, there will also be a Plug-In Unit available for that version.
The installation guides for each hosting model is available from the links below. In both scenarios we need the SOAP URL for the DWWebService and credentials for the Business Central user to proceed the installation.
On-Premise hosted either on perimeter network or cloud hosted windows server.
Once the plug-in is installed, you should be able to access the SOAP URL in the browser.
Installing the Dynamicweb Connector Service
The Dynamicweb Connector Service is basically a Windows service that exposes a web service endpoint on a specified port, which Dynamicweb will use to interact with Business Central. The connector webservice is configured to run against a company specific Business Central web service, so in scenarios where multiple companies must be available to Dynamicweb, multiple instances of the Dynamicweb Connector Services must be installed. Since it is a Windows server, it needs to run on a Windows machine. For on-prem solutions this can the Business Central Server instance, or it could be another server on the perimeter network. For cloud hosted Business Central, the Dynamicweb Connector Service could be installed on the same machine hosting the IIS.
The Dynamicweb Connector Service offers a test mode in which it can accept an XML request and return the content of a static XML file as response, which is very convenient to test for firewall openings, while other installation processes are going on, because it allows the verify a port opening, with the Plug-In Unit being available. Besides that, this feature enables a simple form of service virtualization, which can be useful for implementing interface or data mapping in Dynamicweb for custom services that may be under development. So, the use of the test mode allows different developers on both sides to work in parallel, significantly shortening the development process in comparison to working sequentially.
The Dynamicweb Connector is installed using the InstallUtil.exe in the .Net framework, and it requires administrator permissions to perform the installation, so the person installing the services must have that permission level.
Start by downloading the latest version of the DynamicwebConnectorService zip from the documentation portal (https://doc.dynamicweb.com/downloads/integration). Note that the Dynamicweb Connector Webservice is available in a 32-bit and a 64-bit version. In general, you should choose the 64-bit version, but for some legacy systems you may need the 32-bit version. The version you choose affects the next steps. If necessary, unblock the file and un-zip it in the location of preference, e.g. C:\Dynamicweb\DynamicwebConnectorService\[name of BC company].
Configuration settings
Open the DynamicwebConnectorService.exe.config file in Notepad or equivalent. It contains connection settings for add-ins for various systems. In this scenario we must add some settings to the NavConnector section:
We also need to modify some parameters in the appSettings Section
- ServiceName will be the name of the service in Windows Services
- WebserviceURI will be the web service endpoint exposed by the service
- ConnectorType decides with system platform (Business Central, AX, Perfion) the connector is connected to
The additional parameters can be left as is.
Next, we install the service.
Launch Powershell or Command Prompt as Administrator an navigate to the folder containing your service exe:
From here, launch the InstallUtil.exe with the following parameters:
Alternatively, for 32-bit:
The “-i” option installs the service, and if you at a later point need to uninstall the service, run the same command with “-u” for uninstall.
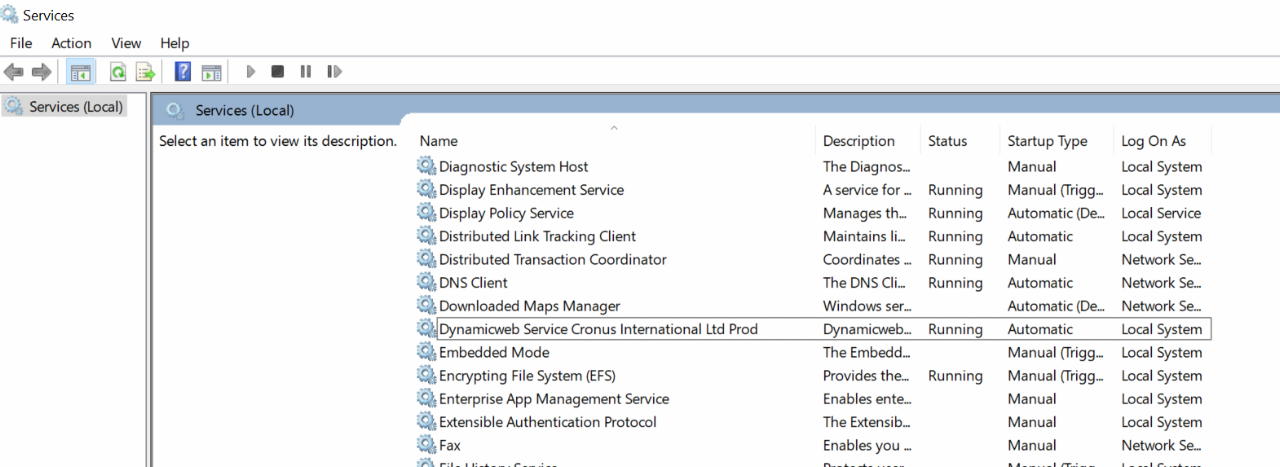
Once completed, you should see a new entry in Services matching your configuration:
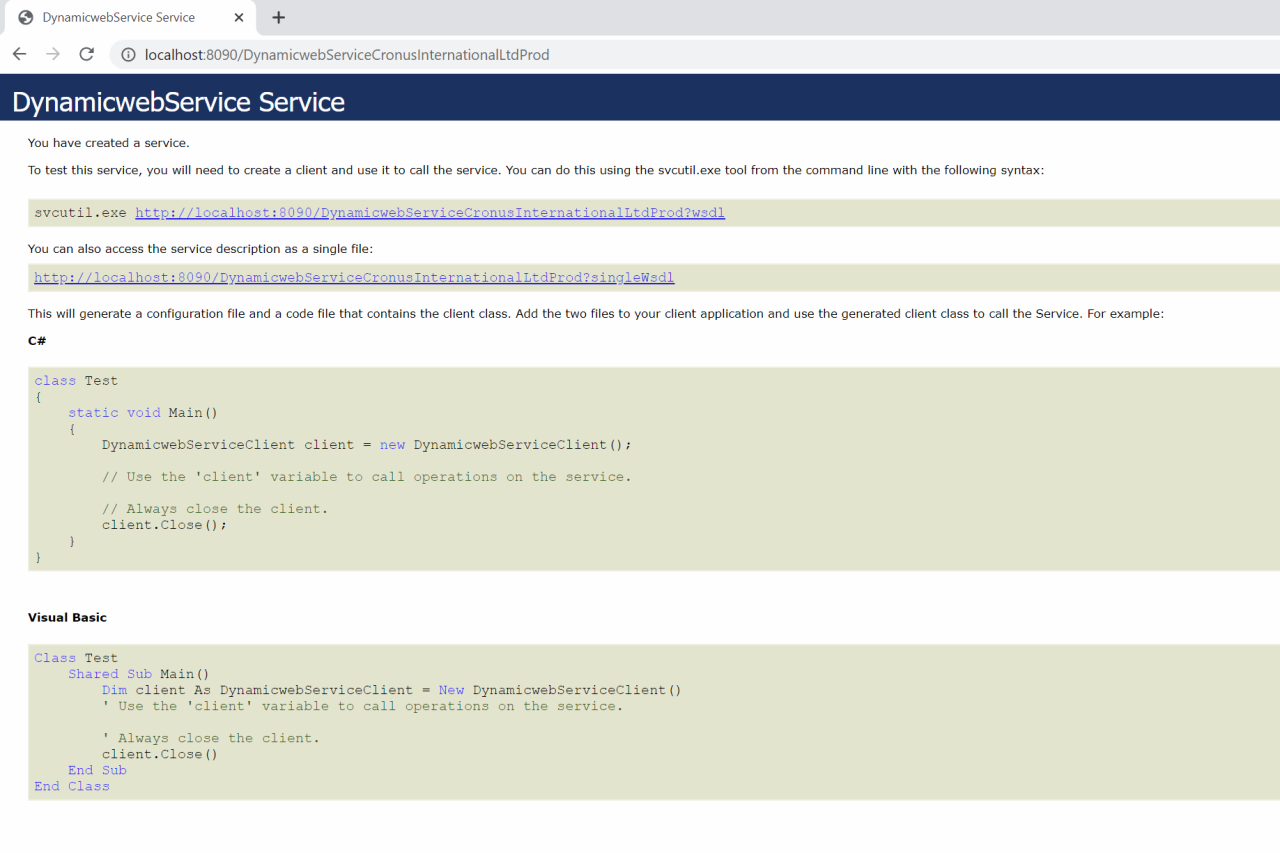
Also, if you launch the URL you typed in the configuration, you should see a web service page:
To allow the service to communicate with Business Central, we must configure it to run in the context of a user, who can log on to Business Central.
- Right click on the service and choose Properties.
- Click the Log On tab and click the This account radio button
- Click Browse and choose the appropriate user
- Add the password
- Click OK
A dialog will appear telling that changes will not take effect, before the service is restarted
- Right click on the service and click Restart
If the service fails at restarting, it usually means that the login is incorrect. Re-enter the password and try again. Another common problem is that the user does not have permissions to listen on the port.
If you need to install connectors for multiple companies or environments, simply copy the folder containing the DynamicwebConnectorServiceexe, in the config change the NavEndpoint to the DWWebService in the other company, Change ServiceName and WebserviceURI to what you want and repeat the installation steps on the copied folder.