
T6.2 Shop layout
Welcome to the second of four tutorials which aim to get you up to speed with Dynamicweb Rapido – for an overview of the course look here.
In the previous tutorial you were introduced to Rapido as a concept, as well as the different configuration options available in the Layout tab of the Rapido website settings; header design, footer, color schemes, fonts, mobile design, etc.
In this tutorial you will again be using the Rapido website settings to configure Rapido – this time focusing on Ecommerce, tackling these overall subjects:
- The product list
- The product page
- The mini cart
- The receipt
Before we can start work, however, the product index must be rebuilt – go to Settings > Repositories > Products and rebuild one of the product index instances (Products or Products secondary). This is necessary because this is a fresh installation; on all live sites indexes will be rebuilt automatically at intervals.
Since you’re already a seasoned veteran of the configuration game we’ll jump right into it. Open the Content area, click on the context menu for the English (Master) website, and then click Edit. Scroll down a bit to see the tabs containing the Rapido settings.
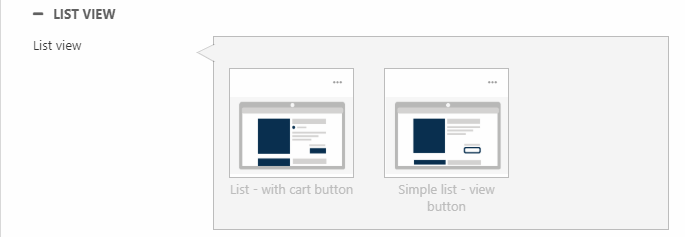
In this tutorial we will be working with the Product List, Product Page, and Ecommerce tabs. In the these tabs, some sections feature presets – preconfigurations of all the underlying settings of a section (Figure 1.1).
Since this course is about exploring your options, we recommend that you create new ’test’ preset whenever you encounter such a section:
- Right click a preset and click Edit/new
- Click Create new preset
Once you’ve created a test-preset you can edit it and make all your changes as normal. Then select it and save.
If this is too cumbersome, you can also go to Settings > Item Types > Settings > Tabs and open the item type tab where the preset is found, then open the relevant Item type field (e.g. List view) and uncheck Enable presets before saving the item type.
Here goes nothing!
Exercise 1: The Product List
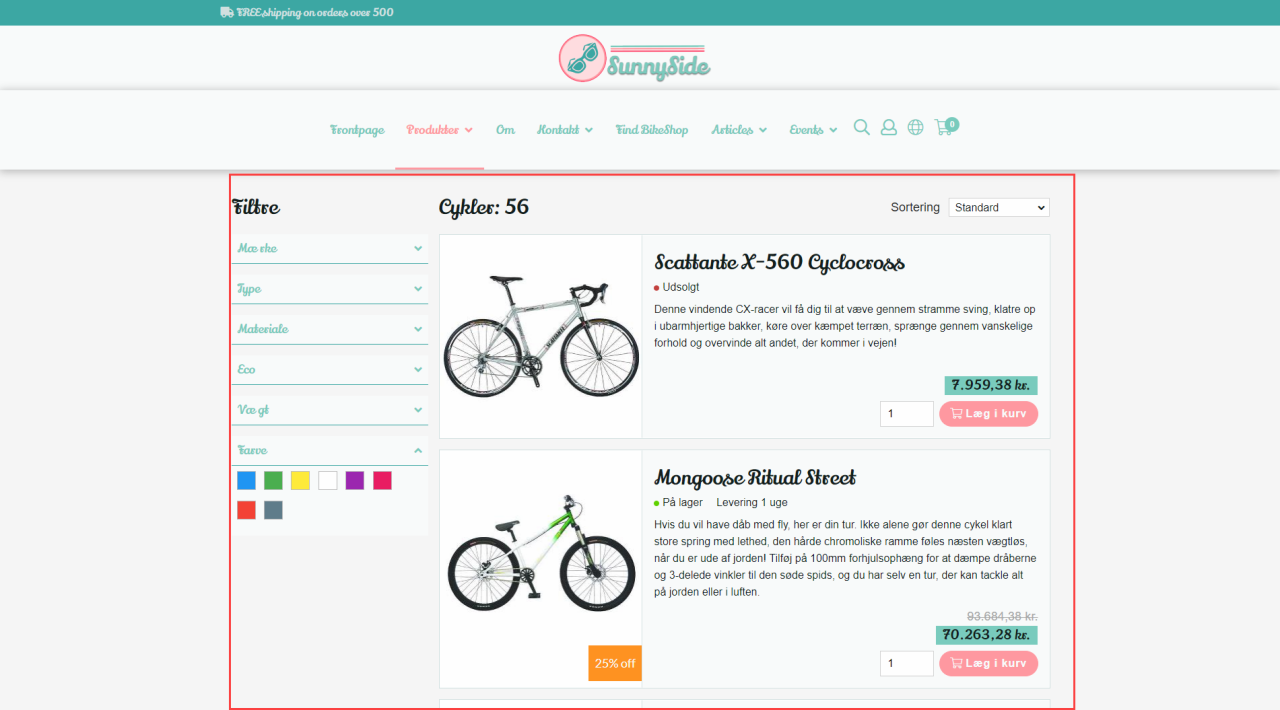
The Product list tab controls the content & styling of, well, the product list (Figure 2.1) – e.g. activate or deactivate each product list view (List, Grid, & Details), style each of the views individually, and so on.
Try it out:
- Read the documentation for the Product List tab
- Play around with the settings – here are some suggested changes:
- Set a different default list view, disable sorting, and change the facets view mode from left-side facets to horizontal facets and back again
- Open the List View section and disable/enable various buttons, select a different border mode, and tweak the hovering settings
- Open the Grid View section and change the number of columns in the grid
- Open the Facets section and play with e.g. the border mode and border color, the font, and the box height – please note that these settings only affect left side facets.
- Open the Price design section and play around with the settings – the font, and the background & border colors
Feel free to go back to previous settings and tweak them – once you’re happy with the look and feel of the product list proceed to the next exercise.
Exercise 2: The Product Page
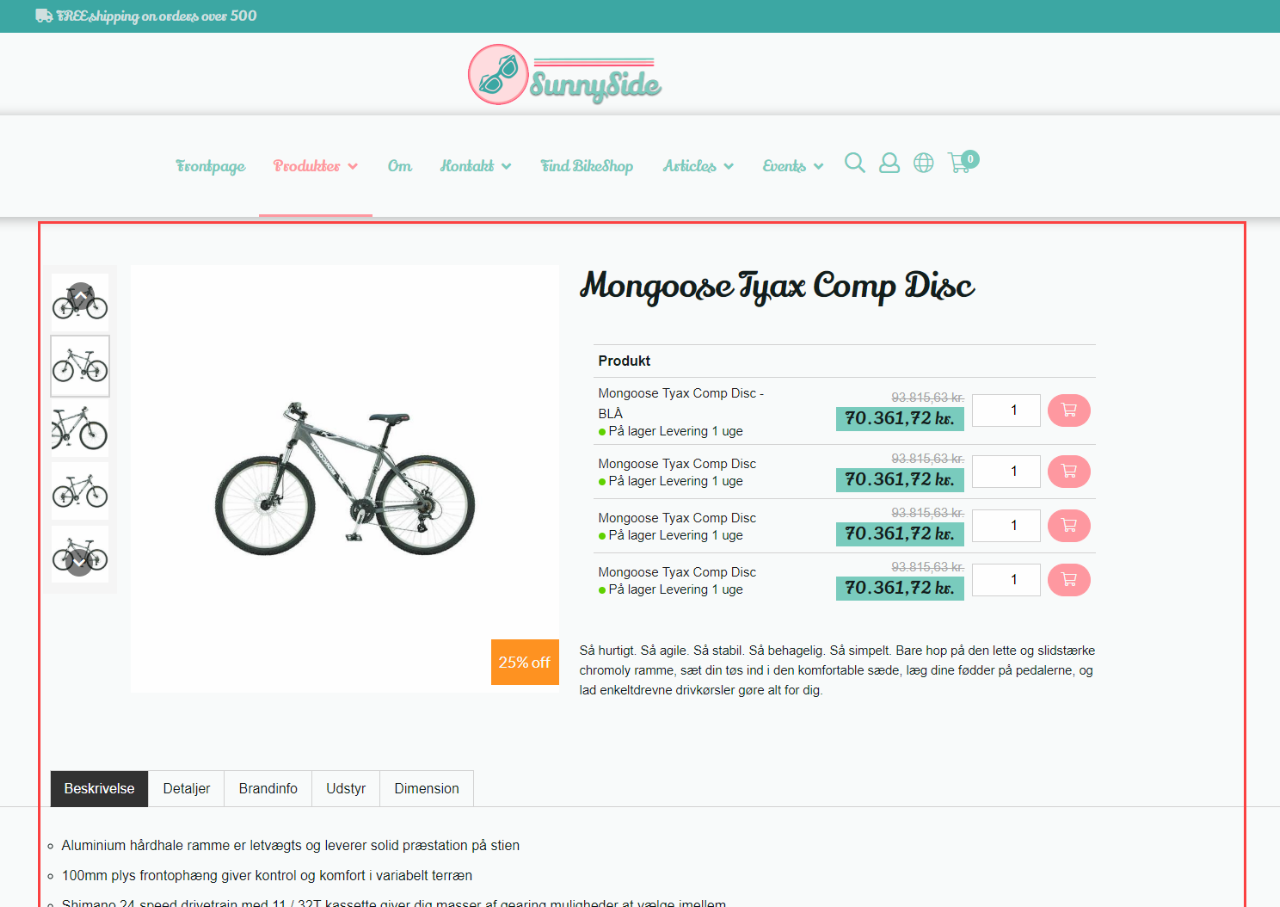
The Product page tab controls the style and contents of the product page – the page shown when a product is clicked in frontend (Figure 3.1).
Try it out:
- Read the documentation for the Product page tab
- Play around with the settings – here are some suggested changes:
- Try out alternative top section layouts – top layout, image & thumb position, button & price alignments
- Try to hide the stock state & shipping information – and perhaps the product number
- Fold out the Details section and play around with the settings – which data should be shown for each product and where?
- Find a product with extended variants – #10001 is usually one by default – and use the variants as product list section to control what data to render for each variant. Then use the Details settings to move the variant table around on the page.
- Use the Price design section to style the price – e.g. give it the same look as on the product list
Feel free to go back to previous settings and tweak them – once you’re happy with the look and feel of the product list proceed to the next exercise.
Exercise 3: Mini-cart, receipts, and more
The next tab – called Ecommerce – is used to configure a number of other ecommerce-related features on the solution:
- The mini cart
- Checkout flow information
- Receipt logo & colors
- Sale-sticker design and position
- Etc.
Try it out:
- Read the documentation for the Ecommerce tab
- Play around with the settings – here are some suggested changes:
- Fold out the mini cart section and change the add to cart notification type, counter design, layout, orderlines view, and animation type
- Proceed to checkout – then open the checkout section and hide various sections, e.g. the create quote request section
- Complete checkout using the Invoice payment option and take a look at the receipt – then fold out the Receipt section and change the logo & perhaps background & font colors
- Go back to a product list where there are discounted products – then fold out the Sale sticker section and change the color, design & perhaps font of sale stickers. This sticker is automatically added to all products with a product discount.
- In the General section hide prices, stock, and add-to-cart buttons for anonymous users – this is essential on B2B solutions
Feel free to play around with or at least note the other settings under the Ecommerce tab – most of these are relevant on only some types of solution and are not in scope for this course.
Summary
In this tutorial you’ve been exploring the settings related to the product list, the product page, and other ecommerce related features such as the mini cart and sales stickers.
This means that you should now have a pretty good understanding of how and what you can change on a Rapido solution using configuration only.
In the next tutorial we will change course and explore another part of Rapido – how to create content using the Rapido item types. This is important because, at the end of the day, you will have to teach or instruct the end-users in how to do the very same thing on their Rapido solution before they go live.