Deploying Dynamicweb to Microsoft Azure
This document describes the process for deploying a Dynamicweb 9 solution to Azure App Service (Azure Web Apps). We will look at two scenarios:
- Deploying a new Dynamicweb 9 solution
- Moving an existing Dynamicweb 9 solution
To follow this how-to you must have:
- An existing Microsoft Azure subscription
- A working DW9 website
Databases created by the Dynamicweb 9 installer work on Azure out of the box. The same is true for the Dynamicweb 9 version of Rapido. Older databases created before Dynamicweb 8.3 may require some massaging to work on Azure – the steps required are outside the scope of this guide. Please refer to Microsoft documentation.
Azure alternatives
This page describes how to install Dynamicweb on Azure App Services and Azure SQL. It is also possible to use Azure VM which is a virtual Windows server. These 2 options are very different. If you need to install Dynamicweb on an Azure VM, refer to the normal installation guide of Dynamicweb.
It is also possible to host Dynamicweb on other cloud services like Amazon AWS and Google Cloud. In both scenarios, choose a VM instance of a Windows machine as described under requirements and follow installation steps in the normal installation guide.
Configuration and support
This section covers settings and configuration that needs to be taken into consideration when installing on Azure App Services
Recommended instances and configuration options of Azure Web App and Azure SQL
- The minimum recommended Azure Web App Tier is S1 for smaller size websites with no Ecommerce. Minimum S2 for smaller Ecommerce sites. For mission critical websites and Ecommerce consider P2 instance as a minimum.
- The minimum recommended Azure SQL Tier is S2 - scale to larger S-instances as required by the load on the site. Consider a vCore instance for improved perrformance.
- Consider disabling 'overlapping recycling' by adding the WEBSITE_DISABLE_OVERLAPPED_RECYCLING setting to appSettings - set the value to 1. This is to avoid potential locking issues in integrations, config files and Lucene index files. See https://github.com/projectkudu/kudu/wiki/Configurable-settings#disable-overlapped-recycling
- Ensure to disable pickup folder for sending emails as they are not supported on Azure - see https://doc.dynamicweb.com/documentation-9/platform/advanced-settings/web-and-http#4448
- Configure an external SMTP server for sending emails from the system like receipts, forgot password etc. See https://doc.dynamicweb.com/documentation-9/platform/advanced-settings/web-and-http#4448
- Configure a Dynamicweb Email Marketing "delivery provider" for mass mailing in email marketing. If this is not configured, the sending of emails will be using the regular SMTP server which causes long sending times. To improve the sending time, use a delivery provider like send grid. See https://doc.dynamicweb.com/documentation-9/platform/advanced-settings/marketing#6574
Support
- For now we are not experts in Azure, but will do our outmost to support you. We support Dynamicweb, but not the hosting environment - but we will take on any improvements to Dynamicweb that is required to support Azure.
- Dynamicweb staff do not have access to solutions you host in Azure and we do not have the same tools available for debugging, performance optimisations and investigations as in our Cloud. If the need arises to conduct any of these things, it is up to you to take care of that. You should be prepared to provide copies of the website if we need to debug on the solution.
- Dynamicweb hosted in Azure is considered an external hosted website as defined in the license terms
Azure vs. Cloud
Below compare some differences between Dynamicweb Cloud and the Azure Cloud
|
|
Azure |
Dynamicweb Cloud |
|
Debugging |
Partner Copy solution to Dynamicweb |
Dynamicweb Support + Development We have full access to environment |
|
Dynamicweb Monitoring |
N/A |
Included |
|
Backup & Restore |
Partner |
Dynamicweb Support |
|
Upgrades |
Partner |
Included |
|
SMTP |
External service |
Included |
|
Email marketing |
External service |
Drop folder |
|
HTTP2 and PushPromise |
NA |
Included |
Installation
There are two scenarios when deploying to Azure:
- Deploying a new Dynamicweb 9 solution
- Moving an existing Dynamicweb 9 solution
Both are described below.
Creating a new Dynamicweb 9 installation
Start by creating a resource group:
- Click Resource Groups > Add (Figure 4.1)
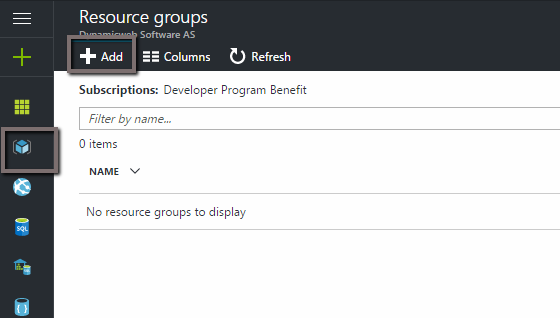
- Enter a name and select a subscription and location (Figure 4.2)

Creating SQL Server and database
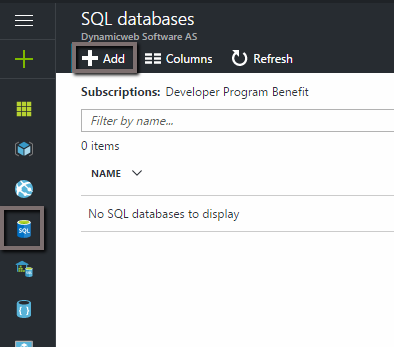
Then create an SQL Server and an empty database:
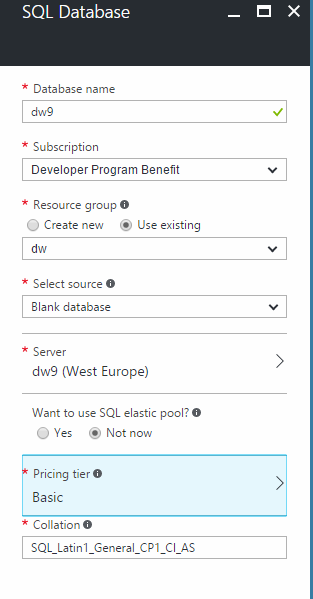
- Click SQL Databases > Add (Figure 5.1)
- Create an SQL server (Figure 5.2)
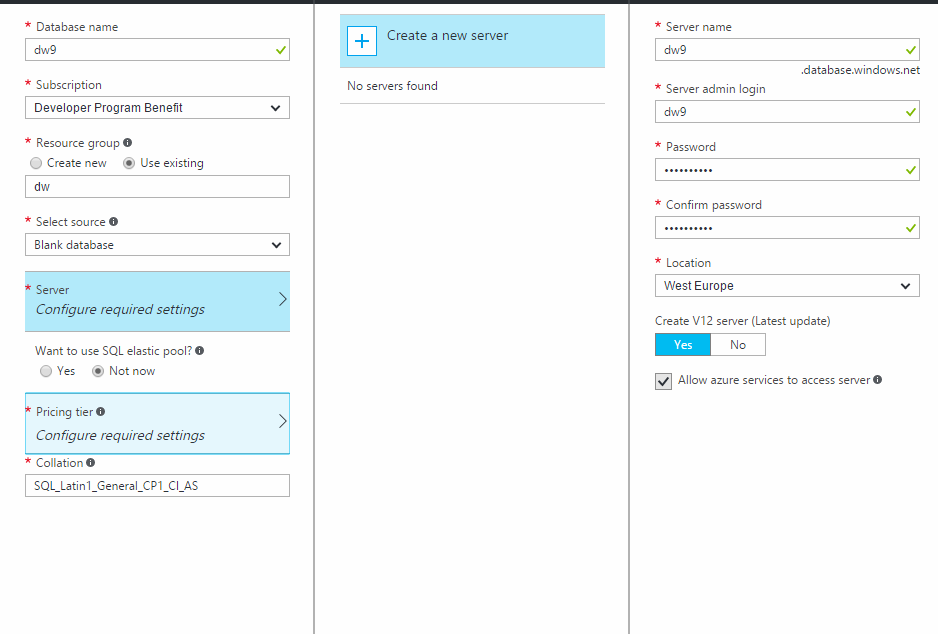
- Create an empty database (Figure 5.3)
Creating App service and App
Next create an App Service to host your application:
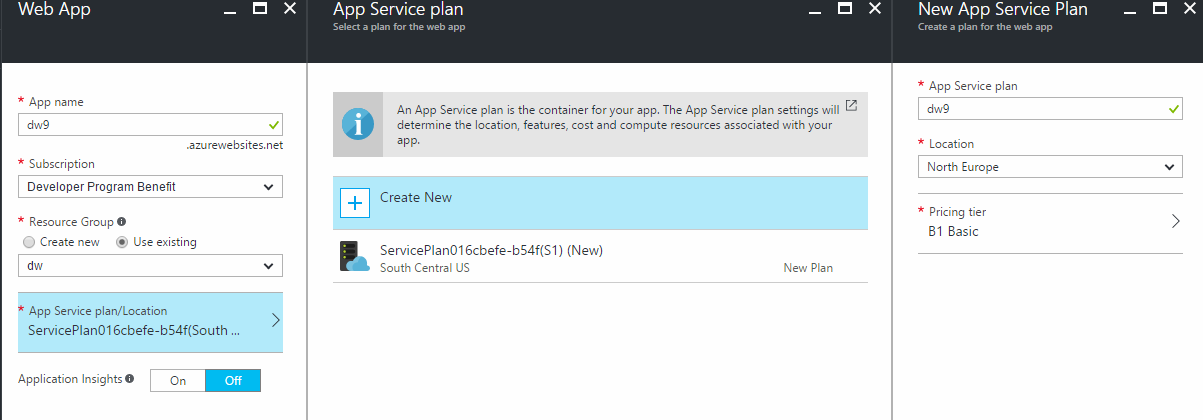
- Click App Services > Add (Figure 6.1)

- Select WebApp and pick an appropriate pricing plan (Figure 6.2)
Uploading the Dynamicweb application
You can now upload your Dynamicweb application:
- Go to App Services and open your App Service
- Under overview locate the FTP hostname and username (Figure 7.1)

- Using whatever ftp client you like connect to your app service storage and upload your DW9 application folder (Figure 7.2)

Configuring the Dynamicweb application
Next you must configure the Dynamicweb application:
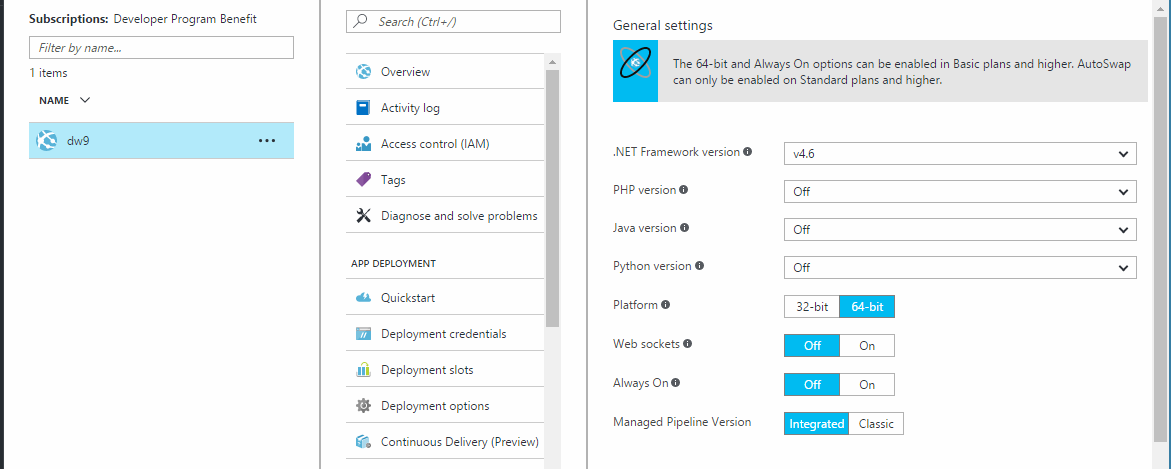
- Go to app services and select your app.
- Under Application settings set .NET Framework version to 4.6 and Platform to 64 bit (Figure 8.1)
- Under Virtual applications and directories edit the root path to point to your application folder (Figure 8.2)

Running the Dynamicweb Installer
You can now run the Dynamicweb installer:
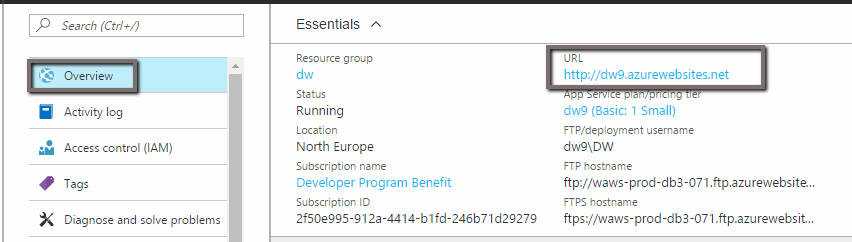
- Locate your app in App services and go to Overview
- Find the URL for your application and access it (Figure 9.1)
- This launches the Dynamicweb installer (Figure 9.2)

- On step 2 select “Create a new /Files Folder” (Figure 9.3)

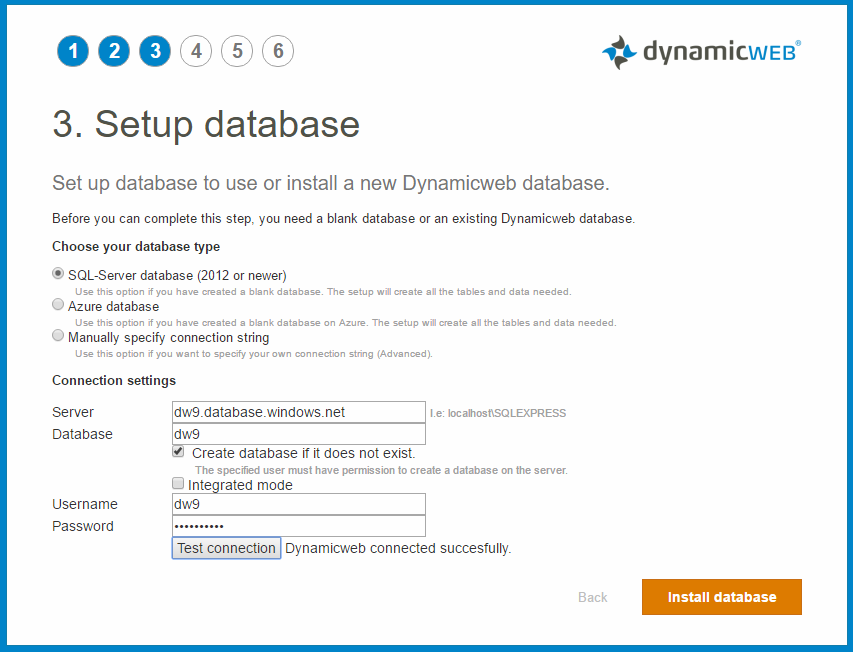
- On step 3 select “Azure database” and fill in the connection settings (if you have forgotten you can find them in the Azure portal under SQl databases) (Figure 10.1)
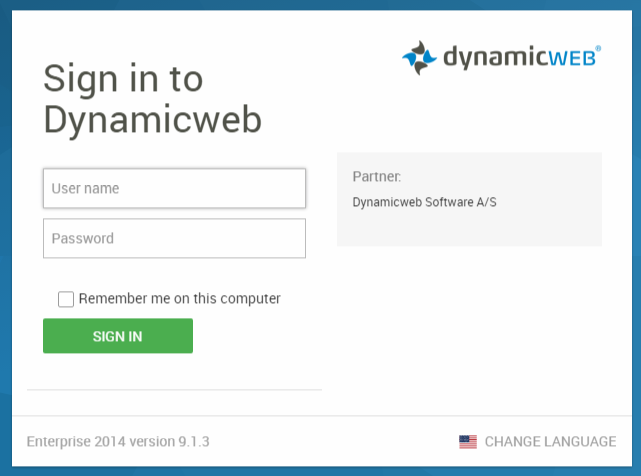
- Select an appropriate license in step 4 and create your Administrator user in step 5 (Figure 10.2)
- You can now access the admin interface and start using Dynamicweb 9
Deploying an existing site
To deploy an existing solution to Azure, create a Resource group, SQL server, App service and App as described above.
You must then migrate your existing database to Azure:
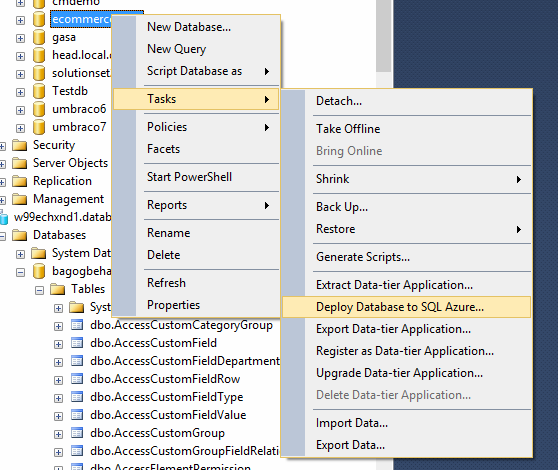
- Open SQL-Server Management Studio and locate your database. Right click the database, choose tasks, deploy database to SQL Azure (Figure 11.1)
- Run through the wizard using the server info from SQL databases in Azure portal.
If migration fails examine the log and fix whatever issues exist with your database and try again
Uploading Files folder
Next, you must upload the Files folder of your existing solution:
- Connect to your app service storage via ftp.
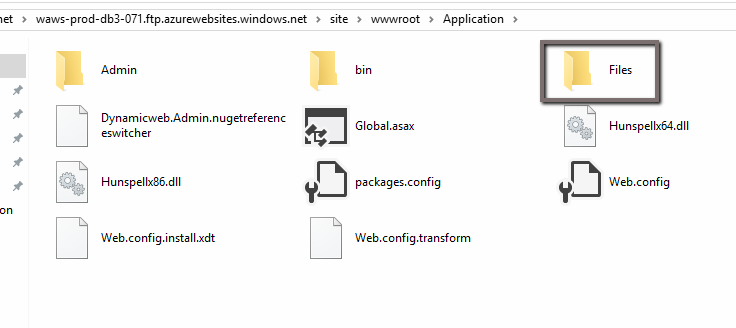
- Navigate to your Application folder and upload Files folder to here
You can place the Files folder elsewhere if you want, but in that case you will need to create a virtual folder reference in the Azure App settings interface.
Connecting to the database
The database just deployed to SQL Azure, needs to be connected to Dynamicweb
- Connect to the ftp
- Browse to /site/wwwroot/Files and open GlobalSettings.aspx in an editor
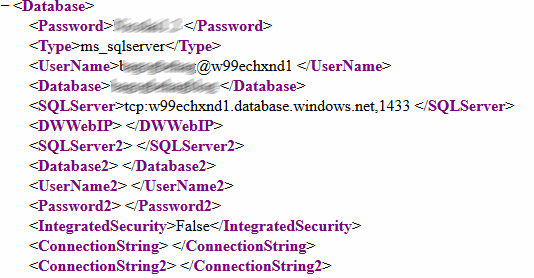
- Update the database section in GlobalSettings.aspx according to connection properties found on the Azure portal (Figure 13.1)
Updating Dynamicweb
- When new versions of Dynamicweb are released, copy the new application folder to /site/wwwroot/ and overwrite the files already there.
- Make sure new settings from the web.config in the Dynamicweb application are copied as well
- It is recommended to delete everything from /site/wwwroot/bin/ before updating.
- Do not remove custom dlls
Setting up scheduled task execution
To run tasks from Dynamicweb, Azure must have some sort of scheduler set up. Previously, we recommended using Azure scheduler to accomplish this - but this tool is being phased out.
Azure recommends using Azure Logic Apps to send HTTP requests to taskexecute.exe:
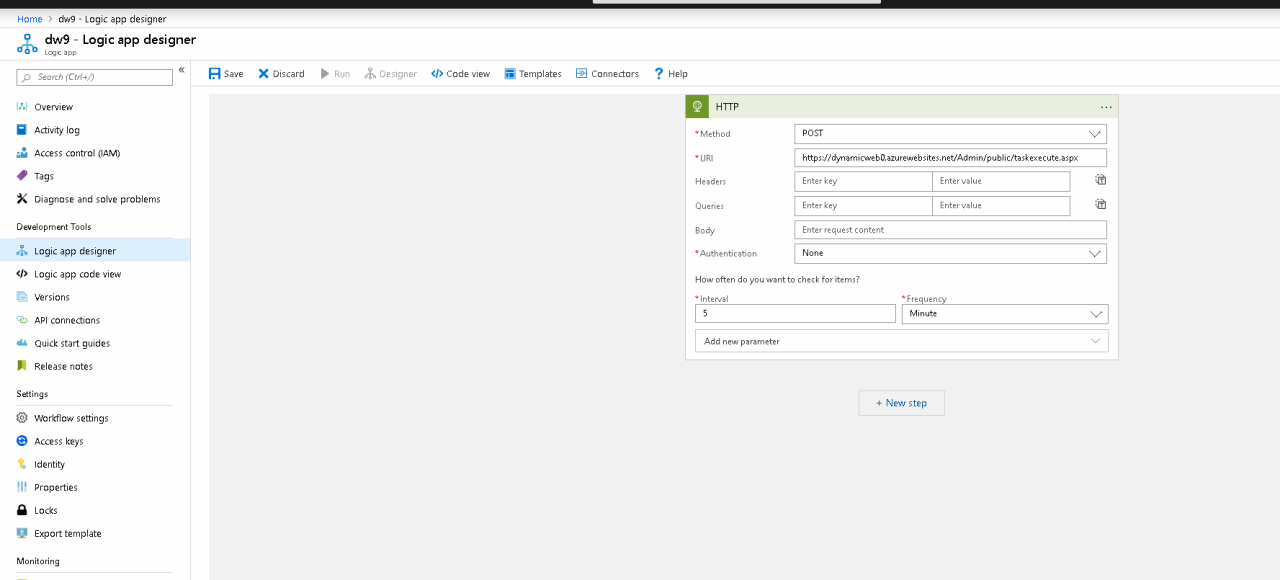
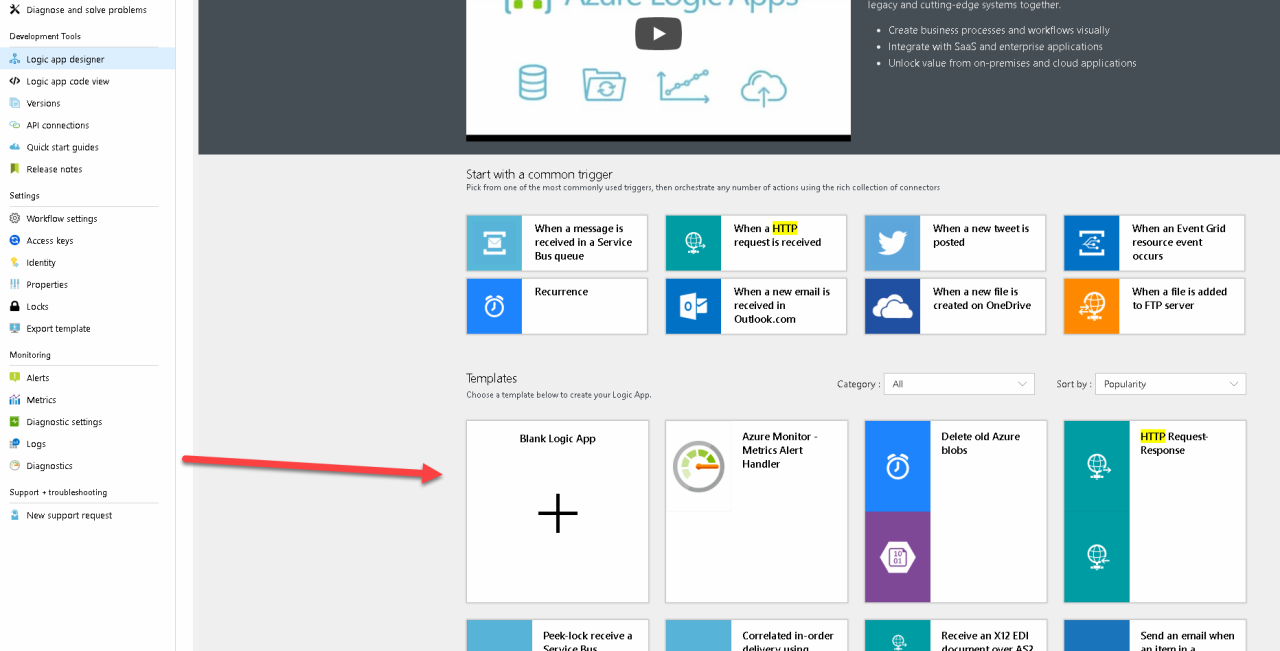
- Create a blank logic app (Figure 15.1)
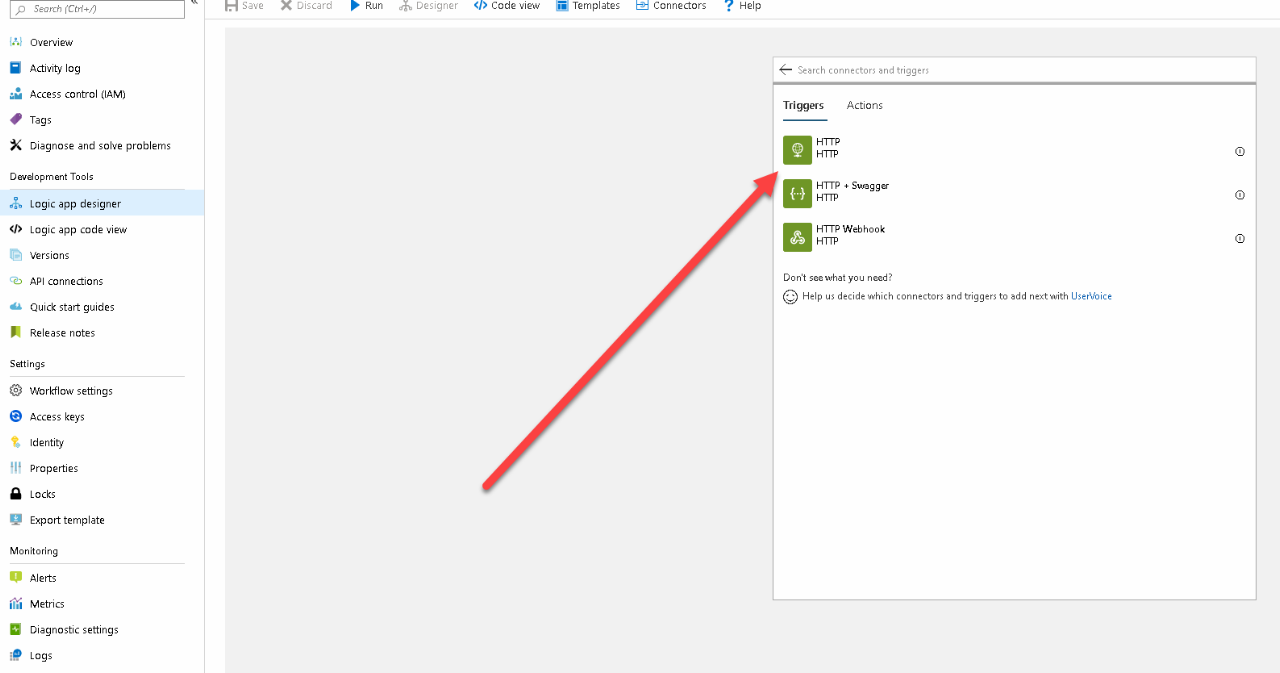
- Add an HTTP trigger (Figure 15.2)
- Configure the trigger (Figure 15.3):
- Method: Post
- Url: yoururl.com/Admin/public/taskexecute.aspx
- Interval: 5
- Frequency: Minute