Azure B2C
This guide will explain how to set up an external login provider connecting to Azure AD, so that it becomes possible for users to login to the backend and frontend using Azure B2C accounts.
Please note that the Dynamicweb solution must have a valid SSL certificate.
Create a microsoft tenant
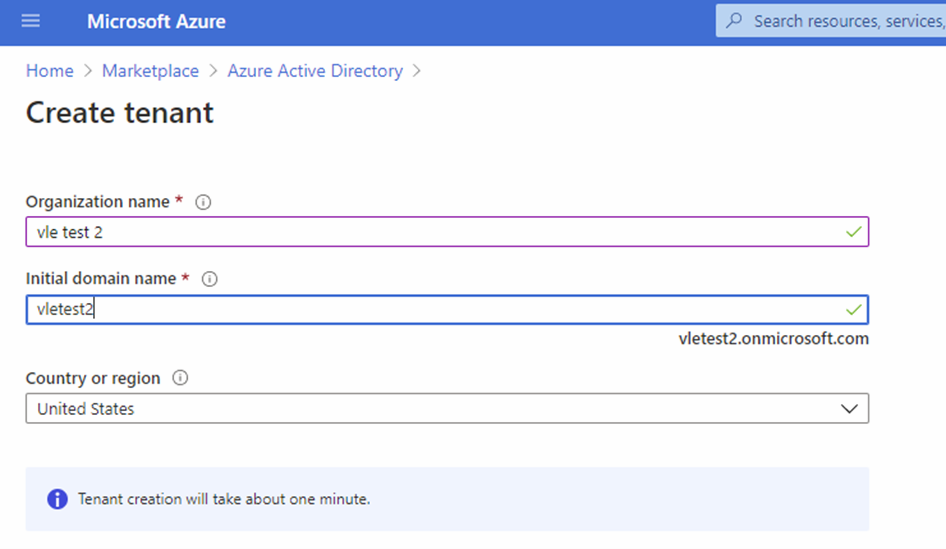
To set up external authentication using Azure AD you must first create a tenant. An Azure AD tenant is a sort of directory, in this case a collection of user accounts which you want to give access to a Dynamicweb backend using their Azure B2C credentials.
- After the tenant is created, click Continue to go to the Active directory Overview page where you need to navigate into B2C service
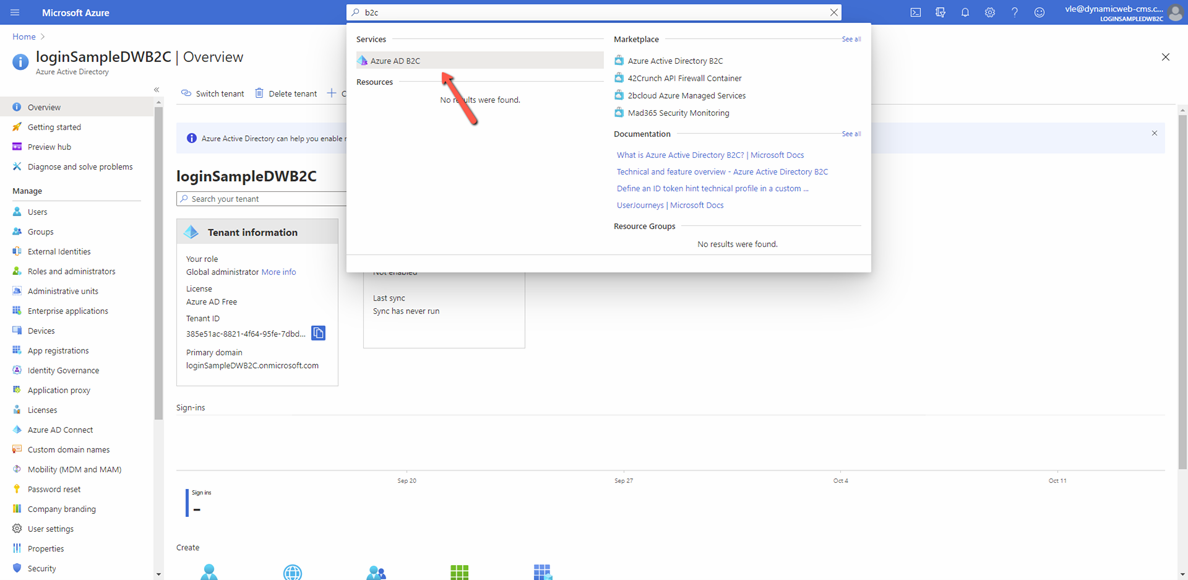
- Create Azure Active Directory B2C according to guide https://docs.microsoft.com/ru-ru/azure/active-directory-b2c/tutorial-create-tenant
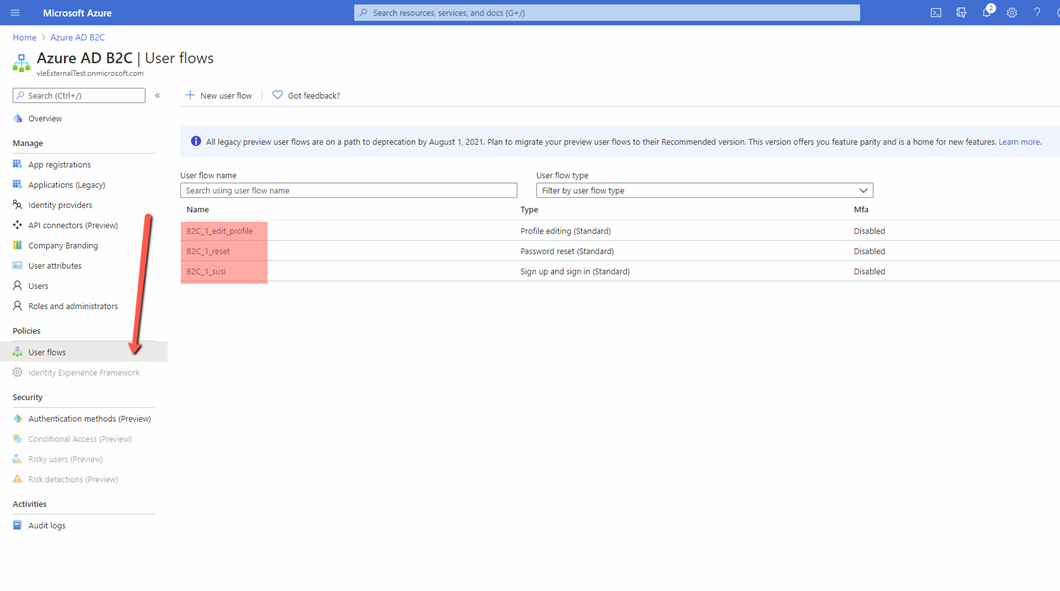
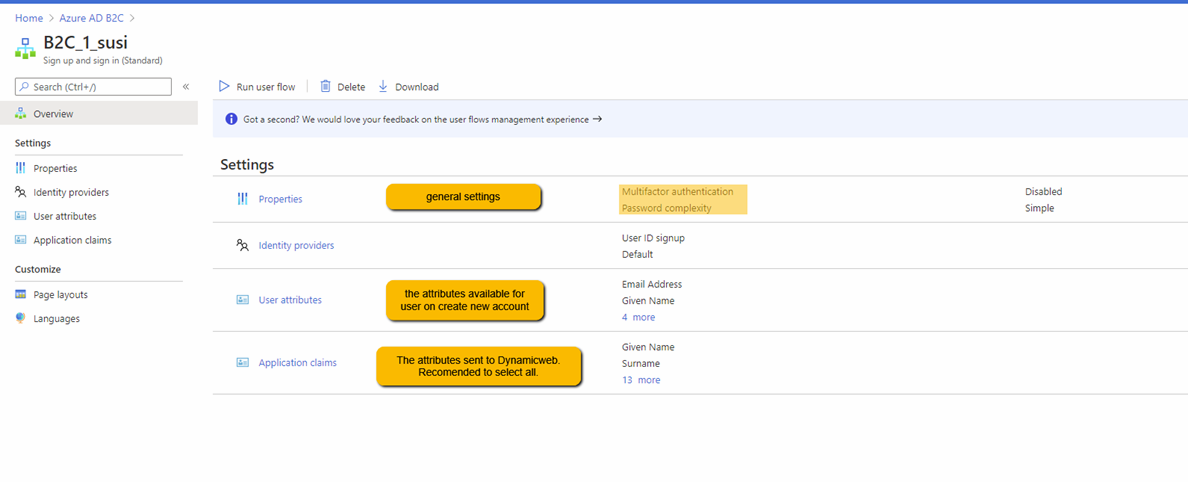
- By default three user flows are created – they handle profile editing, password reset, and sign up/sign in. Note down their names as they are needed to configure the external login provider on the Dynamicweb solution.
- Open and edit the B2C_1_susi flow and configure it – we recommend that you check all attributes in application claims section
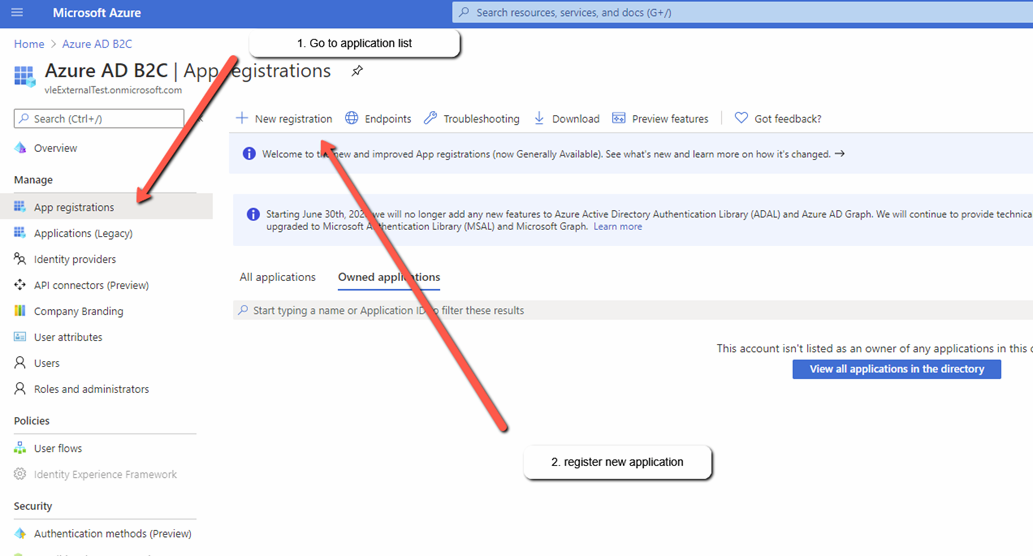
Register an application
Next, you must register an Application – this provides you with a secure way of allowing requests and also ensures that your users are sent to a trusted place after signing in.
- Go to the application list
- Click New registration
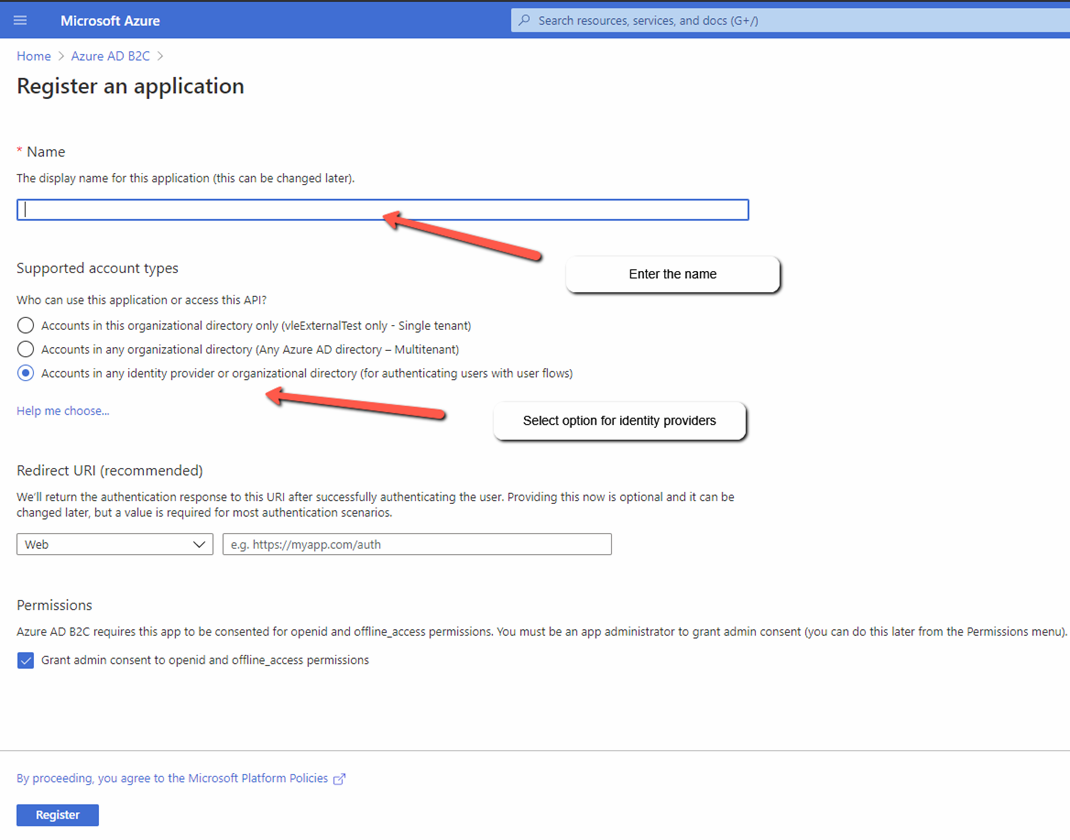
- Fill in the details
- Name
- Account type – make sure you select an appropriate account type, as you cannot change it later
- Redirect url
- Permissions
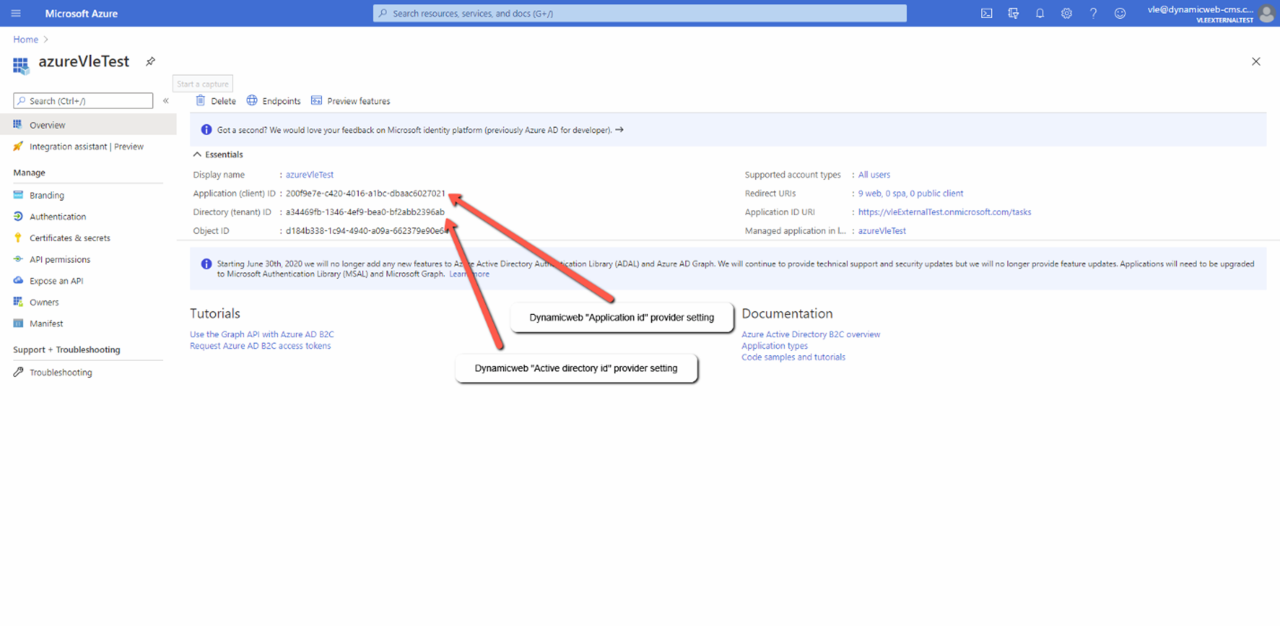
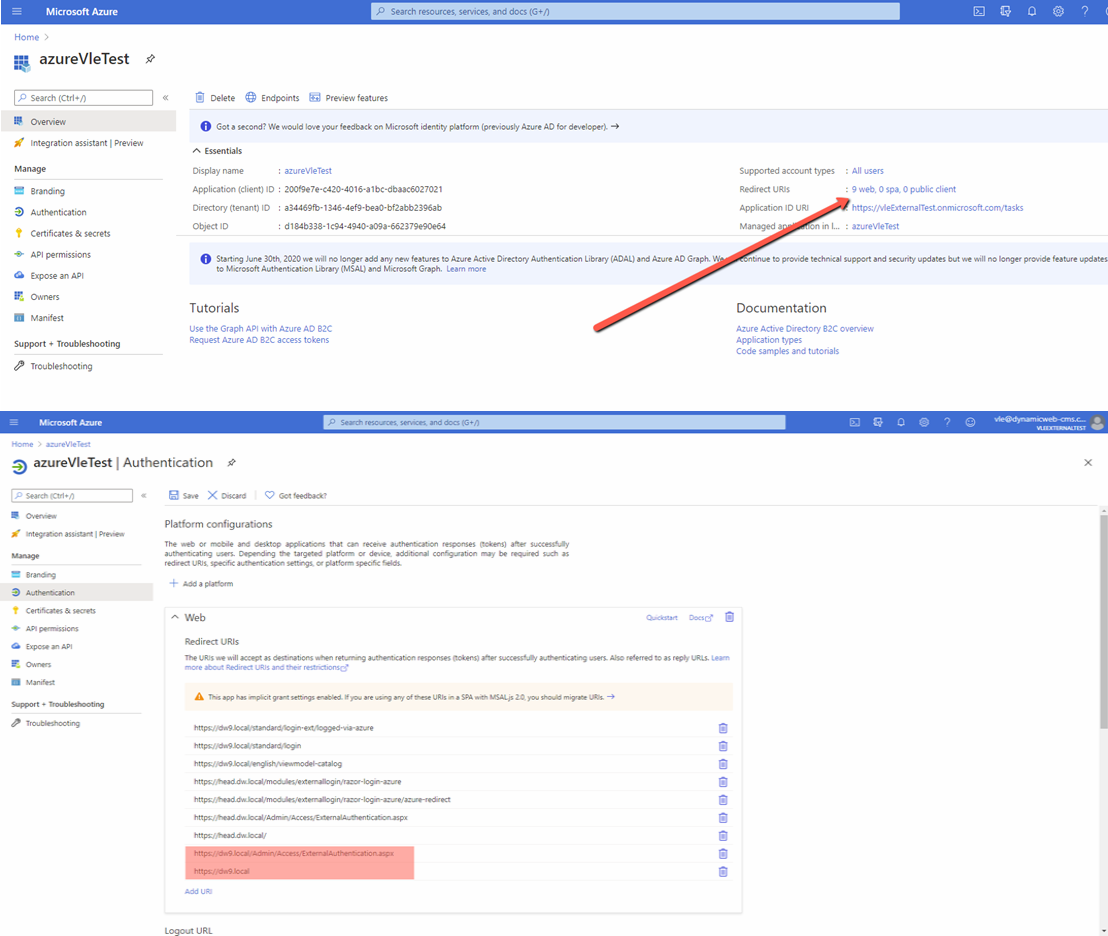
- Once the application is created, note down the Application ID and Directory ID – they will be used for Dynamicweb provider settings
- Add you solution URIs to the application Redirect URIs – see below where [dw9.local] should be your solution url
- Also you need to scroll down the screen and make sure you have selected “ID tokens” option.
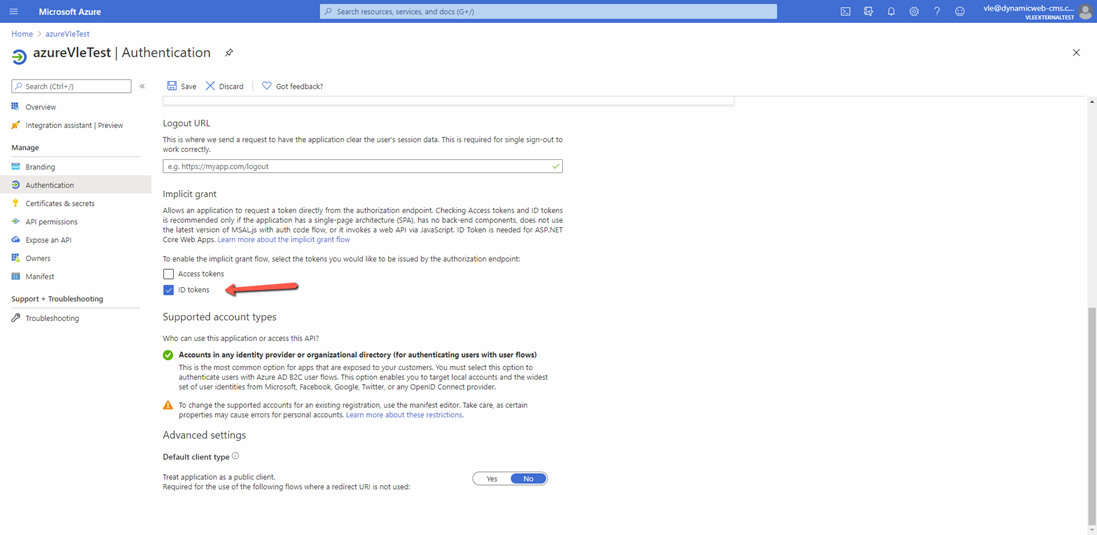
- Finally, create and note down a client secret key to use in the Dynamicweb provider settings

Set up Dynamicweb login provider
Ok, so with all that done you’re finally ready to set up the external login provider in Dynamicweb:
- Go to Settings > Control Panel > External Authentication and click Add in the toolbar
- Provide a name and (optionally) check enable for backend
- Select the Azure B2C login provider and configure it (Figure 6.1)
The following settings are available:
|
Setting |
Value |
Comments |
|
Tenant |
From azure portal |
|
|
Active directory id |
From azure portal |
|
|
SignUpSignInPolicyId |
From azure portal |
Default is b2c_1_susi |
|
EditProfilePolicyId |
From azure portal |
Default is b2c_1_edit_profile |
|
ResetPasswordPolicyId |
From azure portal |
Default is b2c_1_reset |
|
Application Id |
From azure portal |
|
|
Application key |
From azure portal |
|
|
Phone claim name |
- |
See appendix A |
|
Customer impersonation id claim name |
- |
See appendix A |
|
Redirect page |
Page to redirect the user to after login. |
Any url used here will need to be added to the Azure application redirect urls. |
|
Logout from Azure on extranet logout |
True/false |
If not checked a returning user may be logged in immediately without being redirected to azure |
|
Group for new users |
Select group(s) for new users to be added to |
To check if a user exists the provider first checks the email used (if included in the azure application claims) against the user database, then it checks if the default user name from Azure matches the User.Username in Dynamicweb. |
|
Debug |
True/false |
Generates more verbose logs for testing and debugging purposes |
After configuring the provider and saving it you must IIS Reset the solution in order for the login provider to be loaded.
Once everything is setup, customers can log in to the frontend using their Azure B2C credentials. To use the B2C credentials to login to the backend a user must go to https://[solution url]/Admin/Access/ExternalAuthentication.aspx – and of course be authorized to log in.
Appendix A: Additional user attributes
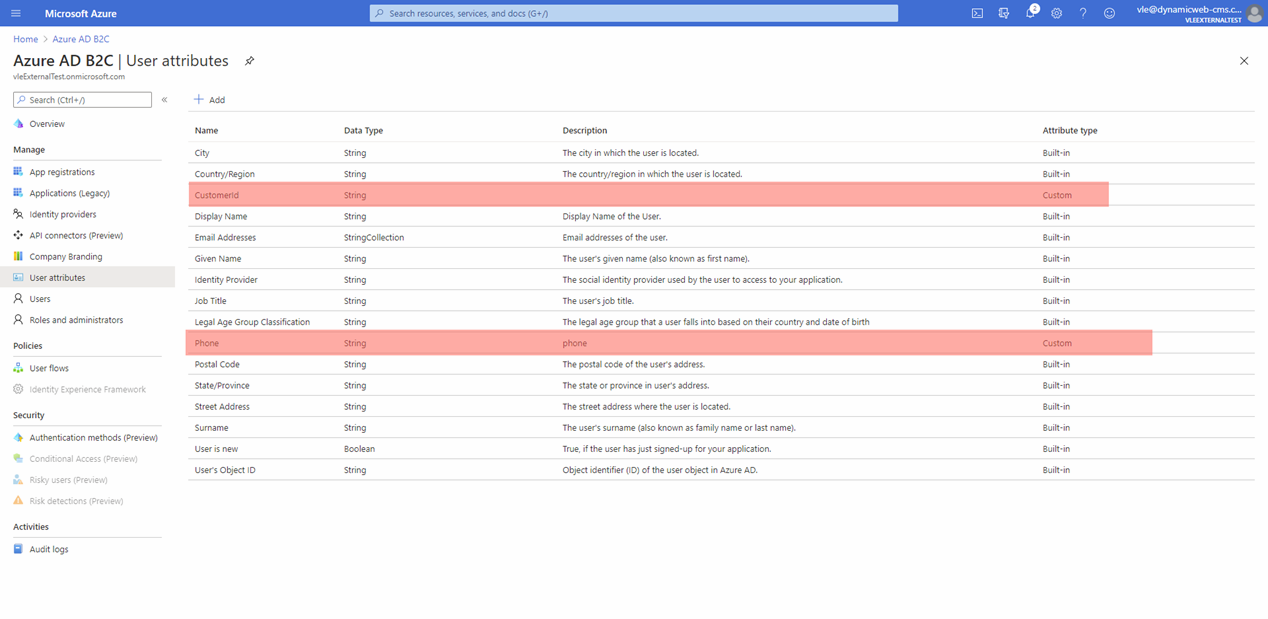
From the Azure Active Directory B2C overview page you can go to user attributes list where you might add 2 custom user attributes works with Dynamicweb provider.
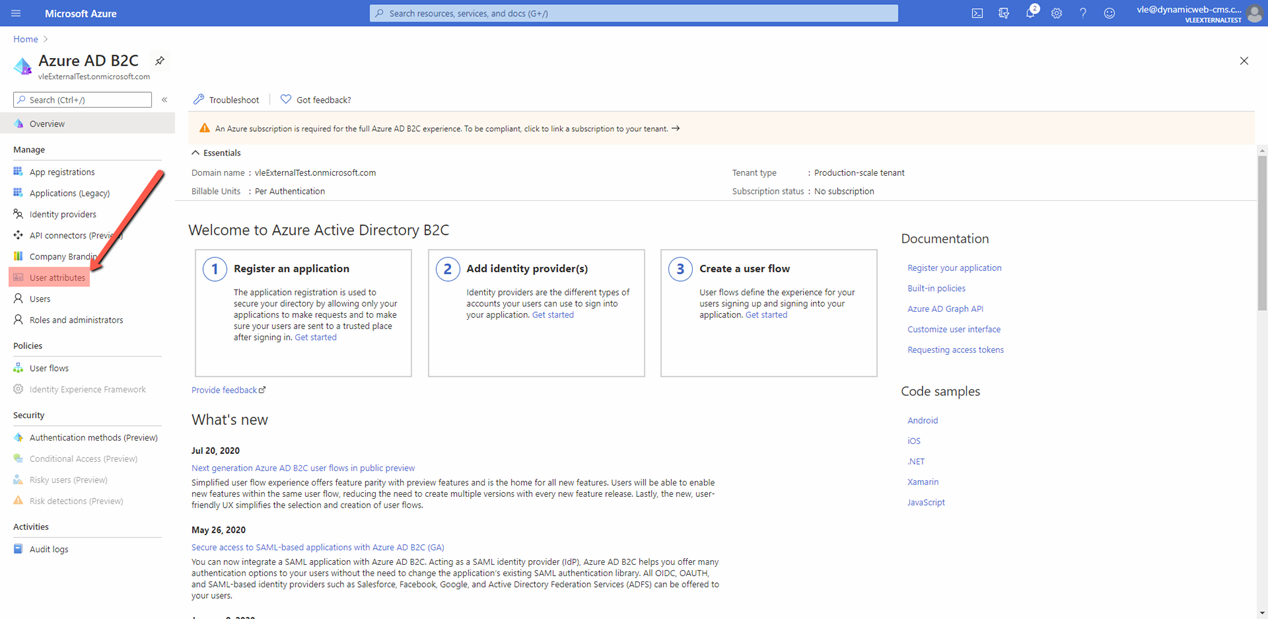
The attributes are:
- Phone custom attribute. If you create phone attribute and set its name as Dynamicweb “Phone claim name” the Dynamicweb user phone will be filled with value set to the Azure phone user custom attribute.
- CustomerId custom attribute. If you create phone attribute and set its name as Dynamicweb “Customer impersonation id claim name”. On Azure user login Dynamicweb will try to find other users having user customer number equal to “CustomerId” from Azure and if there is found user, it will be set as “User I can set as secondary” for the one who logged in.