
Code hinting in templates
Code hinting – like Visual Studio’s IntelliSense – is context-aware code completion feature which speeds up the process of coding by e.g. reducing typos and showing the programmer which namespaces and methods are available in a given context. As such, it is almost indispensable if you’re working with e.g. ViewModels or the API and will save you from countless of hours of browsing the API documentation and muttering curses to yourself.
Fortunately it is quite easy to set up - basically you just set up a completely standard solution on your IIS, and then you create a virtual path to a Files folder, which is placed in the VS solution you create using this guide.
In this guide we cover the following:
- Creating a new project in Visual Studio
- Installing the packages necessary to use code hinting
- Adding an existing Files folder to the project
- Creating the solution in IIS Manager
While we presuppose that you’re following our recommended setup with a separate /Files folder for each solution and shared applications, the setup should be easily transferable to other types of setups.
We also assume that you develop locally and deploy templates and other solution-specific files to staging/production using the Deployment tool.
Create a new project in VS
In this article we will use Visual Studio and therefore IntelliSense – and while you may be able to use other IDEs with NuGet support we haven’t tested this internally.
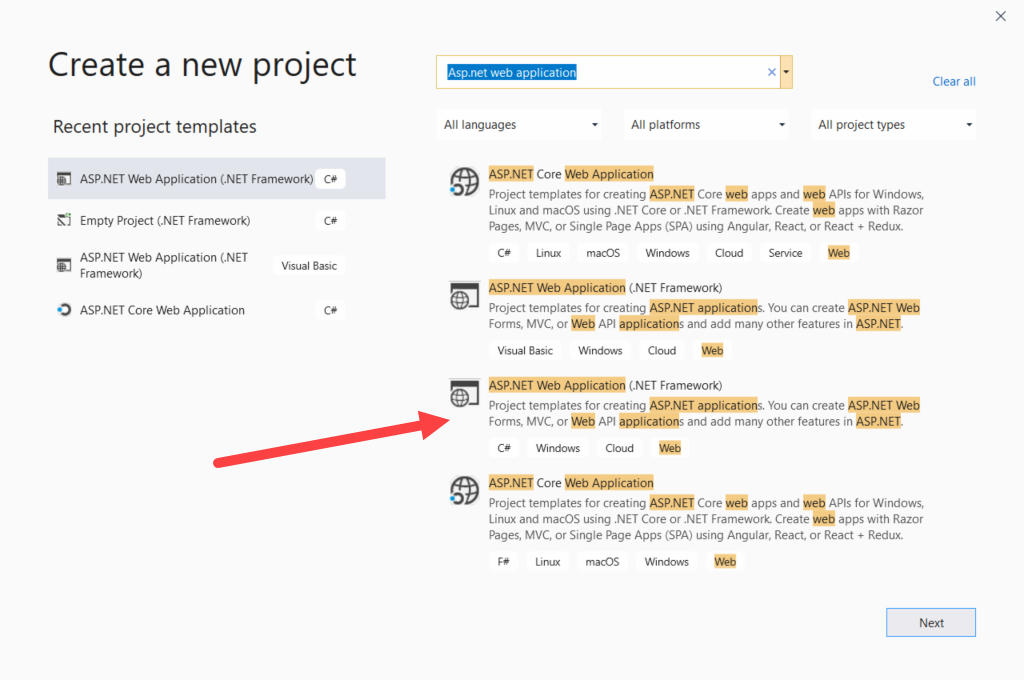
- Open Visual Studio and create new VS project – select the ASP.NET Web Application template with C# (Figure 2.1)
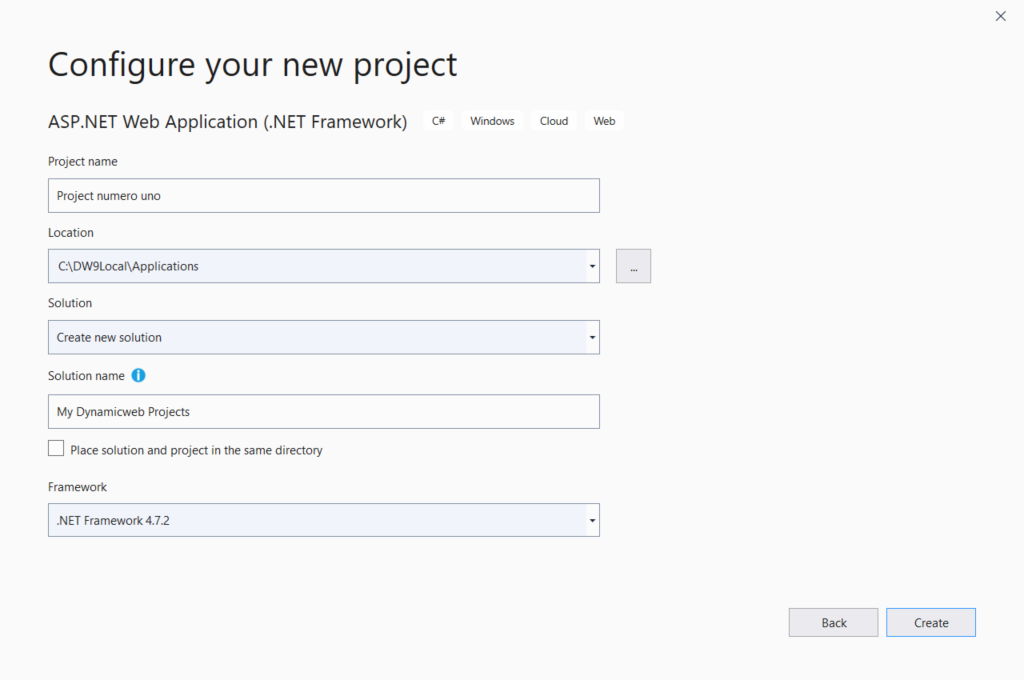
- Fill in the project details – name, location, and solution name - and make sure the target framework is .NET Framework 4.7.2 (Figure 2.2).
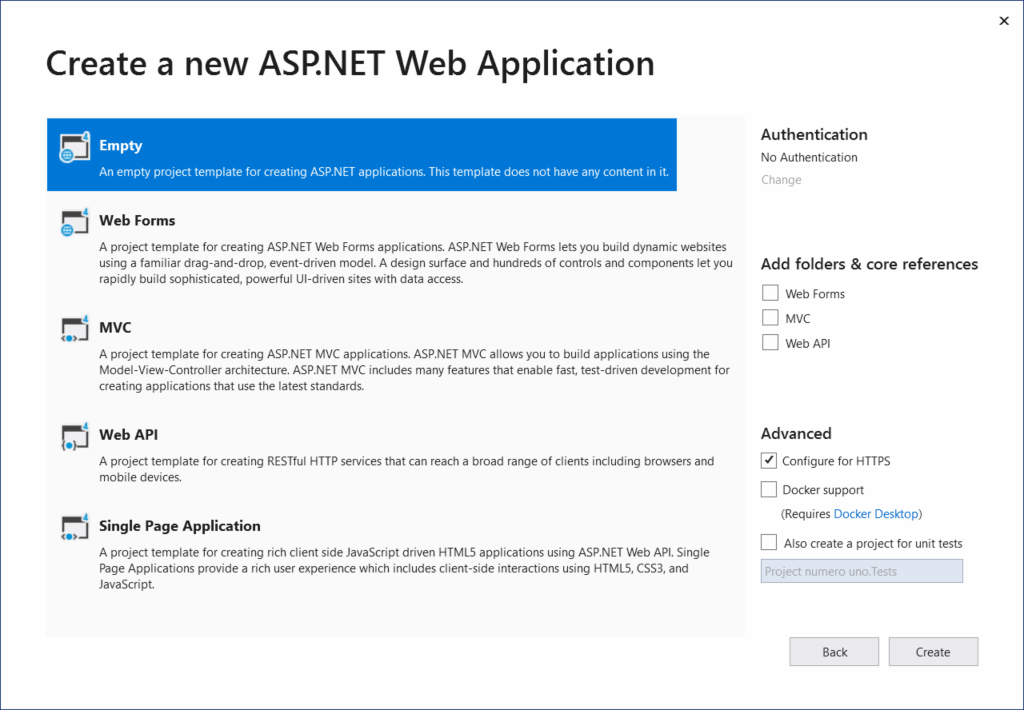
- Click Create and select the Empty project template (Figure 2.3) – then click Create again
- After the project has been created, you must install the packages you will use in your templates, chiefly Dynamicweb.Ecommerce – right-click the project and select Manage NuGet Packages (Figure 3.1)

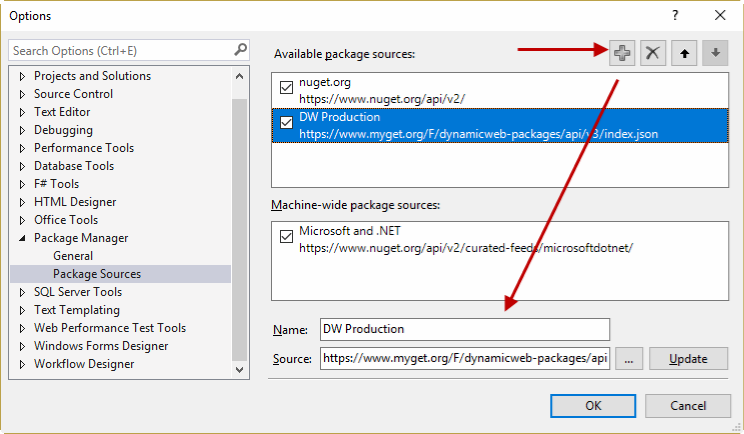
- Check Include prerelease then open the Settings (Figure 3.2)
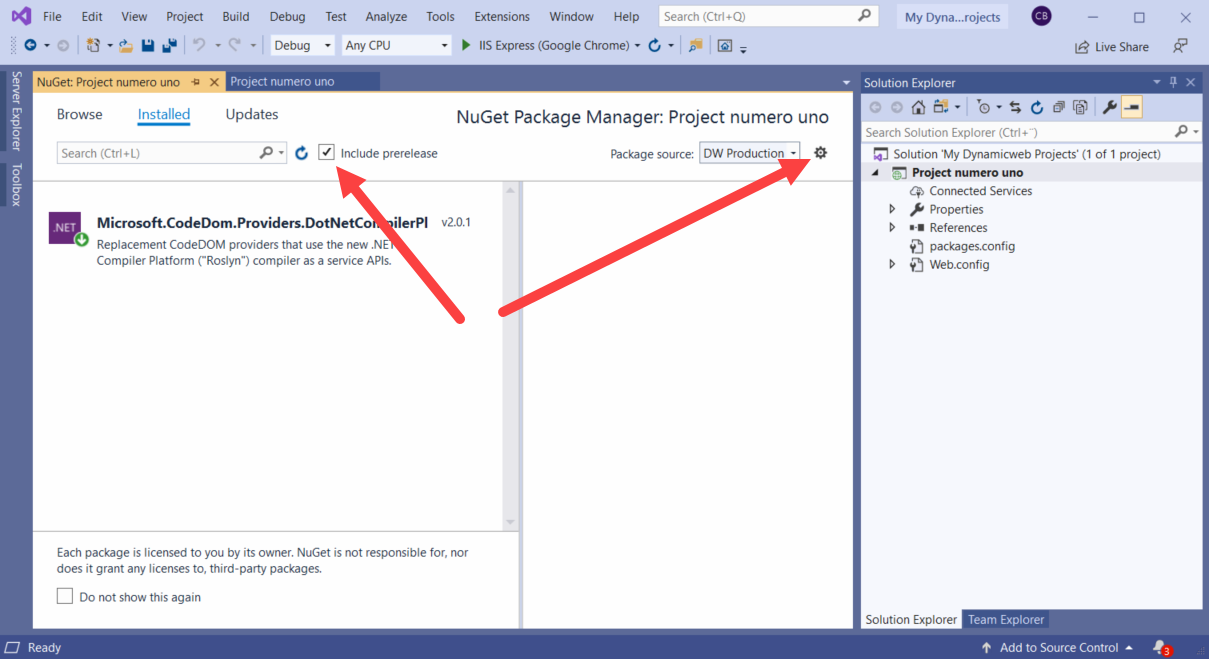
- Add the Dynamicweb production feed – https://api.nuget.org/v3/index.json (Figure 3.3), if it's not already there
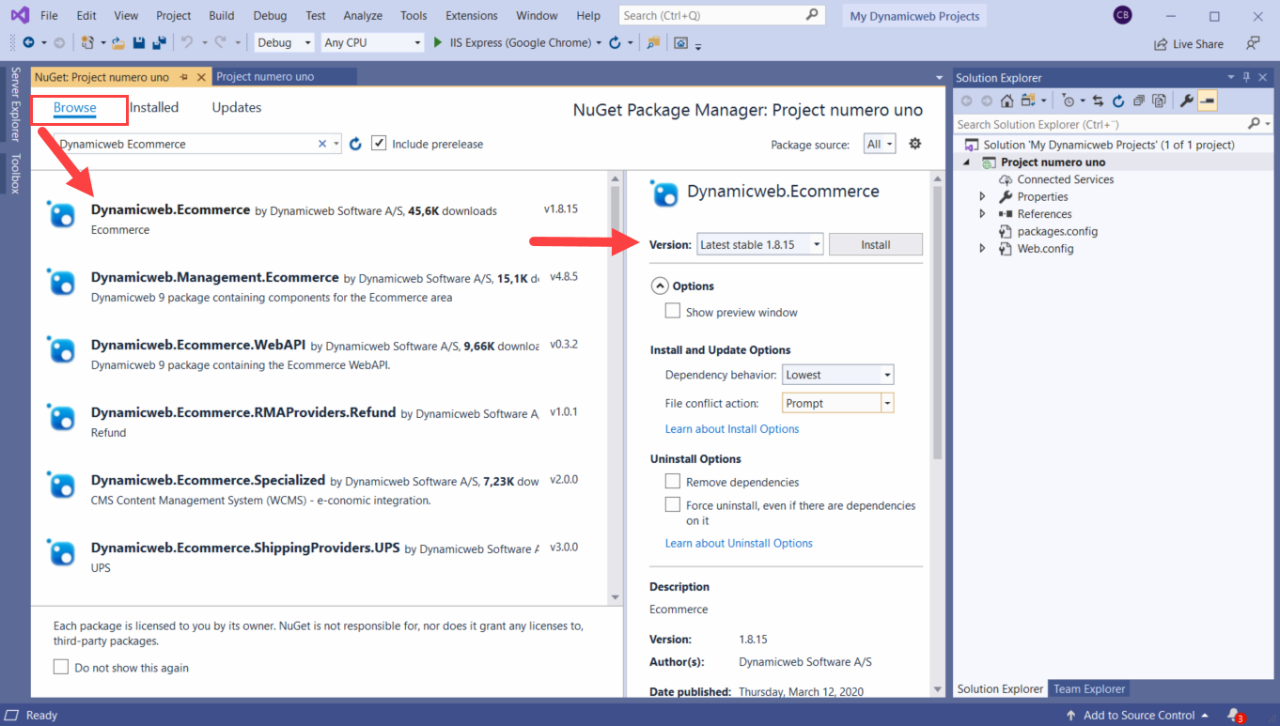
- Browse for the Dynamicweb.Ecommerce package and install it with Dependency behaviour set to lowest (Figure 4.1)
- Due to a bug in NuGet you may get an error – Unable to resolve dependency ‘RazorEngine.Roslyn’. If you do open the Package Manager Console (Tools > NuGet Package Manager > Package Manager Console) and install Dynamicweb.Ecommerce using the command Install-Package Dynamicweb.Ecommerce -Version X.X.XX –IncludePrerelease where X.X.XX is the latest stable released version. Go get coffee.
- If this is a Rapido solution, also include the Dynamicweb.Rapido.dll file from NuGet.
Add a /Files folder to the project
After the packages have been installed it’s time to add a /Files-folder to the project. This could be a clean barebones Files folder as created by the Dynamicweb Installer, a Rapido folder, or a copy of a /Files folder from an existing solution.
The procedure is the same, however:
- Copy the /Files-folder into the project folder – you can right-click the project and click Open folder in file explorer if you’re not sure where the project folder is
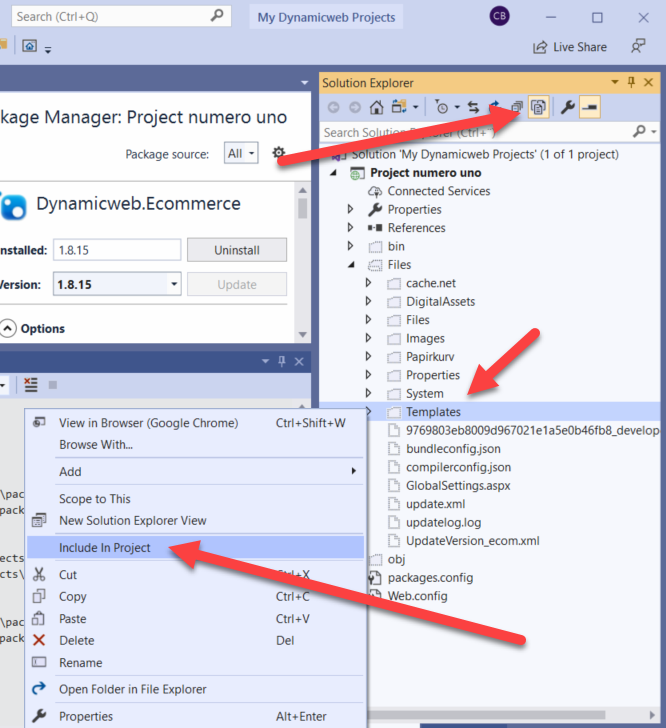
- In Visual Studio click Show all files in the solution explorer toolbar, then right-click the /Files/Templates folder and then press Include in project (Figure 5.1). Include other folders where you have content you want to work with, e.g. the System folder or the Files/Integration folder.
This basically completes the whole add code-hinting part of the article – if you open any of the templates you just added to the project you should now benefit from IntelliSense.
Create the solution in IIS Manager
Of course, you typically also want to create a website with the solution in IIS Manager – so that you can see your template changes in a browser before deploying them.
Please do the following:
- Create a website in IIS Manager
- Add a virtual files folder pointing to /Files folder you included in the VS project
You can now visit the URL in a browser and see any changes you make to the templates live.
Appendix A: Troubleshooting
If you experience that Visual Studio’s IntelliSense is not working properly, we have some solutions for you here.
Netstandard error
Working with a template in Visual Studio, you experience some of the references are underlined with a red line and an error saying:
CS0012: The type 'Object' is defined in an assembly that is not referenced. You must add a reference to assembly 'netstandard, Version=2.0.0.0, Culture=neutral, PublicKeyToken=cc7b13ffcd2ddd51'.
To solve this problem, you must follow these steps:
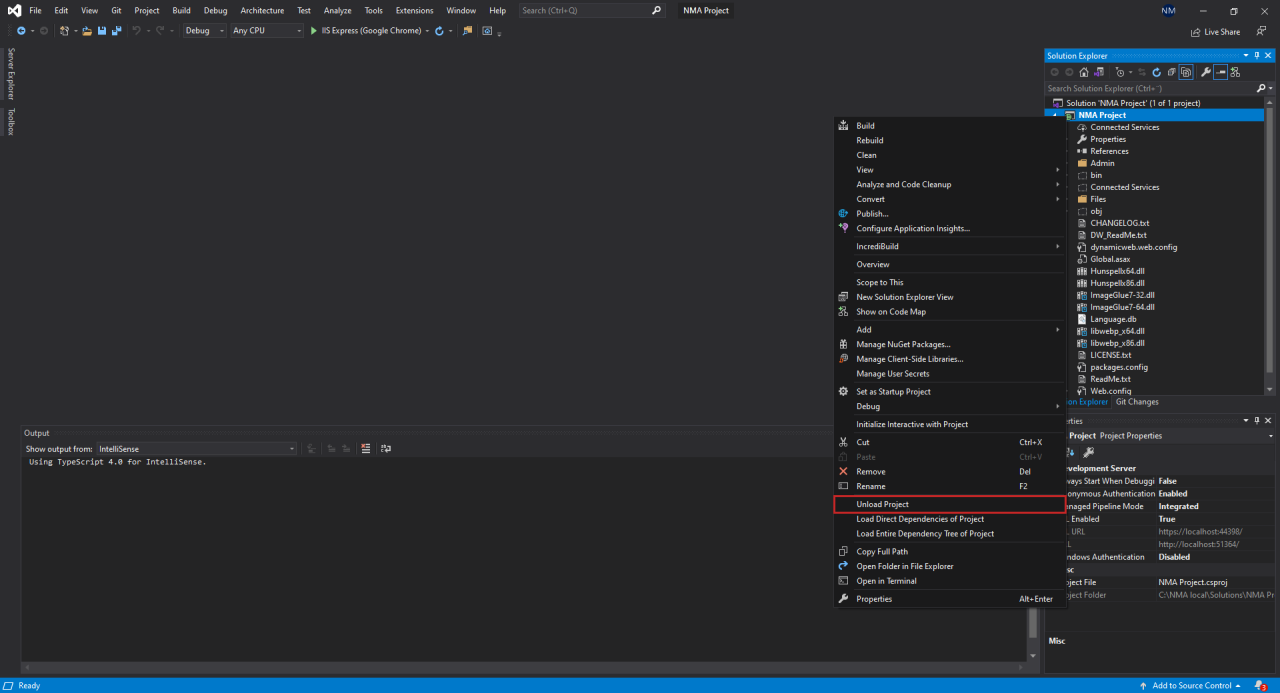
In the Solution Explorer, right-click your project and select Unload project (Figure 8.1).
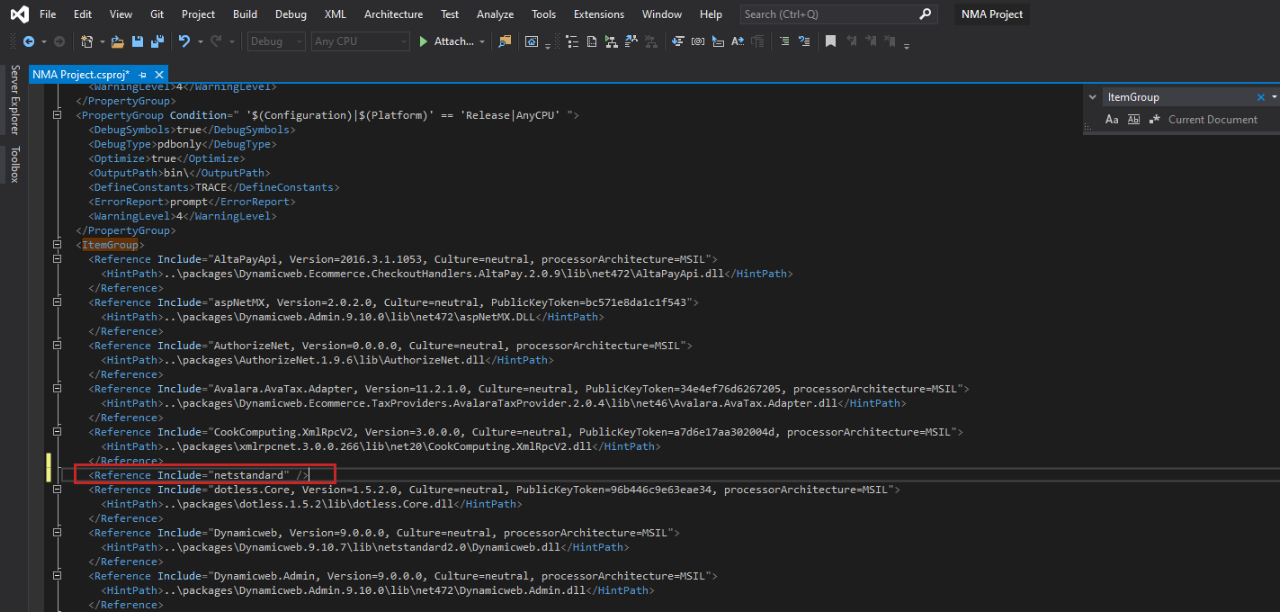
Now you should see the project’s .csproj file in the Server Exploerer as shown in Figure 8.2. Locate the ItemGroup including all your references and paste the following on a new line: <Reference Include="netstandard, Version=2.0.0.0, Culture=neutral, PublicKeyToken=cc7b13ffcd2ddd51" />
Save the file and reload your project by right-clicking the project and selecting Reload Project (Figure 8.3).

Right-click the project again and select Rebuild to load the new reference.

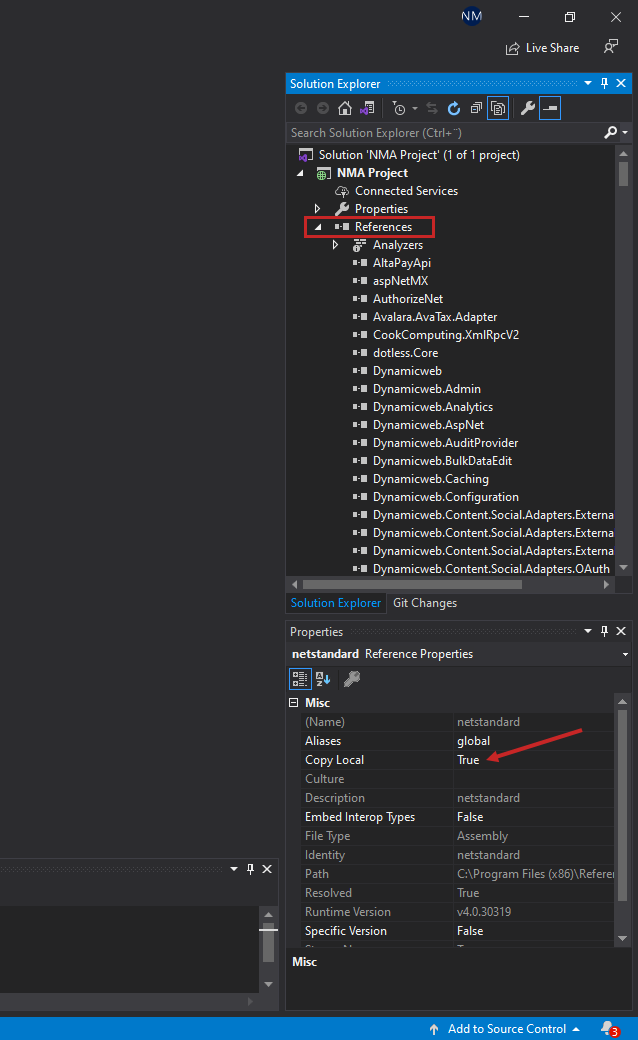
Now in the Solution Explorer, fold out the References node (Figure 9.2) and locate the new “netstandard” reference. Right-click it and open the Properties.
In the Properties, set Copy Local to True.
Lastly Rebuild the project once more, and now IntelliSense should work again. If you had any open template files, close and reopen them to see the changes.
Owin package conflict
If you're encountering Owin package conflicts while running DW9 from Visual Studio, here's how to resolve it:
- Open the Web.config file and locate the binding redirects associated with the package. Pay attention to the "new version" attribute
- Check the packages.config file and find your package
If the version in the packages.config file differs from the version in the Web.config, you should update your package through NuGet to match the version specified in the Web.config
- If you encounter an issue like a version conflict preventing the package from being updated, please navigate to the Web.config file and adjust the version number of the package to match the version specified in the packages.config file