Custom Data Integration providers
If none of our built-in Data Integration providers suit you, you can create a custom Data Integration provider tailored to your specific needs.
That involves:
- Downloading and installing the Visual Studio templates for Dynamicweb 8 or 9, as appropriate (you must be logged in to your account)
- Creating a project, adding the appropriate references, and creating a new item from a template
- Adding custom logic to the template
- Implementing your source or destination provider
- Adding custom fields/controls to the provider UI
- Building the project and moving the .dll to the solution bin-folder
See more below.
Creating the project
To get started:
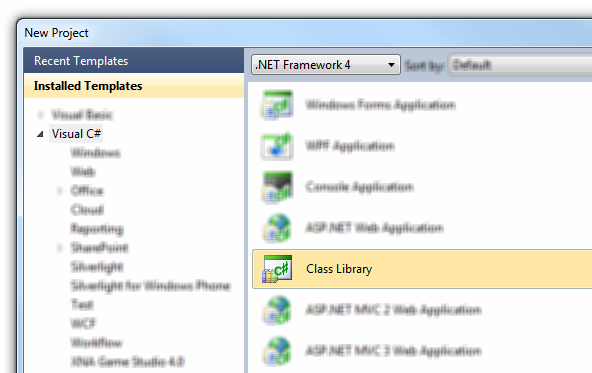
- Create a new project inside Visual Studio and select “Class library” as the project template (Figure 2.1).

- Add references to Dynamicweb.dll and the other assemblies that contain the APIs that we will need:
- Dynamicweb.dll
- Dynamicweb.Data.dll
- Dynamicweb.Data.Providers.dll
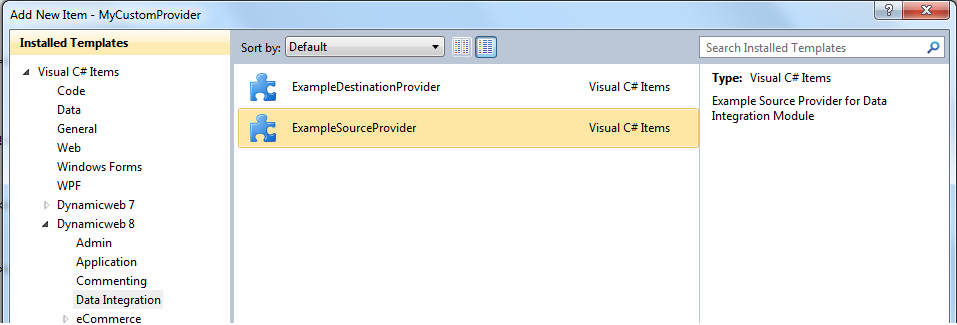
- Add a new item to the project by the right clicking on the project and choosing "Add" -> "New Item". Choose “Dynamicweb 8 -> Data Integration -> ExampleSourceProvider” or "ExampleDestinationProvider" (Figure 2.2)

- Save and build your project – and copy the DLL into the Dynamicweb admin/bin folder.
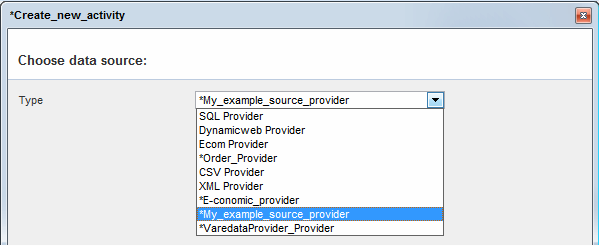
Check that your new custom provider shows up in the Data Integration module when creating a new data integration activity (Figure 2.3).

Adding custom logic
To implement your own logic do the following:
- For a source provider:
- Change “ExampleSourceProvider.GetOriginalSourceSchema()” to reflect the tables and columns you wish to provide.
- Change “ExampleSourceReader.GetNext()” to return the next row the given mapping.
- Change “ExampleSourceReader.IsDone()” to return false when all rows have been imported
- For a destination provider:
- Change “ExampleDestinationProvider.GetOriginalDestinationSchema()” to reflect the tables and columns you wish to provide.
- ExampleDestinationProvider.RunJob() – to make changes in the job running flow
- ExampleDestinationProvider.Write() – to write the row which was read from the source
Implementing a source provider
For a source provider you need to implement the "ISource" interface and inherit from "ConfigurableAddIn" class.
In the GetOriginalSourceSchema() method you need to return the tables and their columns which will be read from the source(csv/xml file, database, etc.). Here is the example which returns the schema with two tables:
In the GetReader() method you need to create an instance of your reader class:
The reader class should implement the "ISourceReader" interface. In the GetNext() method you should look at the mapping, which columns are needed, and only include those. In the IsDone() method check if there are any more items to read - if not, return true. Below is an example of sql source reader. It makes the sql data reader from current mapping table and its columns:
Implementing a destination provider
For destination provider you need to implement "IDestination" interface and inherit from "ConfigurableAddIn" class.
In the GetOriginalDestinationSchema() method you need to return the tables and their columns which will be read from the destination source(csv/xml file, database, etc). For example see method GetOriginalSourceSchema() in the "Implementation source provider" section.
In the RunJob() method we need to read data from source and write it to the destination. This should be done for all active mappings that are in the job:
Also you need to create the writer class or method to write the row with data read from the source. If you choose writing a class you can implement the "IDestinationWriter" interface. Here is a sample csv writer class which writes data to csv file:
Creating provider fields/controls
If you want to create fields and controls to your provider, you can add properties to the provider class, which will then show up in the UI as in Figure 6.1.
Your field/control options are:
Folder selector:
File selector:
Drop-down selector:
Text box:
The AddinParameterGroup should be "Source" if the parameter should show up for the provider when used as a source, and "Destination" if it is used as a destination.
To save the setting in the XML file add the following code to the SaveAsXml() method:
To apply saved settings you need to read them in the provider constructor:
To correctly display the GUI you must add the code to the Serialize() method:
And UpdateSourceSettings() for source provider or UpdateDestinationSettings() for destination provider:
