
Text Editor Tool
In Swift, the Text Editor tool lets you customize your text to make it match your theme and style. The Text Editor is available in both the text column and the text and image column. Though please note that the title and subtitle in these columns are styled through the branding of the whole site and the styling in their column editors.
This guide will show the features embedded in the text editor.
The tool lets you edit texts in most of the ways you know from Microsoft Word or Google Docs. Because of this almost all the icons will be familiar to you. We’ll make a quick walkthrough through the most important ones to explain how the Text Editor tool works.
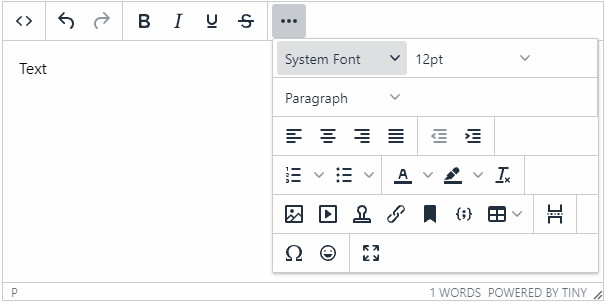
The < > icon lets you see the HTML code should you need that. The arrows allow you to either undo or redo an action. The commonly used features are bold, italic, underlined and strikethrough which is why these icons are placed at an easy-to-access action bar. To access all the other features and formats you’ll need to enter the drop-down menu by clicking the three horizontal dots as shown on figure 1.1.
How to add formatting
To start customizing your text with the different formatting you can do two things depending on your starting point.
- Highlight already written text and click the preferred formatting.
- Choose some formatting settings and start writing.
From here you can start customizing your text. The first options available are very much related to the font. By default, the text will be shown as the system font. You can change this and choose between different commonly used fonts. Furthermore, you can adjust the font size. If you’re working with headings inside your text editor (not the title or subtitle of the column) you can change this by choosing between H1 to H6 in the Paragraph drop-down.
Alignment and indents
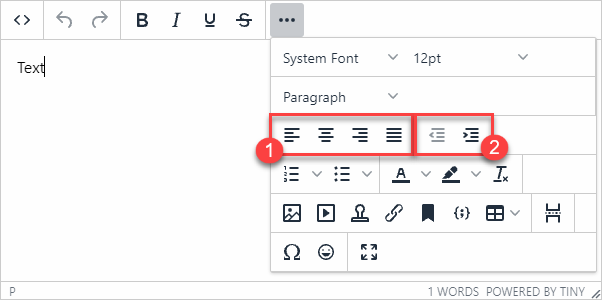
The text editor lets you use the alignments that you should already know from Microsoft Word or Google Docs. The four alignments available (1) in the editor are left, center, right and justify.
In the text editor you’re also able to make ordered or unordered lists. Different types exist for both ordered (numbers, letters, Greek and Roman letters, etc.) and unordered (bullets or squares) lists.
You’re also able to increase or decrease indents without the bullets (2).
This is especially useful combined with images, as it gives you a more precise placing of your images.
Images and embedded videos
Though the Text Editor tool lets you add images and videos alongside your written text, we recommend that you use a combination of text columns and image/video columns either on the same or different rows. This is easier to style and easier to maintain.
Adding images inside the Text editor is mainly effective when working with small inline images.
The easiest way to add an image is to use the icon that pops-up when clicking inside the text area (Figure 4.1).
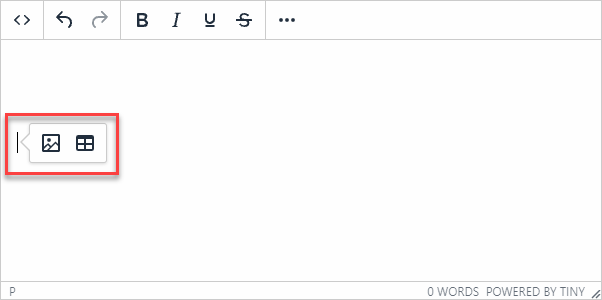
The pop-up allows you to add either an image or a table. Using this tool to add images lets you choose from various files inside your folders.
Alternatively, you can add images or videos clicking the icons in the extended menu found by clicking the three horizontal dots. Though this requires you entering the source or embedded code.
Using links in the Text Editor
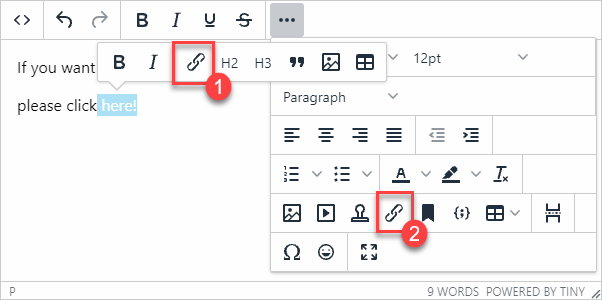
The Text Editor tool also allows you to create internal and external links. The linking tool can be accessed in the action bar appearing when some text is highlighted (1) or in the drop-down menu (2) (Figure 5.1).
Accessing the linking tool through the action bar allows you to quickly link to another page.
Doing it through the drop-down menu lets you customize the linking a bit more. This includes the text you want displayed, the text shown when hovering the link and whether you want it opened in the existing or a new window (Figure 5.2).

Clear formatting
At some point you might end up needing to remove all formatting for a specific part of your text, the whole text, or the text you’re about to write. Using the tool Clear formatting will turn everything about the text back to default. This removes everything you’ve added or edited; colors, fonts, sizes, indents, everything except ordered/unordered lists and the written content.
To clear formatting highlight the part that needs clearing and click the clear formatting icon ( Tx ). If you want the text, you’re about to write to be clear of formatting, click the icon and start writing.