
Creating a Landing Page for your website
When creating a new page, you get to choose from a catalog of templates including two different landing pages templates – additionally you can also choose to create your own page from scratch. In this guide you’ll learn how to create a simple landing page from scratch using only the Visual Editor and preset rows. It will end up looking like the one in the preview below:
In order to make your landing page more about you and less about bikes - you’ll also learn how to change and customize the rows and columns to fit your products.
This guide will use these different content columns:
We’ll keep the customization of each column to a minimum in order to keep it simple. Should you want to discover the full styling and editing options for the different columns, please click the links above.
Creating an empty page
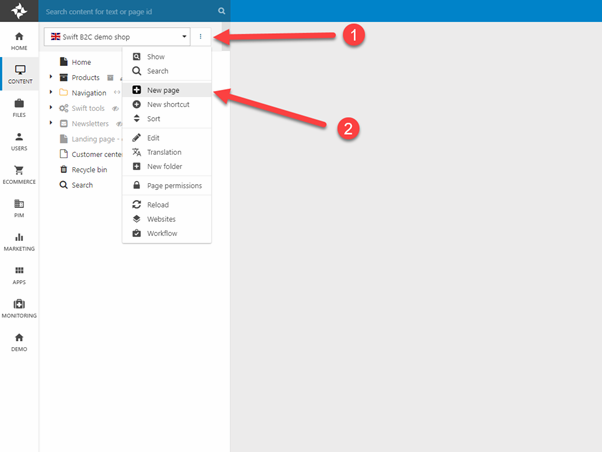
The first thing you’ll need to do is to create an empty page:
- Click the three vertical dots, ⋮, next to your website name (1)
- In the dropdown menu click on New page (2)
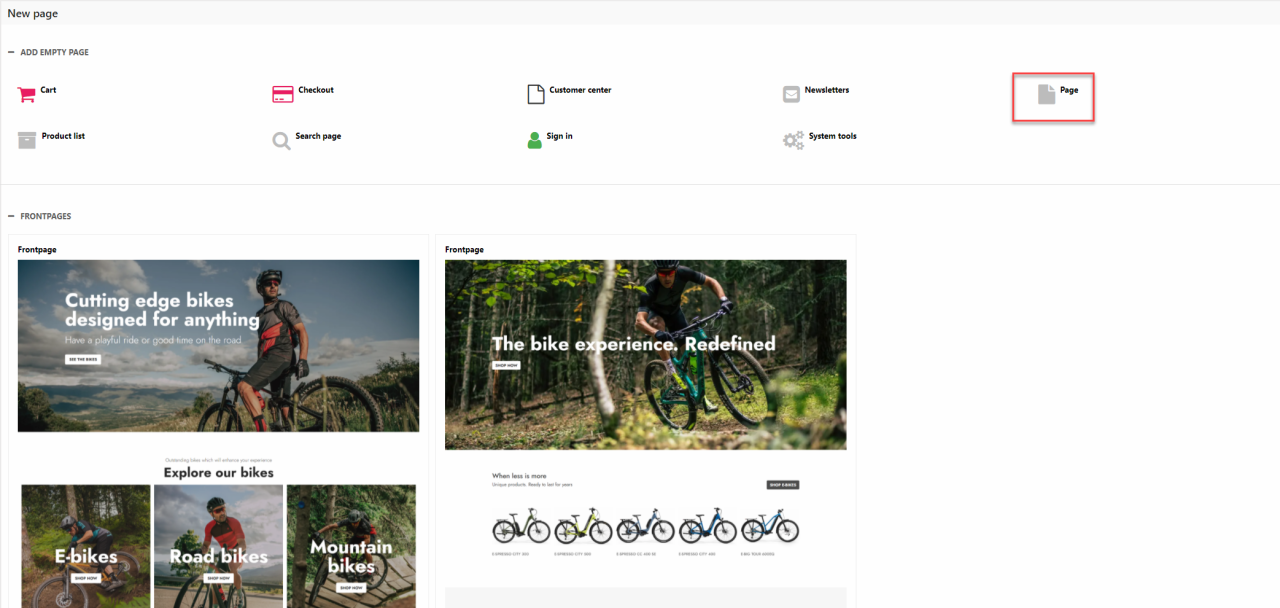
This will open a new page menu. In here you can choose between:
- A page preset
- An empty page
In this example we’ll use an empty page, as it will teach you more about creating content on Swift – but in most day-to-day scenarios it’s easier to use a page preset and then modify it.
When clicking this option, different categories of new pages unfold. For this example we’ll be creating a new landing page, so choose the “Page” option as shown on Figure 2.2.
You’ll be asked to name the page. As we are creating a landing page a fitting name could be “Home” or something like that.
Adding a giant poster
The first thing we’ll add is a greeting for the customers. Looking through the rows’ presets in the Visual Editor, the most fitting type of column is the template called Standard poster. To add this to the landing page we’ll simply drag and drop it onto the page.
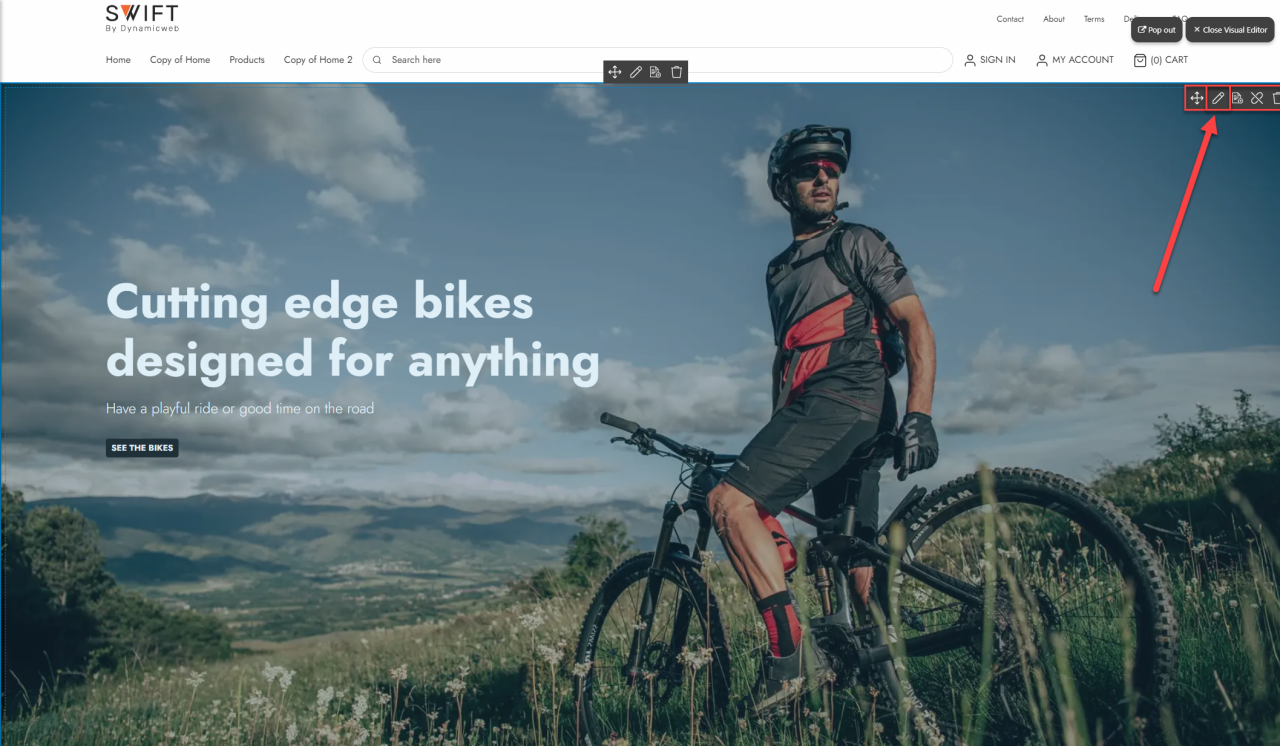
While it is a nice picture and a captivating text, you’ll probably want to change a couple of things about the poster. This is done by hovering the poster and clicking on the pencil in the menu bar in the top-right corner of the poster (Figure 3.1).
- The menu bar in the top-center of a row is for editing and styling the entire row. The one in the top-right corner of an column is for editing and styling the specific column.
This will open the column editor. Here you should customize the poster using your own picture and text.
Most importantly you should make the poster link to your preferred destination. You can link to another page, a product group or a specific product. In this example we’ll link to the general product page. This is done by checking off the “page” option in the “Link type” section (1). When this is done the “Page link” menu (2) will show. Clicking the small blue page icon (3) will open a menu (4) where you can choose your preferred link destination.
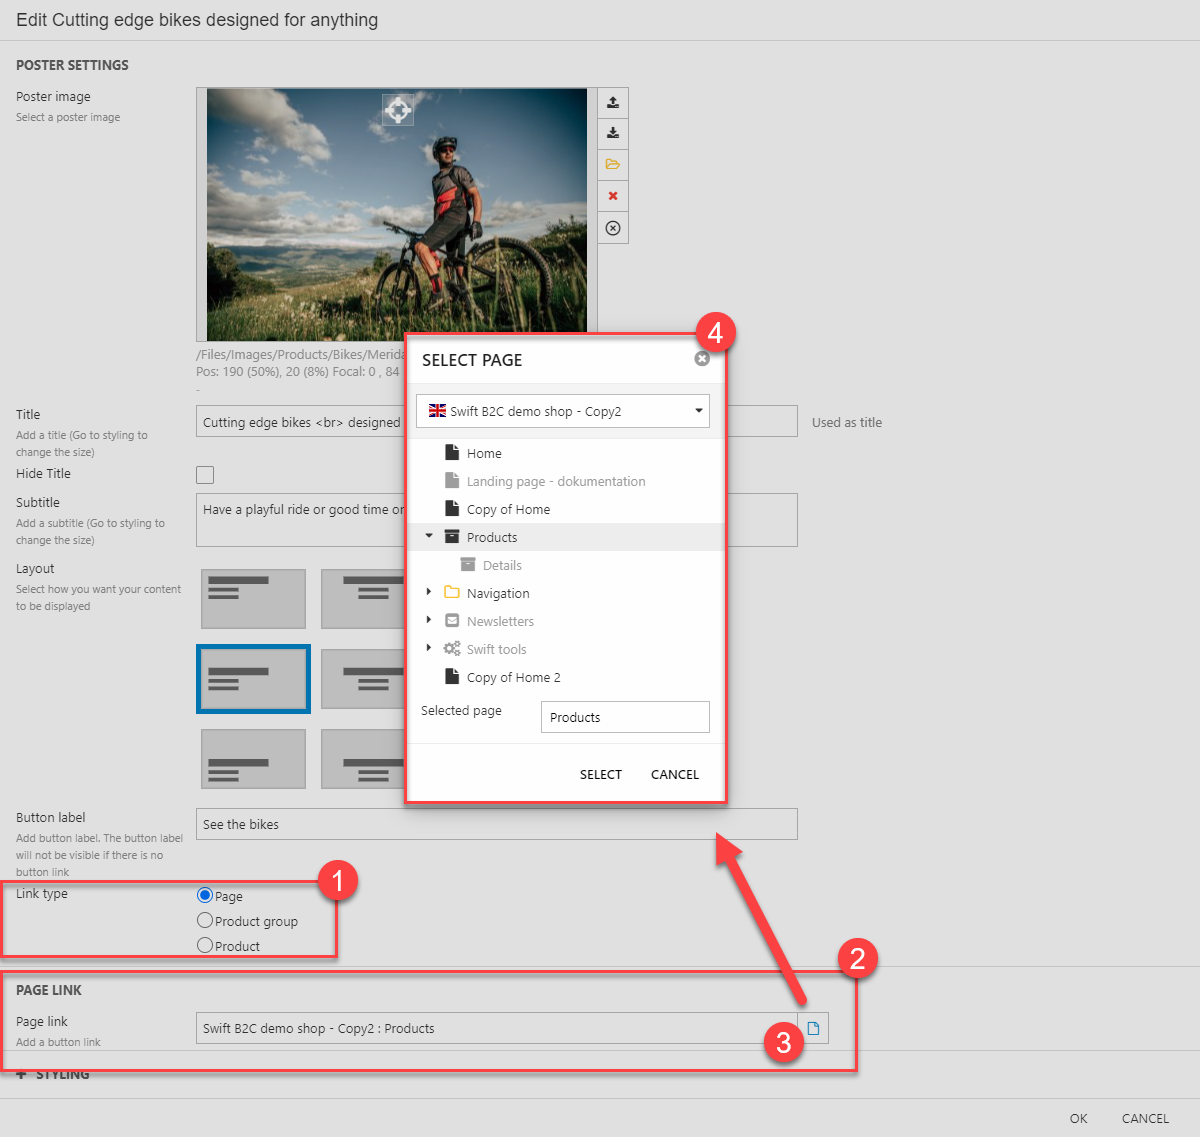
When this is done, click SELECT in the small menu (4) and OK in the bottom-right corner of the editor to save your edits and the result should be shown immediately.
Adding a section header
The next thing we’ll add is a section header.

In this case, the section header will serve as a title for the products and categories following the section header. After adding this to the landing page you’ll find the column editor the same way as with the poster. When you’re done customizing the section header click OK in the bottom-right corner.
Adding a product slider
Beneath the Section header we’ll add a Product slider.
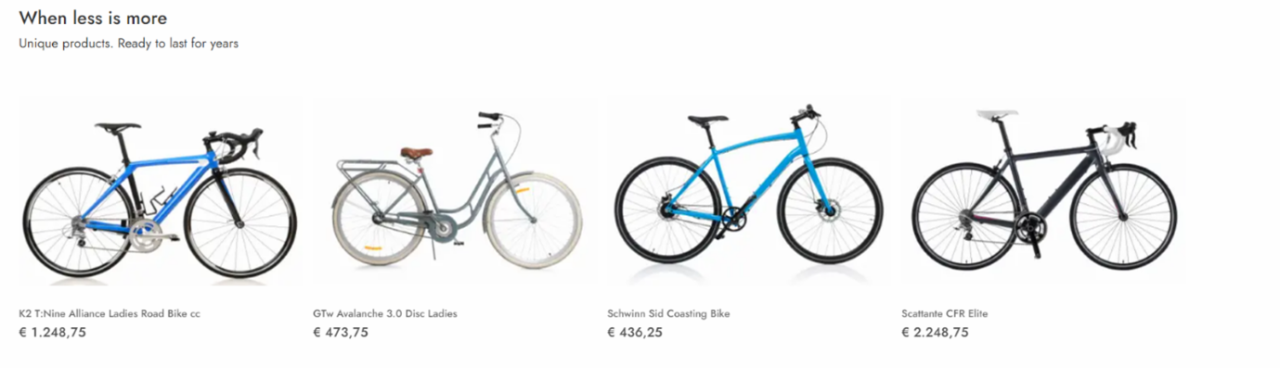
Using the Swift B2C demo shop you’ll find two different presets. In this guide we’ll use the product slider with the text above the products. Both presets can be customized to your liking should you need a different look. Again, this is done by clicking the pencil in the menu bar in the top right-corner of the column.
Using posters as entrances
Until now all our presets have been rows consisting of only one column. The next thing we’ll add is a row consisting of three columns. We’ll add three different posters with buttons to guide the customer to one of three different product groups.
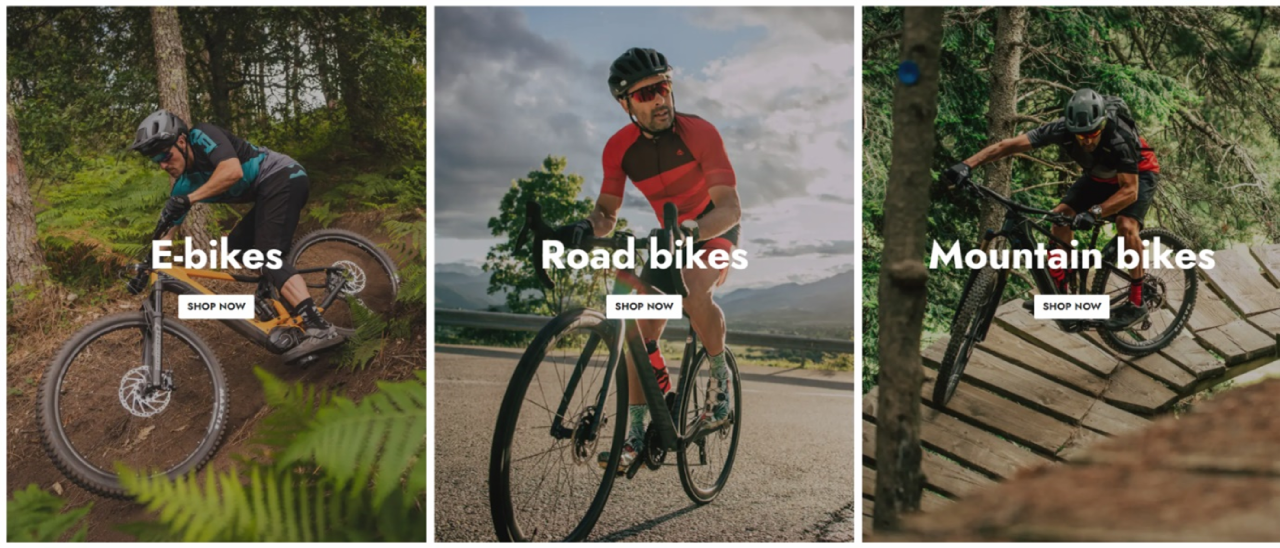
Luckily for us this is already created as a preset called Giant entrances. The only thing you need to do after adding the preset to the page, is changing pictures, texts and links just as you did with the first poster.
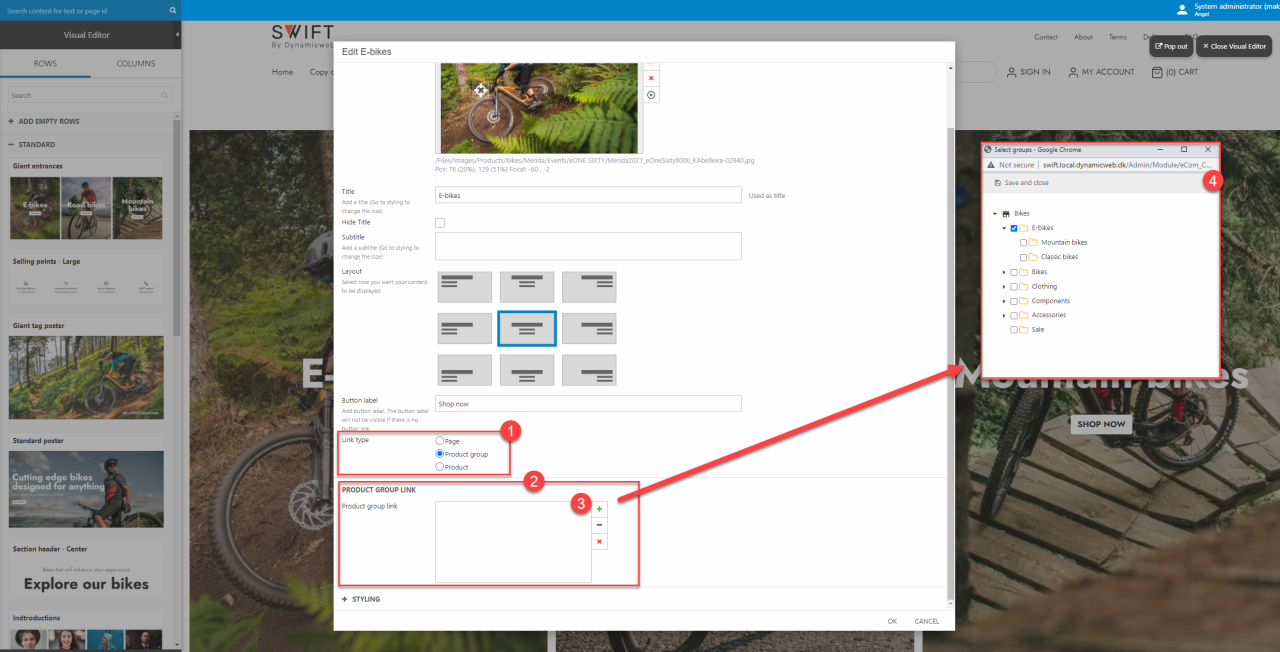
In this example the posters links to specific product groups. To edit this, you enter the editor. Instead of linking to another page (like we did with the first poster) we’ll choose to link to a product group (1). In the ”Product group link” section (2), click on the green + (3). This will open a small window (4) from where you can check off your preferred product group. When done, remember to click ”Save and close” in the small window otherwise your chosen destination won't be saved.
Adding features
The last thing we’ll add to the landing page in this guide is four features.

These can be used as links to other pages or simply just as fancy icons with a descriptive text. A preset consisting of a row with four features as columns has already been made and can be found as a standard preset.
With the Swift B2C demo shop you’ll have access to 40+ different icons but you’re also able to add any icon that suits your own theme.
Placing the header above the content
By now you should have a landing page looking a lot like the one in the preview at the top of the page.
One thing that should be different from the preview and your page is the position of the header. Right now, the header is white and with a clear border between it and the page content. If you want to change this, you’ll need to close the Visual Editor and enter the properties of the page.
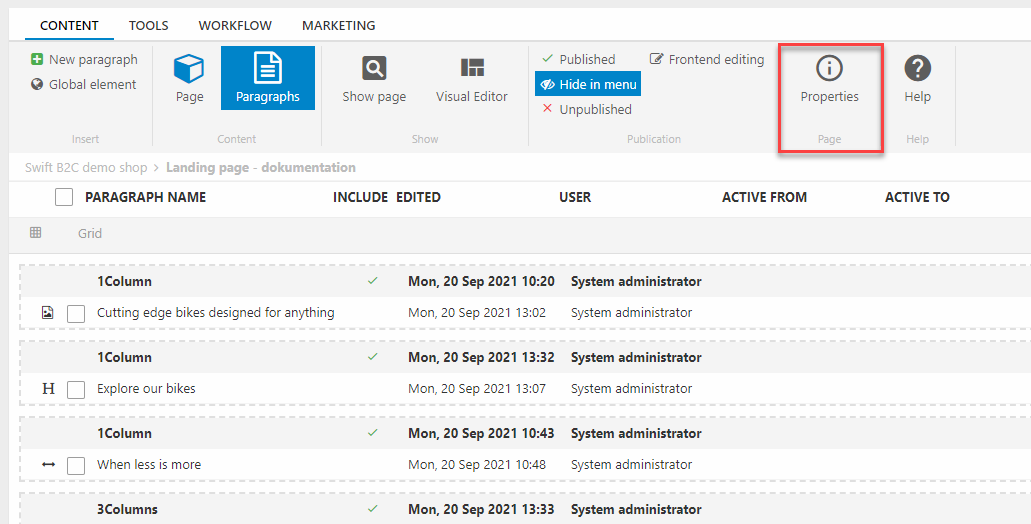
Go to the section called Page settings. Here you can choose a Header Position. If you want the header to be on top of the content click the picture resembling this – if not, leave the settings as they are. When done scroll to the top and click ”Save and close”, otherwise you changes won’t be saved.
That was the final step. You should now have a landing page similar, at least in structure, to the preview.
If you want to customize your landing page even more, you should check the guides explaining the different features of rows and columns.