
T5.2 Managing the product portfolio
Welcome to the second of four tutorials which aim to get you up to speed with Dynamicweb PIM – for an overview of the course look here.
In the previous tutorial, we covered the basic concept of a PIM system – before analyzing and importing the example data. In this tutorial we will explore the different tools for organizing and managing the product portfolio. In more concrete terms, these are our goals for this tutorial:
- Place the imported products in appropriate warehouse groups
- Create a workflow which can be used to control the order in which information is added to products later on
- Use the Combine tool to create variants from the flat products we imported
- Finally, we will take a quick look at queries – instructions for retrieving and displaying product data matching some criteria, regardless of their place in the warehouse structure
These features and tools all have one thing in common; they are used to help PIM editors and managers work with product information in a more structured and organized manner.
Warehouses & Groups
Warehouses are parallel to shops in Dynamicweb Ecommerce – but can be organized in a manner which makes sense for the product enrichment process, independent of how the products are presented across distributions channels (e.g. webshops, print catalogs, etc.). Since you already created a warehouse in the previous tutorial, we will not cover the basics again here.
Warehouses are pretty useless on their own, however – their primary function is to contain warehouse groups. Since warehouse groups are functionally identical to product groups in Ecommerce, you can do two important things on them:
- Select a workflow for the products in the group
- Select a product category for the products in this group
In contrast to product groups in Ecommerce the group structure is only for administrative purposes, and can reflect anything you like without impacting how the products are published across channels. Name them after ERP codes, after manufacturers, or something else which makes sense for your setup.
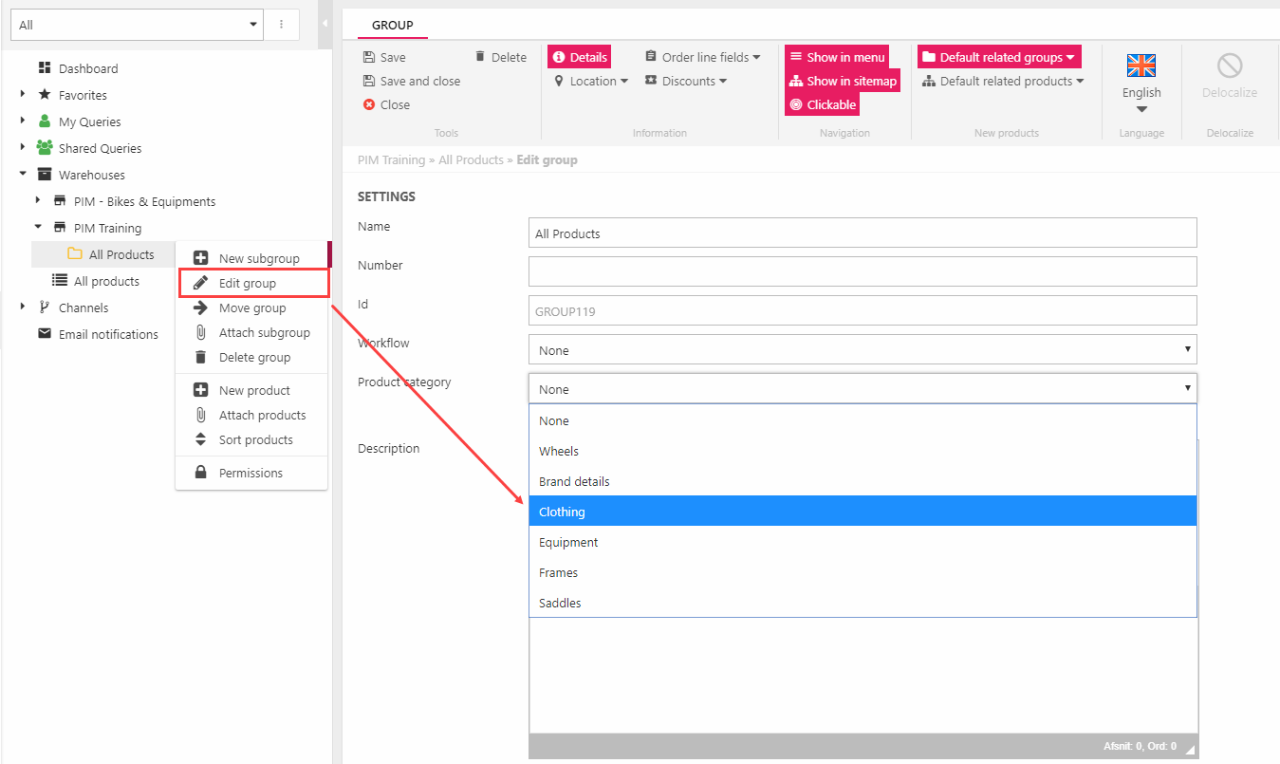
In the previous tutorial, we created a single group for all the products – the All Products group. As all the imported products are apparel, we can use the group settings to apply apparel-related product category fields to our product portfolio:
- Go to PIM > Warehouses > PIM Training
- Right-click the All Products group and click Edit group (Figure 2.1)
- Use the Product category dropdown to select the Clothing category
- Save
In contrast to product fields – like the Pattern field you created in the previous tutorial – product category fields are not available on all products, but only on products which are members of a group with the product category applied.
Products can be members of more than one warehouse group:
- Create a new warehouse group for each brand in the product portfolio:
- Achievement
- Dassler
- Diamond
- Gilliam
- Mortarvalley
- Schein
- Tailspin
- For each brand, select the appropriate products in the All Products group (Figure 2.2)
- You can use the Visible fields button in the ribbon bar to show the Brand for each product (we'll return to the Visible fields in the next tutorial)
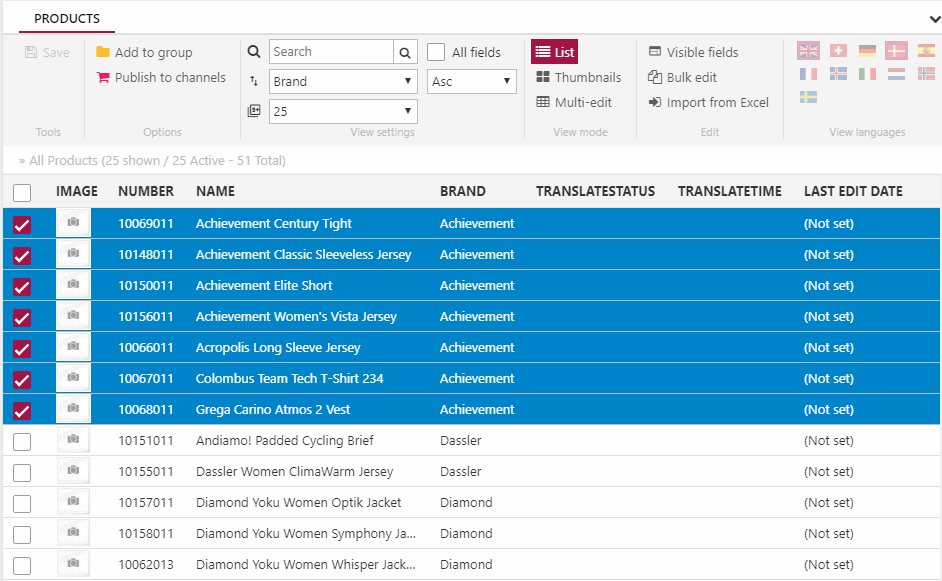
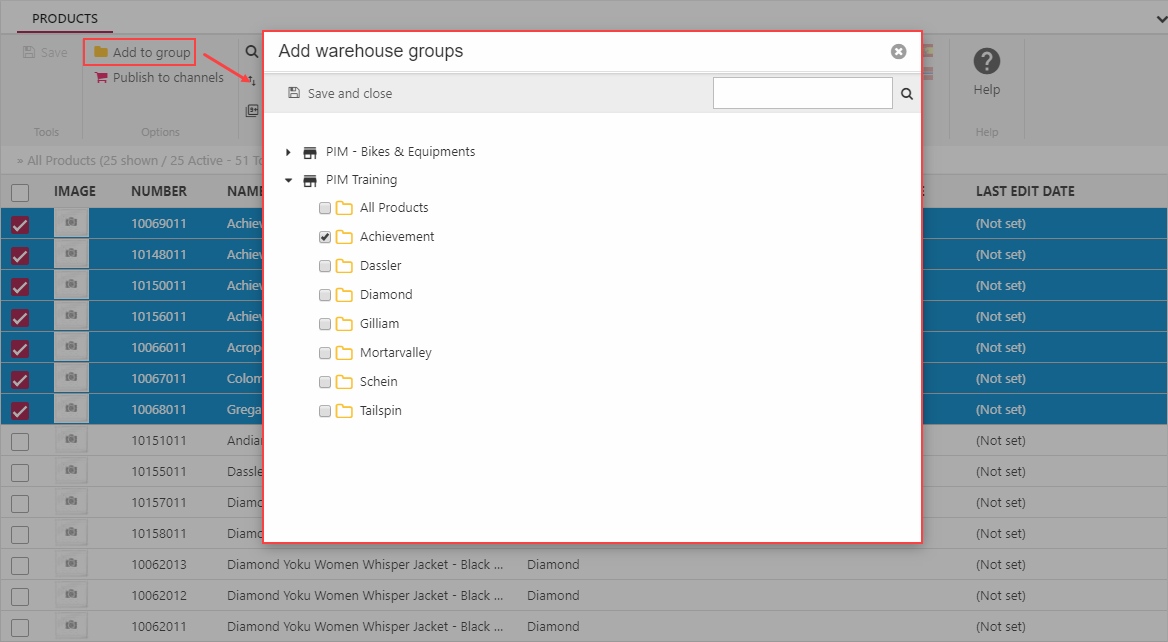
- Click the Add to group button in the ribbon bar
- Select the appropriate warehouse group (Figure 2.3)
- Click Save and close
Workflows
When products are imported to Dynamicweb PIM, they typically don’t have a lot of related information. In some cases, there’s only a product number and a product name – and in other cases, there’s a bit more information, like in this scenario.
Regardless of how much information is already present on a product, workflows can be created to make sure information is added in the right sequence and in a controlled manner. The idea is that products are imported, and then progresses through a set of workflow states until the final state is reached, after which are ready to be published.
Create a workflow:
- Go to Settings > PIM > Workflow
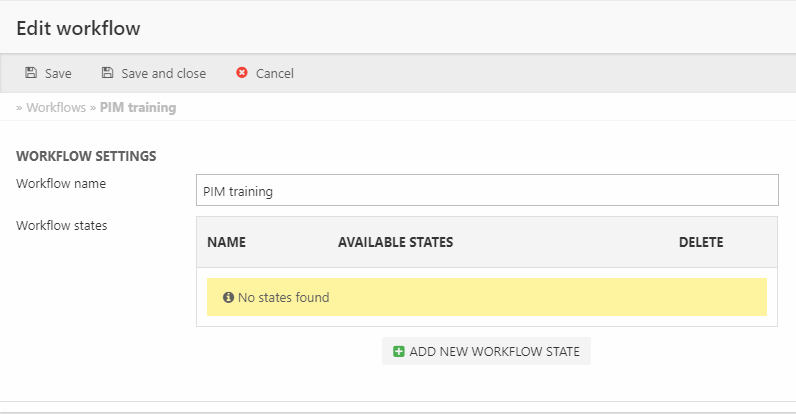
- Click New workflow in the toolbar
- Name the workflow PIM Training (Figure 3.1)
- Save
A workflow in consists of a number of workflow states – e.g. New Product or Translation needed – and instructions on which state leads to which other states:
- Click Add new workflow state
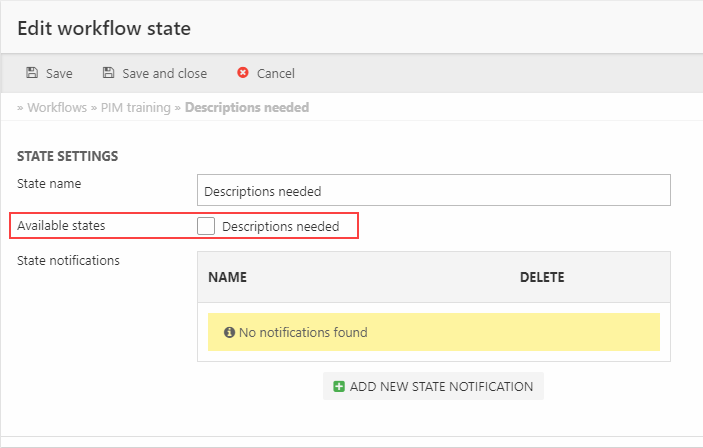
- Name it Descriptions needed
- Save
Notice how a new section in the interface called Available states allows you to select which states are available from this state (Figure 3.2).
Since only one state has been created don’t do anything just yet. Instead go back to the workflow overview create the following states:
- Translation needed
- Ready for images
- Ready for publication
After creating these, open each state and configure the available states so that the products can go from Descriptions needed > Translation needed > Ready for images > Ready for publication. Workflows are immediately available on all products, but you can limit products in a group to using a single workflow by selecting it in the group settings, similar to how you applied the Clothing product category to a group.
Queries
Where warehouses and groups allow you to organize your products in a structured manner, queries allow you to retrieve products which are similar in some way – regardless of their place in the warehouse group hierarchy. If you are familiar with the Dynamicweb indexing framework, you should be familiar with the basics of indexing and queries.
You could, for instance, create a query which returns all product created after a certain date with no product name. Or a query which returns all products with less than 100 stock.
A query is tied to a particular product index and consists of:
- A set of expressions which filter the products returned – no expressions means all products are returned
- Sorting instructions
- Instructions for which fields and languages to show for the products returned
Queries may be personal or shared, and can be organized in folders and subfolders if necessary.
Now, there really isn’t much need for using queries with a product portfolio as small as the one we’re working with – but for the sake of providing an example we’ll create a query which returns all products in the PIM Training warehouse which have either an empty description or an empty teaser text field:
- Open the PIM area
- Right-click on the My Queries node and click New query (Figure 4.1)
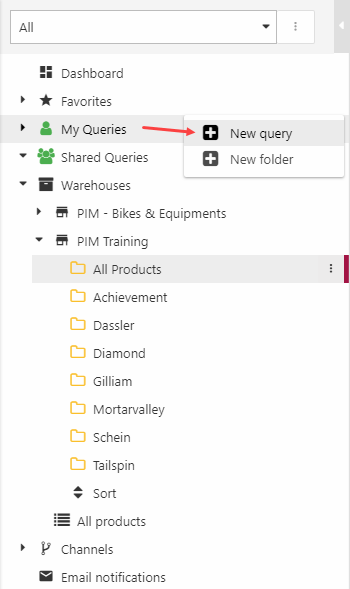
- Name the query Descriptions needed or similar – the Products index should be preselected
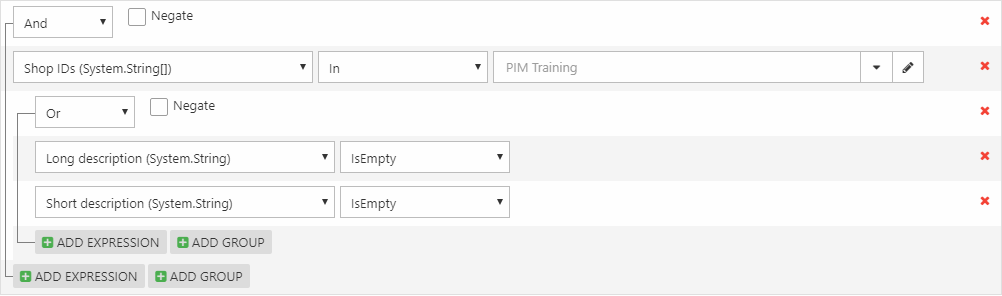
- In the Query section click Add group and then:
- Select the Shop Ids field on the left side of the expression, the operator In, and use the dropdown on the right side of the expression to select the PIM Training warehouse
- Add a second, nested, expression group and select the OR operator
- Select the Long description field on the left side of the expression, and the operator IsEmpty
- Click Add expression for the nested group
- Select the Short description field on the left side of the expression, and the operator IsEmpty
- Save
The query definition should look like Figure 4.2 when you’re done.
Once the query has been saved, click it in the PIM tree to open a list of matching products in the content pane – as none of the products have been enriched yet, it should contain all 51 products from the PIM Training warehouse.
The Combine tool
Where we didn’t have much use for queries, we do need to use the Combine tool – a tool which allows us to create product relations such as variants from flat product data like we have.
First activate the combine tool:
- Go to Settings > Ecommerce > Advanced configuration > General
- Check the Allow combining products as family checkbox
- Save
In many real-world cases, of course, product relations will be handled during the import – but in some cases it’s simply more economical to handle them directly in Dynamicweb PIM, or the remote system we import data from does not account for product relations in a manner which can be handled programmatically.
Our imported data contains a lot of products which ought to be modeled as variants instead of independent products – e.g. most of the products in the Diamond warehouse group (Figure 5.1).
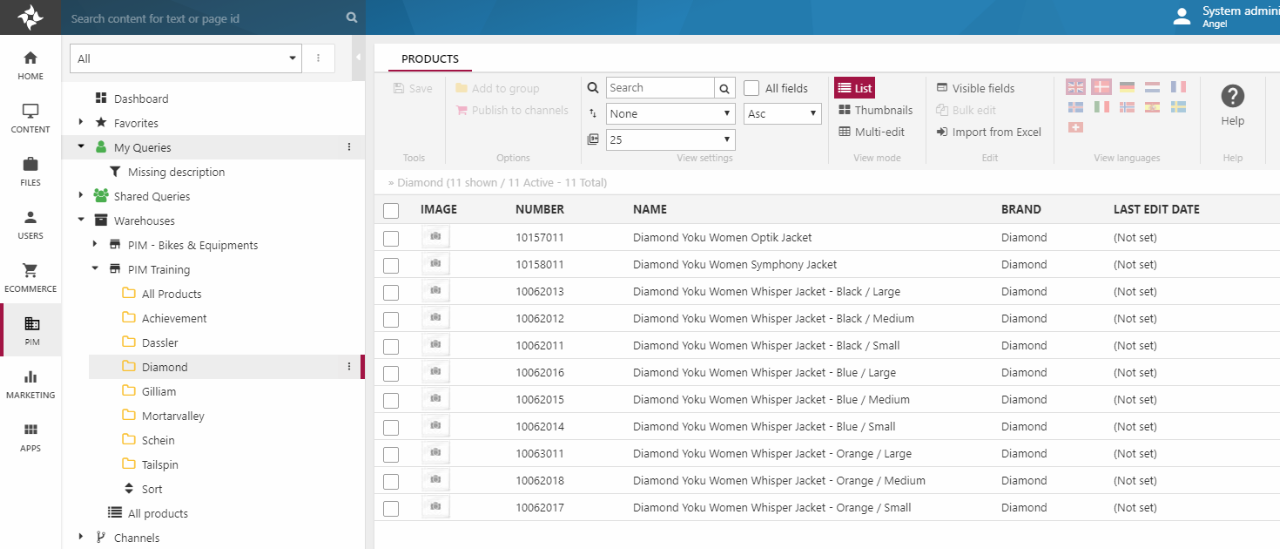
As you can see, 9 of these products are actually identical except for two variant dimensions:
- Colors
- Sizes
Now, these variant groups already exist on the solution, as do the values used here (Black, Blue, Orange and Large, Medium, Small) – so we can use the tool directly:
- Back in the PIM area, open the Diamond warehouse group
- Select the 9 products we want to combine
- Click the Combine products button in the ribbon bar to open the combine tool
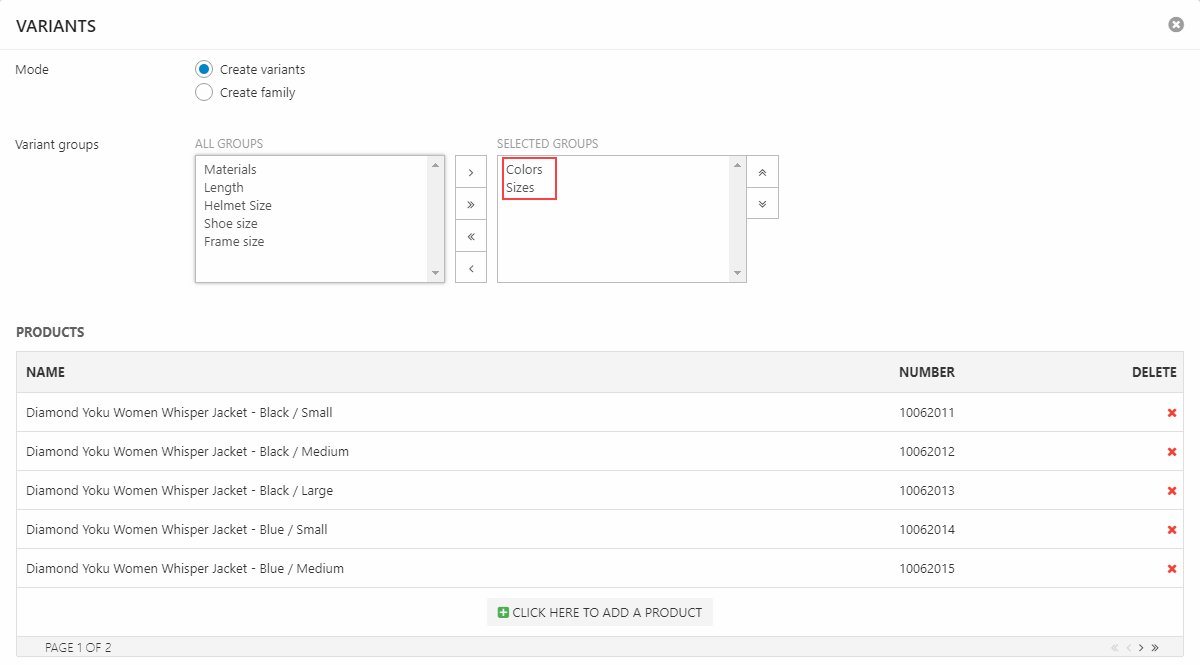
- Move the Color and Size variant groups to the Selected Groups column (Figure 5.2)
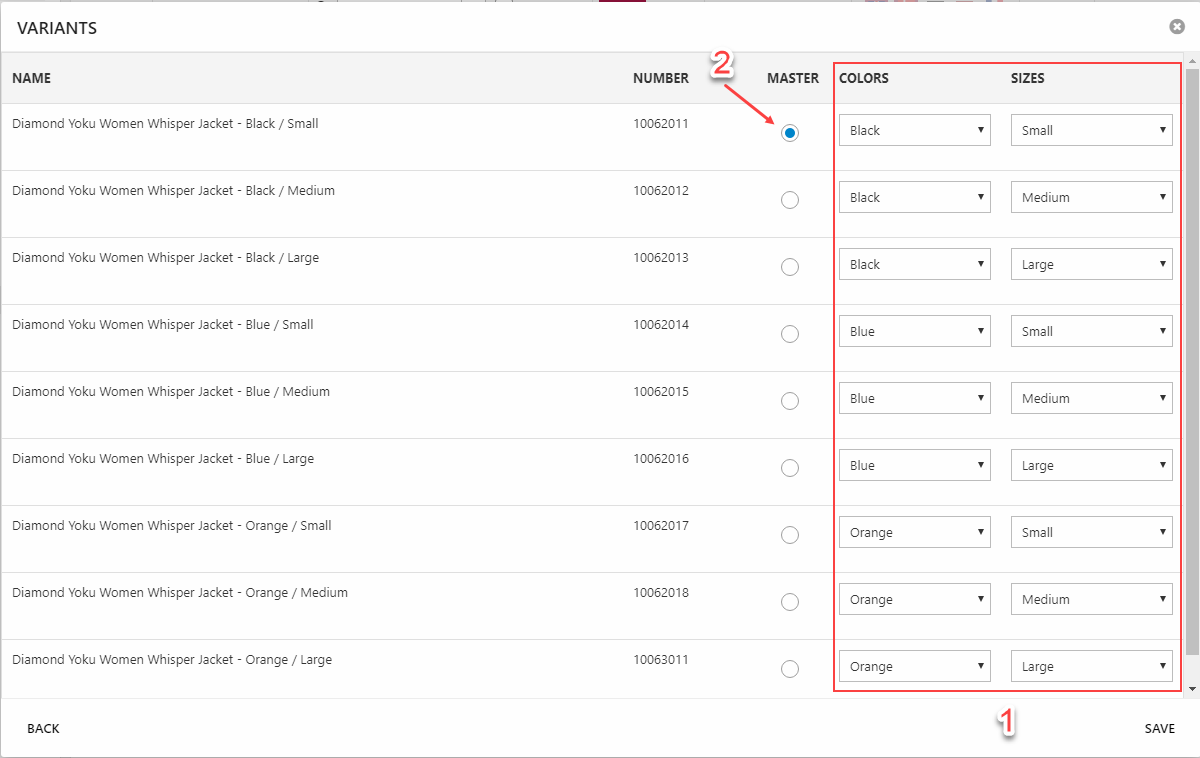
- Click Next to proceed to the next screen (Figure 5.3)
- Use the colors & sizes dropdowns to select the appropriate variant combination values (1)
- Select a product to generate a master product from (2)
- Save
After saving, open the Diamond warehouse group again and use the arrow icon on the master product you selected to fold out the variants under it (Figure 6.1).
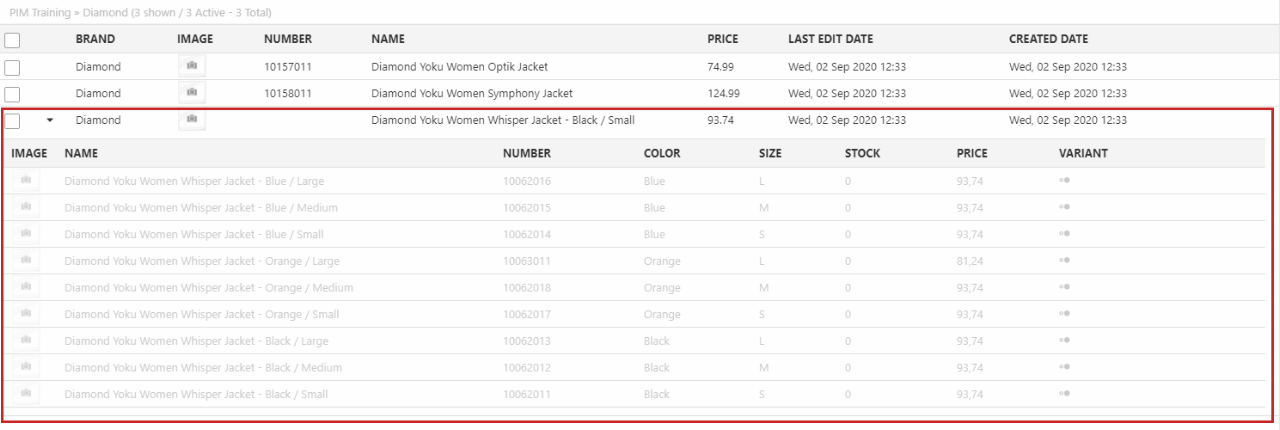
As you can see, the nine products you combined are now listed under the main product with their appropriate variant combinations set.
Ok, so let’s do that for a bit:
- Open to Gilliam group – here we have the same situation; 9 products with Colors/Sizes combinations which already exist. Combine them in the same manner
- Open the Mortarvalley group:
- Combine the Lee Foul Weather Tight products using the Color variant options
- Combine the Freeweight Jersey products using the Size variant options
- Open the Tailspin group:
- Combine the Harmony Symmetrical Tank products using the Color variant options
- Combine the Short Sleeve Jersey products using the Size variant options
And that’s all for this tutorial – cleaning up the names so they don’t have variant options in them will be tackled in the next tutorial!
What you’ve learned – and what’s next
In this tutorial, you’ve been introduced to the various tools you can use to organize the products in your product portfolio – warehouses & groups, workflows, queries & the Combine tool.
In the next tutorial, you will learn more about enriching the product portfolio:
- The different view modes when working with products
- Editing single products & variants
- Bulk-editing products & variants
- Using product versioning with the workflows you created in this tutorial