
AX 2009 Setup
In this how-to we will go through how you setup an AX 2009 based remote system for integration with a Dynamicweb solution.
This covers the following:
- Downloading the Dynamicweb Integration Framework AX example code plugin
- Installing and activating the plugin in AX
Plugin setup
To install the DWService plugin – which exposes the web service that the Dynamicweb Connector communicates with – follow these steps:
- Import the “DynamicsWebIntegration_DAX2009.xpo” file. In the Import Worksheet window, click “Replace All” button, it will replace all existing objects when importing.
- Press Ctrl – D. In the AOT go to Services > DWService. Right click on the selected service Add-Ins > Register action. The service is registered.
- Go to Basic > Setup > Application Integration Framework > Local Endpoints. Add the company and the name of the Local Endpoint. Save and close the form.
- Go to Basic > Setup > Application Integration Framework > Endpoints. Add the Endpoint ID and bind already created Local Endpoint to it. Clickon the Users Tab and add the Endpoint user – Business Connector User. Save and close the form.
- Go to Basic > Setup > Application Integration Framework > Services. Press the “Refresh” button on the opened form. Save and close the form.
- Select the DWService service. Select the “Enabled” check box. Press the “Generate” button on the form. The service’s assembly will be generated.
- Go to Control Panel\All Control Panel Items\Administrative Tools\. Run the Microsoft Dynamics AX 2009 Configuration utility. Make sure the Axapta Local client and Business connector are pointed to the same AOS server.
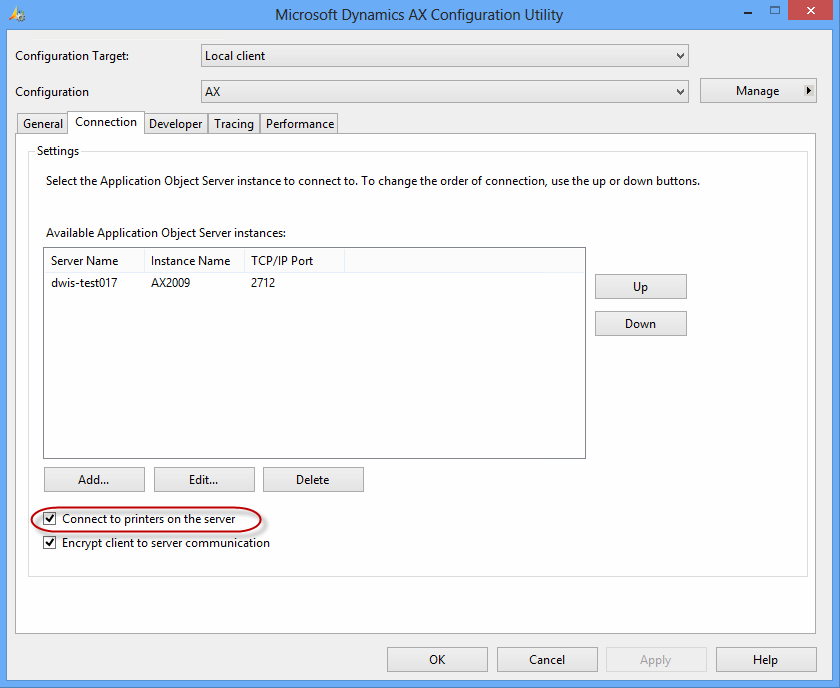
- On the Connection Tab, check the Connect to printer on the server check box (Figure 2.1)
- Go to Control Panel\All Control Panel Items\Administrative Tools\. Run the Microsoft Dynamics AX 2009 Server Configuration utility. On the Connection Tab set the Allow clients to connect to printers on this server check box (Figure 2.2).

- Go to Account receivable > Setup > Parameters > AIF Tab. Set the default values for the “Sales tax group”, “Customer group” and a path to the temporary location for generated PDF reports in the corresponding fields (Figure 2.3).
