
How to: Using an OData API for data integration
The following guide is an introduction to setting up data integration activities in Dynamicweb using an OData API.
Importing data with OData API
Importing data using the Open Data Protocol (OData) requires adding the relevant endpoint in Settings > Integration > Endpoint Management.
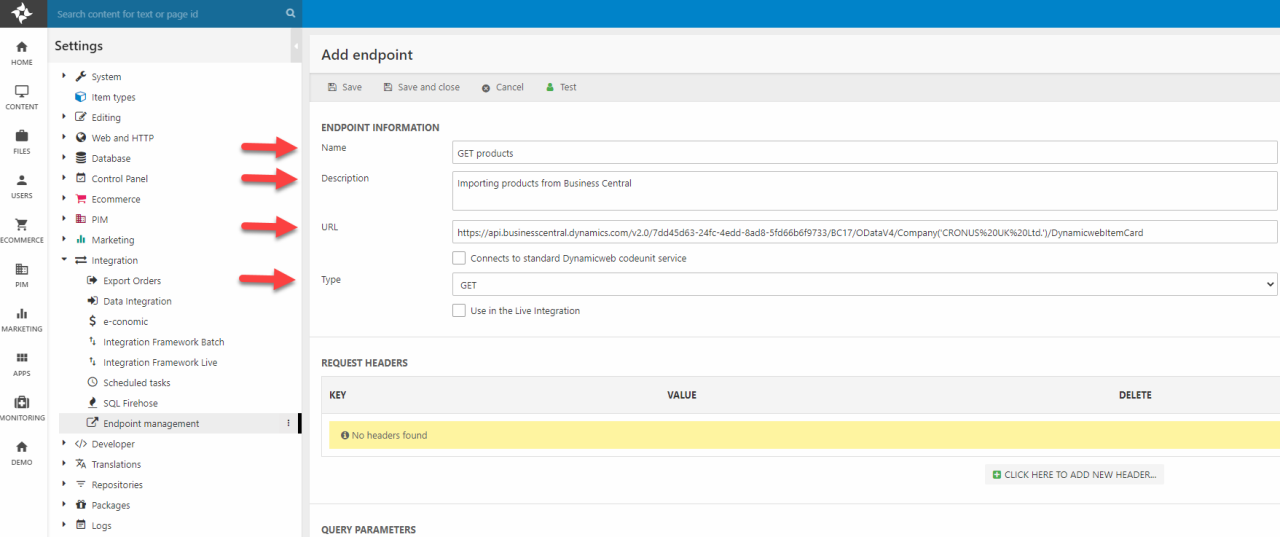
To do so, click "Add endpoint" in the navigation bar and follow these steps:
- Provide the endpoint with a Name and an optional Description
- Insert the URL of the desired OData API
- Set Type to Get
- Choose Endpoint Authentication at the bottom of the page (See next section)
- Save and Close
Endpoint authentication
Please notice that cloud instances of Business Central requires the use of OAuth 2.0 to authenticate endpoint interactions.
If you are establishing an integration activity between a locally hosted Business Central enviroment or a sandbox enviroment you can make do with a simpler authentication such as a WebServiceAccesKey.
Endpoint authentications can be managed in Settings > Integration > Endpoint Management.
Filtering endpoints
When using OData integration, you might not be interested in importing every record of a given object type.
To filter in the imported data, you can add one or more query parameters to the endpoint. The applied filter will affect all interactions with the endpoint. If you want to apply a filter to specific integration activities only, you should instead apply the query parameter in the integration activity settings.
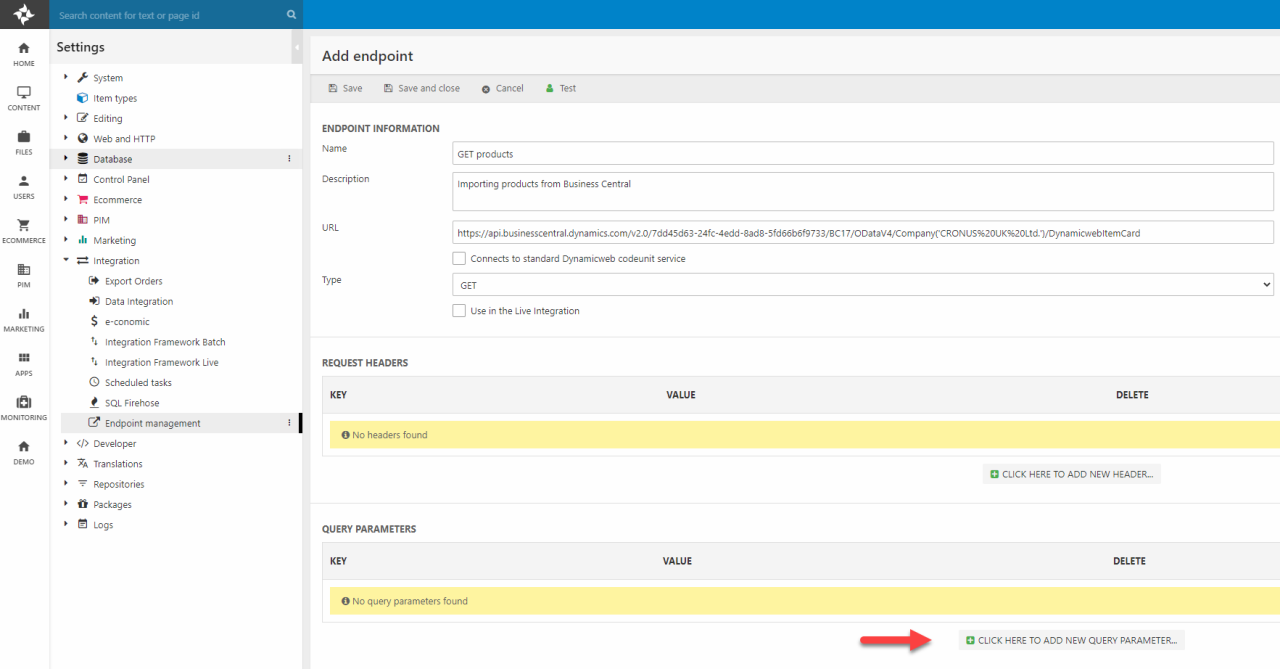
A query parameter consists of a key and a value such as the examples in the table below.
|
Key |
Value |
Description |
|
$filter |
Startswith(Item_No,’IN1’) |
Filters the data provided by the endpoint, so that only records where the Item_No attribute starts with the string IN1 is included. |
|
$top |
10 |
Only selects the first 10 records of the object type. |
Once a query parameter has been added to the endpoint and the endpoint itself has been saved, the full URL (including the added query parameter) will be visible in the endpoint editor.
There are many more ways to filter the OData provided by the endpoint. A complete documentation for OData filter expressions can be found here:
Please notice that the endpoint provider does not allow users to filter on time specific attributes such as "Last_Date_Modified", "LastModifiedDateTime", "Order_Date", "LastDateTimeModified". If you want to filter on these attributes you will need to use the Delta Replication mode of your integration activity.
Setting up a data integration activity for imports
When the endpoint has been set up, the next step is to add an integration activity in Settings > Integration > Data Integration > New Activity.
Fundamentally, there are two approaches to importing data from an added endpoint.
- To load all of the entities exposed in the metadata. This gives you the opportunity to manage mappings between multiple tables within a single data integration activity
- To specify the exact entity you wish to import in the source settings. This way you can create a quick single-purpose data integration activity.
Follow the steps below to add an integration activity.
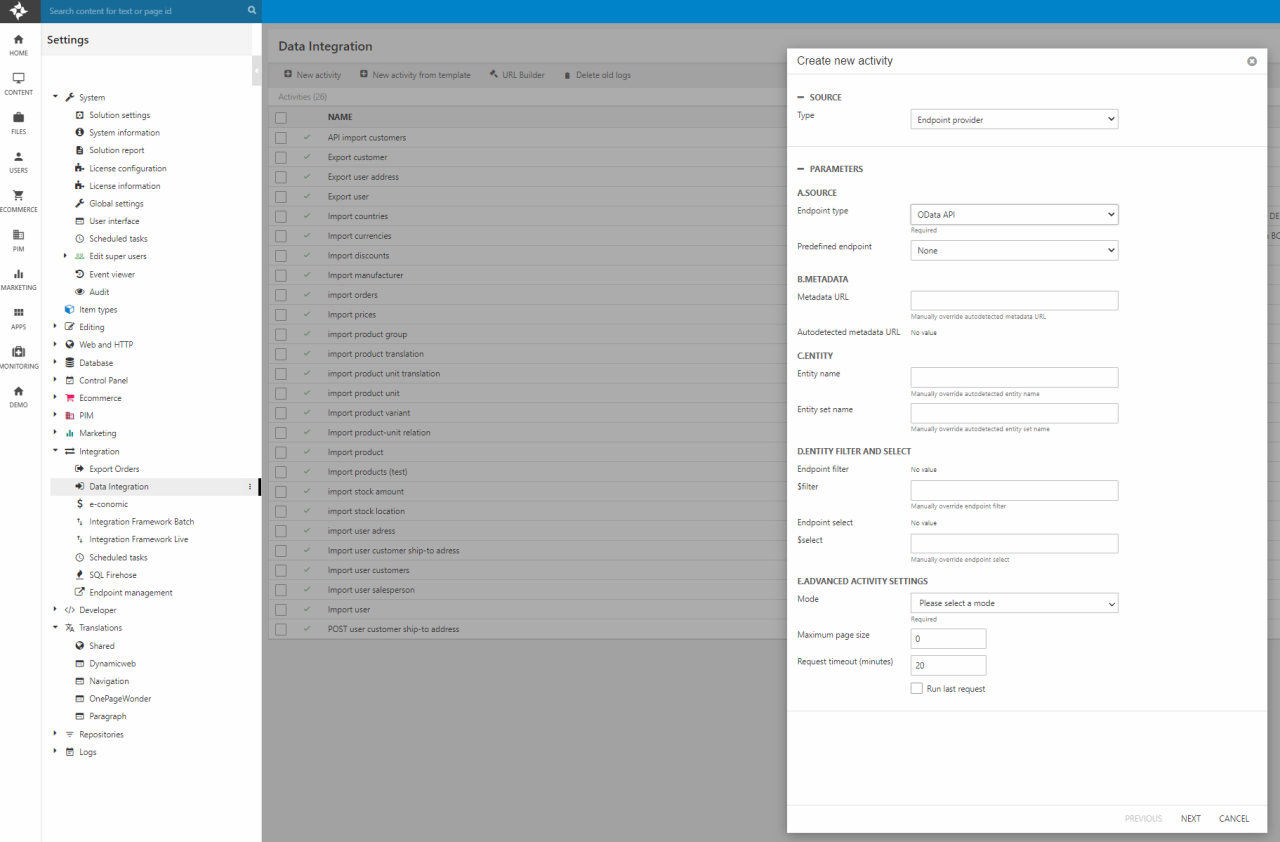
- For the Source setting choose Type: “Endpoint provider”.
- Choose the Endpoint type: OData API.
- Select the predefined endpoint from the dropdown menu.
- If you wish to import multiple tables, check Load all entities. You can manage specifically which endpoints to pull data from later in the process.
- If you wish to add a single entity data ingration you must specify the Entity name and Entity set name. Since the OData APIs may expose multible tables these settings allow users to choose the specific entity that should be loaded. This way multiple integration activities can utilize the same API for different purposes.
- A Filter can be applied to the integration activity at the Entity Filter and Select settings menu. This will extent any already existing query parameters of the endpoint. Filtering possibilites may vary depending on the OData source. Documentation on the filtering possibilities in Dynamics365 Business Central can be accessed here.
- Optionally, you can add a Select statement to the activity in the same menu. Applying a select statement will allow you to choose specific attributes of the entity for import. Attributes are statet with comma separation (i.e. "id,name").
- In the Advanced Activity Settings you can choose between the four integration modes Delete, Delta replication, First page and Full replication. Further documentation on the different modes can be accesed in the endpoint provider article.
- Click next.
- For the Target setting choose Type: “OData provider”.
- Select the Object Type from the dropdown menu in Parameters > destination > object type. Since any object type exposed by OData will inherently be a custom object type, this will also be the only available destination parameter. This also means that the OData provider will automatically delegate to the Dynamicweb provider.
- Click next.
- Select the Source table to import from.
- Select the Target entity from the dropdown menu. Unlike with the OData V4 endpoints, this mapping between source and target entities must be manually defined.
- Click finish.
- Finally, provide the activity with a name and an optional description and click OK.
- At this point the activity settings menu depicted below will be visible.
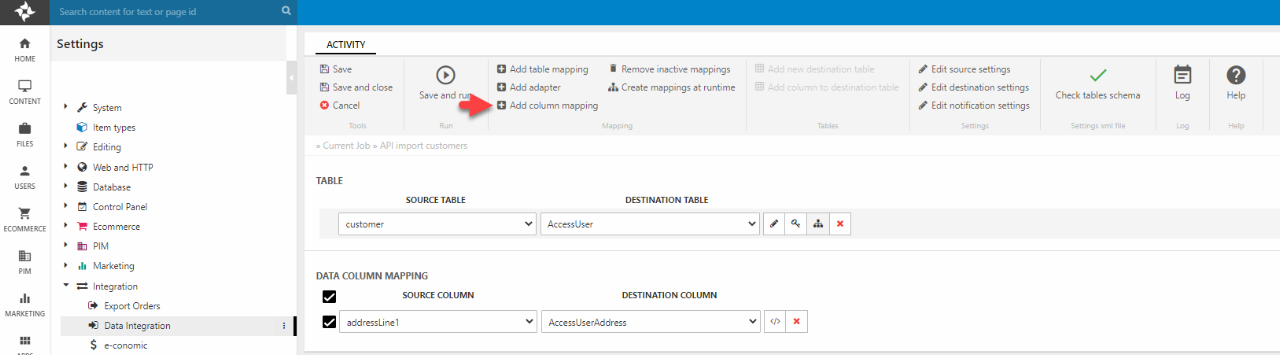
Data column mappings can be managed in the activity settings menu by following these steps:
- To add a source/destination column mapping, click "Add column mapping" in the action bar. This will add dropdown menus for Source column, where all attributes selected in the source settings will be visible (or all attributes of the entity if no select statement is applied to the activity).
- Select the corresponding Destination column from the dropdown menu to the right to establish the column mapping.
- Further column mappings for entity attributes may be added by repeating the previous steps.
- Conclude the activity setup by clicking "Save and close" or "Save and run" to perform the import job immidiately.
Integration activity modes
| Delete | This mode compares primary keys between records in the endpoint and in Dynamicweb. Records in Dynamicweb that do not appear in the endpoint will be deleted. |
| Delta replication |
By locating the time of the last succesful run this mode will import new records only. No records are deleted from Dynamicweb when this mode is used. Note: Delta replication converts all Datetime attributes to UTC-time to ensure correct comparison across timezones. |
| First page | Imports the first page of records only. The maximum amount of records on a page is specified in the maximum_page_size setting. |
| Full replication | This mode imports all records and deletes nothing in Dynamicweb. Activities with this mode should only be run once. |
Formatted values from Dynamics 365 CRM
A standard OData query to Dynamics 365 CRM will contain IDs instead of the actual values rendered in the frontend of CRM.
To circumvent this, the endpoint provider of Dynamicweb checks if any of the imported columns contain annotations of formatted values. For any data column that does so, the provider will by default add a Prefer Header to the OData query to request the formatted values.
The formatted values are requested for all columns with the exeption of proporties with the data type of Boolean to avoid various translations or CRM specific formats of True/False.
With the addition of the Prefer Header, the imported JSON will thus contain both the non-formatted value (the ID) and the formatted value like this:
As the Prefer Header is added to the request only upon execution of a data integration activity the data columns with formatted values will not be visible in the data column mapping view.
Mapping a source column with the non-formatted values though, will import the formatted values to the specified destination.