
OAuth 2.0 Service-to-Service
Endpoint management authentications allow setting up a Service-to-Service (sometimes referred to as S2S or Server-to-Server) authorization.
There are three fundamental steps in an S2S configuration:
- Configuring an App registration in Microsoft Entra
- Adding the application in your ERP or CRM
- Adding a corresponding authentication in Dynamicweb
App registration in Microsoft Entra
To add an app registration go to https://entra.microsoft.com/ > App registrations > New registration, choose single tenant application acces and give your application a suitable name.
Next, copy the Application (client) ID and the Directory (Tenant) ID from the App overview screen and go to Certificates & secrets to add a new Client secret. Make sure to copy the value of the client secret once it is added, since this will be hidden henceforth.
Go to Authentication and a new web platform. Add the URL of your Dynamicweb solution to the list of redirect URIs.
For S2S authorization to a Business Central client, you should also add the URL https://businesscentral.dynamics.com/OAuthLanding.htm for cloud hosted Business Central instance, or you are using an on-prem version, the URL of your Business Central browser client, followed by /oauthlanding.htm - for example: https://MyServer/BC200/OAuthLanding.htm
Finally, go to API permissions and add a new permission for the application (Dynamics 365 Business Central/Dynamics ERP/Dynamics CRM). The type of permission should be set to Application permission. Select the appropriate permissions from the available options. The required permission is most likely API.ReadWrite.All but please refer to the official Azure Active Directory API permission documentation to learn more.
Check out this Microsoft learn article more information on Microsoft Entra app registrations.
Business Central - adding the application
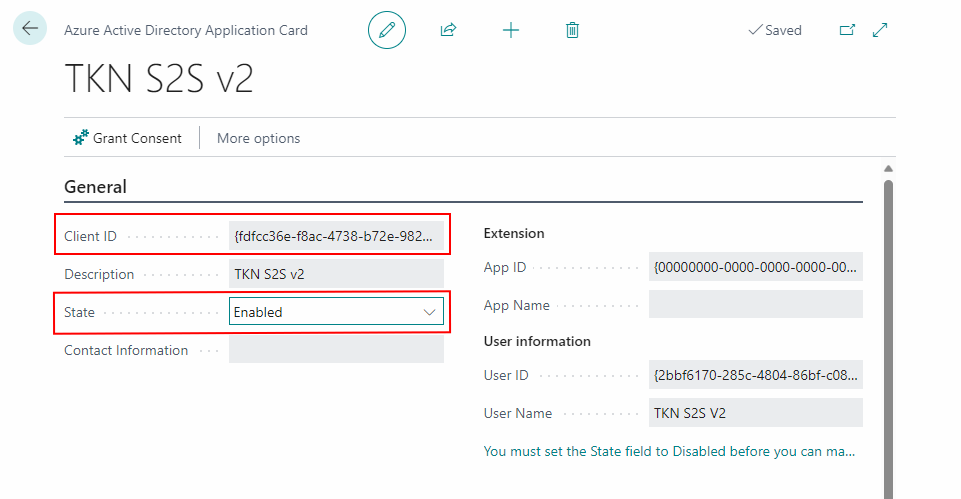
To add your new application to your cloud hosted Business Central instance, open BC and search for Microsoft Entra Applications.
In here, click new, paste the Client ID of your application and change the State to enabled. Please notice that your Business Central user needs SECURITY persmission to change states of Microsoft Entra apps.
Adding the application to an on-prem Business Central instance is achieved through a CMD with admin rights by following steps 3 and 4 in this Microsoft Learn article.
The official details on the using S2S with Business Central can be found here.
Configuring application permissions
To configure what is exposed through the Microsoft Entra Application:
- Go to the User Permissions Sets menu at the bottom of the Application Card
- Add the D365 BUS FULL ACCESS permission to the list of User Permission Sets.
To use the S2S authentication with a DynamicWeb Plug-in unit exposing custom fields, you also need to add the dedicated DYNAMICWEBPERMISSION (Business Central plug-in unit version 1.2.0.29 or later required)

Granting consent
To complete the setup of your Microsoft Entra application, you (or a member of the organization with the appropriate privileges) must grant consent for the application to expose data. There are two possible ways of doing this:
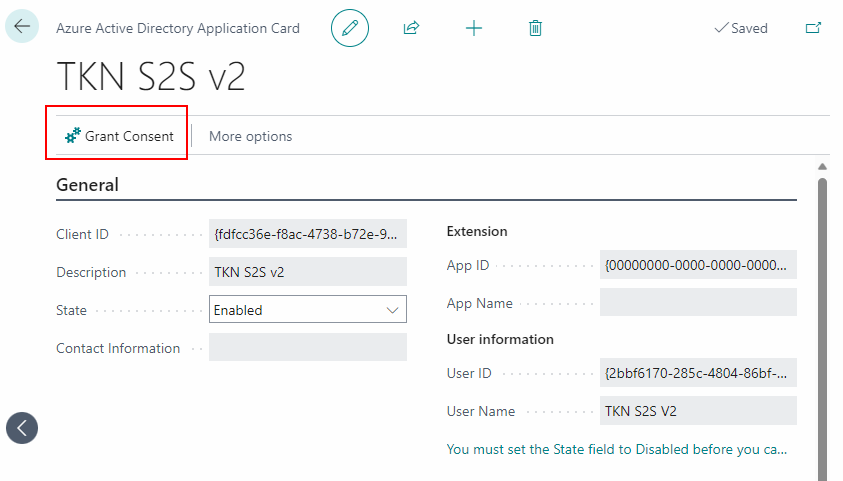
The first way is to click the Grant Consent button in the Application Card from within the Business Central Web interface. This will bring up a log-in window, where you can use your Microsoft Entra credentials to grant consent.
However, granting consent requires one of the following three Azure Active Directory roles:
- Global Administrator
- Application Administrator
- Cloud Application Administrator
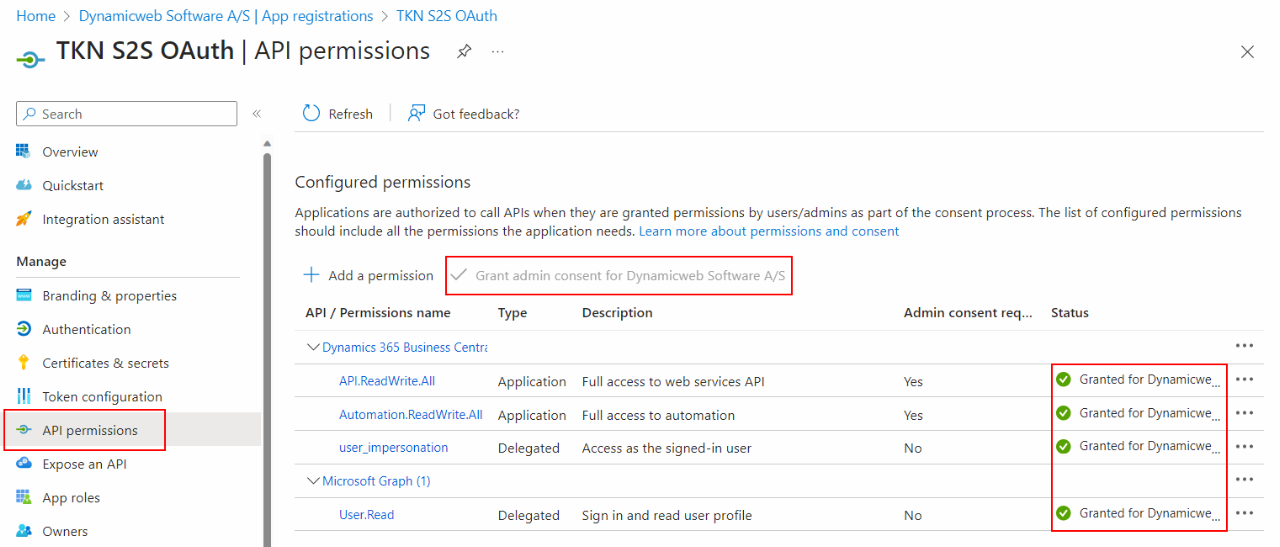
If you have not been assigned such a role in Azure Active Directory, it is possible to let an administrator of one of the aforementioned kinds grant consent through the Azure Active Directory web interface instead.
Consent is granted in the API permissions area of Active Directory as shown below.
Finance & Operations - adding the application
To add your Entra application in Finance & Operations, search for Microsoft Entra Applications, click new, add the Client ID of your application, a suitable name and select a user (you can select the ADMIN user or any available user with the required permissions).
Dynamics CRM - adding the application
To add your Entra application to your CRM instance, go to the Power Platform Admin Center, select your enviroment and open S2S apps.
Add a new app user, and select your Entra application from the list of available apps.
Add the authentication in Dynamicweb
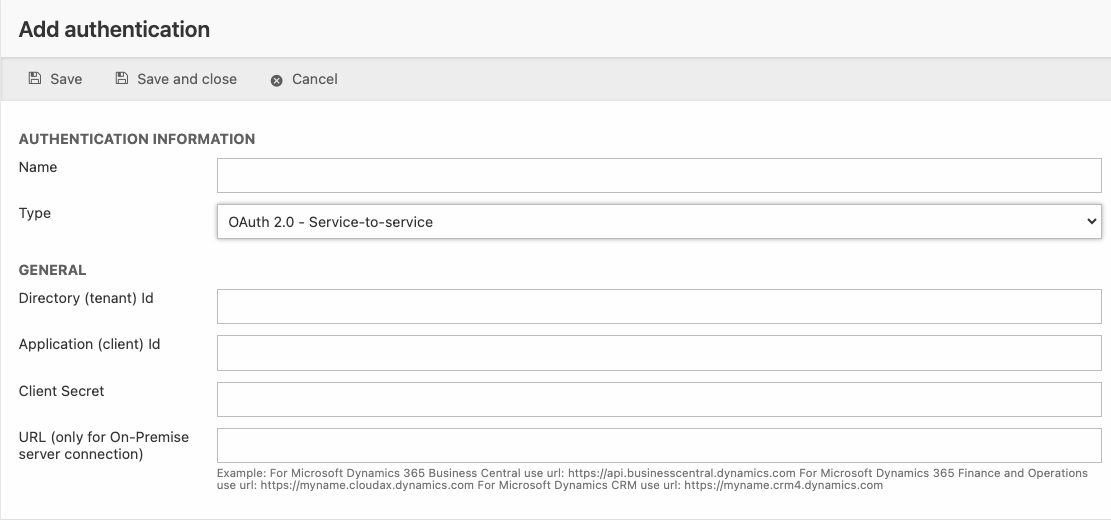
In Dynamicweb, go to Settings > Integration > Endpoint Management and click Add authentication.
Give your authentication a suitable name and select OAuth 2.0 - Service-to-Service as type.
Paste the Tenant ID, Client ID and Client Secret from your Microsoft Entra application and save.
If connecting to an on-premice solution, write the appropriate for either BC, F&O or CRM as stated in the hint text.
Unlike the OAuth 2.0 - User impersonation flow, the S2S authentication does not prompt the user for log in, in order to obain an acces token. Instead the token is exchanged between Dynamicweb and the remote system as a background service, sometimes refered to as a daemon.
Using an S2S authentication with Dynamicweb connector service
When the S2S application has been registered in Microsoft Entra and has been added to your on-prem Business Central solution, you can utilize the authentication from within your Dynamicweb connector service (version 2.2.0 or later) by setting the config like in the example below: