
Personalization
With the personalization module, you can create profiles, and profile your visitors by their activities on your website, and by the way they access it. Even if the visitors are not registered users.
You can then use template tags to personalize the content shown to your profiles.
You could, for instance:
- Create personalized recommendations on completing a purchase
- Show personalized content on the front page, based on Google search terms
- Float profile-relevant products to the top of your web shop
- Show campaign-related products for customers who have been referred to your site by a specific advertising campaign
In this manner, you can create personalized experiences for your visitors, increasing their satisfaction, and your conversion rate.
Watch a very short video introduction to Personalization below:
Personalization requires the Personalization module, which must be purchased separately.
For more information, contact your partner – or get in touch with our salespeople here.
Content personalization is an incredibly powerful tool, and requires careful planning.
You DON’T want users to buy one thing, get 20 profile points for the ‘ladies’ profile, and then never be able to see men’s products again.
To avoid most problems, make sure that:
- DON’T personalize your entire website – stick to personalizing key areas
- DO make sure there’s a "way out" of your personalized content
- DON’T stop people from finding what they need today, based on what they needed yesterday

Basic Concepts
In this section, you will learn about:
- Creating new personalization profiles
- Personalizing content
- Getting an overview of all your personalized content
Getting started with personalization
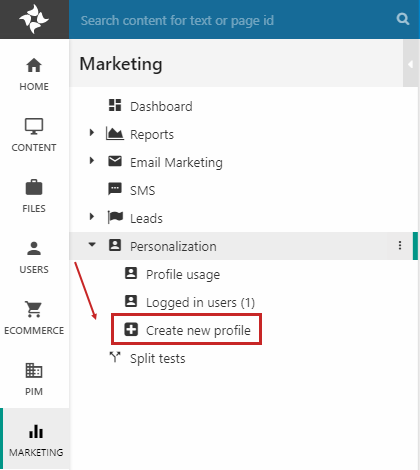
To get started with personalization:
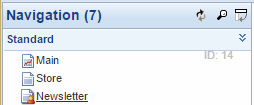
- Click Marketing on your accordion
- Click Personalization on your marketing tree (Figure 3.1)

From here, you can:
- Create new profiles
- Look at profile usage
Personalization Profiles
Personalization revolves around profiles.
A user can have one primary and several secondary profiles. If a user belongs to a certain profile, and which profile is primary and secondary, is determined by how many points they accumulate by their behavior on your site.
Points can be awarded on the basis on recognition rules - defined in the personalization profile settings - and by the actions of the visitor on your website, if you have defined personalization profile points for specific actions.
You can then use template tags and content specific personalization to show customized content, based on the primary and the secondary profiles of a visitor.
Creating a personalization profile
To create a personalization profile:
- Click Create new profile on your marketing tree (Figure 5.1)
- Specify a name and description for the profile
- Select a number of recognition rules appropriate for the profile (if any)
- Save the profile
Adding recognition rules
You do not need to add recognition rules to a profile, to use it as a dynamic profile. If you simply create a profile with a name and a description, you can award profile points on specific content, without using recognition rules at all. Read more below, under personalizing content.
Recognition rules help define a profile, by adding profile points to a visitor session even before they take any actions on your site.
When creating or editing a personalization profile, you will see the regognition rules area (Figure 6.2).
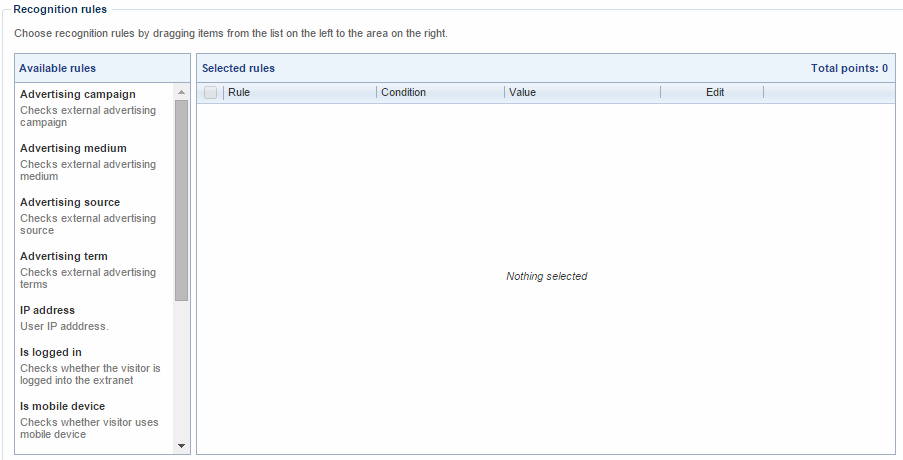
To add a recognition rule, simply:
- Drag and drop the rule from the Available rules section to the Selected rules section
- Specify conditions and values for the rule (if any are needed)
The rules available to you are:
- Check for external advertising campaign, medium, source or term.
- Check for IP addresses, either individual or in a range
- Check if a user is logged in to their extranet account
- Check if a visitor comes from a mobile device
- Check if a user is a returning visitor
- Check the user agent language, i.e. the language of the visitor’s browser’s user interface
- Check if the visitor is a member of a smart search user group
- Check the referrer URL
- Check the target language (website) of the visitor (based on website language settings)
Configuring and removing recognition rules
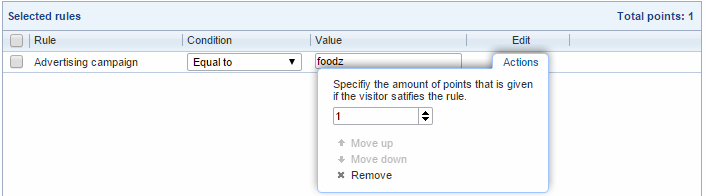
Once you have added a recognition rule, you may have to configure it.
To configure a rule:
- Select a condition – such as equal to, contains, or starts with. The conditions available to you depend on the individual rule.
- Type or select a value for the rule to be checked against
Rules that are binary values (is logged in, is mobile device, is returning visitor) do not need a condition or value.
Hover your mouse over Actions in the Edit column to move a rule up or down, customize the point value of the rule returning true for the visitor, or to remove the rule:
If you are running an advertisement campaign with Google Analytics, you can use the advertising recognition rules to profile visitors who have been referred to your website from that campaign. Do so by implementing the campaign variables utm_campaign, utm_medium, utm_source and utm_term from Google Analytics.
Example: You send out a marketing email every month with special offers on certain products. When you link people to your website in that email, the href value could look like this:
http://www.mycompany.com/?utm_source =monthly_newsletter&utm_campaign=January&utm_medium=email
When a new visitor arrives on your website through the campaign link, they will be allocated 10 profile points, and you can now customize the content shown to them even before they take any actions (Figure 7.2)
Recognition rules to listen for the variables:

Grouping recognition rules
Recognition rules can be grouped, giving you even more control over your profile point distribution (Figure 8.1).
To group rules, simply:
- Select the rules you want to group by clicking their checkboxes
- On your content tab, select all must apply or any must apply, whichever is appropriate

Once grouped, your rules will look similar to Figure 8.2.

Note that points for rule-groups are awarded for the whole group, not per rule – hence why the examples above say ‘Total points: 1’, even if the rules before being grouped had a total point value of 3.
Personalizing content
Content personalization consists of two things:
- Making content exclusive to certain profiles
- Awarding personalization profile points for interacting with content
You can personalize both paragraphs, pages and products. Here’s how!
Personalizing pages
To personalize a page:
- Right-click on the page in the Content tree and select page properties (Figure 10.1)
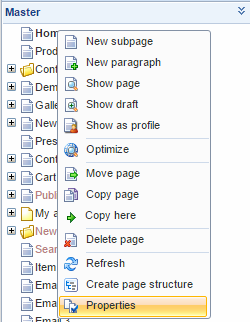
- Go to the Advanced tab (Figure 10.2)

You can now access the Personalize and Add profile points buttons for the page.
Click Personalize on a page, to see the personalization settings window (Figure 10.3).
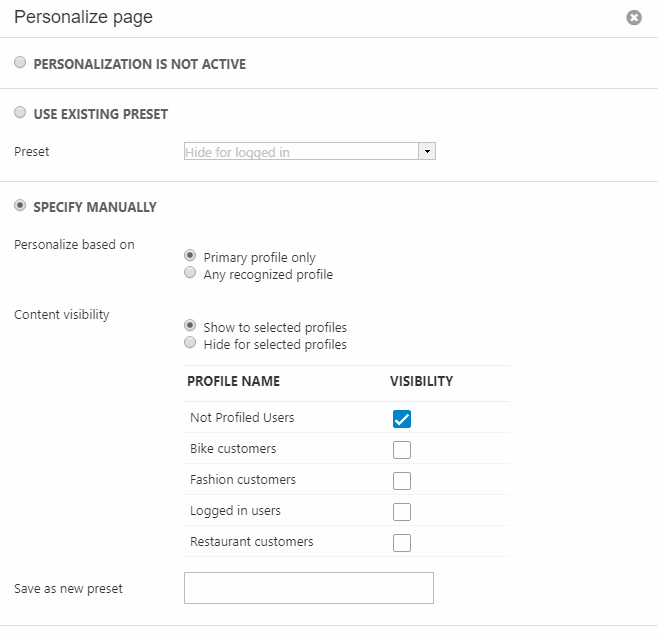
From the personalization settings window, you can:
- Enable personalization by selecting a preset or specifying your personalization settings manually
- If you choose manual specification, you must decide to personalize the content based on only the primary profile of the visitor, or on any recognized profile
- Select if you want to show or hide the content from your personalization profiles
- Once you have configured the settings to your liking, click OK to apply the personalization
- You can also save the settings as a preset, to be used in other places
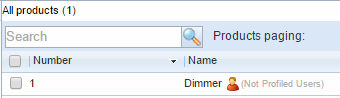
Besides custom personalization profiles, you can also always select ‘Not profiled users’. Keep in mind that many of your visitors will not be profiled, and that you should also have content for them!
When a page has been personalized, it will show a little person-icon in your content tree (Figure 11.3).
This makes it easy to recognize personalized content at a glance - or you can use the Profile Usage overview
Personalizing paragraphs
To personalize a paragraph:
- Go to your paragraph
- Go to the Marketing tab
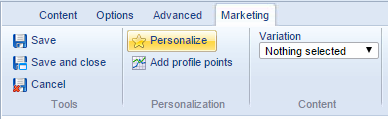
You can now access the Personalize and Add profile points buttons for the product or paragraph
When you click Personalize on a paragraph, you will see the personalization settings window (Figure 12.2).
From this window, you can:
- Enable personalization by selecting a preset or specifying your personalization settings manually
- If you choose manual specification, you must decide to personalize the content based on only the primary profile of the visitor, or on any recognized profile
- Select if you want to show or hide the content from your personalization profiles
- Once you have configured the settings to your liking, click OK to apply the personalization
- You can also save the settings as a preset, to be used in other places
Besides custom personalization profiles, you can also always select ‘Not profiled users’. Keep in mind that many of your visitors will not be profiled, and that you should also have content for them!
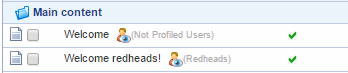
Once a paragraph has been personalized, you will see a little personalization icon and description next to content (Figure 13.2). This makes it easy to recognize personalized content at a glance - or use the Profile Usage overview.
Personalizing products
To personalize a product:
- Go to your product
- Go to the Marketing tab
You can now access the Personalize and Add profile points buttons for the product.
When you click Personalize on a product, you will see personalization settings window for products (Figure 14.2).
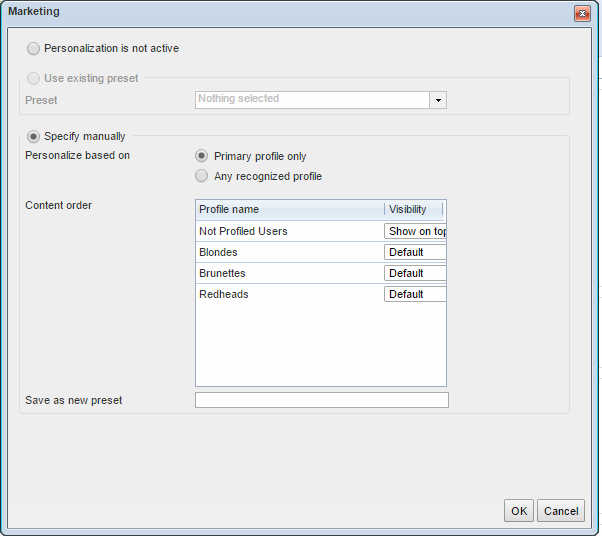
From this window, you can:
- Enable personalization by selecting a preset or specifying your personalization settings manually
- If you choose manual specification, you must decide to personalize the content based on only the primary profile of the visitor, or on any recognized profile
- Select for which profiles you want to float this product to the top and for which you want it to be shown in the default manner
- Once you have configured the settings to your liking, click OK to apply the personalization
- You can also save the settings as a preset, to be used in other places
Besides custom personalization profiles, you can also always select ‘Not profiled users’. Keep in mind that many of your visitors will not be profiled, and that you should also have content for them!
Once a paragraph has been personalized, you will see a little personalization icon and description next to content (Figure 15.2). This makes it easy to recognize personalized content at a glance – or use the Profile Usage overview.
Adding profile points from content
All content can be configured, so that a user viewing or interacting with it received personalization profile points.
To add profile points to content, click Add profile points from the marketing tab (paragraphs and products) or advanced tab (pages).
You will see the add profile points window (Figure 16.1).
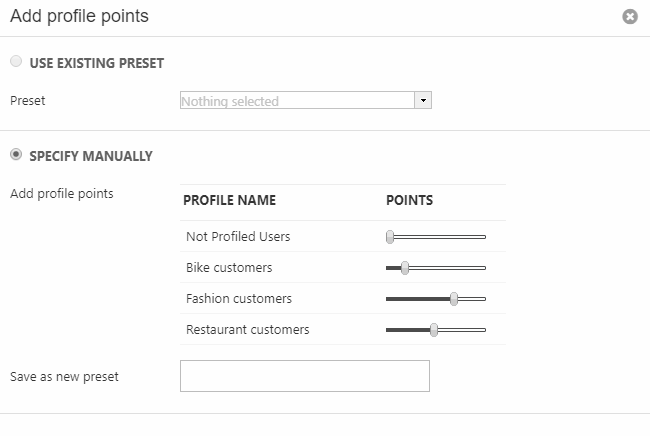
From here you can:
- Choose between using a preset or specifying profile points awarded manually
- Assign profile points to a profile by moving the slider for the profile to the right
- Save your manual selection to use as a preset somewhere else
The Profile Usage overview
You can get an overview of all personalized content on the profile usage page.
To access the profile usage overview, click Personalization > Profile Usage on your marketing tree (Figure 17.1).
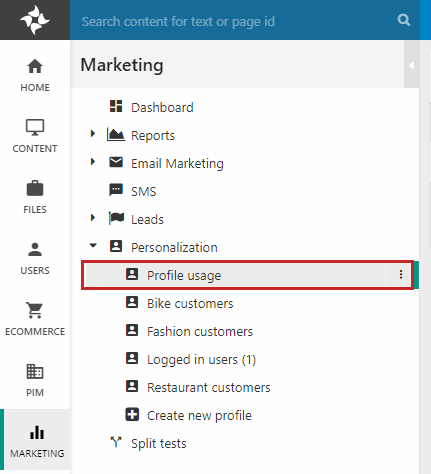
This takes you to the profile usage overview (Figure 17.2).
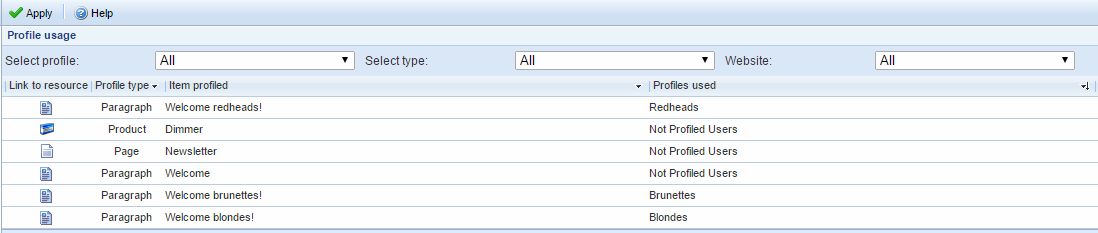
From here, you can get an overview of all personalized content on your solution.
You can filter the content by:
- Personalization profile
- Type of content – page, paragraph, or product
- Website
Filters can be combined – once you are satisfied with your choices, simply click APPLY in the upper left corner of the overview.


Database
The database structure is fairly straight forward - it's simply two tables.
Table: EmailMarketingParagraphSegments
Columns:
- PageSegmentID
- SmartsearchID
- PageID
- showAsDefault
Table: EmailMarketingParagraphSegmentSettings
Columns:
- PageSegmentID
- ParagraphID
- SegmentSelected