
In this guide we will look at how to customize the product details page, which is the page used to render details about a product. As you may know, the product details page consists of a series of content element created using ecommerce columns – you can read more about the general layout of the product details page here.
In this guide we will:
- Customize the Product Details Info column to include a manufacturer logo
- Customize the Product Details info column to add a checkbox controlling whether the manufacturer logo is shown or not
Like most customizations on Swift, the first step is to copy the existing item type and template associated with the column you want to customize. This ensures that if you later want to upgrade to a newer version of Swift, you won’t have to be careful not to overwrite customized system templates when you merge in the new content. It also provides you with full control over the whole view, which is often necessary even for small changes as you often need to finetune adjacent elements when adding an element.
To copy the item type and template:
- Go to /Files/System/Items and copy the ItemType_Swift_ProductDetailsInfo.xml file – call it ItemType_Swift_ProductDetailsInfo_Custom.xml
- Open the new xml-file and change the Name and System name to something appropriate
- Go to Files/Templates/Designs/Swift/Paragraph and copy the Swift_ProductDetailsInfo.cshtml template – give it the same name as the new item type
Now you must make it possible for the new item type to be used in Swift by allowing it as a child of the Product list page item type:
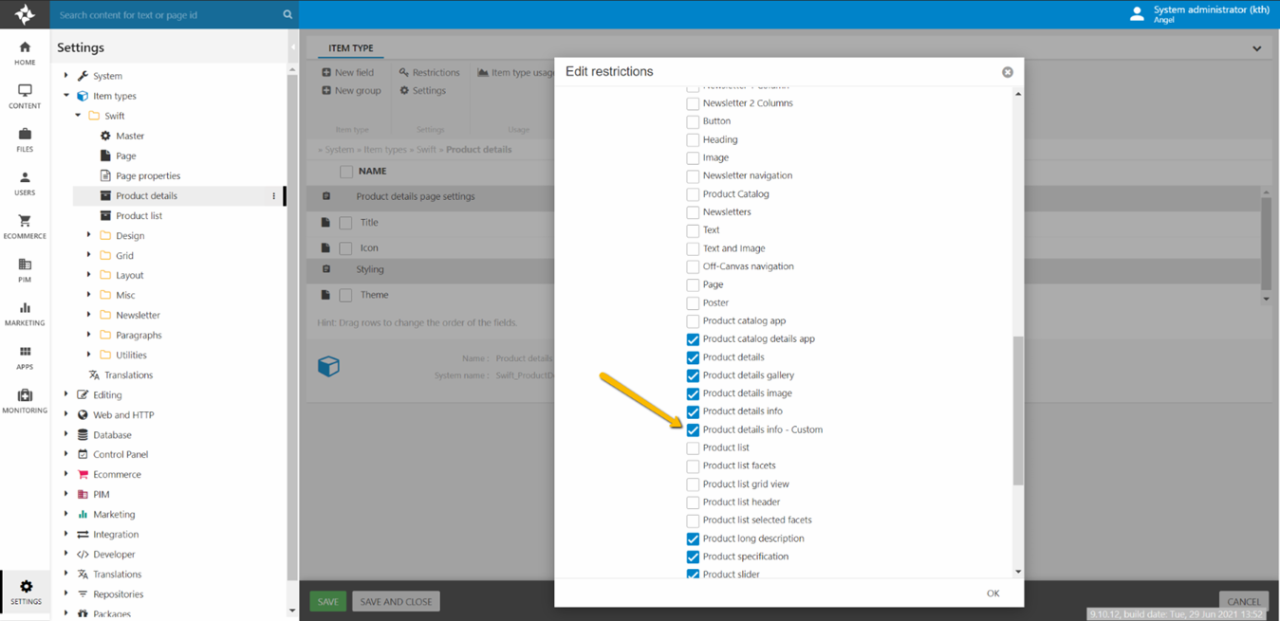
- Log into the backend and navigate to Settings > Item types > Swift > Product details
- Open the Restrictions modal and check the new item type under Allowed children (Figure 1.1)
- Save
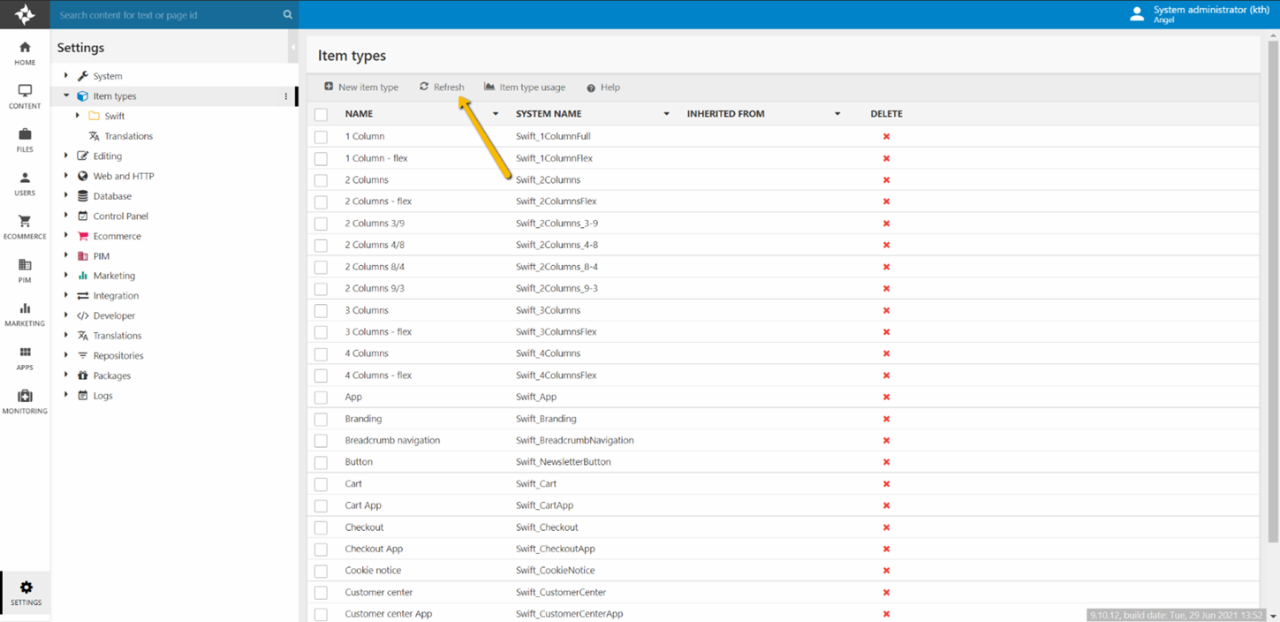
To make sure the system loads the new item types and restrictions open the Settings > Item types view and click Refresh in the toolbar (Figure 1.2).
Finally, you should add the new column to a page on the solution, so you can see how it’s being rendered – this makes it much easier to develop your custom content:
- Log into the backend and navigate to the Content area
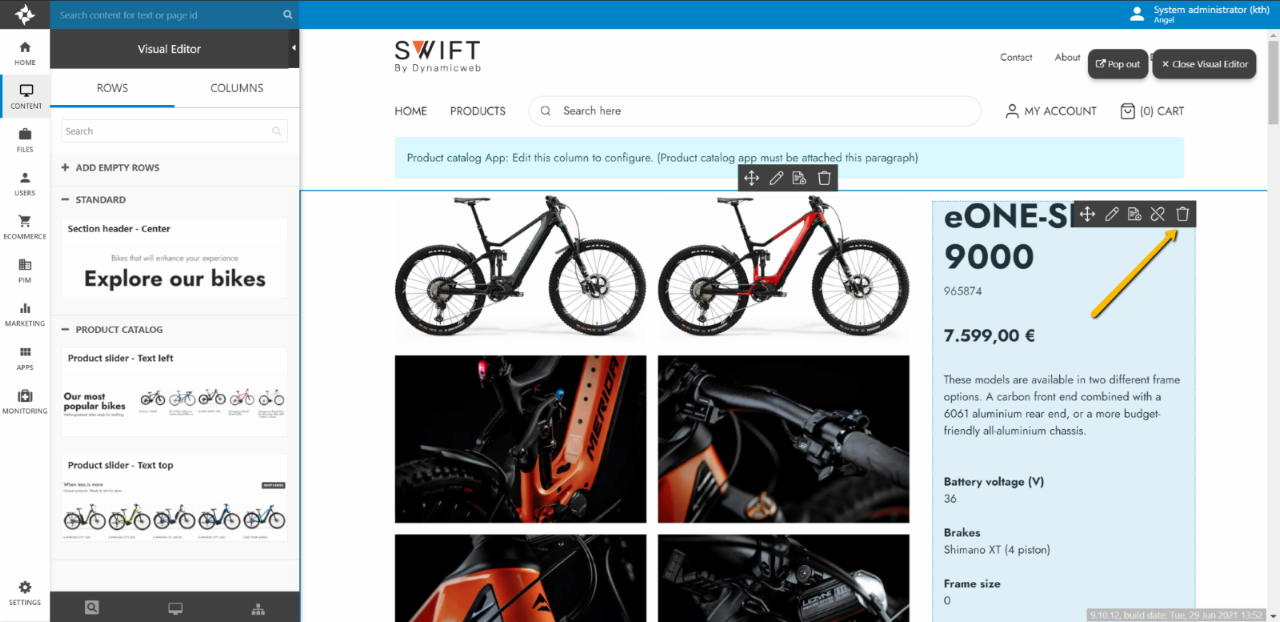
- Open the page which will the product details information – on the example website this is the Product details page
- Remove the product details info column currently being used (Figure 1.3)
- Add the new column and configure it
You can now start creating the custom feature or view and see it rendered in the visual editor or frontend.
Once the item type and template has been copied, the actual customization can take place. As you may know/remembers the product details page uses a product catalog to make the ProductViewModel available to all content elements on the page. This makes it pretty easy to access properties on the product such as details about the manufacturer. Please note that we recommend that you do all customizations in Visual Studio with Intellisense (code-hinting), as this is the most practical way to figure out which properties are available on the ProductViewModel.
To add a custom element to the Product Details Info column:
- Open the Swift_ProductDetailsInfo_Custom.cshtml template in an editor with code-hinting of your choice – we recommend Visual Studio
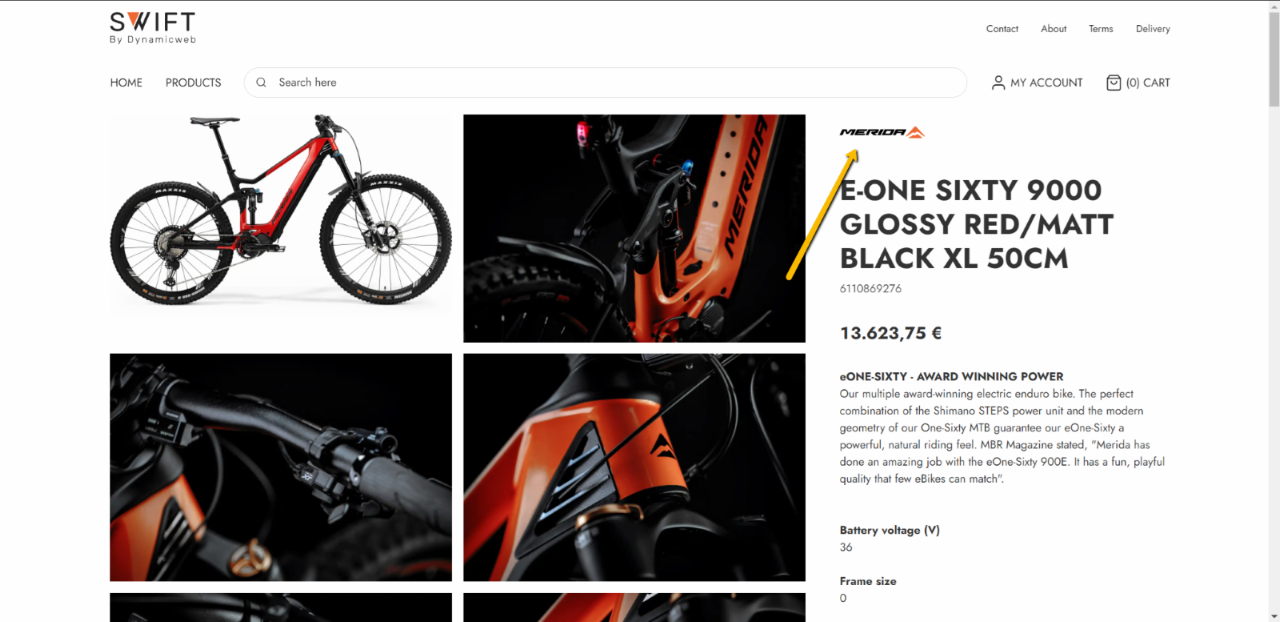
- Finde a place to add the logo – we suggest just above the <h1>-element containing the product name
- Write your code for rendering the manufacturer logo – here’s a bit of code for reference:
As you can see, you’ve got access to the manufacturer logo via the ProductViewModel – alongside a lot of other properties belonging to the manufacturer, e.g. name, phone, web address. Of course, the product must have a manufacturer set – and the manufacturer must have the relevant properties – you can read about manufacturers here.
If everything is done correctly, you will get something like this on the product details page:
So, what if you’re planning to use this custom column on multiple websites, but you don’t always want the manufacturer logo to show up? One way to handle this is to make it possible for the backend user to toggle if the logo should be shown or not whenever the column is being used. This can be done by adding a property to the item type and then making the template react to the state set on this item type.
Here's how to add a custom property to the item type:
- In the backend navigate to Settings > Item types > Paragraphs > Product details > Product details info – Custom – this is the item type you just created
- Right-click on the Product details info settings section and add a new field of the type Checkbox – name it Hide manufacturer
- Open the associated template in your code editor add a check on the checkbos state to the condition for rendering the logo:
You may want to do more adjustments to get everything just right – go find something that inspires you and try it out! 😊