
NAV 2013/2018 Setup
In this how-to we will go through how you setup a NAV 2013/2018 system for integration with a Dynamicweb solution.
This covers the following:
- Downloading the systems-appropriate code unit
- Installing and activating the code unit in NAV
Pre-requisities
To install the Dynamicweb plug-in unit on a Dynamics NAV solution make sure you have the following:
- A NAV developer license to import the code unit
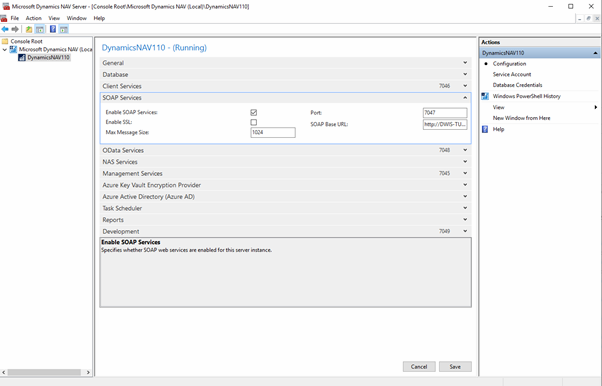
- SOAP web services enabled on NAV (check the image below)
Installing the Dynamicweb Plug-in Unit on Dynamics NAV
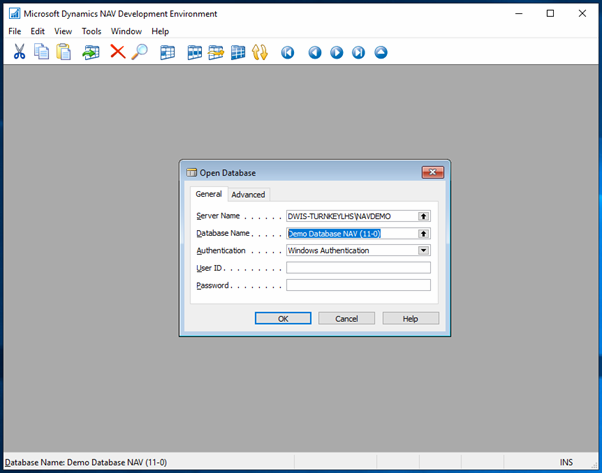
To begin the installation, launch the NAV Development Environment and open the database, where you would like to install the add-in.
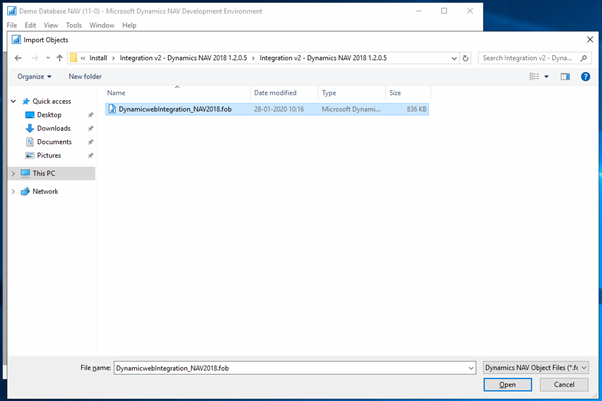
Click File -> Import.

Navigate to the folder containing the. FOB file and open it.
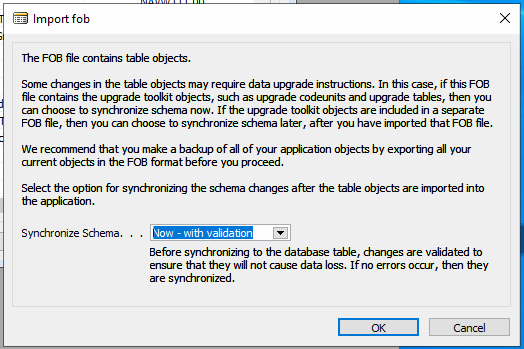
Briefly, the FOB file will be examined for conflicts. If it is a new installation, no conflicts should be found. A dialogue will then appear stating that "All objects have been examined, and no conflicts were found". Click yes to import all objects and continue with the installation.
Depending on the version of Dynamics NAV you may receive this message. In this case choose the default option and click OK.
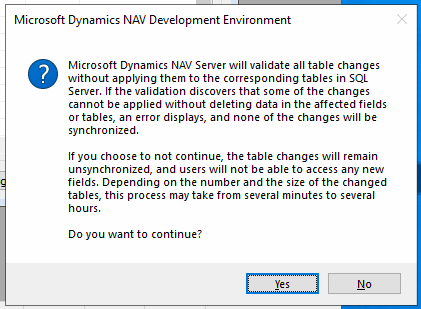
The following dialogue will then appear. Click yes to continue.
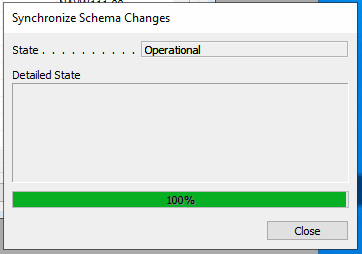
Once the synchronization is done, click Close.
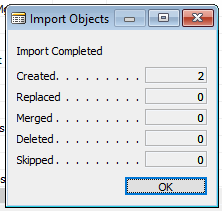
Click Yes to complete the import. The following dialogue will be displayed:
Activating the code unit
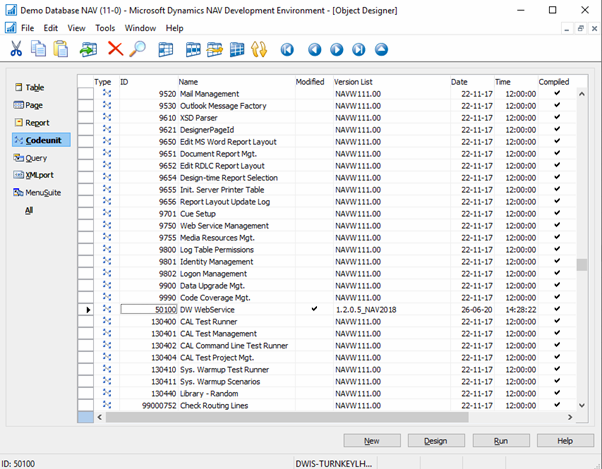
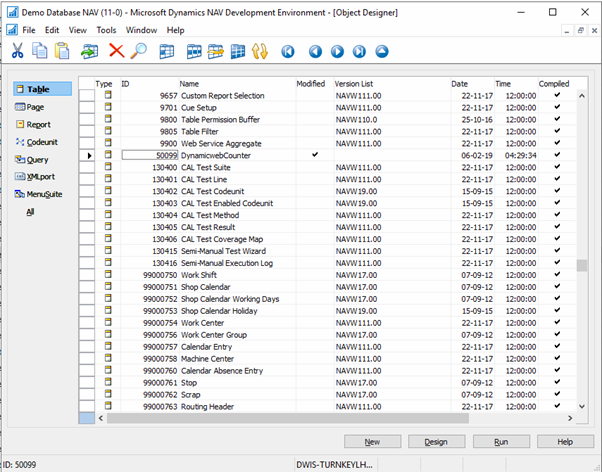
Once the import has been completed you’ll see that two objects were created. On the Codeunit tab of the NAV Development Environment you should be able to find a line with ID 50100 and Name DW WebService. This is the codeunit that contains all the logic for the integration in the NAV end.
And on the Table tab you should be able to find a line with ID 50099 and Name DynamicwebCounter. This is used for keeping track of the progress, when exchanging large volumes of product data in smaller batches.
For the codeunit to take effect, we need to compile it. Right click on the line of the codeunit and click Design.
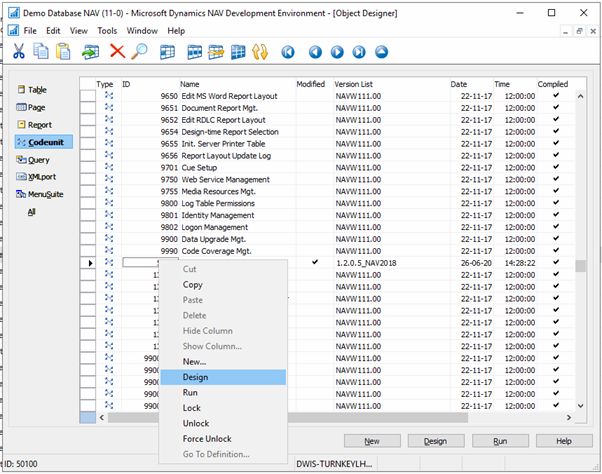
Clicking Design launches the C/AL editor with the source code of the codeunit.
In the menu, click Tools -> Compile or hit the F11 button.
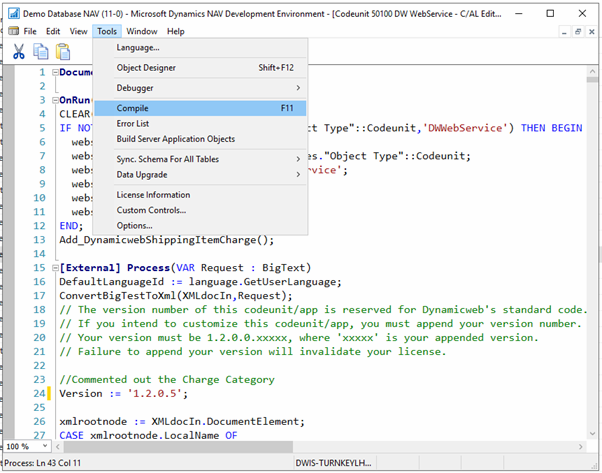
The codeunit is now compiled. To interact with it remotely, it must be set up as a webservice.
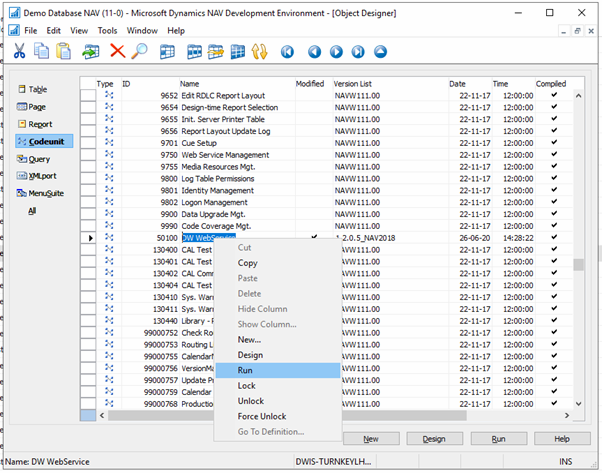
To do so, right click the DW Webservice line on the codeunit tab and click Run.
This invokes the OnRun method in the codeunit, which creates the webservice on the NAV service tier.
Verify the webservice
To test the webservice you have just installed, launch the NAV client and navigate to Administration -> IT Administration -> General -> Web Service or simply hit F3 and search for “web services” and click the “Web Services” entry in the result.
On the Web Services page you should see, at least, the web service that was just installed.

For Dynamicweb to connect to NAV, we need the SOAP url. In some versions you’ll see the URL of the webservice in the overview, but in others it is not displayed. It does, however, exist, and you can find it using the following syntax:
http://localhost:7047/[Microsoft Dynamics NAV Server Instance]/WS/[Company Name]/Codeunit/DWWebService
But here we can simply right click on the SOAP URL and choose Copy Cell.

We can use the Dynamicweb Connector Test Tool to test whether the webservice responds correctly.
Open the DynamicwebConnectorTestTool.exe.config file in Notepad or another text editor.
Locate the section called “NavConnector” and enter the URL for the web service in the “value” attribute of the node called “add” with key “NavEndpoint”.
In the “add” node with key “ClientCredentialType” enter “Windows” in the “value” attribute. This means, that the connector test tool will use your credentials to validate against the webservice.

Close the .config file and launch the DynamicwebConnectorTestTool.exe.
Choose NavConnector from the drop down.
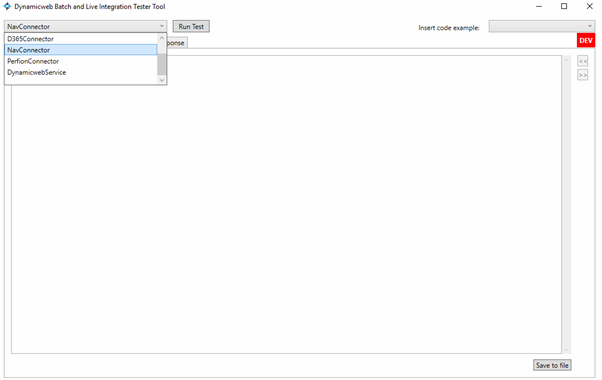
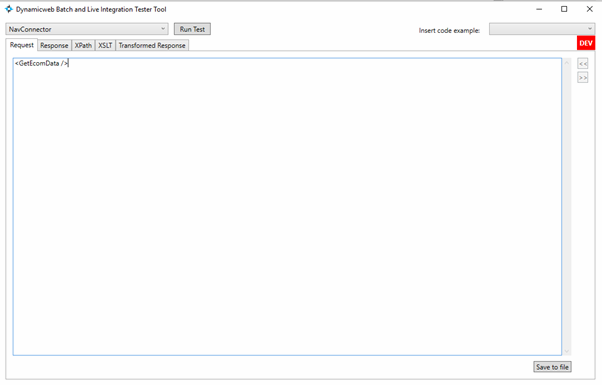
In the text field on the Request tab enter <GetEcomData />
<GetEcomData /> is one of the commands that the web service listens to, and when it doesn’t have additional attributes, this is interpreted as a heartbeat request asking the web service “are you alive”.
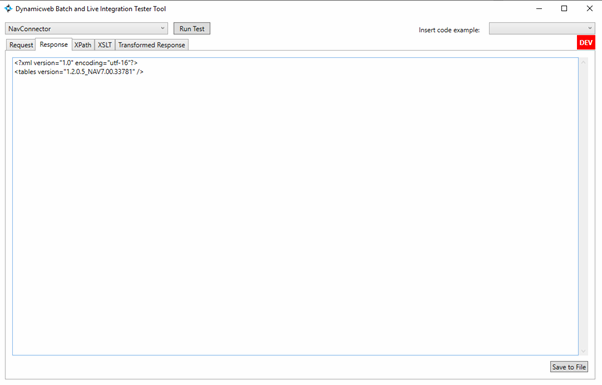
Hit the “Run Test” button. Ideally you should receive a response like the one on the following image.
This is the response from the codeunit confirming “Yes, I’m alive”, and this means that the installation has been successful.
Setting up NAV user for Dynamicweb
For the Dynamicweb Connector Services to interact with NAV, we must create a windows user who can log on to NAV and configure the Dynamicweb Connector Service. The user should be able to log on as a service, and must be able to log on to NAV. In this walkthrough we will use a local user, but in a real-life scenario you most probably would use a domain user.
Please follow these steps to set up a NAV user for Dynamicweb:
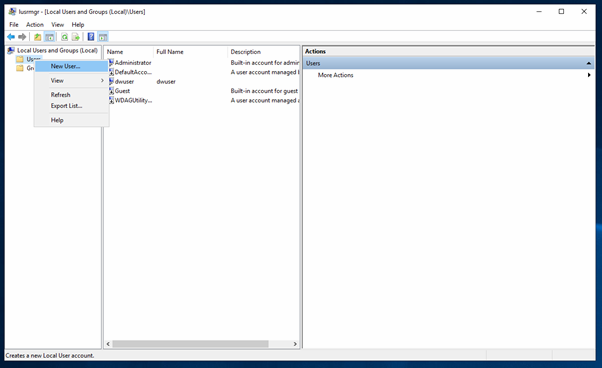
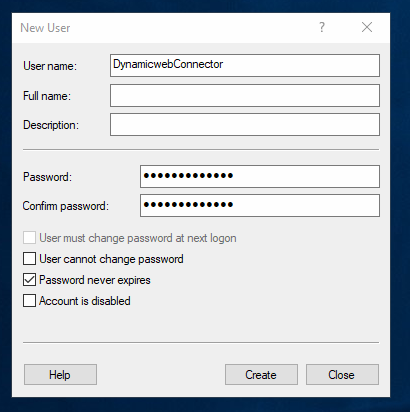
1. Load Local Users and Groups, right click Users and choose New User.
2. Fill in at least a User name and a Password and click Create.
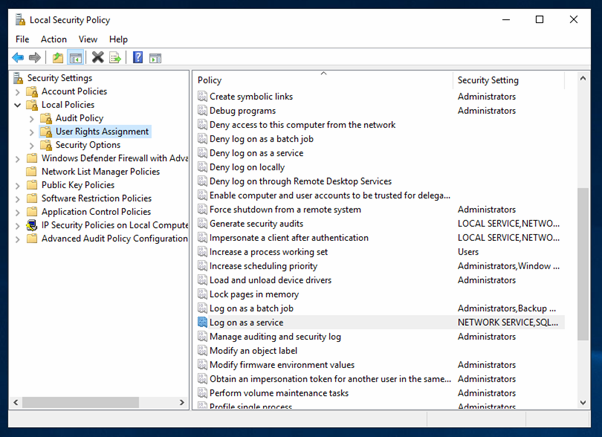
3. Load Local Security Policy, expand Local Policies and click User Rights Assignment. Double-click on Log on as service.
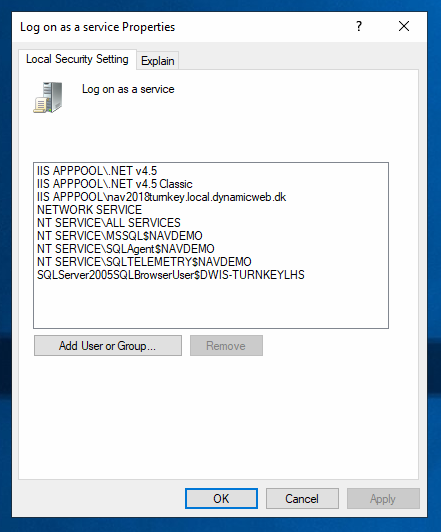
4. Click Add User or Group.
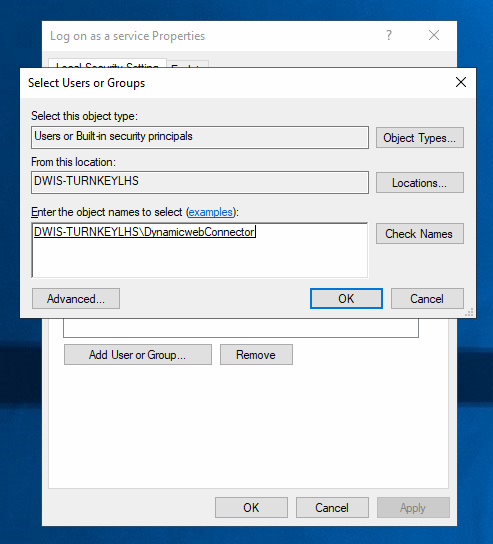
5. Choose the user you created earlier and click OK. Click OK in the Log on as service Properties dialogue box as well.
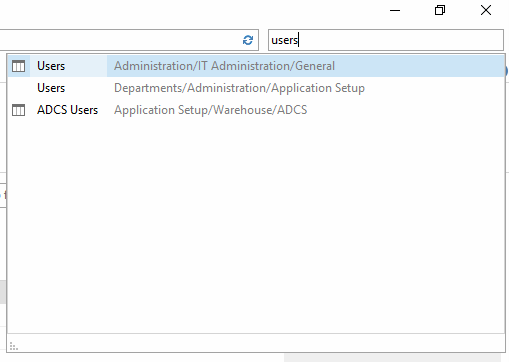
6. Launch the NAV client and open the Users page.
7. Click the New button and type in the user name in the Windows User Name field and tab away from the field. If the field isn’t automatically filled with the right user information, click the button next to the field to look the user up. Grant the user SUPER permission set. In a real life scenario you might want to set up a fine grained permission set for the user, but for this example we grant the user SUPER permission.
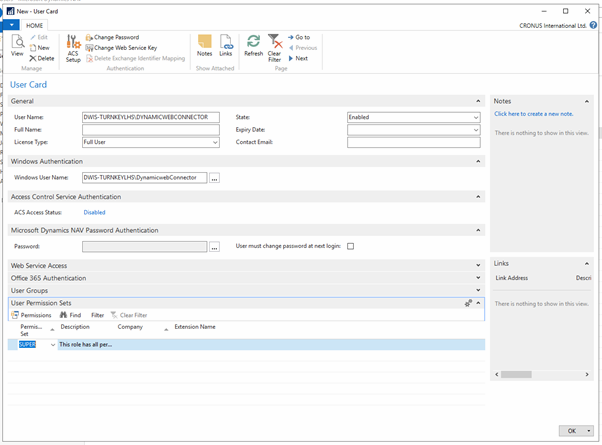
8. Click OK to close the user card.
Now, you can proceed with installing the Dynamicweb Connector Service, where you can use the credentials of this user to allow the connector webservice to log on to NAV.