
Tutorial 1: Shops, Product Groups & Products
Welcome to the T2 tutorials – in which you will learn the basics of implementing e-commerce solutions in Dynamicweb.
We presume that you are familiar with the subject matter covered in the T1 tutorials, but it’s not a requirement that you’ve actually followed the course.
This tutorial is based on using the standard Dynamicweb design, so using any other design may cause template errors. Use the standard Dw_Page.cshtml template in Website settings under the Layout tab.
In tutorial 1 we will cover the following topics:
- Creating shops
- Creating product groups
- Creating products
- Rendering products in frontend using the product catalog app
So basically we will be creating a web shop from scratch.
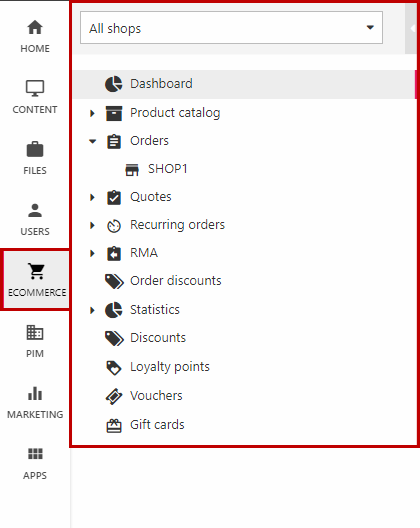
You will mainly be working in the Ecommerce area (Figure 2.1).
Here goes!
Note: There’s an Ecommerce wizard which will run the first time you access the Ecommerce area. It will not provide you with a good understanding of what is going on, so please close it and follow this tutorial instead.
Creating a shop
Shops act as containers for product groups (which contain products), and a place to define some advanced shop settings such as shop languages and stock locations.
Your solution will be born with a shop – SHOP1 (Figure 3.1).
However, we will create one from scratch to make sure you know how to.
To create a shop:
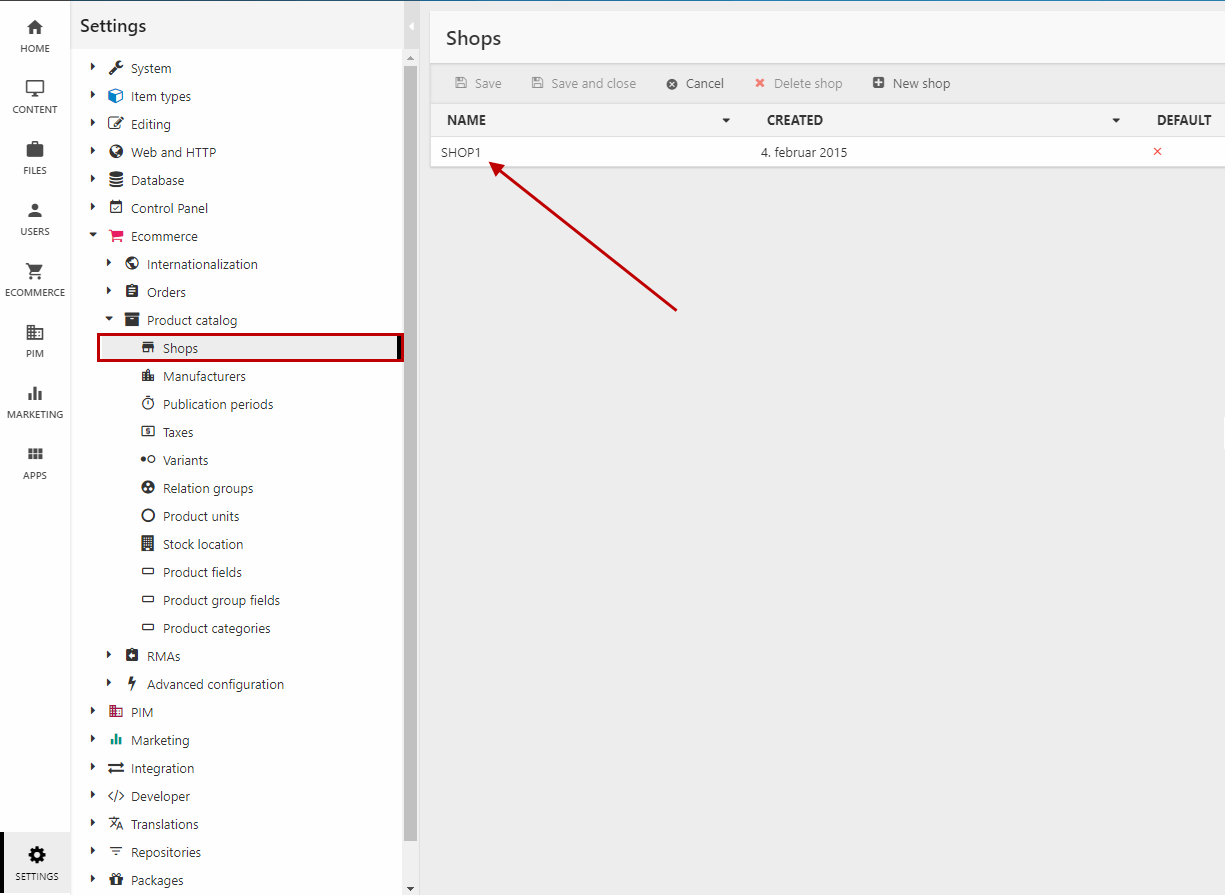
- Go to Settings > Ecommerce > Product Catalog > Shops
- Click New shop in the toolbar
- Name the shop – choosing a theme (e.g a bike shop or a spice merchant) will make it easier to visualize the rest of the shop content
- Check the Default box to make this your default shop
- Ignore the other settings and click Save and close
And that’s all there is to it – you’ve created a (very basic) shop.
A shop without any content is pretty useless, though – so let’s create some shop content – but first, something very important needs to be done.
Ecommerce Website Settings
The single most common source of support cases for Ecommerce comes from people neglecting to configure the Ecommerce website settings – and we won’t make the same mistake!
So before we proceed, we need to take care of three things:
- Creating a country
- Creating a currency
- Configuring the Ecommerce website settings
Creating a country
Countries in Dynamicweb are used to:
- Control which countries a customer can select as shipping & billing countries when creating an order (Tutorial 2)
- Anchor shipping methods and payment methods to a particular country (Tutorial 4)
- Applying VAT to an order (Tutorial 4)
Create a country:
- Go to Settings > Ecommerce > Internationalization > Countries
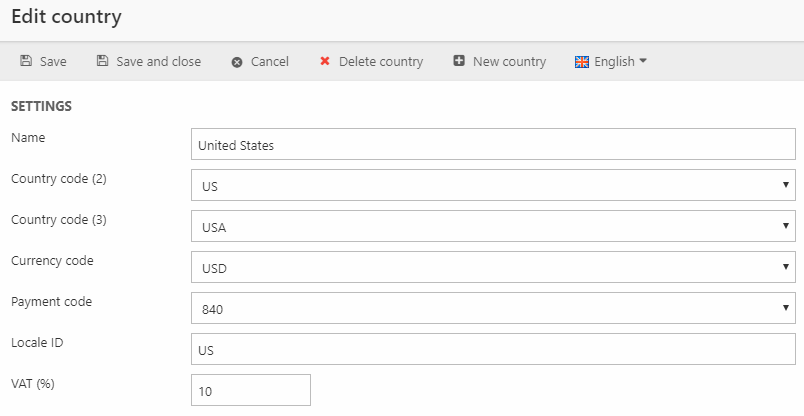
- Click New country in the toolbar and select United States - you will be shown the default country configuration for the US (Figure 5.1)
- Save and close
Regions & Default methods
You can create regions and states in the country settings and use them to e.g. set up address validation or for sales tax calculations using Avalara AvaTax (US only).
You can also select default (preselected) payment and shipping methods in the country settings – payment & shipping methods will be covered in T2 Tutorial 4.
Creating a currency
Currencies are used to define the, well, units your products can be bought and sold in. You need to create a default currency, which is the currency the products in your product catalog are priced in – you can then create additional currencies and define exchange rates in relation to the default currency.
Create a default currency:
- Go to Settings > Ecommerce > Internationalization > Currencies
- Click New currency in the toolbar to open the Edit Currency view (Figure 6.1)
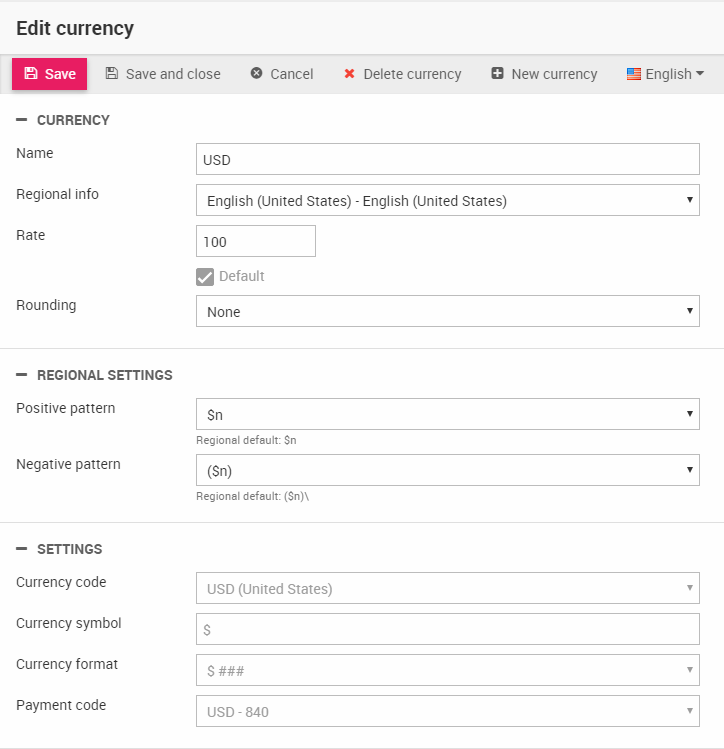
- Name the currency “USD”
- In the Regional info dropdown, select English (United States)
- Set the Rate to 100
- Check the Default checkbox
- Save and close
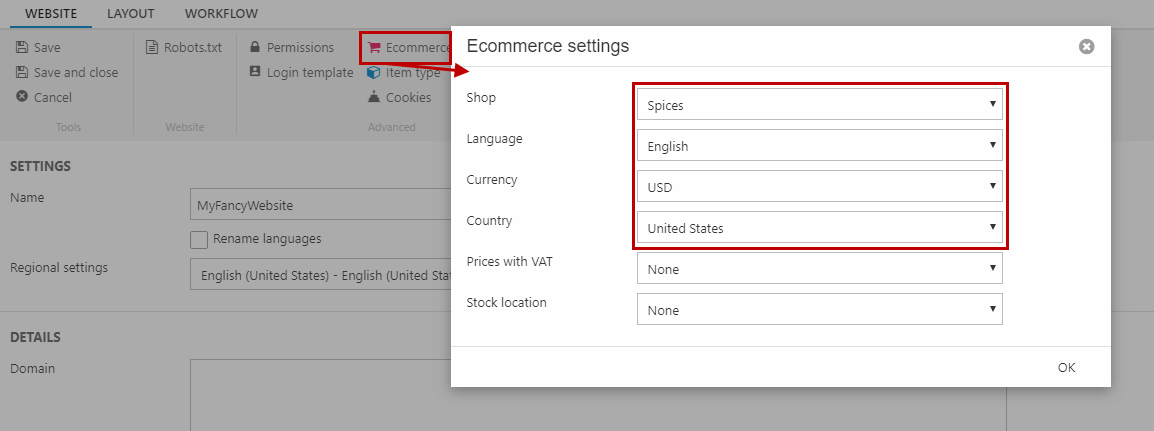
Configuring the website Ecommerce settings
The final step of this short interlude is configuring the website Ecommerce settings.
To do so:
- Open the website settings for your training website
- Click the Ecommerce icon in the ribbon bar to open the Ecommerce settings (Figure 7.1)
- Select your Shop, language, currency and country using the dropdowns
- Click OK
- Save
Creating product groups
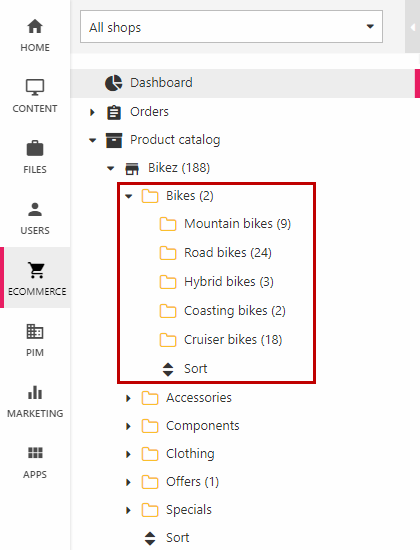
A product group is a container for products – and a way to organize them.
For a bike shop you could have the product groups bikes, accessories and eyewear – and bikes could have the subgroups mountain bikes, road bikes and children’s bikes, etc. (Figure 8.1).
To create a product group:
- Open your Ecommerce area
- Locate and fold out the Product Catalog node
- Right click on your newly created shop and click New Group
- Name the group something appropriate to your theme
- Save
You can use the numerous product group settings and tools to add a group number, a description, and media to the group – and to set default settings for products created in the group. Ignore the settings for now, though.
Create a couple of more groups and name them appropriately, then create two subgroups under one of the product groups.
Ok, so that’s the product group structure taken care of – let’s create some products.
Creating products
Products are, well, products – they’re what a web shop is all about.
In Dynamicweb products are potentially very rich objects with loads of properties, settings, options and associated tools – all of which you can safely ignore in this tutorial.
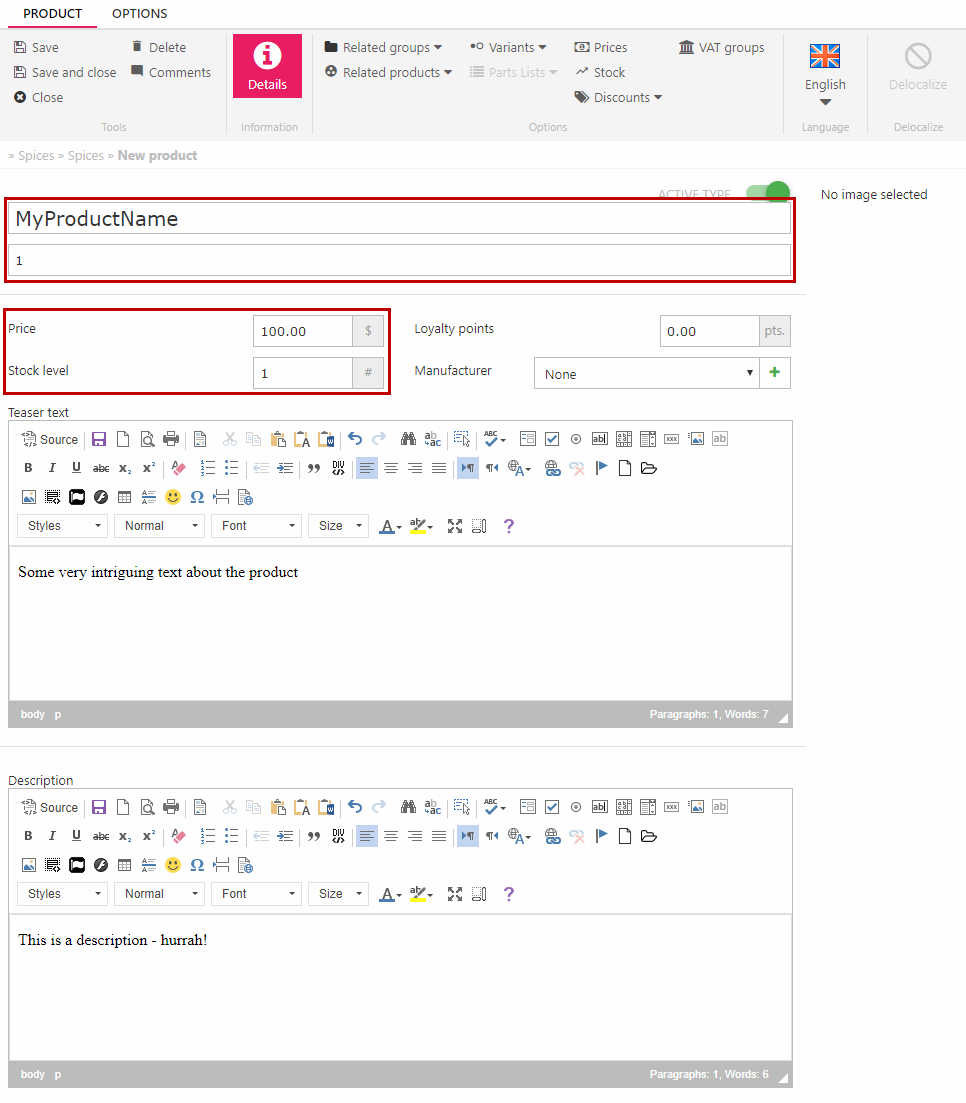
To create a product:
- Click on one of your product groups
- Click New Product in the toolbar to open the product details view (Figure 9.1) and:
- Name the product
- Enter 1 in the product number field
- Set the price to 100
- Set the stock level to 1
- Save
You usually also want to have one or more product images associated with a product, but we are going to do that the smart way later on so ignore the Images section of the product details for now.
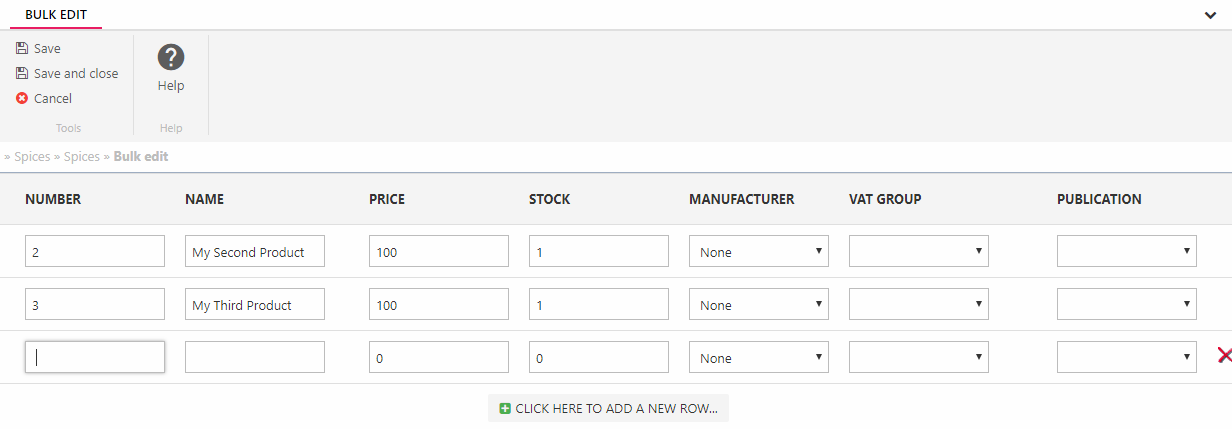
So that’s how you create one product – we need more:
- Open the product group view – you should see the product you just created in the product list
- Click Create multiple products in the toolbar to open the bulk edit interface (Figure 9.2)
- Create a few more products with a product number, name, stock level and a price.
The fields available to you are the fields shown in the product list – you can right click the column-header of the product list to add or remove product fields as you see fit.
In later tutorials, we are going to use the Manufacturer field – so let’s add that to the list:
- Right click the an existing column in the product list and add the field Manufacturer
- Multi-select your products and click Edit products in the ribbon bar
- Notice how you can’t select a manufacturer :( - click Cancel
- Go to Settings > Ecommerce > Product Catalog > Manufacturers and create two manufacturer records – just provide a name
- Go back and try multi-edit again – you can now select a manufacturer – yay! :)
- Give half of your products one manufacturer, the other half the other manufacturer
- Save
You are now ready to render products in frontend.
Rendering products in frontend
In Dynamicweb, products are rendered in frontend using a Product Catalogue app:
- Open the Store page on your training website
- Add a new paragraph – call it Product Catalog – and attach a product catalog app to it
You are now looking at the product catalog app settings – this is where you can configure and customize the way products are rendered in frontend:
- Select Product Groups in the Show settings
- Select Selected Groups in the Groups settings – and use the selector to add the product group you created your products in
- In the Templates section select the List.cshtml template as the List template and Details.cshtml as the Product template
Save and click Show in the toolbar to view the page – you should see something like Figure 10.1.
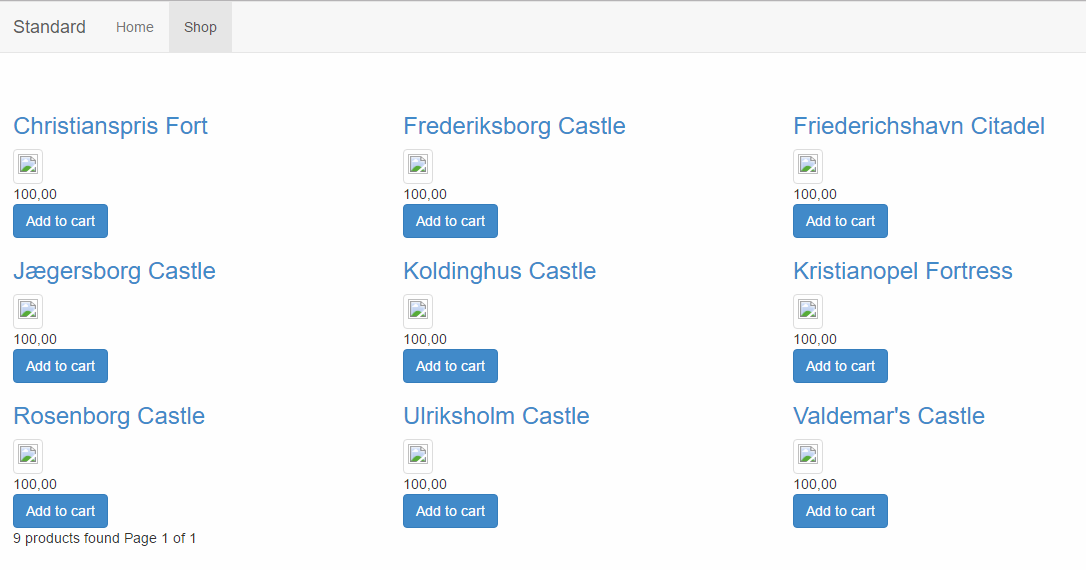
As you can see, List.cshtml renders a basic product grid with:
- A title linking to the product details
- An image (except no images are added to the products)
- An add to cart button (we will be creating a shopping cart in the next tutorial)
Using image patterns
Now, it’s perfectly possible to manually add images to each of your products. They will render perfectly fine and many of our customers do exactly that. However, it’s somewhat time consuming.
Instead we recommend you use an image pattern to specify a folder and a pattern by which the product catalog can assign images to products on the fly:
- Open the app settings for the product catalog app (app on your paragraph)
- Under Images, check the use alt. images checkbox to access the image pattern settings (Figure 11.1)
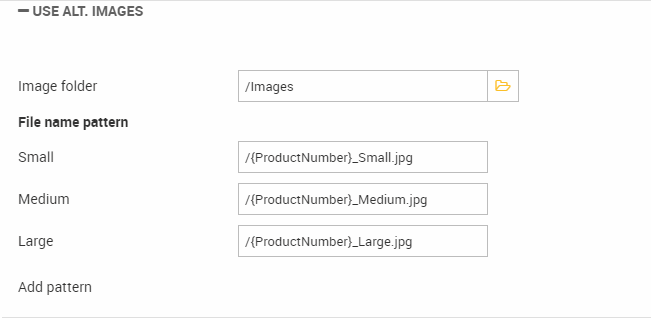
Using these settings, you must:
- Point to an image folder – could be /Images or a subfolder you create
- Enter a pattern for assigning images to a product – the possible values inside the curly brackets can be viewed here, but for now simply use {ProductNumber}.jpg for all three sizes
- Save
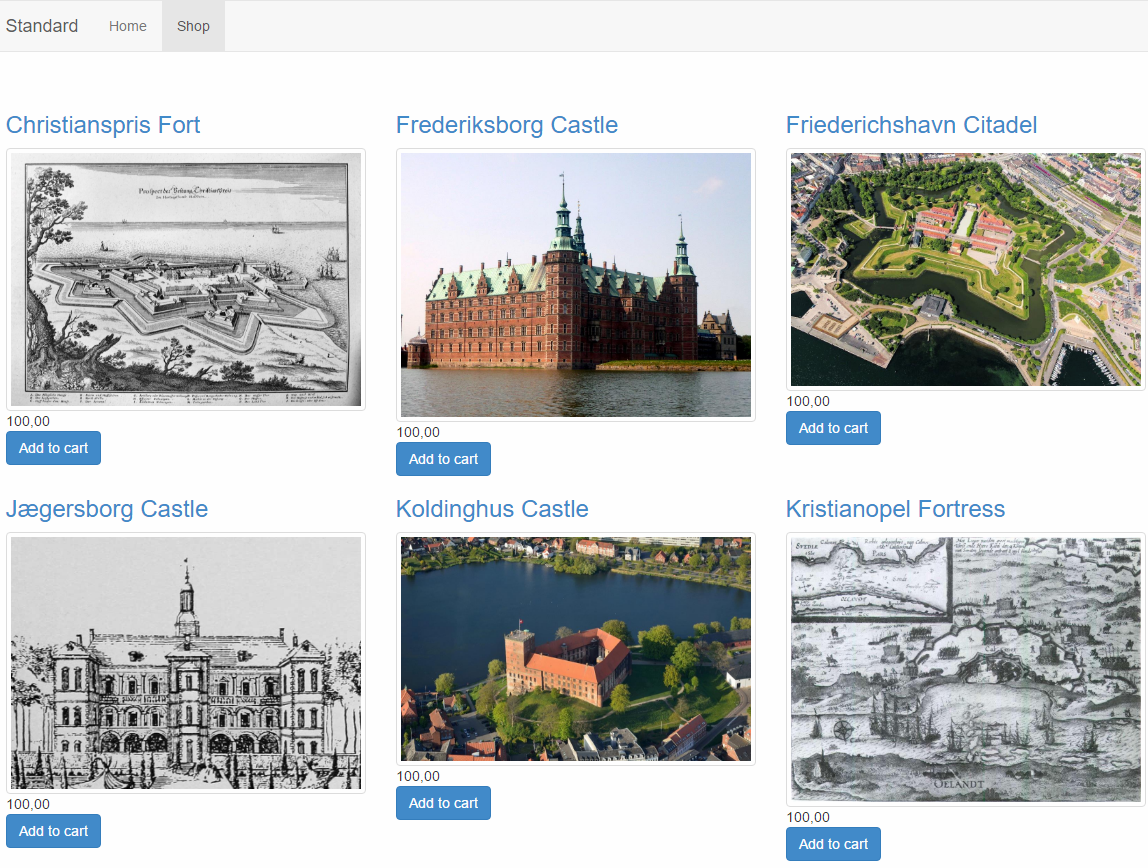
Now simply add some images to the image folder you selected, then rename them to match the product numbers – you should now have a product list looking something like Figure 11.2:
Playtime
Ok, so one thing is following the steps above – another is getting properly acquainted with the product catalog app and your options.
So play around with the settings and the templates for a while:
- Open the List.cshtml template and see if you can figure out what’s going on
- Style the details template a little bit – perhaps add a section where you render a product description – use @TemplateTags() to see the data available to you form the details template.
- Check the Groups checkbox in the templates section – see what happens in frontend. Then select All top groups in under the Groups selector and check again.
What you’ve learned – and what’s next
During this tutorial you’ve learned how to:
- Create a shop
- Create product groups
- Create products – in details or bulk-edit mode
- Render products and product groups in frontend using the Product Catalog app
- Use an image pattern to match products to images on the fly
In the next tutorial you will learn how to:
- Create a shopping cart
- Add products to the cart
- Check out – and modifying the checkout procedure
Extra exercises
If you have extra time, or you’re extra curious, consider doing one or more of the extra exercises below.
Custom Product fields
In many cases, and especially for integration purposes, you may need to create a field which is not a part of the standard product fields.
In those cases, you can create a custom product field – try it now:
- Go to Settings > Ecommerce > Product catalog > Product fields
- Click New field in the toolbar
- Provide a name, a template tag value, and select a field type
- Save
The custom product field will now appear on all products on your solution, and is available to be rendered in frontend.
Using Getimage.ashx
The Dynamicweb image handler – GetImage.ashx – can generate dynamically manipulated images on the fly, which can then be used in templates. This eliminates the need for generating thumbnails or resizing images manually or automatically from the file manager.
The image handler is used by calling GetImage.ashx directly, with a set of parameters controlling the size, crop offset, color mode, etc. of the image rendered.
Try it out:
- Go to Settings > Developer > Image Handler
- Use the tool to generate an URL with the appropriate parameters
- Use the URL in your product list template (Use a tag to retrieve the correct product image for the URL)
You can use GetImage.ashx without using the tool, of course – and you can read more about the different parameters in the manual.
Assortments
Assortments are a flexible way of showing certain shops, product groups, and products to only certain users or user groups.
The process is as follows:
- Create an assortment and add users to it
- Add shops, product groups and products to the assortment
- Activate assortments in frontend
Try it out now – go to Assortments and follow the steps to set it up.