
Product Details
The Swift example website ships with a product details design which shows off a single product to a customer, with more information and more product images than shown on the product list (Figure 1.1).
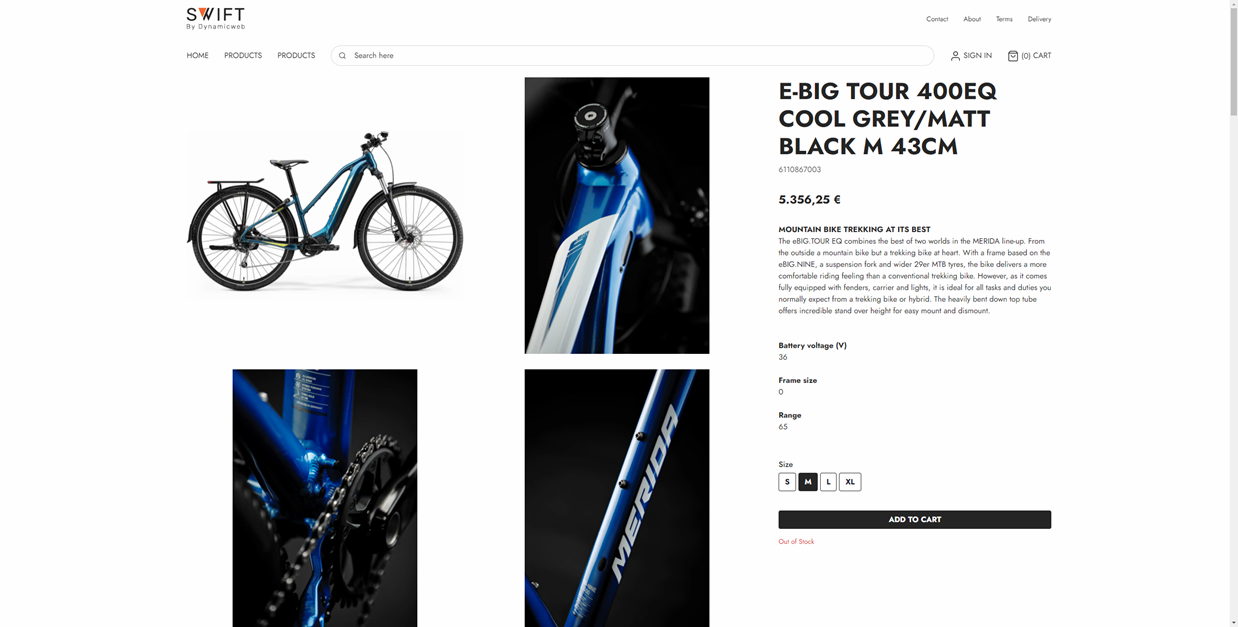
It consists of a number of content elements created using ecommerce columns – such as:
- A gallery of images
- An main info panel with an add to cart button and essential information like:
- Name
- Number
- Price
- Variants
- Etc.
- A description panel
- Etc.
Just like on the product list page the various columns are dependent on a paragraph with a Product Catalog for ViewModel making product data available on the page – in the standard setup this is done by the Products app paragraph. The overall idea is that this setup allows you a great deal of freedom to design beautiful product details pages suited to many different types of ecommerce solutions, since the data is simply made available for all the various ecommerce columns to use as you please.
When you’re using Swift you have three options
- You can use the existing setup – in which case you don’t need to do much
- You can use the page presets as a starting point for creating a new product details page
- You can do a complete manual setup
Using the existing setup
If you use the existing setup you don’t really need to do much – except for a few minor things:
- The products app paragraph used to make data available for the other ecommerce columns allows you to select a dummy product to show when viewing the page using the visual editor. By default this is a bike, but since you will at some point remove the example product you should set this to something else.
Using presets
If you want to explore more of the options available to you when using Swift you can use one of our page presets (Figure 3.1) to create a new product details page.
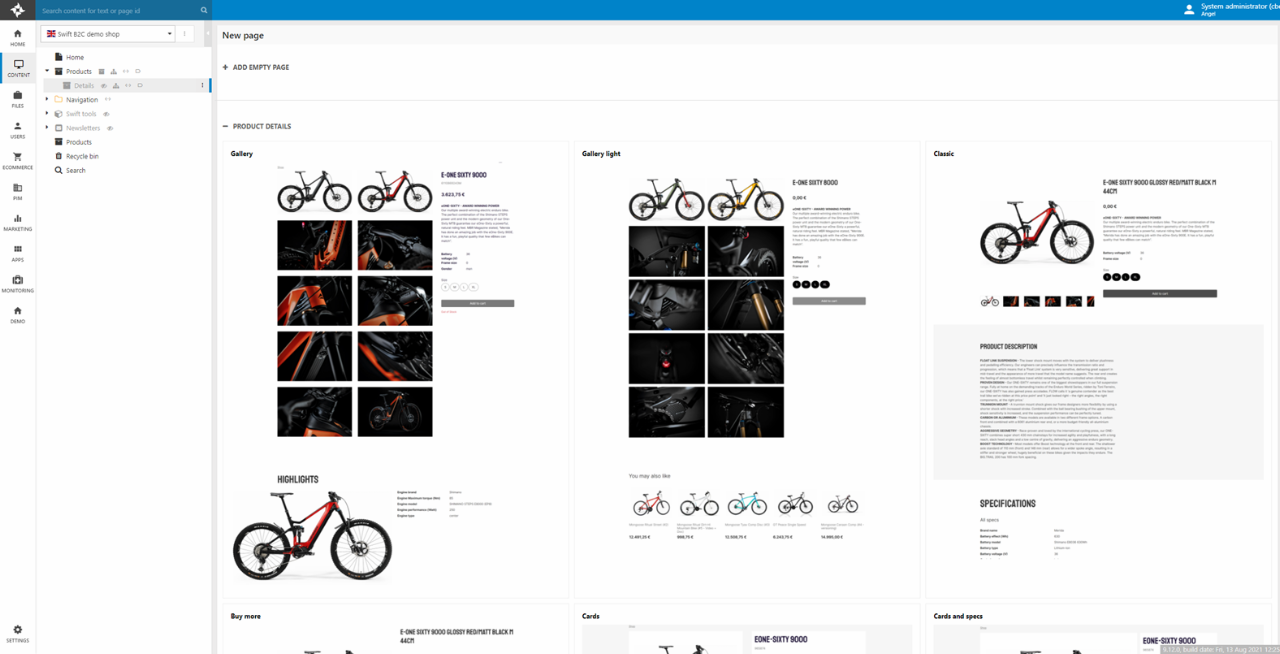
To create a product details page using a page preset:
- Open the backend and locate the Product list page
- Open a context menu for the product list page and click New page
- Under the Product Details section select a page preset
Each page preset contains a different preconfiguration of how the product details page can look and what it can contain – so it’s easy to find one that fits and base your details page on that.
Manual Setup
If you want to setup the product details page manually – or want to see check whether an existing setup is correctly configured – follow this guide.
First you must create the product catalog which all other item types in the product details page are dependent on for data:
- Create a new page using the Product details page type
- Open the visual editor and add a new empty row
- Add an empty column of the type Product catalog details app to the row – then configure it:
- Select a dummy product – this is the product shown when the product details page is being edited using the visual editor
- Switch to the App tab and attach a Product Catalog for ViewModel app
- In the app settings under Query select the Products.query
- In the app settings under Templates select the following templates:
- List: ProductViewList.cshtml
- Product: ProductViewDetails.cshtml
- Compare: CompareProducts.cshtml
Next set up navigation and urls:
- Close the visual editor and go to Properties > Options and open the Navigation-tool and configure it:
- Add the navigation tag ProductDetailsPage
- Under Properties > Options also open the URL-tool and configure it:
- Select the Ecommerce provider
- Under parameters specify how you want the URLs to behave
Once the paragraph delivering data has been created and the navigation and urls have been configure, you can create the paragraphs which render the facets & product list content.
This is done using our various ecommerce columns – the following column types are typically used:
- Product details gallery
- Product details image
- Product details info
- Product long description
- Product specification
Customizing Product Details
The product detail page opens for some customization. With the Product components tool you can customize the design of the Product detail page, as you are able to create custom ecommerce columns. This tool combined with the ability to create different Product details pages for different Product groups gives you a lot of freedom when designing.
Creating multiple Product Details pages
By default, all products will show on the same product details page called “Details” in the content tree. But every product group can have its own product details page. This is useful as different product groups often need different designs. E.g., a computer might need a more technical page, whereas clothes need more images. The easiest way to do that is to make a copy of the default product details page and customize it afterwards, but you can also use presets or do it manually. For now, we will just copy the existing page:
- In the content tree locate the default Product Details page called “Details” in the Product list folder
- Right click the page and click “Copy here”
- Give it a name matching with the purpose of the page (e.g., “Shirts Details page” or “Accessories Details page” and hit Submit
As only the primary product details page should have the navigation tag “ProductDetailPage”, you need to remove this:
- Go to the properties of the newly created Product Details page.
- In the top menu bar click on Options. After that click Navigation and delete the navigation tag.
- Hit OK and Save and Close.
Now you need to link the intended product group(s) with the new Product Details page. To do that:
- In Ecommerce, locate the Product Group you want to be displayed on the new details page.
- Click Edit group and locate the Primary page field in the Meta Information section
- Link the Product Group with the newly created product details page
- Do the same for all the subgroups you want to link to the Product Details page
When all this is done the products in the chosen group will use the new product details page. By redoing the steps, you can keep creating new Product Details pages should you need that.
Now, the new Product Details page is ready for customization in the Visual Editor. We recommend that you keep the multiple Product Details pages in the same theme, to make the customers feel at home while shopping different types of products.
If the products still use the default product details page, it might be because you haven’t set the default group on the products. To check this:
- Go to Ecommerce, locate the product that use the wrong details page
- Click “Related groups” and make sure the right group is selected as Primary