
Installing a pre-existing solution
In this guide we will go through the process used when you install a pre-existing solution on top of an empty solution. As such, the guide presupposes that you have already installed a local Dynamicweb solution.
A pre-existing solution could be a Swift release or a copy of another Dynamicweb solution.
In practical terms, a solution consists of:
- A Files-folder with system files, templates, and other static ressources
- A database with data - pages, products, paragraphs, etc.
To install an existing solution on top of an empty solution:
- Download the solution database and files folder
- Extract the Files folder and use it in place of the default application files folder
- Open SQL Management Studio and restore the database
- Edit the globalsettings.aspx file and point it to the restored database
Download and use a pre-existing files folder
The Files-folder of a solution contains solution-specific static content such as:
- Images
- System files
- Templates
- Global settings
- Etc.
When you're installing a pre-existing solution (e.g. Swift) you will download a /Files-folder and use it in place of the one auto-generated by the Dynamicweb Installer:
- Obtain the Files folder - e.g. by downloading the latest Swift zip here or by zipping a Files-folder from elsewhere
- Extract it - we recommend you place all your local solutions in dedicated folders inside a /Solutions-folder
- Open IIS and create a virtual folder, then point it to the extracted /Files folder
After following this procedure, you can log in to the solution and access the contents of the /Files folder - this includes designs, item types (if stored as XML), images, and so on. This is sometimes all you want.
Often, however, you also want to access the solution database which contains data such as pages, paragraphs, users, orders, etc.
Restoring a solution database
A database contains solution-specific data such as pages, paragraphs, orders, users, products, etc.
Most databases are packaged as a .bacpac file, which is a useful file format when moving a database from one server to another (basically what we're doing here). If you're following the requirements you will be running a version of MS SQL Server which can handle .bacpac files.
To restore the database:
- Obtain the database backup - e.g. by downloading the latest Swift database zip here
- Extract it to an easily accessible location
- Open SQL Management Studio and connect to your server
- Right-click the server and open Properties > Security - verify that Server authentication is set to “SQL Server and Windows authentication mode” (Figure 3.2)

Right-click the Databases node and click Import Data-tier Application. This opens the Import Data-tier Application window (Figure 3.3). Click Next.

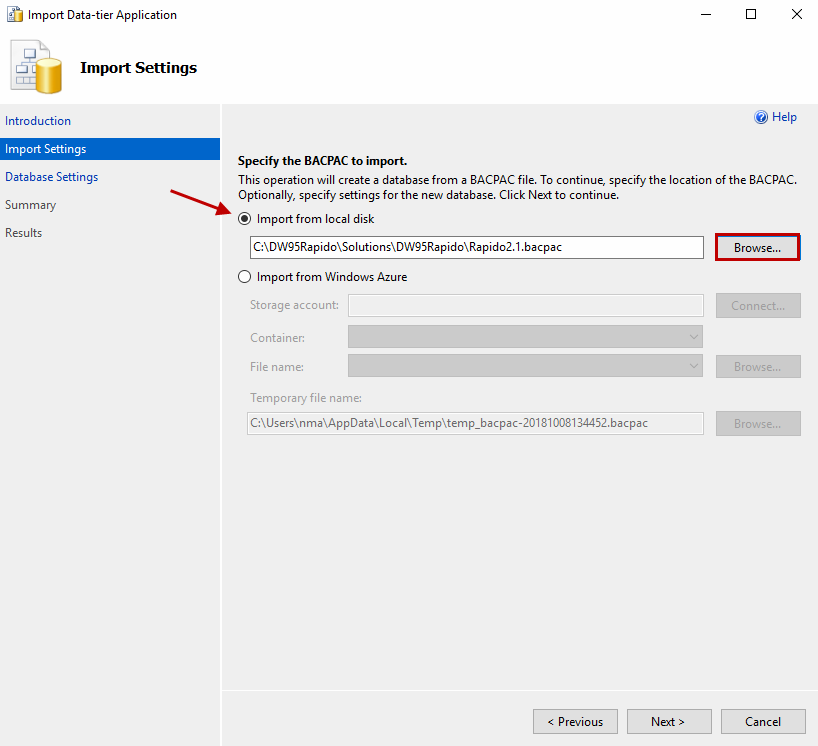
If not already selected, select Import from local disk and click Browse and locate your .bacpac-file (Figure 4.1). Then, click Next.
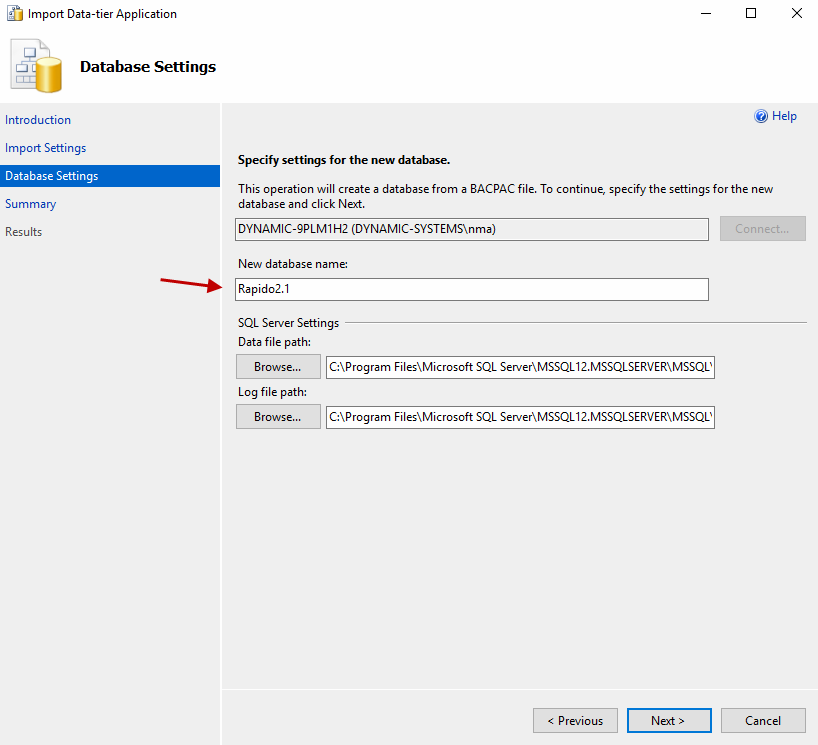
Name your new database (Figure 4.2). You can also change the Data file path and Log file path for the SQL Sever (optional).
Click Next to proceed to the Summary step and verify that the settings are correct, and then click Finish.
When the operation is done, the database should now be accessible from the Databases node (Figure 4.3).

Set SQL user mappings for the database
Since this is a restored database you must manually map an SQL user to the database.
- Go to Security > Logins and open your SQL user (double-click)
- Open the User Mapping node
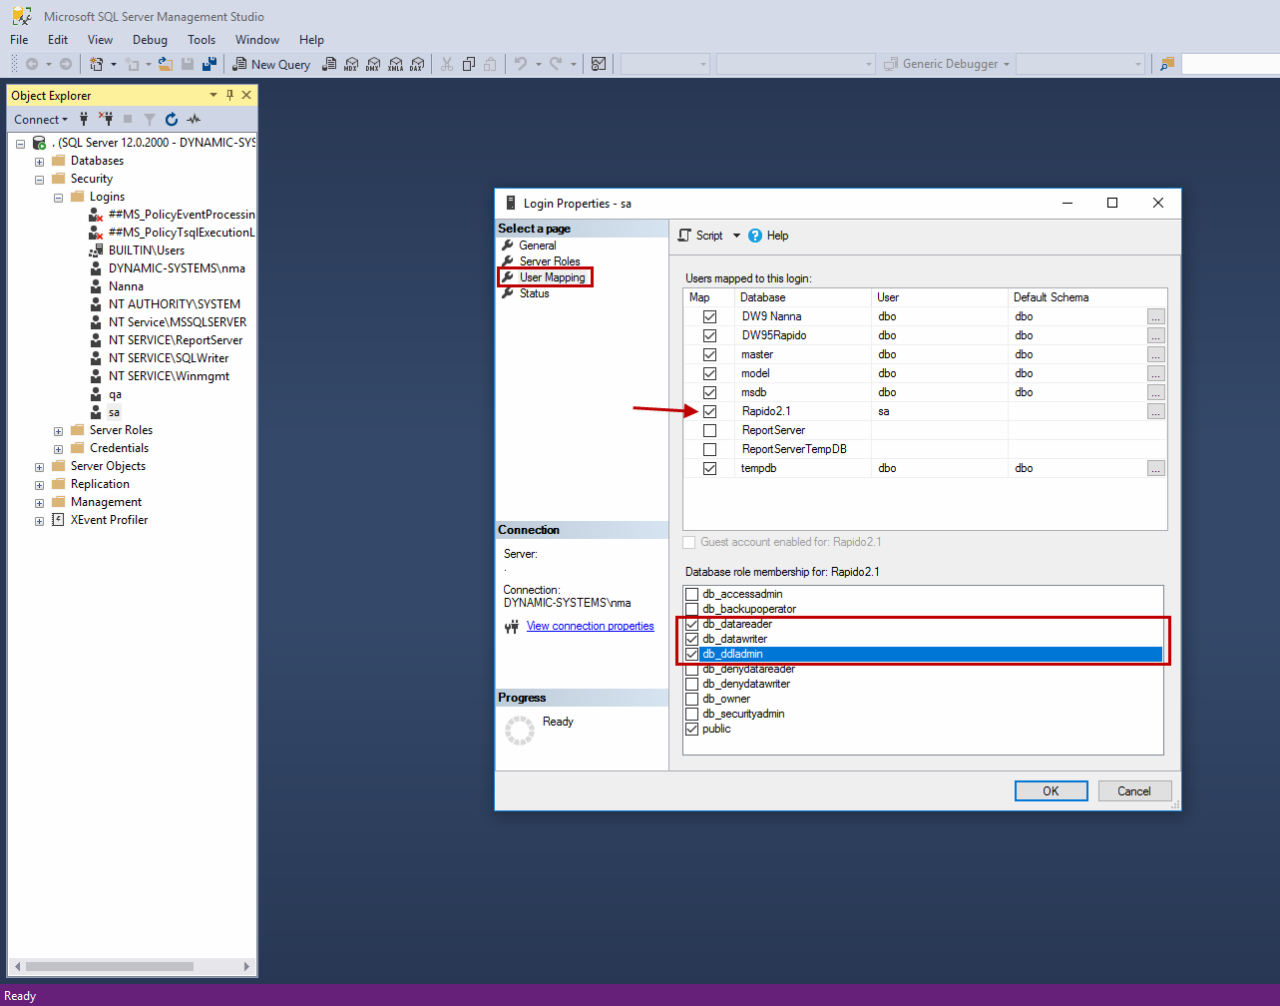
- Click the Map checkbox for the restored database (Figure 5.1)
- Check the db_datareader, db_datawriter and db_ddladmin roles for the user
- Click OK
Editing Globalsettings.aspx
To make the solution use the extracted database:
- Go to the Files folder and open Globalsettings.aspx in a text editor, e.g. notepad++ or visual studio code
- Locate and edit the Database-section to match the user and database details (Figure 6.1)
- Save

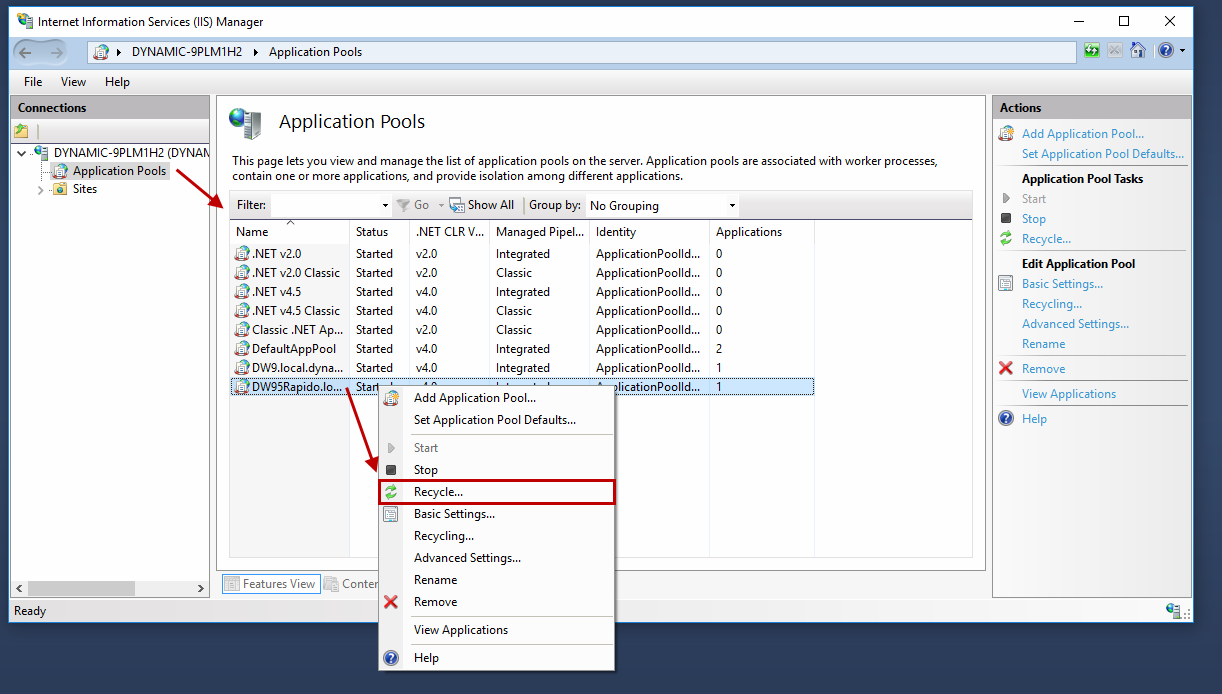
You should now recycle the application pool for the site in IIS Manager (Figure 6.2) – occasionally the SQL user credentials are cached and will prevent you from connecting properly to the database.
Building your indexes
Many solutions - such as Swift - depend on various indexes being built to render e.g. products in frontend or enable content search.
To build an index:
- Go to your.localsolutionurl.dk/admin and log in using the administrator credentials you created earlier
- Go to Settings > Repositories
- Open a repository and click on the index
- Under Builds click on the yellow button to build an instance of the index
- Repeat these steps for all remaining indexes
You have now built the indexes – if relevant, open the solution frontend and verify that products are now being rendered.
Rerun update scripts
The final step in the install process is to rerun the update script - this ensures that the database is updated to correspond with the current application requirements.
And that’s all :) You now have a local installation to work with.