Example 1: Extending the Master template
As you probably know, the Master template contains content which is identical on all pages on a solution, e.g. the header, navigation & footer, as well as references to static resources like CSS and scripts.
As of Rapido 3+ most of the actual content has been moved into Block templates located in the Rapido/MasterBlocks folder. The Master template instead contains a Blocks structure where the Block template content is placed in e.g. the MasterHeader or MasterFooter Blocks.
So. Let’s get down to business. You want to extend the master template with a sweet new bar to the header with a ‘Free shipping’ message (Figure 1.1).

First create a new Block:
- Open the MasterBlocks/Custom__Blocks.cshtml file
- Add @using Dynamicweb.Rapido.Blocks.Extensibility to get list of imported resources
- Write a simple new block definition inside the code clause:
- To add the block to the Master template, add the following line below the Block definition:
This adds the block to the extensibility point called MasterHeader – to see all available extensibility points open Master.cshtml and add the following just before the body end tag:
Refresh the page and scroll to the bottom to see a tree structure representing the various extensibility points available for the Master template (Figure 2.2).
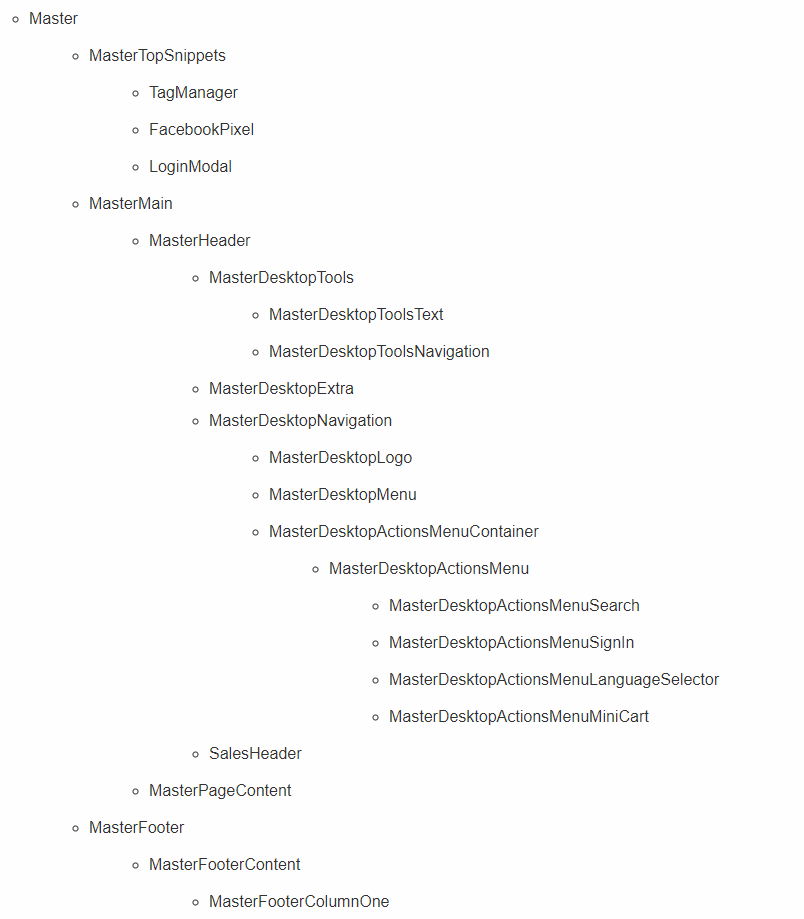
Please keep in mind that your website settings could influence which extensibility points are actually available; if the Footer is disabled in the configuration, Blocks added to the Footer won’t be rendered.
To add the Block to e.g. the first column in the footer you could simply edit the code to masterBlocksBlocksPage.Add("MasterFooterColumnOne", salesHeader);. Try it out, but change it back to placing the Block in the header, as before.
Now that the Block has been placed in the header we’ll write a helper (Template) for it. Add the following helper below the code block:
Then reference the new helper in the Block definition – you should also change the sortId to 41, to ensure that the block is rendered last in the header block:
Congratulations. That’s it – your frontend should now look like Figure 3.2.