
Automatic Digital Assets Handling
Automatic digital assets handling is the process of automatically assigning assets in a folder to products and placing them in asset categories based on the name of the file. This could be various types of product images, datasheets, manuals, etc. – the only requirement is, that the files must be consistently named and follow some sort of pattern, e.g. {ProductNumber}_datasheet.
To set this up:
- Upload assets to a folder in the file system
- On each asset category create patterns which an asset must match to be assigned to this category
- Create a scheduled task for assigning assets to products and asset categories
- Create a scheduled task for removing references to digital assets no longer in the file folder
You can then schedule the two tasks as appropriate.
Creating auto checkin patterns
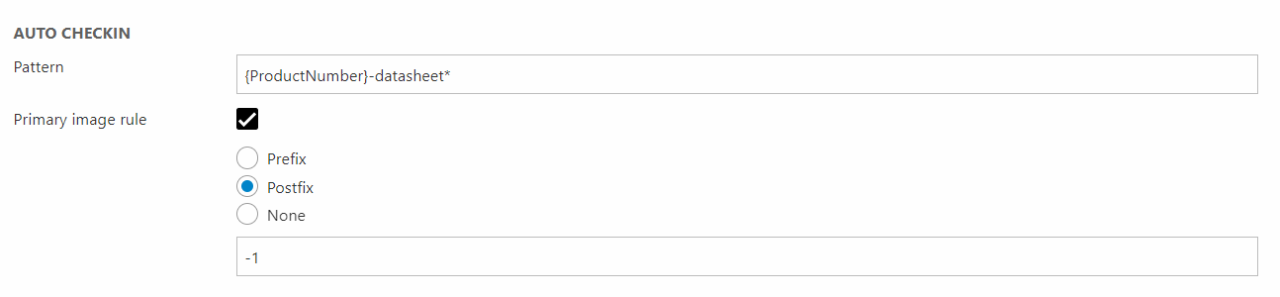
Each asset category has a section – Auto Checkin – which is used to define a pattern, e.g. {ProductName}-datasheet.
When the scheduled task for assigning assets to asset categories is run, the filenames of the files in the specified folder are evaluated agains the pattern – and any filename matching the pattern is assigned to the product in the relevant asset category.
You can also activate and define how to identify the primary image out of all the images matching a pattern – this is done by specifying which prefix/postfix denotes the primary image. If your primary image consists of neither a prefix nor a postfix you can choose none. This is especially useful if your pattern only consists of e.g. {ProductNumber}.
In the example in Figure 2.1, each file matching the pattern {ProductNumber}-datasheet* is assigned to the asset category, and the one with a -1 postfix is set as the primary image. When defining these patterns, you can use the same placeholders and wildcards (* and ?) supported by image patterns. Unlike image patterns you don’t have to specify an extension as this is handled by the file extensions section.
Scheduled task: Digital Assets checkin on Products
Once you have defined auto checkin patterns on one or more assets, you should set up the scheduled task which will auto-assign assets to the categories based on the file name patterns you specified:
- Go to Settings > System > Scheduled tasks
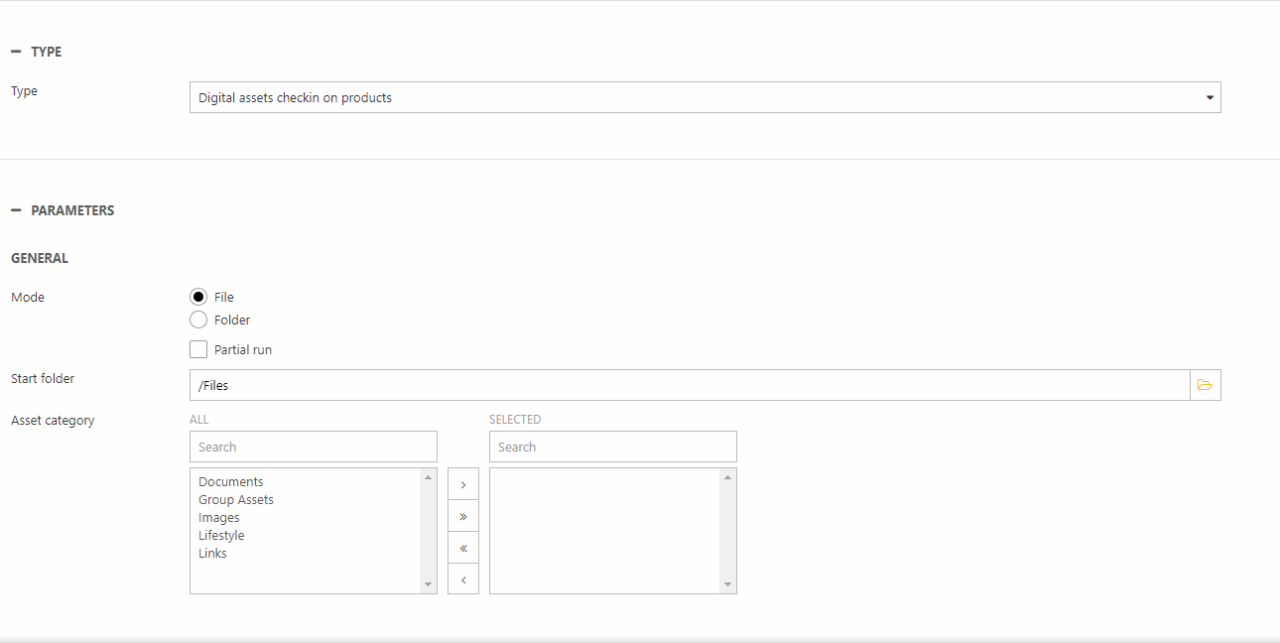
- Create a new scheduled task using the Digital assets checkin on products add-in (Figure 3.1)
To use this scheduled task add-in:
- Select a Mode:
- File means the file name – e.g. PROD712.jpg or PROD712.xml – is parsed and the files associated with an asset category if it matches the rule set on it
- Folder mean the folder name – e.g. ‘PROD712-specsheet’ – is parsed, and all files under it are assigned to an asset category if it matches the rule set on it
- Optionally check Partial run – this causes the scheduled task to only look at files added to the start folder since the last run
- Select a start folder – all files/folders under the start folder will be parsed when the scheduled task is run and assigned to asset categories
- Select a number of assets categories to check for when the task is run. This is useful if some asset categories are manually maintained (e.g. marketing images), and some are automatically maintained (e.g. datasheets). You can of course also set up multiple scheduled tasks using this task add-in if relevant.
Once configured you can schedule the task as usual – when run, the names of the files/folders in the start folder are evaluated against the rules set on the asset categories, and the assets are assigned to each category where the name matches the rule.
Scheduled task: Cleanup missing digital assets
To make sure your products don't reference assets which have since been removed from the assets folder you can create a second scheduled task, this time using the Cleanup missing digital assets add-in (Figure 4.1).
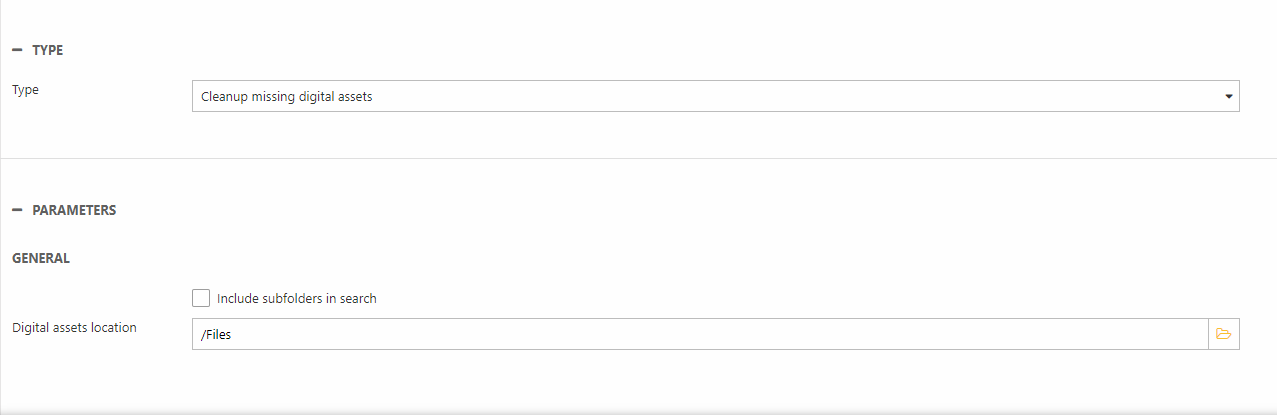
The add-in is very simple - it checks values in the database against all files in the asset folder (and optionally subfolders) and removes those values not matched by a file name.