Setting up OAuth 2.0 for Dynamics F&O endpoints
OData integration with Dynamics F&O requires authentication with OAuth 2.0. This guide will you take you through the necessary steps in establishing such an authentication.
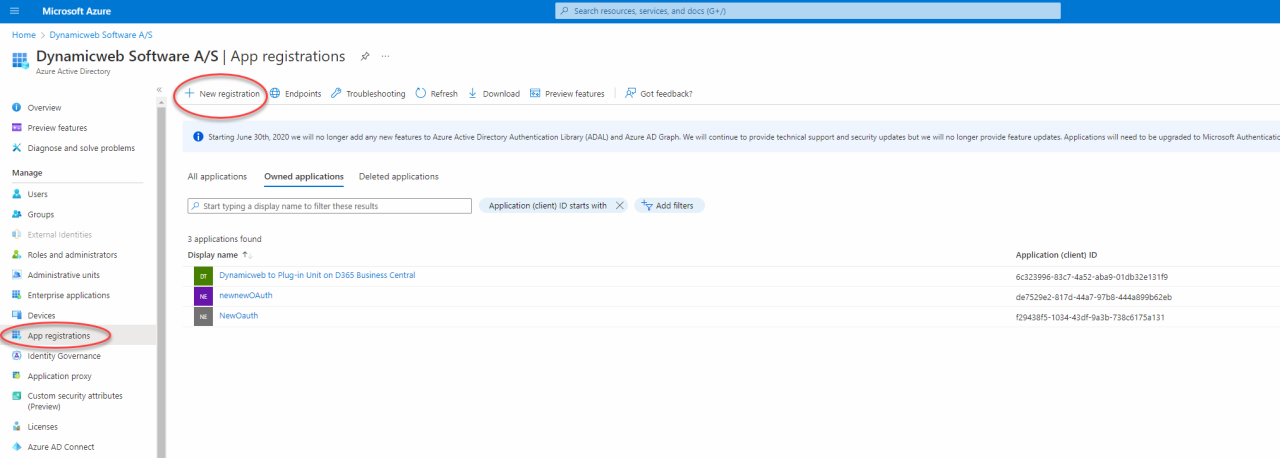
Creating a registration in Microsoft Entra
To add a registration, launchMicrosoft Entra, go to App registrations and click New registration. Give the registration a name and click Register at the bottom of the page.
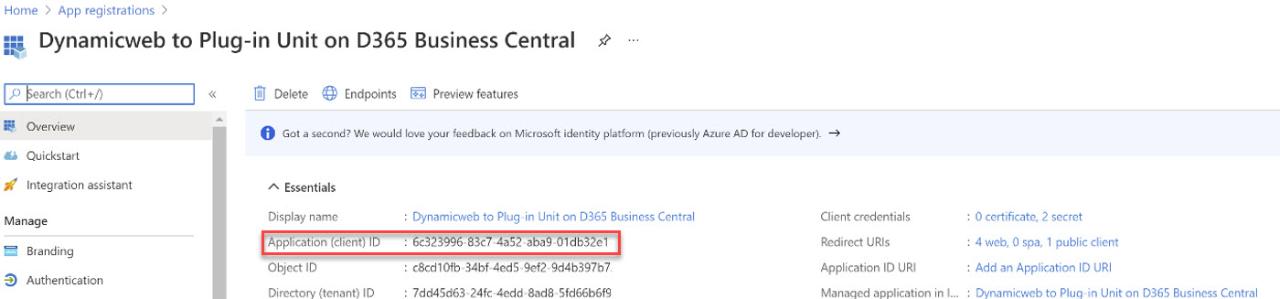
In here, copy the Application (client) ID and the Directory (tenant) ID . The ID's will be used later in the setup process.
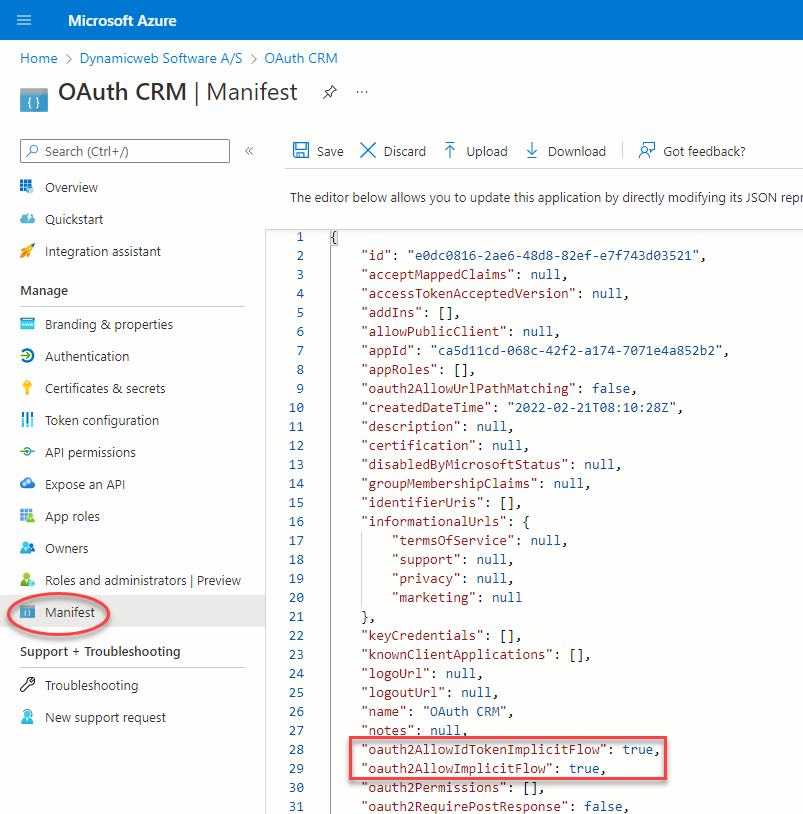
Changing the manifest
To allow the OAuth token to flow between F&O and Dynamicweb we need to adjust a couple of values inside the JSON manifest of the app.
Click Manifest in the left navigation pane, set both the "oauth2AllowIdTokenImplicitFlow" and "oauth2AllowImplicitFlow" values to true, and save the updated manifest.
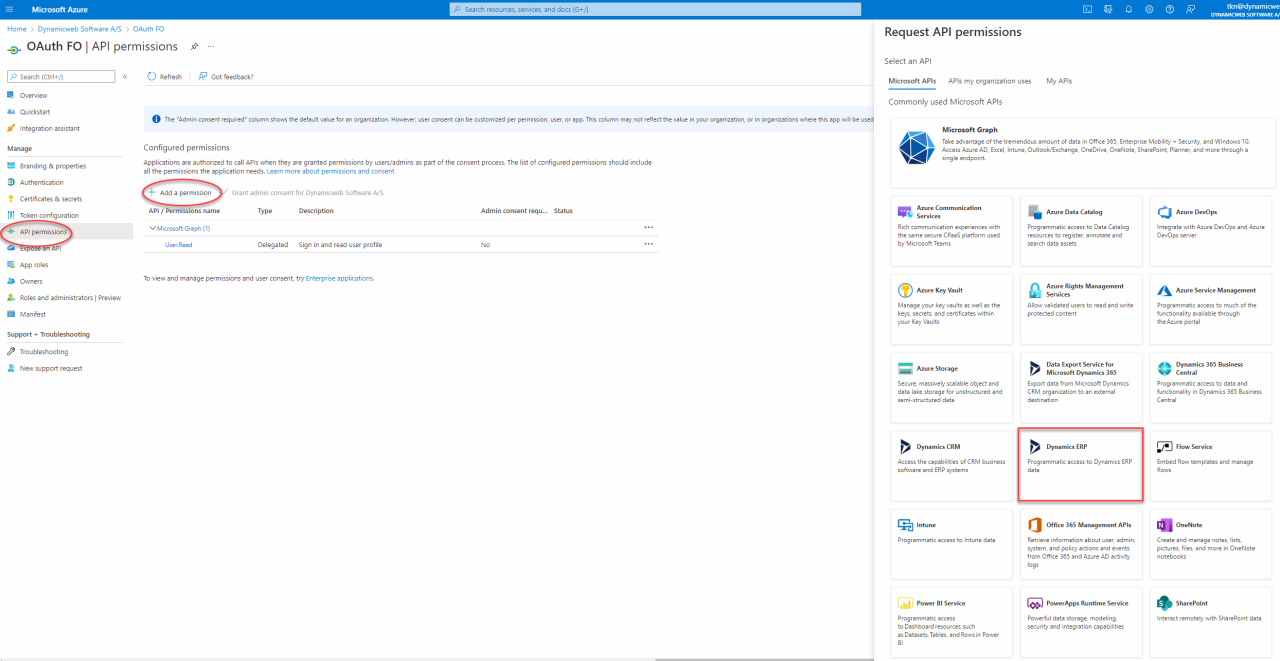
Adding an API permission
Go to API permissions in the left navigation pane and click Add a permission. Select the Dynamics ERP API.
In the following menu, choose Delegated permissions and check the following permission checkboxes:
- AX.FullAccess
- CustomService.FullAccess
- Odata.FullAccess
Finish by clicking Add permission in the bottom left corner.
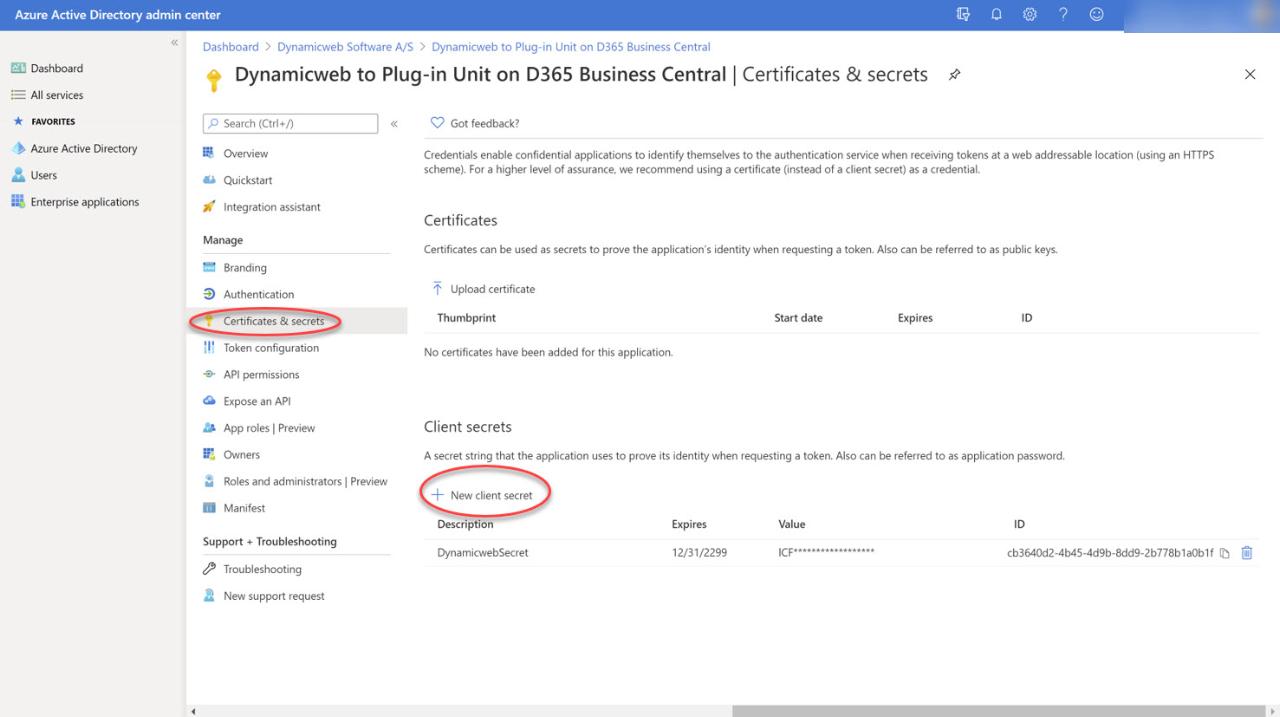
Adding a client secret
Next, go to Certificates & secrets to add a client secret.
Make sure to copy the value (not to be confused with the ID) as it will never be shown again and is needed later in the process.
Platform configuration
Next, add a redirect URI in Manage > Authentication > Add a platform and choose "Web".
The redirect URI needs to be in the following format with your host website in the URI instead of "yourwebsite.com".
https://yourwebsite.com/Admin/Public/Module/EndpointManagement/EndpointAuthorization.aspx
Please notice that the HTTPS protocol is required for redirect URI's in Microsoft Entra.
The redirect can also be a localhost app though, as shown in the picture below.
Check both the "Access tokens" and "ID tokens" checkboxes in the Configure Web window.

Adding the authentication in Dynamicweb
After the app registration, API permission and client secret has been added in Microsoft Entra, we must setup the authentication in Dynamicweb.
To do so, go to Settings > Integration > Endpoint Management and click "Add authentication".
Set the type to OAuth 2.0 - User Impersonation and fill in the fields with the copied values from Microsoft Entra as well as the URL for the F&O instance you wish to integrate with.
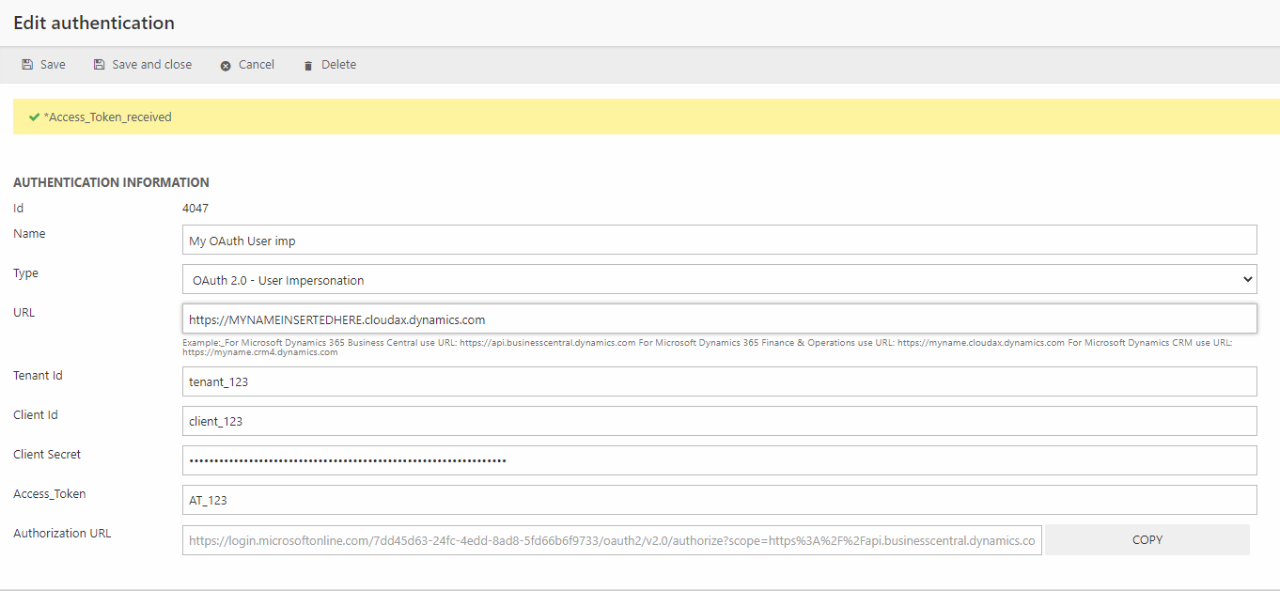
Clicking "Save" will redirect you to the Business Central login page, where you must enter your credentials.
In some cases, the browser might block the pop-up with the Business Central login page. Make sure to allow pop-ups from Dynamicweb if that is the case.
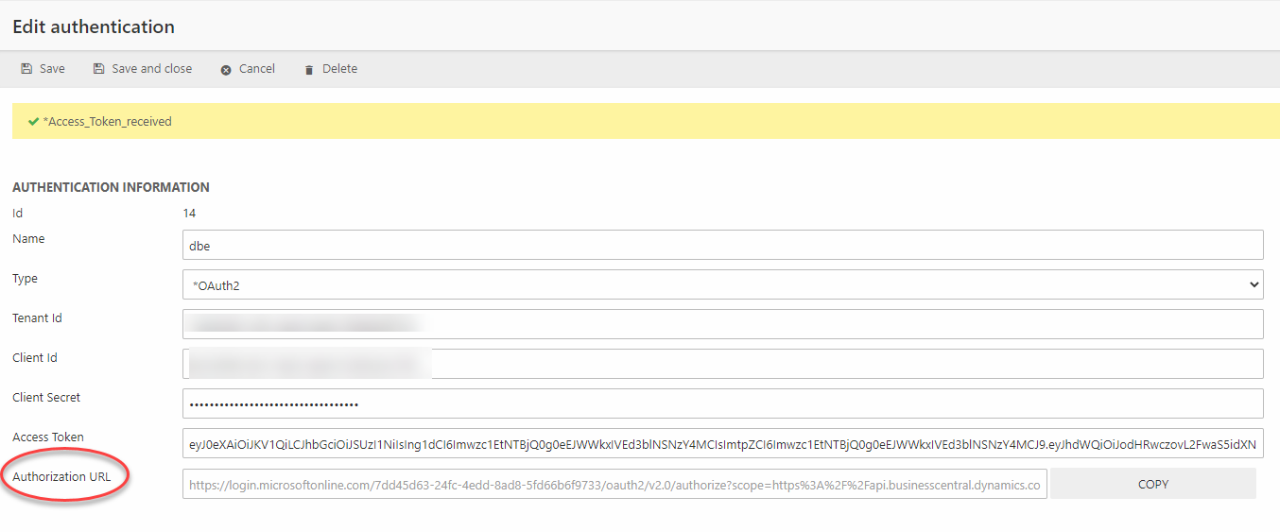
A successful login will redirect you back to the "Edit Authentication" page in Dynamicweb where an "Access token received" prompt should be shown as depicted below. The "Access Token" field should now also show a string.
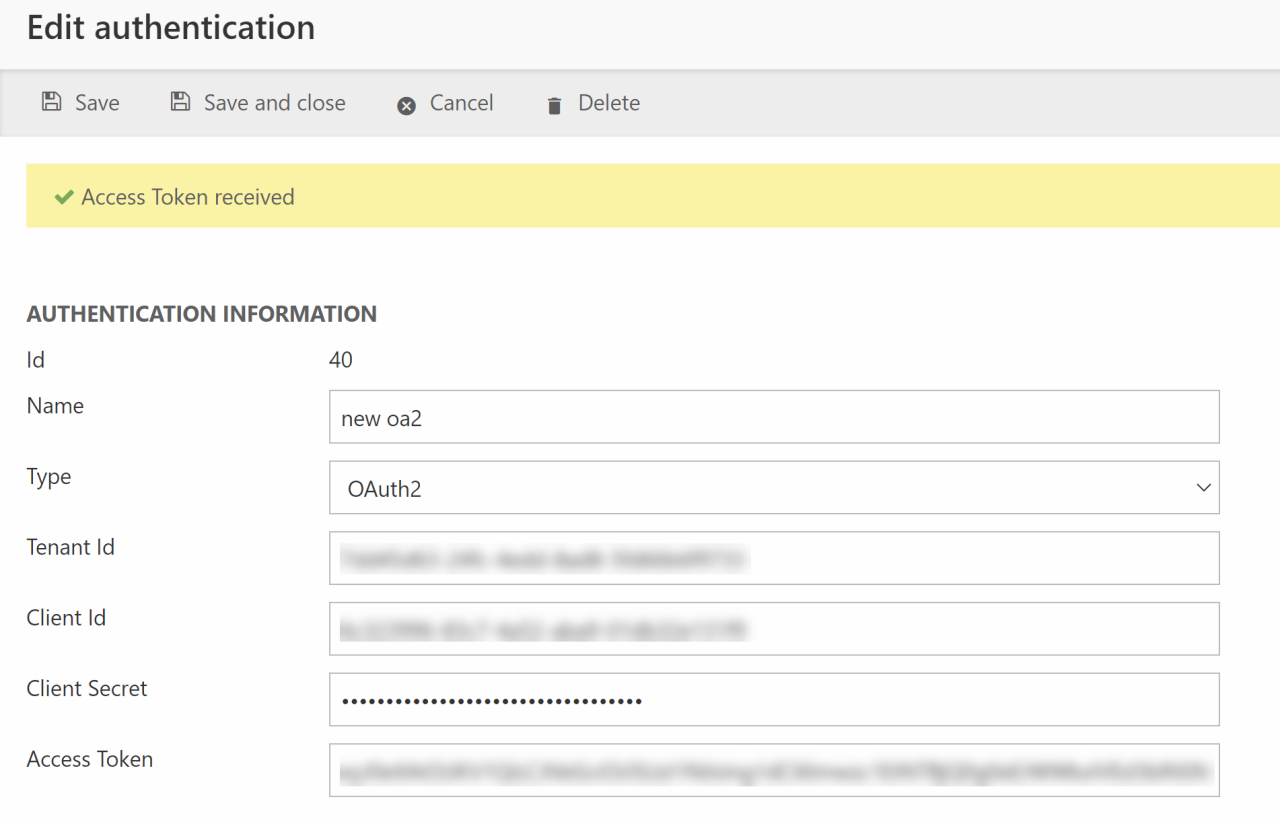
Clicking "Save and close" should now enable you to interact with Business Central endpoints using the established OAuth 2.0 authentication.
Once the access token expires the OAuth 2.0 library will make a silent token refresh request so it can be optained without a login.
Authenticating without F&O login
In the case that you want to obtain an access token but do not have the credentials for the Dynamics F&O instance, you can use the Authorization URL depicted below.
When an authentication method provided with a the necessary fields is saved, a new field with an Authorization URL appears. This URL can be sent to someone who has a Microsoft login for enviroment, who can then authenticate on behalf of you to let you obtain the Access Token.
This essentially means that person A configuring the OAuth2.0 in Dynamicweb can have person B with credentials to F&O authenticate on behalf of them through the Authorization URL.