
Payment Methods
A payment method is a way for a customer to pay for a product or a service during checkout.
Payment methods are created from Settings > Ecommerce > Orders > Payment and typically integrate with an external payment service such as Klarna, Nets, DIBS, or QuickPay (Figure 1.1)

When you create a payment method you decide:
- Which countries to make it available for – only payment methods matching the country of the customer will be shown in the shopping cart during checkout
- Which users/groups to make it available for – this is not often used, but occasionally you want to restrict a payment method to a specific user groups
- Which fees to charge (if any)
- Which checkout handler to use – this is the piece of software which communicates with the external payment provider you’re using.
You can also choose not to use a checkout handler – this is used for e.g. an Invoice payment method, and is often accompanied by a fee.
To create a payment method:
- Navigate to Settings > Ecommerce > Orders > Payment
- Click New payment in the toolbar
- Fill in the basic details – name, description, and icon
- Configure the rest of the settings – as described in the following sections
Payment methods are created in the default ecommerce language but may be localized to other Ecommerce languages (Figure 1.2) – this makes it possible to change the name & description. If you need to use different settings for a payment method used in a particular country, you will have to create a separate payment method and use the Countries section to restrict it to that country.

Integration IDs, Payment and terms codes
In the general payment method settings, you will find the fields Code, Terms code and Terms, which can be used to match a payment method in Dynamicweb with a payment method in an integrated Dynamics Business Central instance.
These three fields correspond to the following Business Central Standard fields:
- PaymentCode [text[25]] (the ID in the ERP)
- PaymentTermsCode [text[25]] (the ID in the ERP)
- PaymentTermsDescription [text] (a long text description)
When a Payment or Terms code is added to a payment method, the live integration will check if a matching payment or terms code exists in the ERP before including the fields in the salesheader. The ERP will then add the relevant information to the response XML generated in the codeunit.
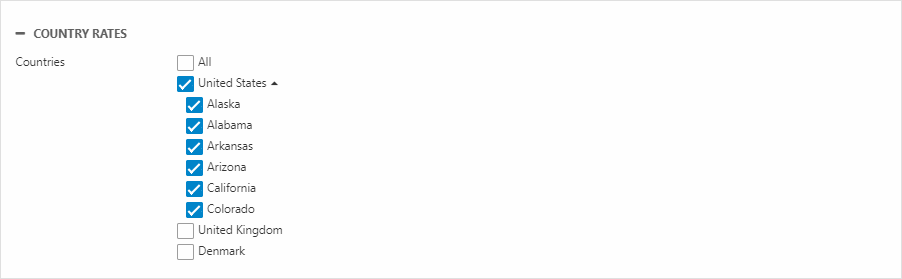
Countries
The Countries section (Figure 3.1) is used to specify where the payment method will be available.
The context is determined by the billing address of the user or visitor going through checkout - only the payment methods which have been made available for that country will be rendered. If you add states or regions to an ecommerce country they are also selectable here.
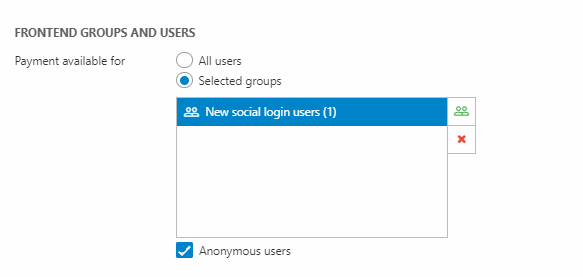
Frontend groups and users
The frontend groups and users section (Figure 4.1) is used to control which users or user groups will have access to this payment methods in frontend. This feature is often used on B2A solutions where you want to differentiate between consumers and business customers during checkout.
Select All users to make it available for everyone - or Selected groups to limit it to only a subset of your users. Check Anonymous users to make it available for anonymous users.
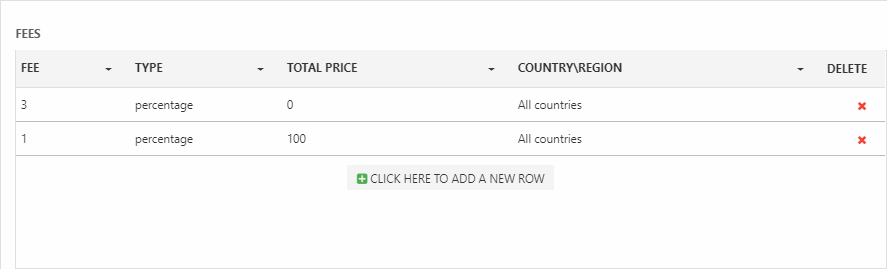
Fees
The Fees section (Figure 5.1) is used to create percentage-based or fixed-amount fees which will be added to the total price of an order when using this payment method.
To create a fee:
- Click Click here to add a new row
- Enter a fee and select a type – amount or percentage
- Select a Total Price at which point the fee will trigger – below this threshold, the fee will not trigger
If multiple fees apply, the the more specific fee applies – a region fee trumps a country fee, and a country fee trumps an all countries fee. By default, fees are applied based on the billing country – but you can go to Settings > Ecommerce > Advanced Configuration and use the Fee Calculation setting to use the delivery country instead.
Cart type
The Cart type section (Figure 6.1) is used to select a checkout handler for the payment method. A checkout handler is a piece of software which integrates with a payment provider such as PayPal or Stripe.
You can also select None and simply use the Fees section to charge an appropriate fee for shipping & handling.

A checkout handler must be configured in accordance with the requirements of the payment provider – see the documentation for each of the payment providers in the left navigation pane for details.
Inline checkout forms
Some checkout handlers support rendering the payment form inline – directly on a checkout page (Figure 8.1).
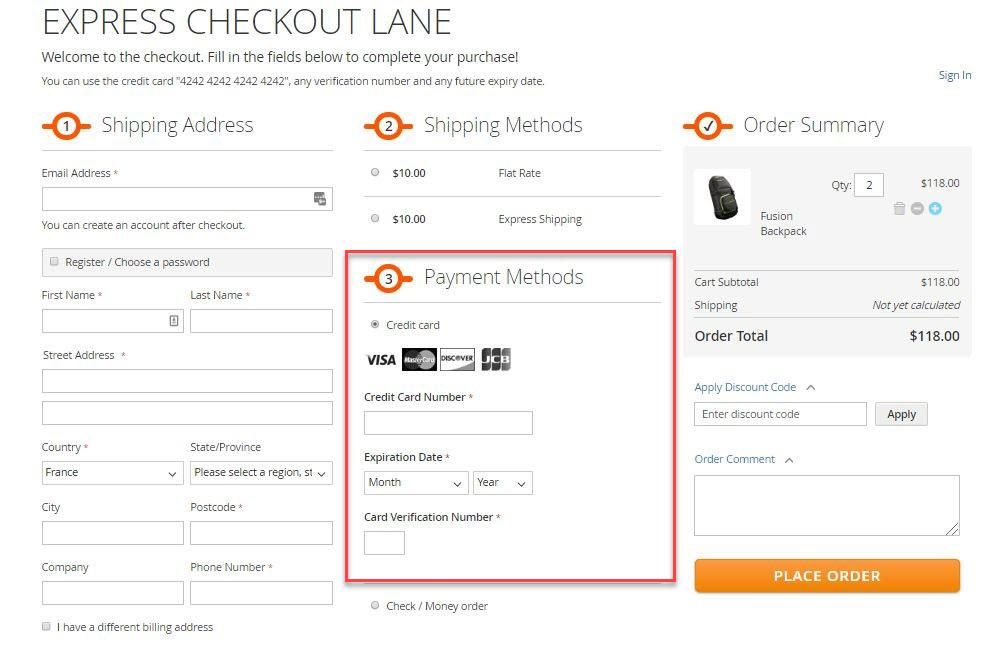
Currently this is true for:
On these checkout handlers a checkbox or a dropdown can be used to enable inline checkout forms. This causes the Ecom:Cart.PaymentInlineForm tag available in the shopping cart templates to be filled with the payment form from the checkout handler, which means it can be rendered inline on e.g. a one-step checkout step.
Third party payment services and order validation
Please note, that if the checkout handler you use communicates with a third party payment service – e.g. MobilePay or PayPal – and the order is manipulated in a manner which makes it invalid between being sent off and receiving a callback from the payment service, we have no way of communicating to the third party service that the order is now invalid.
Please ensure that an order has been successfully completed in Dynamicweb before capturing payment.
PCI compliance
Dynamicweb does not collect information that necessitates PCI compliance. When saved cards are utilized in Dynamicweb, we store a token, payment ID, or another identifier that does not contain credit card information. In Dynamicweb, we do store certain data, such as the last four digits of a credit card, as part of the payment response received from gateways. However, this process does not mandate PCI compliance for either the software or the hosting environment.