Processing orders
Orders are created when a customer adds one or more products to a shopping cart and then completes the checkout process. The order then appears in the order list and the order is ready to be processed.
Typically, an order is processed by moving through steps in an order flow – with each step corresponding to a particular order state, for example:
- Received
- Processed
- Shipped
- Completed
The exact nature of the order flow, of course, will depend on the internal workflows of the customer using the solution. While Dynamicweb ships with a default order flow you are well advised to create a custom order flow tailored to the needs of the customer, e.g. send out notification emails to customers or staff when an order changes from one state to another.
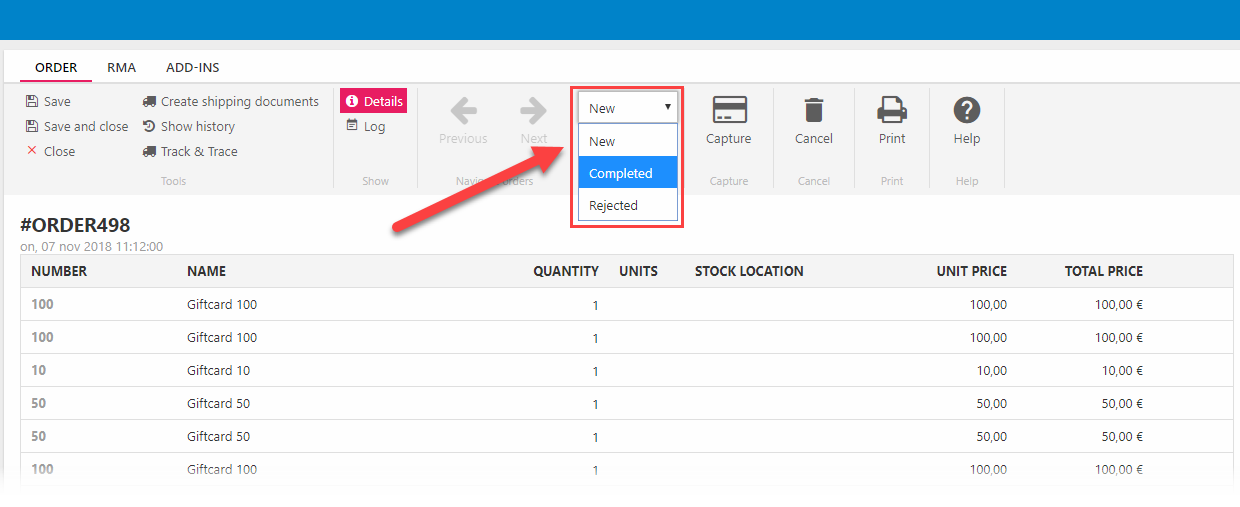
To move an order from one order state to another:
- Open the order details
- Use the State dropdown to select the new order state (Figure 1.1)
- Save
You can also change the order state for multiple orders from the order list.
When you move an order from one state to another it typically means some action has been taken. What those actions are depends on the customer and on the industry – but some of the most common actions are:
- Printing orders
- Creating shipping documents
- Adding track & trace information to the order
- Capturing payment
- Refunds & Cancellations
Read more about these actions below.
Printing orders
Orders can be printed from both the order list and the order details view – to do so press Print in the ribbon bar in either view (Figure 2.1).

This opens the print view, where you can select/create a print template, see a preview of the order using the selected template, and print the order.
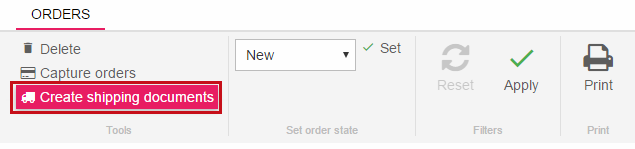
Creating shipping documents
If your shipping provider supports it, you can click the Create shipping documents button (Figure 3.1) to create shipping documents for an order.
This is currently supported for the following shipping providers:
- GLS ShopDelivery provider - compatible with GLS Interline 7.0 (Uni-Connect).
- Post Danmark PacSoft provider
For GLS, a .csv file will be created in the folder specified in the shipping provider settings (default is the /Files folder) – you must then manually import this to the GLS Interline 7.0 service. Read about GLS Interline here and here.
For Post Danmark, the provider sends orderdata to the PacSoftt webservice, and also saves the data to DB:EcomOrders >> OrderShippingDocumentData.
Track & Trace
In recent years, track & trace on all orders has become increasingly important – all B2C and many B2B customers expect a tracking link to be sent to them as soon as the order has been processed.
In Dynamicweb, this is done in the following manner:
- A Track & Trace scheme is created for each shipping provider with tracking
- Tracking codes are retrieved or generated – the process varies from carrier to carrier
- On the order, click Track & Trace in the toolbar and fill in the relevant parameters (Figure 4.1)
- Save
This adds a track & trace url to the order and makes it available to be rendered in order state notification emails.

Capturing payment
Capturing payment is the process of authorizing and accepting funds from your customer for a particular order.
If an order has been made through a payment gateway which supports payment capture in Dynamicweb, it will occur in the order list with the capture state column showing not captured (Figure 5.1).

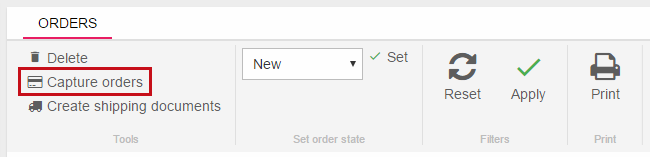
To capture one or more of these orders:
- Select them from the order list or opend the order details
- Click the capture orders button in the toolbar (Figure 5.2)
This opens the capture order window (Figure 5.3). Press Capture to capture payment – you will see a timestamp and a result of your capture payment action.
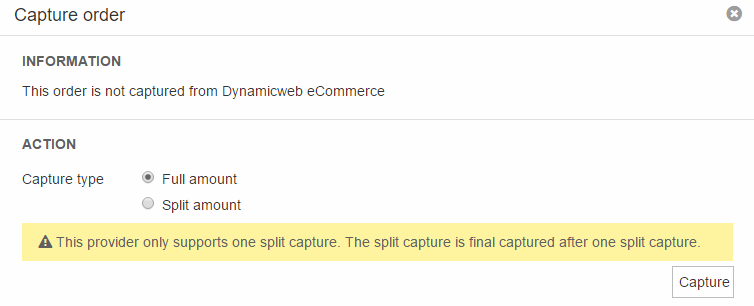
Some payment providers support split capture – this allows you to capture partial amounts as the order is being fulfilled in stages. The combined amount can, of course, never exceep the total order price.
To finalize an order with split capture, you can either capture the full amount – this captures the part of the total order amount not paid so far – or manually select final capture. Using final capture lets you finalize an order after capturing only part of the initial total, e.g. in cases where part of an order cannot be delivered.
Split capture is currently only supported by DIBS and Quickpay
After an order has been captured the capture state will change. Depending on your solution setup, the following capture states can be encountered:
- Not captured/Not supported:
If the provider is setup to only authorize the payment, all incoming orders are set to Not captured in the order list when successfully completed. A few providers don’t support capture from external services like Dynamicweb. They are listed with Not supported and you need to capture the payment from the administration at the provider website. - Captured
When you have captured an order manually the state is changed to Captured in the order list. Some payment providers (mainly the US providers) have the option to setup if the payment should only be authorized or both authorize and capture. If authorization and capture is used, the amount is sent for authorization, and if approved, is automatically captured. Then all incoming orders are set to Captured in the order list when successfully completed. - Split captured
Split capture allows you to capture partial payments on a running basis, until the full transaction amount has been captured. This is useful (and, in some countries, required by law) if you ship items separately, or some items are in backorder.
Refunds & Cancellations
An order which cannot be fulfilled must be either deleted, cancelled, or refunded depending on where in the process the order is. Please note that not all of these operations are available for all payment providers, as the gateway API must support it in order for it to be implemented.
|
Operation |
Available for |
Effect |
|
Cancel |
All uncaptured orders |
Cancels any Authorizations for the order, cancels taxes, and returns products to stock |
|
Delete |
Not completed orders, Cancelled orders |
Marks order as deleted and removes it from the order list. You cannot delete Completed orders. This is by design. |
|
Refund |
Orders paid with a payment provider supporting refunds |
Refunds payment fully or partially, as supported by the payment provider |
To delete, cancel, or refund an order:
- Open the order details
- Press the appropriate ribbon bar button (Figure 7.1).

For refunds, you will be asked to specify the refund details (Figure 7.2), e.g. the type of refund, the amount refunded, etc.
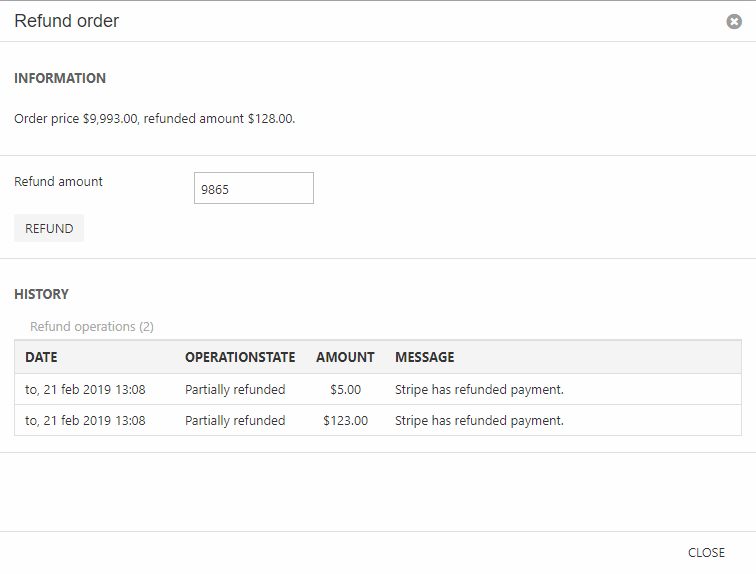
The exact options are dependent on the payment gateway. You can also see a list of previous refund operations on the order.